All blogs

Understanding Types of Frameworks in Test Automation
Automation testing involves frameworks that include test frameworks and guidelines to execute tests faster than manual testing. There are multiple automation frameworks available. Depending upon the application's complexity, the number of test cases, and the available resources, the QA team needs to decide the framework type.
The following post delves deep into the multiple automation frameworks.
Linear Framework
The linear automation framework is the fundamental framework that is very commonly used. It is primarily used for testing small applications and is easy to understand. The test scripts are executed one after the other, following a particular sequence. Testers usually implement the framework to analyze a particular software feature or functionality.
It is also referred to as a record and playback framework, as the testers record all steps like navigation and user inputs. These steps or tests are then played back to understand their efficiencies.
Moreover, the test scripts are executed individually, following a particular sequence. The method follows an incremental approach, where every new software interaction will be added to the test process.
So, the process is not very complex for inexperienced testers to handle and master.
Benefits
- It does not require the tester to write custom testing code from scratch.
- Extensive automation testing knowledge is optional.
- Test cases are easier to understand as they are arranged sequentially.
- Fast generation of test scripts due to recording and play structure.
- Non-complex workflows reduce the need for rigorous test planning.
Drawbacks
- Test scripts are not reusable due to hardcoded data geared toward a particular use case.
- Test cases must be modified if the associated data is altered, which can increase complexity.
- The framework is not scalable, as modifications involve rebuilding test cases. It complicates the maintenance process.
Here's an example of linear-driven framework.
The TestModule is responsible for setting up the Selenium WebDriver and performing a specific sequence of actions on the website. This approach is simple and easy to use for straightforward test cases, but may become unwieldy for more complex test cases.
Modular-Based Testing Framework
The modular testing framework enables the tester to follow the “divide and conquer” approach. So, the tester can test each application section separately by dividing it into multiple modules. The process can be suitable for complex applications with many features to analyze.
In some cases, testers need to break down or divide the entire software according to the client's requirements. A linear framework will not be advantageous in such situations, but a modular framework will be ideal. So, the application will be divided into separate modules, which will be tested individually.
The tester will develop an individual test script for each module and combine the test with building a larger test representing the entire software. The process involves multiple steps such as test case generation, test execution report generation, and defect logging.
Moreover, after the tester has written a function library, it is possible to store a test script. Particular adjustments or modifications can be made to this included script, so the entire app need not be modified. These features improve the convenience for both developers and testers.
Benefits
- Maintaining test scripts is easier and less complicated due to the modular structure.
- The reusability of test scripts makes the framework cost-effective and flexible. Testers can conveniently edit individual sections of the application.
- It is easy to include new functionalities and scale the software according to the project requirements.
Drawbacks
- Requires extensive programming knowledge and debugging expertise to identify failures in test steps.
- Building up test cases takes little time for experienced programmers.
- Application updates might cause problems as data is hardcoded into the test scripts.
Let's consider the 'MainTest' class is the main entry point that calls different modules (in this case, 'LoginModule' and 'SearchModule') to perform specific tasks. Each module is responsible for setting up the Selenium WebDriver and performing specific actions on the website.
Data-Driven Framework
A data-driven framework will be beneficial when professionals need to test a particular scenario or function having multiple data sets. Testing becomes simpler as the framework separates the internal test logic from the data set.
This framework does not have data hard-coded into the test scripts, which is the primary difference between a modular and linear framework. So, when testers need to test a particular application feature multiple times, data decoupling becomes essential.
It comprises the following steps -
- Collecting information from multiple data sets and sources like .xls, .csv, and .xml on a single platform.
- Designing test scripts to read the data and enter it into the respective application as input.
- Comparing the test outputs with the expected outputs.
- Repeat the process by using the information in the subsequent data row.
For example, a data-driven framework can help test the functionalities of a website login page. In this process, the tester will create a test data file that will contain the inputs for the driver script. It will also contain the expected output and results in a separate table. Then, the input values and the operators will then be tested by the driver or test script.
After comparing the expected results with the actual results received, the tester concludes the web page's functionality and efficiency. QED42’s open-source product, Headway, is a data-driven framework built using Selenium, Testng and Java.
Benefits
- Faster test execution by separating data and scripts.
- Convenient testing of several data sets and better regression testing.
- The data does not get affected when modifications are performed on test scripts.
Drawbacks
- Technical expertise and programming knowledge are required. Debugging might be difficult for inexperienced programmers.
- Resource-intensive process and might involve complicated test data.
Keyword Driven Automation Framework
The data and test script logic is separated in a keyword-driven framework. The data is stored externally, and every software function is included in a separate table. Moreover, specific keywords are assigned to particular actions used for GUI testing.
These keywords are arranged in a different table and represent GUI actions like click, log in or hyperlink. These are stored step-by-step and are associated with an object or area of the UI being tested.
This is the major strength of the framework, as it makes the separate keyboards entities connected to functions. Testers write code to invoke a particular keyword-based action, and the corresponding test script will be executed.
The key elements of any keyword-driven framework are –
- An excel sheet to identify and store the keywords.
- A function library comprising the functions which will be called during the test.
- Data sheets for storing application test data.
- An object repository for storing the objects associated with the keywords.
- Single driver scripts or test scripts for every test case.
Benefits
- A highly flexible and reusable framework that does not require extensive programming knowledge.
- Compatible with multiple automation tools and independent of languages or tools.
Drawbacks
- Difficult to configure and requires a managed environment.
Here's an example of a keyword-driven framework in Java using Selenium. In this example, the MainTest class sets up test data in a HashMap and calls the KeywordModule to perform actions based on the keywords in the test data.
Hybrid Test Automation Framework
A hybrid test automation framework is a combination of multiple testing frameworks. Depending on a particular framework is not the best option for most testing projects. A hybrid framework leverages the strengths of numerous frameworks to execute tests properly.
It can be a combination of keyword-driven and data-driven frameworks. So, the test data and keywords can be externally stored. The test data can be stored in an excel file, and the keywords can be stored in a particular Java file.
The hybrid framework enables testers to experiment and combine other frameworks to suit the testing requirements. The scalable approach supports different testing environments and improves application efficiency.
Benefits
- Combining the strengths of multiple frameworks, it takes less time to execute scripts.
- Facilitates code reusability and maximum test coverage.
- Better efficiency in testing with lower maintenance expenses.
Drawbacks
- Sufficient programming proficiency and testing experience are required.
Summing Up
Automation testing frameworks make the testing process smoother and allow testers to analyze the app thoroughly. By helping in bug detection and improving efficiency, these frameworks will boost the app deployment process. So, testers must select the automation framework according to their project or application requirements.
Testing frameworks must be selected according to the technical experience and expertise of the testers. Factors such as scalability, flexibility, and speed also need to be considered.
For instance, a linear framework does not need custom coding, but a hybrid framework will require coding expertise. Thus, careful consideration and interactions with senior professionals might be necessary for choosing a testing framework.
Headway is available for download on GitHub. Check out some of our automation strategy and testing work with global enterprises to know in detail how Headway minimizes risks and ensures impeccable quality at speed, helping our clients with faster go-to-market.

The Importance of Robots.txt
Web crawlers usually comprehend all the pages available on your website and index them. Then, how can we communicate to the web crawler to stop indexing all unwanted or private pages/info on our website? By implementing robots.txt!
What is robots.txt?
Robots.txt is a map or a guide for the web crawlers for indexing your website. It is a file used to restrict the indexing of certain sections or pages of a website.
For example, you own an educational website but do not want confidential data, such as student details or account info, to be indexed. This task can be done using robots.txt. In the image below, you can see that robots.txt blocks the indexing of site sections like temp files, private files, and parts of databases.

When to use robots.txt?
Below are the few use cases where implementation of robots.txt file is preferred:
- When a website has a sitemap
- To prevent server overloading when the website is crawled by several bots simultaneously adding a delay
- To prevent duplicate search results of the same pages on Google search
- To save crawl budget by preventing indexing of unimportant pages
- Blocking a few site locations, files, and media from indexing
If there are no such use cases on your website, robots.txt is not required.
Implementation of Robots.txt
Robots.txt of any site exists on the root of the domain, and you can access it by clicking on https://mywebsite.com/robots.txt. Robots.txt file must always be placed in the root directory of the website so that it is easily accessible to the web crawlers.
Sample of a robots.txt file

Consider the below example of a robots.txt file for your website http://www.mywebsite.com/.
The above code in the robots.txt file means:
- Googlebot - the user agent.
- Disallow - specify pages that you do not want bots to index. So, Googlebot will not be allowed to crawl any URL starting with http://mywesite.com/nogooglebot/.
- User-agent: * - all other user agents are allowed to crawl the site.
- Sitemap - website's sitemap file is located at http://www.mywebsite.com/sitemap.xml Linking the XML sitemap makes it easy for web crawlers to find it, making the site indexing faster.
Testing and inspecting Robots.txt
Since robots.txt is essential for indexing your website correctly, any error in setting up this file can cause serious SEO troubles or get your website deindexed. So, testing it before uploading is very crucial. Luckily, there are great tools available for auditing robots.txt.
Google Robots.txt tester
Google has a free robots.txt Tester Tool available in Google Search Console. Select the registered website for the list under the crawl section and find the robot.txt tester link. After a scan, Google gives errors and warning details. Before uploading the robot.txt file, do a round of testing.

Screaming frog SEO Spider
This application is an SEO auditing tool used to enhance the onsite SEO of the website. It can be used for multiple SEO tasks such as finding broken links, generating sitemaps, reviewing robots.txt files, and many more SEO audit-related features.
Download the application first to use it. Crawling up to 500 URLs is free. For more URLs, users will need to opt for a paid version.
Steps to test site Robots.txt
- Crawl the website or URL; Open the SEO Spider app, enter the site URL in the search field, and hit ‘Start’.

- Switch to the ‘Response Codes’ Tab, and select the ‘Blocked By Robots.txt’ Filter.

- Disallowed URLs will appear with the status -> ‘Blocked by Robots.txt’ after the whole site is crawled.

The blocked URLs will have the status Blocked by robots.txt. The ‘Matched Robots.txt Line’ column specifies the line number and the disallow path of the robots.txt entry.
- We can export the links result in bulk via the ‘Bulk Export -> Response Codes -> Internal & External -> Blocked by Robots.txt Inlinks’ report.


There are many more tools available online with which we can test robots.txt.
Best practices to implement Robots.txt
The right implementation of robots.txt will give the best outcomes in terms of SEO. Below are the best practices you should apply while implementing robots.txt on your website.
- Place the Robots.txt file in the root directory of the website to make it easily accessible to web crawlers. As the file is case-sensitive, name it robots.txt.
- All important pages must be accessible to the crawler for indexing. Unimportant pages can be blocked to save the crawl budget.
- Never use a robot.txt file to disallow or hide private files with sensitive information. It can make your website vulnerable to hackers. For such use cases, use password protection methods.
- Do not use the Noindex tag as it's no longer accepted, instead use meta tags or X-Robots-Tag.
- If the website has subdomains, use a separate robots.txt file for each subdomain.
- Add a sitemap link to the bottom of the robots.txt file.
- Do not block the website's JS or CSS files using robots.txt.
- Follow the robots.txt directives like capitalization of directories, file names, etc.
Conclusion
It is important to keep your robots.txt file updated whenever new pages are added or when there is any change in the website. There are a few limitations:
- Blocked pages will still appear in search results if they are linked to any crawlable page
- The max file size of robots.txt is 521kb
- Robots.txt is cached for 24hrs
In general, robots.txt is good for a website’s SEO but not mandatory. Implementing robots.txt in the right way will ensure a higher SEO score and also the security of websites.

Implementing Page Object Model in Cypress
Page Object Model is an object design pattern that is popularly used in test automation for a better testing experience. In this technique, a Page class is created for each web page of the application. This Page class contains web elements and methods for action to be performed on these web elements. These web elements and methods are accessed by test cases, which are written in a separate Test class file.
Consider that you need to perform login action before booking a flight and viewing the itinerary. The login function is common for both booking flights and viewing itinerary scenarios. Instead of writing login web elements and methods in each page class, we can create one login page class, and reuse it in other page classes.
Cypress, a popular automation framework, provides features to support Page Object Model. In this article, we will cover the setup and end-to-end flow for the Page Object Model using Cypress (version 10).
Cypress E2E Page Object Model
To demonstrate the working of the page object model in Cypress, we will use newtoursdemosite as a demo site. We will implement the 'Login' scenario in this example. Let's start!
Step 1
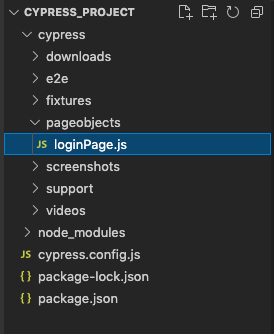
Create a 'pageobjects' folder under the 'cypress' folder of the project, which will store the page classes.
Step 2
Create a page class 'loginPage.js' under the 'pageobjects' folder. In 'loginPage.js', we will store the web elements and write methods to perform login functionality.
Step 3
In loginPage.js, create a 'loginPage' class that we will export to the test spec file using 'export'.
Inside the class, create an object named 'elements'. 'elements' object contains a set of key and value pairs for locating web elements on the login page.
Then write methods for the following actions:
- Enter username
- Enter password
- Click Submit
Step 4
Create a 'tests' folder under the 'e2e' folder, which will store all test cases. Now, create a test spec file 'verifyLogin.spec.cy.js' under the 'tests' folder.
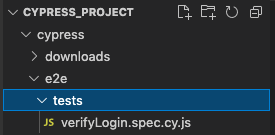
Note: For the cypress version below 10, create a 'tests' folder under 'integration'.
Step 5
Import loginPage.js class to access its methods. Then create an instance of the loginPage.js class and call the respective methods.
Step 6
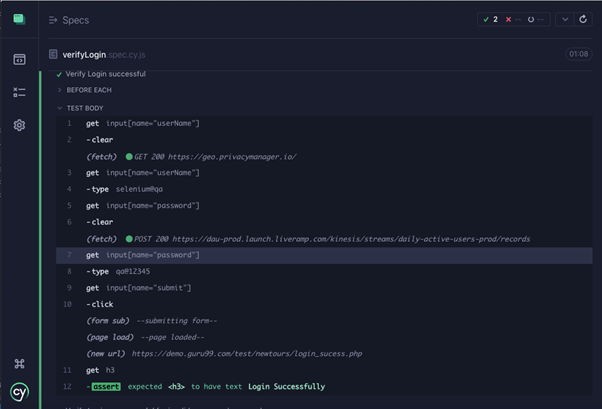
Run the test in Cypress
Using Getter and Setter
You need to create a "get" and "set" command to define Object accessors. The advantage of using getter and setter is that we can use them as properties instead of functions.
Without Getter
With Getter
loginObj.enterUsername('selenium@qa')
loginObj.username.type('selenium@qa')
loginPage.js class file
verifyPage.spec.cy.js class file
Test result
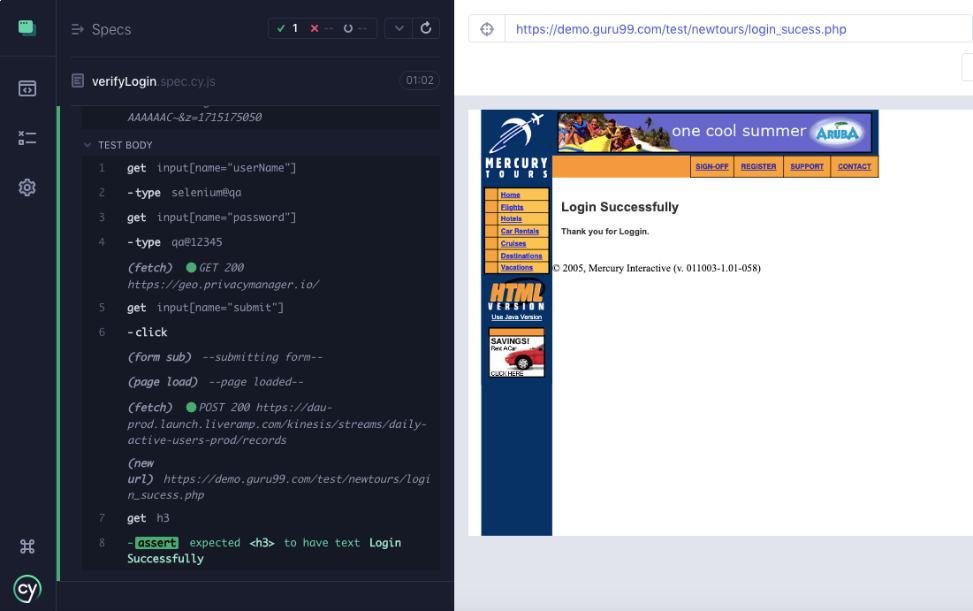
Note: Find the sample code snippets for these features in the GitHub repository here.
Conclusion
Go ahead and implement Page Object Model using Cypress in your project. And improve test readability, and code maintainability, and reduce code duplication.
Happy Testing!

Automation Framework: Improve Testing Speed and Efficiency
Generally, a framework means a combination of rules and standards to follow for the best results. Similarly, an automation framework is a platform that combines tools and practices to run automation tests. Simply put, it provides a complete environment for your development teams to execute automated test scripts successfully.
The significant components in an automation framework are testing tools, procedures, scripts, libraries, and data management. These components facilitate test executions and comprehensive reports of test results.
The guidelines of an automation framework could include coding standards, repositories, data handling methods, results storing processes, or info on accessing external resources. While these guidelines are not mandatory for every automation framework, they make automation testing more organized with additional benefits.
Automation framework: Accelerating the testing process

Let’s explore how an automation framework can improve testing speed and efficiency.
Maximum test coverage
QA teams can add new scripts to test more features or add in-depth scripts for complex use cases to an automation framework. Your team can execute numerous tests to cover all features and requirements in every test cycle.
Less manual intervention
There is no need for your QA team to input test data manually or monitor the test script for each test. An automation framework will run tests perfectly each time and prevent discrepancies between different coding standards.
Reduced costs
An automation framework is cost-effective as it enables repetitive and parallel testing. It also allows for frequent testing of new features or changed objectives per your business need without extra costs. You can reduce significant costs that accompany changed scripts or bugs in a production pipeline.
Standardization
Coding patterns are different within a team of developers, making multiple testing a necessity. An automation framework consolidates all coding data to enable easy and consistent scripting and reduce duplicate coding.
High scalability
As your project scales in growth, there would be a need for upgrades, new features, and changes. An automation framework will grow with your project and fulfill all these necessities in a short time while maintaining all the required parameters.
Reporting
An automation framework provides a clear and comprehensive report for every test executed, every bug discovered, every script written, and more. Your QA team can extract every inch of information and derive insights for assessing the project’s goals, and organizational goals.
Modularity
An automation framework helps to break down the testing process into smaller, more manageable modules, making it easier to maintain and update the test suite. You can categorize and store specific test data in external databases and configure them quickly, as the framework covers all sorts of apps in the process.
Reusability
Writing effective test scripts takes time and effort, and an automation framework makes it convenient with reusable scripts. You can reuse test scripts as many times as you need, even with cross-browser testing or a change in the device OS.
Integration
An automation framework can integrate with other tools and technologies, such as continuous integration and deployment (CI/CD) pipelines. You can streamline the testing process and reduce the time to market with such powerful integrations.
Automation framework: Progressive automation testing
With the automation industry progressing immensely, your business can build high-quality applications and meet the increasing security standards with an automation framework. You can make your development process more efficient and achieve optimal testing speed.
Consider, QED42’s open-source Selenium framework. It accelerates automation testing by 30% and increases test accuracy to 90%. Being open-source, Headway is free to use thereby reducing costs to a greater extent. It is available for download on GitHub.

The ROI of Automation Testing
The demand for rapid product development is increasing and driving quality standards higher and higher. Automation testing has transformed from a “good to have” component to a critical component in delivering best-in-class software quickly. The latest technologies have added more capabilities to test automation like codeless automation for example can be considered the future of modern testing.
When it comes to businesses, automation testing increases development speed and adds flexibility to development pipelines. While decision leaders accept test automation as a great idea, they hesitate to adopt it into the business. Reasons range from the uncertainty of costs involved to whether the costs justify the value delivered.
Your development team may be thinking about automated testing for a new project. Would it be productive for the project in the long run? Would your team be more productive with fewer manual regression tests? Can your business derive quantitative benefits from test automation to justify the investment?
We will consider all these questions and more in this blog. You will understand how to get the best ROI and some best practices to optimize automation testing.
Top business advantages of automation testing

Quick delivery
A major challenge in software development is fixing defects. Longer delays between development and identifying defects increases time, expenses, and efforts to fix them. Test automation creates a tighter feedback loop to reduce the fixing time from weeks and months to minutes. Your business will not miss out on market opportunities due to testing holding up development. You will reduce defect costs by a large margin with automated testing.
Identify more regressions
It is typical to identify more regressions after adopting automation testing. While more regressions may seem like high costs for your business now, regressions found by users after your product is launched in the market tend to cause severe losses for your business. In the past, developers may see a failed test in the CI environment, identify the issue, and fix it quickly without documenting it. Test automation captures all defects and reduces the fixing time drastically enough to justify the regressions found and documents it for future insights.
Highly testable products
Test automation makes testing time trend downward over significant periods leading to qualitative and quantitative benefits. Automated testing enables better test coverage with minimal manual intervention leading to better testable products. Your business can test such products in more ways, reduce the risk of missing use cases in testing, and go to market rapidly with quality applications.
Early evaluation
Shift-left refers to the practice of evaluating quality, testing, and performance early in the development cycle. This practice is crucial to a business as it speeds up development efficiency and addresses any defects early in the development cycle before your apps get into production. Your development teams can deliver applications or software more frequently with high quality.
Less slow regression
Regression is slow and does not help identify significant issues. Automated checking is more beneficial than manual checking as the performance is the same anytime and every time it is done. The procedures don’t change, the costs are lower for repeated testing, and your teams can easily identify and document a regression any time it happens.
Avoiding test automation pitfalls
A significant aspect in determining the ROI of automation testing lies in how your business approaches the implementation process. Automation testing has evolved enough to identify common pitfalls, and your business would benefit by avoiding these mistakes. Let’s consider a few of them.
Ignoring manual testing
While test automation is highly beneficial, it will not fit all scenarios or processes. The value of automated testing lies in running tests multiple times, but all cases do not require automation. If your development teams are working on diverse products, features, or processes, you may require manual testing in some cases along with automated testing. Your teams need to discern scenarios that require automated testing and scenarios that require manual testing to save your business money in the long run.
Short-term calculations
Your business needs to plan long-term ROI other than the initial costs and short-term calculations. You need to consider some questions that will help evaluate test automation ROI for now and in the future. Would automation testing help solve more issues for your company in the long run other than reducing QA time? Would it open new opportunities for your business to expand and grow? Will automated testing help to improve the quality of your products and development?
Excluding test maintenance
Automated testing is still based on coding and requires maintenance and upgrades if you want to derive value from them for years. Test maintenance takes time, so your business should consider it while planning implementation. Significant code changes might take away most of your development team’s time. Would your team be able to handle it? Or do you have a third-party partner doing test maintenance for your business? Do you want your business to handle long-term test maintenance? Answering these questions in the initial stage would help your business get the best ROI of test automation.
Not documenting
Documentation is essential to calculate automation testing ROI. Document everything your team does. Even if you have a key developer dropping out, your team will not be at risk of losing all progress or having to re-engineer multiple complex cases with accurate and detailed records. Proper documentation eliminates complete dependence on human expertise and ensures only necessary dependence just like test automation.
Parameters for advanced test automation

The basic formula for calculating ROI is universally applicable - (ROI = Cost Savings-Investment/Investment). However, the components, cases, metrics, and best practices may differ from business to business. The top three significant parameters that would apply to any business are:
Cost
The most important parameter in automation testing ROI is the cost. A critical decision revolving around automation testing is the investment in infrastructure. Factors like framework, test suite, and cloud hosting have a direct impact on the outcome of automated testing. While it seems expensive initially, it pays off in multiple long-term benefits.
Opting for test automation on the cloud ensures a scalable and secure infrastructure that is available to run tests at any time, regardless of the tester’s location. Benefits, such as reducing critical man hours or savings due to investment in in-house infrastructure result in huge cost savings in the long run. Remember that ROI on automation testing will not be evident right away, but once your business reaches breakeven, you can see the benefits.
Quality
Test coverage and accuracy are the significant value propositions for automation testing. A higher test coverage means a high probability of detecting bugs quickly, resulting in a high-quality product. You should align automation testing with integrations, such as CI/CD tools, product management tools, and bug tracking tools to expedite the process of defect discovery, issue tracking, and issue fixing.
Execution speed, test reporting, and QA are major factors in the automation testing ROI calculations. While they do not bring in direct financial benefits, they contribute to huge time savings and quality applications that benefit the overall product delivery timeline. Test automation enhances customer satisfaction with better products in less time.
Speed
Test automation can work 24/7 and can run a significantly large number of test cases within a short time. Tests are more accurate than manual tests and are executed at a much faster pace. Integrating test automation with CI/CD tools results in high-quality products and rapid product readiness, making the best out of continuous automation testing.
The time reduced in running rigorous test cycles and creating products with faster time-to-market leads to huge savings on the investment.
You can leverage test automation on a scalable test infrastructure to run:
- Multiple tests on the same test combinations parallelly
- Multiple tests on different test combinations parallelly
- Same tests on different test combinations parallelly
A few parameters that can be integrated or used as stand-alone parameters for your business are:
- Automating new tests
- Automating older tests
- Reusing testing scripts
- Testing all-around environment
Best practices for ensuring proper test coverage
Test automation implementation should include two vital factors: Gradual introduction and long-term strategy. Both factors contribute directly or indirectly to your business costs and returns. Knowing the best practices of the industry will help you implement test automation in the right way. Consider these three best practices while preparing to integrate automation testing into your business.
Do not rush to automate every single test right away
Trying to automate every test from day one is an extreme approach that will not benefit your business. As considered earlier, manual testing is required in some cases while you automate other tests. So, carefully consider your project pipeline and the testing needs of your business to start from the right place. Identify the ROI parameter most vital for your business and start from there.
Remember every test will become a regression in the future
Consider the long-term impact of automation testing as every testing will become a regression testing eventually. The best practice is to integrate new tests with existing tests as a part of your regression testing right away.
Perform test automation early in the development lifecycle
The traditional waterfall method where development and testing are done in different phases is less productive when compared to the advanced shift-left testing process. The shift-left method enables your teams to develop and test simultaneously. This method helps you detect any bugs early in the development cycle and fix them, saving your business much time and money.
Become a dominant market player with automation testing
Implementing an automation pipeline might seem like a daunting task when it comes to monetary, time, and effort investment. But understanding all the factors and calculating the ROI of automation testing will demonstrate how it adds value to your QA operations and business. Digital customers are prioritizing agility, and your business requires automation testing to deliver an agile experience to your customers.
Adopting automating testing will give you a head start on your market competition and empower you to become a dominant market player. While there is no shortcut to reaping the benefits of automated testing in one go as it depends on multiple factors, the best way is to choose the right test automation provider.

Why Should Performance Budgeting be a Part of your CI/CD?
The automation of any process raises the user satisfaction of that specific project to the next level. However, CI/CD offers more than simply automation to eliminate human error. It helps businesses roll out innovative solutions promptly, effectively, and affordably for users. It is the ultimate cheat code for smoother operations as it enables the delivery of software with fewer risks, frequent deployment of additional features per user demands, and increased developer productivity.
There are various options available now for incorporating performance budgets into Continuous Integration. They ensure that an application does not exceed a specific data cap. Tracking a webpage's performance budget and integrating it with the CI/CD workflow can minimize the performance degradation caused by adding a new code.
What is CI/CD?
Software delivery is a continuous loophole. CI/CD or Continuous Integration and Continuous Deployment are two of its most crucial steps to maintain user satisfaction and operational standards. The entire process is reminiscent of an assembly line with well-defined steps that often need to be done and re-done throughout the software's lifetime.
CI/CD is the process of creating software that allows companies to deploy modifications at any moment in a sustainable manner. With regular code changes, development cycles become more relevant and speedy while maintaining frequency.
Four general steps make up the entire CI/CD process:
- The general architecture for implementing these modifications is known as "continuous delivery."
- The starting step is known as "continuous integration."
- The method of ensuring quality is known as "continuous testing."
- The process of making the finished product available to consumers is known as "continuous deployment."
CI for improved collaboration and quality
Continuous Integration impacts the areas of collaboration and quality control rather significantly. It helps quickly deploy features, allowing the DevOps team to maintain its quality standards. And CI allows it to happen quickly. Here's how:
Easier to spot faults and software quality concerns
Continuous Integration or CI is a development model underpinned by process mechanics and automation. During the CI stage, developers often submit their code to the version control repository. Most teams set a minimum benchmark of committing code at least once daily. The reasoning that prefaces this is that smaller code differentials allow easier detection of faults and other software quality concerns versus bigger codes created over long periods. When teams work on tighter cycles, it is less likely for many developers to modify the same code simultaneously, eliminating a merge when committing the code.
Short and long-term time frames to develop features and improvements
Continuous integration teams frequently commence projects by configuring version control and practice definitions. Although code is checked often, improvements and fixes are introduced in long and short time frames. Continuous Integration development teams use many ways to govern whether features and code are production-ready.
Feature flags for better testing and higher quality software
Many teams employ feature flags, a configuration mechanism that allows them to toggle features and code on and off at the run time. Features still in development are enveloped in code with feature flags, pushed to production alongside the main branch, and left off until their time of use. Feature flags offer improved testing and superior quality. Optimizely Rollouts, CloudBees Rollout, and LaunchDarkly are feature flagging tools that connect with CI/CD platforms and enable feature-level configurations.
Version control branching
Version control branching is another way of managing features. A branching strategy establishes a protocol for integrating new code into standard development, testing, and production branches. Additional branches are generated for features that may need longer development cycles. Once the feature is completed, the developers can merge the modifications from the feature branches into the main development branch. However, an effective strategy can be tough to manage when numerous features are created simultaneously. In such cases, one can automate the build process by packaging the software, databases, and other components.
Achieves complete testing automation
In addition to bundling all application and database components, CI automates the execution of unit tests and other testing. This testing ensures that the developers' code modifications did not break any current unit tests.
Why do you need CI/CD?
CI/CD is a smart integration plan for any DevOps team. But why exactly should it be considered? Given below are a few reasons why.
Quicker software building
Integrating CI and CD results in much quicker builds and faster delivery outputs. With deployments running in a continuous sequence, it enables a project's consistent tracking, provides real-time feedback, and repairs errors as required. Continuous reviews enable product development to remain tuned to end-user expectations.
Better time-to-value proportion
The development pace is tremendous, and the delay between introducing and delivering a new feature is lessened considerably. The team devotes less time and effort to debugging and more time to creating new features. It also results in a shortened feedback loop, and the amount of time separating user participation and updates. As a result of using the CI/CD automated system, the DevOps team produces faster test results for the development and deployment of the application.
Management based on data
The CI/CD approach also requires continuous data monitoring of the development process. Once the procedures and insights become apparent, the team can optimize the existing workflow and remove engineering impediments. This results in a more sophisticated system and a quicker turnaround for the intended software solution.
Effective development
The goal of CI/CD is to improve the integration process by breaking it down into essential and regular development tasks. That helps reduce build costs and discover errors early in the software lifecycle. It increases real-time transparency, allowing developers to work much more efficiently.
Performance budgeting explained
A performance budget is defined as a set of regulations placed on metrics that impact site performance. Performance metrics are a vital part of the user experience. It may include the overall page size, a site's load time on a mobile network, or the total number of HTTP requests sent. Setting a performance budget is the reference point for making design, technical, and feature decisions.
A budget allows designers to consider the impact of high-resolution photos and the number of web fonts they select. It also assists developers in comparing diverse solutions for an issue and evaluating libraries and frameworks based on characteristics, such as size and parsing costs.
Why use performance budget
A budget exists to represent a site's attainable objectives. It is a balance of user experience and other performance measures. It also entails many other advantages mentioned below.
Improves expenditure
A performance budget is essentially a rundown of the amount of data that the development of a website might require to create a well-functioning website. Little similar to allocating funds for a business. It ensures better utilization of resources and cuts down anticipated wastage.
Betters performance
The web continues to grow in size. The size of web pages is also increasing, as are the various resources necessary to display a webpage, such as graphics, scripts, and style sheets. A quick, responsive website is essential for a successful business. The performance budget is a strategy that places performance at the center of development and eliminates needless distractions that cause the site to slow down.
Effective allocation of funds
Performance budgeting plays a rather significant role in the allocation of funds. It explicitly maps out the objectives and uses for allocated funds, increasing visibility with budget planning.
Assists in reviewing the efficiency of programs
Quantity-based metrics do not have a direct relationship to the user experience. However, they provide the critical advantage of providing metrics that are far easier to understand and prepare for than the effect on the user experience.
Combines planning, budgeting, and programming
Performance budgeting allows the integration of three of the most significant aspects of site development. The budgeting enables a better understanding of the site requirements. That results in better programming of the site for its smooth functioning.
Metrics for performance budgeting
Being able to measure something is the only way to improve performance. It is especially true for websites where the metrics influence the overall website performance. Let's consider three primary performance budgeting metrics that track the user-friendliness of a website:
Time-based metrics
The majority of time-based metrics are referred to as "milestone timings." This metric type indicates how quickly specific components of the website load. DOMContentLoaded and load events are two of the most frequent events used to measure page load speed. However, they do not present a complete user experience because the server might send a minimal page to the user while deferring actual content load and display for many seconds.
Some of the essential timing metrics employed in a performance budget are as follows:
- Cumulative Layout Shift (CLS)
- Time to Interactive (TTI)
- Total Blocking Time (TBT)
- First Contentful Paint (FCP)
- First Input Delay (FID)
- Largest Contentful Paint (LCP)
Quantity-based metrics
These metrics are consequential in the early phases of development since they illustrate the implications of including large pictures and scripts. It's much simpler to grasp the effect of one extra script, or another large picture, on a 300kb budget than on a SpeedIndex budget. They are also simple to convey to designers and developers and help their collaboration process. Their primary benefit is that they are considerably easier to envision throughout the design and development process.
Rule-based metrics
Website speed testing tools such as WebPageTest and Lighthouse can generate performance ratings that users can use to define the site's performance budget. One can count on these tools to be generally consistent since they adhere to standard best practice criteria for measuring site performance. DevOps teams receive the best results when they monitor a mix of quantitative and user-centric performance measures. Focusing on asset quantities and tracking FCP and TTI can be beneficial in the early stages of a software development project. Lighthouse also provides tips on improving site performance and creating a performance budget.
Tools for enforcing performance budgeting
WebPageTest: WebPageTest API is one of the most trusted website performance testing tools. It is a free tool that allows users to create an account and retrieve test results for a year. One can also use the WebPageTest API to automate the tests.
Lighthouse LightWallet: LightWallet is a feature integrated with Google Lighthouse that allows users to establish a performance budget. When testing a website with Lighthouse, it will immediately notify the user if any metrics exceed the budget limitations. Users can also use the Lighthouse Bot to define a performance budget and automate the performance testing process.
SpeedCurve: A high-end website speed testing and monitoring application, SpeedCurve also allows users to create performance budgets. If any metric exceeds budget limitations, the tool promptly sends an alert.
Calibre: Similar to SpeedCurve, Calibre is a premium performance tracking tool that allows users to define performance budgets and receive notifications when any metrics exceed the budget limit.
Conclusion
The current scenario requires organizations to go digital in some way or another. Even smaller businesses have a website or are looking to create websites to sell their services. Adopting CI/CD is a need rather than a choice. No matter how small the company is, website maintenance is a mammoth task that invites a lot of monetary investment. That is where performance budgeting tools can prove to be a worthwhile investment.
Performance budgeting can help in the efficient development, update, and integration of software. Performance budgeting tools can assist in focusing on improving site performance even more efficiently.
In addition to helping enhance site performance and speed, some of these tools are also available free of cost. It is a massive boon since it helps eliminate excessive monetary investments while maintaining a functional website.
A Comprehensive Guide to Codeless Automation: Basics, Benefits, and Approaches
Conducting traditional test automation is a key aspect of product analysis and increasing deployment speed. But the traditional approach of hand-coded automation requires programming expertise. Hence, companies face challenges in preparing robust test code.
As the programmer-centric approach creates a shortage of skilled human resources, companies want a modern solution. This gave birth to the codeless automation approach that enables developers to execute test scripts without writing code.
It allowed all team members to contribute to the test automation process. As such, more companies are planning to shift to codeless automation from traditional testing. It is hence not surprising that its demand is projected to grow at a 15.5% CAGR from 2021 to 2031!
Moreover, the approach allows testers to execute tests faster, resulting in quicker product delivery and release rates. Given these trendsetting benefits, this article will take a closer look at the crucial details of the codeless automation process.
What is codeless test automation?
Codeless test automation is a modern process where the tester can develop test scripts without writing code. It allows professionals to automate test script creation without being technically proficient.
Even if a tester doesn’t know a programming language, he can automate the scripts. A professional can also maintain test scripts conveniently through this approach without any coding. Thus, professionals, including the managers, software developers, and even release managers, can contribute to the testing process.
Moreover, unlike legacy testing tools, codeless testing offerings are equipped with artificial intelligence and machine learning which allows testers to create and modify test steps manually.
Additionally, codeless automation facilitates the creation of test flow diagrams, making the process even more convenient.
Hence, to sum up, codeless test automation is an excellent approach that frees up the testers’ and developers’ time so that they can utilize these working hours to focus on enhancing product strategies and improving testing activities.
How codeless testing works
For conducting codeless testing, testers do not necessarily need to know the exact code to move forward and hence they utilize codeless testing tools for developing the scripts.
The idea behind the process is to make executing, maintaining, and integrating test scripts convenient via a simple UI. This is done generally through two test automation approaches-
1. Record and play approach
In this process, the tester performs the test manually, while the automation tool records any action that helps develop the test script.
As per product requirements, the testers can be modified and can edit this script which the company and professionals can execute later on. As such, this approach is highly prevalent among web-based product developers.
For instance, Katalon Studio, a very popular codeless automation platform, offers this feature.
2. Test flow diagram
In this approach, software testers develop a test flow diagram that consists of structured test blocks. Here, the test script will run automatically depending upon the actions present in the test flow diagram.
Low-code vs. no-code vs. codeless automation
In this rapidly expanding market, organizations are always aiming to gain a competitive edge over other firms. Hence, product testing and developing test scripts need to be faster than before.
That’s why development teams try to implement multiple strategies for automation testing. They use technologies like no-code, low-code, and codeless tools interchangeably. However, these tools have specific characteristics that separate them.
Low code test automation
Low code test automation tools allow developers of different technical skills to begin application development without manual coding. These tools offer built-in visual code blocks that the testers can drag and drop to develop applications.
With these tools, testers can avoid learning the latest programming frameworks or executing multiple tests for their application code. However, some amount of coding knowledge is still required for operating these tools.
That's why professionals with programming knowledge utilize these tools to enhance the speed of their development process. Although non-technical professionals might be able to work with low-code technologies, the projects will require coding at some point.
Lastly, low-code tools allow developers to conveniently build apps for several platforms and share them with stakeholders.
No-code test automation
These tools are targeted at IT professionals who do not have actual programming knowledge or experience. They provide visual development along with drag and drop features. As such, both technical and non-technical professionals can collaborate on a single project to speed up its development.
Additionally, they are similar to low-code automation tools, but no-code technologies don't require programming expertise. Not to forget, the tools comprise of all the elements required for application development. As such, they are quite popular and used in Bubble and Makerpad.
Furthermore, these platforms are ideal if testers want a simple application for a specific business purpose. Instead of waiting for your software development team to deliver it, you can assemble a team and develop an application in a quick time.
Codeless automation
No-code and codeless automation are the same as they don’t involve extensive coding during app development. In addition, codeless automation platforms can also consist of NLP and self-healing features which allow the tool to modify the tests according to the changes in the user interface.
Code-based vs. codeless selenium testing
A skilled programmer might need to automate a web script and have sufficient time to go ahead with it. In such a situation, Selenium is the best automation testing tool for the project.
The tool is open-source software that supports most browsers and is preferred for web applications. Additionally, to enhance the test automation process, codeless Selenium has emerged in recent times.
1. Code-based Selenium testing
Selenium automation testing requires superior programming expertise and app developmental abilities. The tools support major programming languages like Python, Java, Ruby, and PHP. Moreover, it offers a suite of tools such as Selenium WebDriver, Selenium IDE, and Selenium Grid.
Due to these features, developers accustomed to low-code or no-code platforms might face difficulties operating this platform.
Moreover, the test scenarios are complex and very structured and hence tales sufficient time to set up the testing process and maintain the scripts. In addition, testers might require third-party integrations to execute some tests. As such, developers with strict project deadlines might not prefer code-based Selenium.
2. Codeless Selenium testing
As the name suggests, codeless Selenium testing is all about executing test scripts faster with less code involved. This approach enables testers of various skills and expertise to start working on an application. So, it reduces the complexity of the automation testing process.
Additionally, it has less complicated test scripts which aren’t heavily structured which allows testers and developers to create test scripts and execute test cases faster than code-based Selenium.
So, each codeless test usually takes approximately an hour.
For instance, Selenium IDE is a useful tool that makes codeless testing convenient. Testers can record interactions in the browser and playback them easily. This automatically reduces the time and complexity of executing the tests.
Moreover, another excellent feature of codeless Selenium automation is test case reusability which allows testers and other team members to reuse already created test cases.
So, they save a substantial amount of time by avoiding developing test scripts for multiple scenarios. Not to forget, cross-browser testing is also much faster and more convenient in the codeless approach.
Besides, professionals can lessen the complexities of maintaining these test scripts. As a result, they can spend more time enhancing the product, innovation, and deployment.
Which tests are best for codeless automated testing?
To implement codeless automated testing, it is crucial to identify the tests that need automation to help the testers and the company enhance their testing processes.
These variations include:
1. Manual tests
Organizations can consider manual tests which make for the most common testing strategy across the globe. This is evident in a recent survey that showed that companies execute manual and automated testing with a ratio of 75:25.
Here, 9% of the survey respondents stated that they carry out only manual testing, but 73% would like to achieve a ratio of 50:50. However, 14% of these firms want to discontinue manual testing and shift to codeless automation.
The primary reason behind this change is the significant amount of time manual testing entails and its complexity.
2. Inconsistent tests
Testers would also prefer to automate inconsistent or flaky test scripts that often provide undesirable results.
These tests might lead to returning false negatives or return failures and passes without any code modifications. But, handling these inconsistent tests gets difficult with time, as application development becomes complex and the amount of code increases.
So, along with these tests, companies must also consider automating tests needing substantial expertise.
As every company may not be able to manage the necessary resources or hire new employees, automation will be a boon for them.
How to get started with codeless automation?
Before starting with codeless automation, you need to identify the tests you wish to automate.
These can be the time-consuming and flaky tests that complicate your testing processes. Furthermore, it is important to determine the tests that create instability within your testing pipeline. To do so, you must follow the listed steps:
1. Begin with automating repeatable tests
If the company doesn't have an automation suite for implementation, starting with repeatable yet simple tests is a commendable strategy. Regression tests and smoke tests are the most recommended test strategies here.
Testers can start by applying codeless automation for a small number of tests to evaluate the process’s efficiency. However, they have to be careful to ensure that these tests are absolutely atomic and independent from other tests. This is important because it will allow them to execute these tests efficiently without affecting other test scripts.
Additionally, in case the organization has a scripted test automation suite, they must regularly replace scripted tests with codeless tests.
2. Preparing the test team
The next most important step is to identify the professionals who will be handling the entire testing procedure.
It's important to gather the required professionals, including testers, developers, product engineers, and release managers, for moving forward with the process.
This will be a structured approach that will stabilize the codeless automation processes. Moreover, these professionals will be able to track the testing progress and analyze the outcomes.
3. Modularize the tests
As codeless automation offers many reusable components, testers can utilize modular blocks of tests that might be already in place. So, if they want to test the specific functionality of an application, they can use the associated test block rather than prepare an end-to-end test script.
This will allow teams to also evaluate these small test cases separately to increase the testing efficiency.
In addition, testis can also utilize some repeatable test steps, which can work as prerequisites for other cases.
Codeless test automation tools and approaches
Developers and testers are looking for codeless automation tools that will offer maximum usability, reliability, and flexibility during testing. Hence, companies must select the appropriate codeless testing tools for their business operations.
Being a cost-effective and less time-consuming method, codeless automation tools allow testers to enhance application quality.
To understand this better, let’s look at some of the best codeless automation tools currently used in the industry:
Katalon Studio
Katalon Studio is one of the most popular codeless testing platforms supporting testers of a variety of skill levels. It is ideal for developing desktop, mobile, APIs, and web solutions. Plus, it offers a solid automation framework for added convenience.
Moreover, it provides a record and playback feature to capture test movements and a BDD Cucumber feature for conveying test scenarios to facilitate team collaboration. Furthermore, the Katalon TestOps functionality enhances the workflow along with DevOps and test orchestration.
Leapwork
This is a user-friendly cloud-based automation tool that supports applications for Windows, SAP Testing, and the Web. It allows professionals to combine and reuse test flows and perform cross-browser testing efficiently. Moreover, testers can conveniently integrate it with their existing DevOps toolset.
Additionally, testers get notified through an SMS alert if there are performance errors and they can view reports on the live dashboards for performing modifications.
Perfecto Scriptless
This is another cloud-based web and mobile application that is powered by a record and playback functionality. It doesn't require extra plugins but supports parallel execution for multiple data sets.
Its smart binding feature captures application changes and attributes like position, size, or text value. Additionally, the platform offers numerous built-in integrations such as Issue Management, Communication, Notifications, and Test Management.
Not to forget, the analysis and reports of every test step also help testers evaluate the automation test’s efficiency.
Ranorex Studio
Ranorex Studio is a multipurpose codeless automation tool that is suitable for mobile, desktop, web, and cross-platform testing. Preferred by experienced and beginner testers, it comes with drag and drop objects and regression testing code modules.
Hence, professionals can easily integrate this platform with Android, iOS, Java, HTML5, and Silverlight. Furthermore, the flexible automation interface makes integration and test execution convenient and testers can utilize the Ranorex Spy and RanoreXPath features for identifying GUI elements during testing.
Codeless Automation Approaches
Organizations must ensure that all selected codeless automation tool is suitable for professionals with varied technical skills and experiences. Hence, they must follow the listed approaches for selecting these tools:
- The tools must reduce programming complexity and enable testers to use common constructs like loops, arrays, and conditional blocks.
- It must provide reusability and modularity in automation testing
- The tool must maintain the business process flow and consistency
- The testing platform must-have functionalities to handle the dynamics of UI changes
Benefits of codeless automation
One of the most important benefits of codeless automation is it allows companies to free up resources and improve the testing processes. As professionals take lesser time for automation testing, they can spend more time on exploratory application testing.
The approach hence helps them understand the nuances of the application and suggest areas for improvement. Furthermore, with parallel test execution, companies can execute more tests in a variety of environments. All of this helps reduce their expenses and increase the efficiency of their organizational strategies.
Better automation scope
As codeless automation testing tools are equipped to handle multiple applications such as desktop and mobile apps, the automation scope is huge.
These tests involve several interfaces and offer maximum flexibility. So, it becomes easier to scale the automation of several applications and support project integration.
Moreover, it also allows testers to evaluate possible risks and issues in the application.
User-friendliness
The codeless automation tools have excellent functionalities to make the testing process convenient and simple. They offer a user-friendly interface and features that non-technical professionals too can learn.
Moreover, having a shallow learning curve, codeless automation allows professionals to start testing right after they register for the tool. Not to forget, most tools offer product tours and simple configurations to make the testing process smooth.
High scalability
Upgrading standard automation testing platforms is a difficult task for most professionals. But in codeless automation, companies receive excellent scalability as most of the tools are cloud-based.
This makes it much more convenient to scale up the tools according to the project and product requirements. In addition, it provides greater security and is less expensive than scaling a traditional automation system.
As such, companies can utilize saved costs to increase the application’s functionalities.
Reusability
Codeless testing tools facilitate the reusability of test steps of cross projects, applications, and even operating systems.
The tools might also prioritize a particular test case's reusability and automatically update the test cases. These practical features thus help in saving time and expenses.
The bottom line
It is expected that by 2026, the automation testing market might be worth $49.9 billion. This is because more companies are adopting codeless automation to free up their resources, enhance collaboration and elevate product standards. It proves beneficial as they won’t have to hire more testers. So, codeless automation can be considered the future of modern testing. With artificial intelligence, analytics, and IoT becoming popular in codeless tools, professionals will have more flexibility to execute tests.

Everything you need to know about automated visual regression testing
Regression testing is a form of software testing that involves executing functional and non-functional tests again and again. These tests are carried out to guarantee that previously designed, and tested software continues to function properly even after a modification has been made. It primarily examines if an application's UI is still looking good once a new feature has been implemented. In addition, it is a verification procedure that looks for any new flaw or fault in the current software.
Impact of visual errors on the user experience
When we talk about visual mistakes, we're not talking about logical problems in the system; we're talking about aesthetic flaws that cause interfaces to appear improperly, degrading the user experience.
Some of the common UI defects are as follows:
- Issues with the font (instead of text, there are unknown markings)
- Issues with alignment
- Issues with layout
- Issues with rendering
- Elements that overlap
- Issues with responsive layout
Most consumers will not return to your website or app if they have a poor experience visiting it. In addition, users don't like to visit websites with fundamental issues. Therefore, the content of the website should be clear, concise, and crisp.
Visual errors are issues with the design or layout of an online or mobile application's interface. As a result, users may experience application problems when they visit your app or website. In addition, these visual flaws wreak havoc on an app's user experience.
What exactly is automated visual regression testing, and why should you care?
Visual regression testing is done to conduct UI or front-end regression testing by gathering screenshots of the UI and comparing them to the original or baseline pictures. If there is a slight variation from the baseline image utilizing the captured mobile UI, the visual regression mechanism will alert you and highlight the pixel-by-pixel problem.
Visual testing examines an application's visual output and compares it to the results predicted by the designer. Visual tests may be conducted at any moment on any application with a graphical user interface. Most developers conduct visual tests on individual components during development, and during end-to-end testing, they run visual tests on a fully functional program. Thus, a regression test functions similarly to a verification technique. However, test cases are often automated as they must be executed repeatedly, and it can be tiresome to execute the same test cases manually.
Programming languages, such as Java, C++, C#, and others, are not required for regression testing. Instead, it’s a type of testing utilized to see whether the product has been modified or if any updates have been made. It ensures that any changes to a product do not disrupt the product's current modules.
Case scenario for visual bugs

Here's an example of a visual flaw in Amazon's mobile experience: the filter bar covers the product description, which is inconvenient for shoppers who want to read it quickly. Of course, the issue is inconvenient in this situation, but there are other times when a visual fault renders a program useless. For instance, when a visible component shifts or vanishes entirely.
Once the developer has fixed the problem, it must be re-tested. Regression testing is also required because while the price on the reported page may have been corrected, it may still show an incorrect price on the summary page. The total is displayed alongside other charges or in the email sent to the customer. Unfortunately, automated UI tests aren't designed to check for visual errors. Thus they'd miss this one. Even tech titans, as seen in the Amazon example, are not resistant to these flaws. Visual mistakes in an application are conceivable as automated UI testing does not discover them. It's critical to find these issues since they may significantly influence an app's usability and accessibility and the user experience.
If a visual problem prevents a user from accessing an application's core functions, it should be reported as a functional bug.
Function vs. design
While it is self-evident that you must examine your website for regression, many individuals mistakenly believe this includes the aesthetic element. On the contrary, visual regression testing is unique from functional regression testing. It examines whether any new code has hampered the functionality of a page. In contrast, functional regression testing examines whether the latest code has impeded the usability of a page.
There are several browsers, mobile devices, and screen sizes to consider for web development. For example, a single page in the system may be displayed by Chrome or Firefox, viewed by small, medium, or large desktop displays, and browsed by various operating systems on mobile devices with various screen sizes.
Understanding the difference is critical since a visually "altered" page may work perfectly and pass all functionality tests. When we consider browser rendering and responsive design, where the web pages are autonomously scaled, and some components are concealed, reduced, or extended to look good across all screen sizes, the difference becomes even more apparent.
Unfortunately, functional testing doesn't pick up these more subtle design changes regarding user involvement, which can vary from moderately uncomfortable to outright unpleasant and disruptive.
Visual compatibility
Visual regression testing becomes even more necessary when dealing with responsive systems to discover compatibility issues while rendering websites. Furthermore, those tests may detect some of the cross-platform issues that are more difficult to detect. Websites or web pages must be visually perfect in all screen sizes and all operating systems. It must be compatible with all screen sizes and should be responsive.
Opera or Chrome might display a single page in the system, viewed on small (under 6-7 inches), medium (10-12 inches), or large (desktop) displays, and browsed by several operating systems on mobile devices with a wide range of screen sizes.
How does automated visual regression testing work?
Automated visual testing is a method of determining if a user interface appears visually as intended. If you need regression visual testing to deal with frequent changes to a stable UI, automation is a smart option. Automated testing also aids in a great visual comparison of screenshots.
The advantages of automating visual tests are that they save money in the long run. In addition, they are faster and accurate than manual tests because they can eliminate human errors and deliver pixel-perfect visual tests, are reusable, and are transparent because they provide automatic reports that are easily accessible by anyone on the team.
Automated snapshot comparison improves the precision of visual inspection while also increasing the return on investment. Bugs that are hard to identify with human eyes and manual comparison can be captured with automatic snapshot comparison. It's also beneficial for complicated user story end-to-end testing.
- Drive the program and test it, as well as take screenshots at this stage.
- The automation engine compares these screenshots to the baseline screenshots in this phase. The baseline screenshots are often photos captured during prior test runs and verified by a tester.
- When the program receives the results of the picture comparisons, it creates a report with all of the discrepancies highlighted.
- When the tool receives the results of the picture comparisons, it creates a report that summarizes all of the differences discovered.
Manual regression testing vs. automated
When manual regression testers do regression testing, test cases are first written and then executed. These tests assist in determining if a test is a pass or a fail based on the expected results specified in the test cases. Automated regression testing entails many stages. The generation of effective test data and the development of quality test cases are critical for test computerization. There are various automated regression testing solutions available, and organizations should choose one based on the application being tested.
How to implement automated visual regression testing?
Testing is just repeating a process in a given circumstance for a specific reason. As a result, we can confidently deduce that the same approach used for testing in the first place may also be used for this. As a result, if manual testing is possible, so is regression testing. It is not required to utilize a tool. However, as time passes, programs get increasingly bloated with features, growing the danger of regression. Therefore, this testing is frequently automated to make the most of the time.
Visual regression testing should be automated and integrated into the CI/CD workflow. This saves time, minimizes the risk of human mistakes, and guarantees that the software's aesthetic attractiveness is maintained.
- Create scenarios for testing. Define what should be recorded in screenshots and when they should be taken during the test. Be careful to incorporate a range of user interactions in these situations, as the software will have to deal with them in the real world.
- The program that compares new screenshots with older screenshots using an automated visual testing method will provide a report that lists all of the changes found.
- Critics examine whether the modifications made resulted in the intended outcomes or whether there were any interruptions.
- If any bugs are discovered, they must be repaired. Update the updated screenshot as a reference point for upcoming visual regression testing once that's done.
Benefits of automated visual regression testing
Automated visual regression testing tools analyze pictures "pixel by pixel" to check for changes caused by faults or bad practices. It allows businesses to guarantee that these changes do not negatively impact the final product experience.
- Hundreds of claims can be replaced with a single visual picture.
- Automated visual testing examines the user interface in a variety of browsers, displays, and devices.
- We can highlight significant differences in material and small-scale UI.
- It helps to improve the product quality and user experience.
- It helps to improve the ability to make functioning automated checks.
- The process of checking accuracy has improved.
- This frees up time for test analysts to focus on interpretation and more difficult challenges.
- Great visual design contributes to the development of trust and credibility.
Where and when not to use visual regression testing?
Automated visual testing analyzes the graphic look of a test application and compares the results to known excellent screenshots to see whether they match. In addition, this method evaluates graphic value criteria such as paint consistency, alignment, size, etc.
If you are short of time, you should avoid using this method. Visual regression testing is time-consuming and should not be utilized unless you have a strict deadline. Neither automatic nor entirely manual visual regression testing is possible. It is preferable to use a combination of automated and manual visual regression. When comparing pictures, don't rely on tool error configuration ratios.
Visual regression testing is one of the most reliable ways to reach the desired output. The essential factor is whether the human eye can detect the change is put into the system of this testing method.
Visual testing is used in conjunction with functional testing to analyze the visual quality while testing an application. This is challenging for functional automation frameworks to capture because they are designed and implemented to focus solely on functional elements.
Tools for visual regression testing
Let's have a look at a few tools for visual regression testing:
The complete visual UX testing solution and visual validation is Kobiton's scriptless automated visual testing solution. In addition, Kobiton is a mobile testing tool that offers complete visual validation and visual user experience testing for mobile devices.
BrowserStack's Percy is an automated visual testing platform designed for task forces to conduct automated visual validation tests. It enables you to create, develop, and distribute software. Smart visual regression testing, responsive visual testing, and cross-browser testing are all supported.
Applitools Eyes is a cloud-based facility for automatic visual UI testing of mobile, web, and desktop applications from Applitools. It verifies the visual output of your UI across a variety of browsers, operating systems, devices, and screen sizes.
BackstopJS is a JavaScript-based framework for visual regression testing. BackstopJS sees your website just as a black box, so you don't need to write your website in JavaScript to use it. One of its features is very detailed and helpful as it points out the differences among your pictures, which is included in the report it creates.
Chromatic aids in the consistency of UI elements. It captures pixel-perfect images of rendered code, style, and assets in real-time. In addition, every commit to the repository is automatically checked in the cloud for visible changes.
Teams may use Screener to examine their UI across various operating systems, browsers, and other electronic devices. It detects visual regressions and inconsistencies in the UI automatically. It shows changes by comparing screenshots and DOM snapshots.
Conclusion
Regression testing is a proven method of ensuring that an application stays defect-free even after several modifications. It also guarantees that no current functionality has been harmed as a result of the recent changes. Regression testing should be used to discover issues in a new software release while also ensuring that prior defects have been addressed. Any new feature should be subjected to regression testing, validated using an efficient regression test automation approach, and maybe checked manually or using an automated regression testing framework and tools.
There are a variety of automated visual regression testing solutions. Choosing one may be influenced by your demands and budget, as well as the goals you wish to achieve. QED42 is a full-service solution provider that uses design and technology to create ambitious digital experiences for consumers worldwide.
It helps companies reinvent themselves to provide superior data-driven online, mobile, and social experiences. Our intelligently crafted online and mobile experiences have earned us the confidence of over 200 worldwide customers. Sony, Intel, and others are among our notable clients. In addition, our extensive knowledge in Drupal, JavaScript frameworks, and design thinking can convert organizations into intelligent enterprises.

Tips and tricks of mobile automation testing
The number of active mobile applications has reached over 7.5 billion. mobile applications are not only enabling customers to communicate but also to shop and pay bills. Hence, the importance of understanding the concept of mobile testing is becoming crucial. Furthermore, mobile automation testing ensures cost-effectiveness and also delivers a faster Return of Investment (ROI).
Mobile automation testing is a process of testing mobile applications via tools like TestComplete Mobile, AI Test Creation and Analytics For iOS and Android, Appium (Android and iOS), and many more. It helps in reducing the time taken for testing mobile applications. Mobile automation testing is a technique of building application software by testing its usability, consistency, and functionality.
The mobile solutions delivered should be tested very well. The aim is to promote mobile testing or improve the knowledge of those who have switched to it lately. Nowadays, mobility solutions have gripped the market. People do not wish to switch on their laptops/PCs to look for or learn everything. They want handy devices such as smartphones to solve their queries quickly.
We are here to guide you about everything you need to know and understand about mobile automation testing. Our main goal is to provide you with every tip and trick of mobile automation and create a clear picture of this concept.
Why should businesses leverage mobile test automation?
Today, there are millions of smartphone users. This can help achieve growth in the mobile apps' space in business operations. Hence, with so many enterprises producing millions of apps and smartphones, mobile automation testing is important to ensure app safety and effectiveness. Here are some of the reasons why businesses should leverage mobile test automation.
- App functionality- Mobile automation testing ensures app functionality by checking whether the mobile app functions as specified in the design document for several testing specifications.
- App performance- Mobile performance automation testing assesses operation capacity, the app's readiness, app responsiveness, and performance while it has several users at the same time.
- App usability- Application usability testing is necessary nowadays as users prefer apps that deliver better usability. It ensures that users manage to perform intended tasks with satisfaction.
- App security- Application security testing verifies storage security issues, data integrity, and security of activity logs.
- App accessibility- Nowadays, it is becoming mandatory that all mobile apps have access to various abled populations that ensure easy usage and access.
- Across browsers, OS, various mobile applications- Mobile test automation should be done using different mobile automation tools to ensure that mobile apps work functionally across various operating systems, browsers, and mobile applications.
Types of mobile application testing
Mobile automation testing produces a high quality product and improves the app development process. Here are different types of mobile app testing:
- Usability Testing- Usability testing is ideal for determining how an app makes it easier for users to accomplish their intended tasks.
- Performance Testing - Performance testing is implemented on mobile applications to check their performance and response to the increasing workload. These tests are mandatory to check how the mobile device will perform under varied loads.
- Security Testing- 80% of the users uninstall apps due to security reasons. Hence, security testing is implemented to focus on app behavior and data security in various permission schemes.
- Manual Testing-Manual testing ensures that the mobile product is working as expected. It includes complex testing, exploratory testing, and physical interface tests.
- Interruption Testing- Interruption testing ensures and checks the behavior of mobile applications in an interrupted state. For instance, interruptions include incoming SMS or phone calls, push notifications, battery low notification, and many more.
- Functional Testing- Functional testing ensures that mobile applications work as per the requirements. Functionality tests ensure consumer satisfaction, provide a quality product, and meet device requirements.
- Localization Testing- Localization testing ensures the responsiveness of mobile apps to a specific culture and language-related aspects of a specific region.
- Compatibility Testing- Checking compatibility is an important test to do on mobile applications. It is necessary to make sure that mobile applications are compatible with every device you aim to support. A compatibility test is crucial to check the standard usage and performance of mobile applications.
- Installation Testing- Installation testing verifies that a mobile app is properly installed and uninstalled. It also ensures that app updates are free of errors.
- Automated Testing- Automated testing along with manual testing ensures quality and helps in producing a better quality product at a faster rate.
How to select the right device for testing your mobile application?
When you know the answer to the following questions, you'll be saving a lot of your time and money. In addition, it decreases the number of devices needed for testing.
- What is the target device type? Smartphones, tablets or both.
- Which devices will be best for your target audience?
- Which Operating System (OS) version is suitable for your mobile application?
- Which screen sizes are not in high demand?
- What is the minimum hardware configuration required for the device (2GB/4GB/6GB RAM)?
Steps in mobile testing
After creating a mobile app with every feature, mobile automation testing should be implemented to ensure that the mobile app is a success and does not require any future changes. It involves a few steps: https://www.testingxperts.com/wp-content/uploads/2020/04/mobile-app-automation-testing.jpg
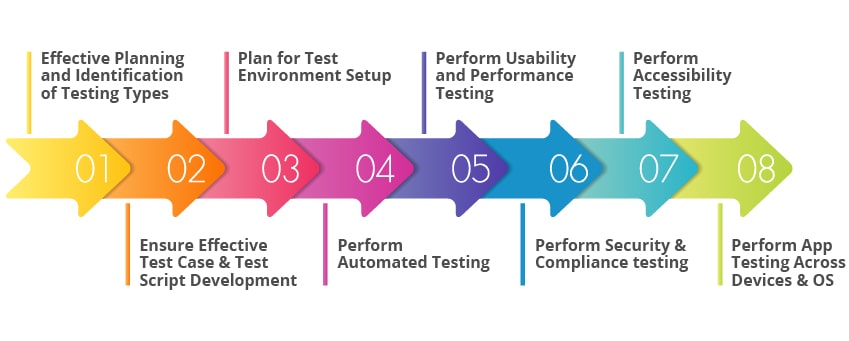
Business outcomes of mobile automation testing
- Understanding mobile testing and technology drivers help in creating the best mobile test strategy. About 36% of the organizations are spending more than $10000 on mobile automation tools and testing.
- Understanding and identifying the key risks and challenges of mobile applications for creating a test strategy.
- Applying test levels and types specific to the mobile apps.
- Applying common mobile test types such as functional, hybrid, native, progressive, and non-functional.
- Half of the entire organization is implementing mobile testing daily.
Key factors to consider during mobile testing
Just building a mobile application and launching it to the consumer world does not make sense. Instead, proper mobile testing is necessary to ensure the mobile applications' compatibility and make them user-friendly. Here are some of the factors you should keep in mind before testing mobile applications:
- Ascertain Testing Goals
Testing of mobile applications requires business goals. It helps in setting the approach and efforts required for mobile testing. The overall mobile testing approach depends on various objectives. Cost-effectiveness, enhanced test coverage, and faster time-to-market are some objectives for mobile testing.
- Consider Mobile Testing with a Goal
Mobile testing brings down the efforts, costs, and money. It helps in achieving better test coverage. Hence, there should be a proper plan for mobile automation. It should be implemented by keeping in mind the objectives and goals of the required mobile application. Security, compatibility, responsiveness, and accessibility should be a part of mobile automation.
- Prioritize security of the mobile application
Virus and cyber-attacks are becoming likely to attack your mobile applications. Unfortunately, mobile applications are vulnerable and sensitive to such viruses. It can expose information to other users. So, along with the testing performance of mobile applications, test the security of mobile applications too. Security tests include security scanning, risk assessment, penetration testing, and ethical hacking.
- Take early tests to ensure quality.
New approaches in mobile testing require early tests to ensure the quality of the devices and make them ready for usage. Thus, early tests help in saving costs and ensure the quality of mobile applications. Dev-ops, Shift-Left, and Agile are some of the testing approaches that help save costs and check the quality of your mobile applications.
Tips and Tricks for mobile app testing
Mobile automation testing produces a higher quality product and improves the app development process. Here are some of the tips and tricks for mobile automation:
- Define your ways of working - Always ensure you have a good set of end-to-end tests, units, and integration running as a part of your mobile automation pipeline. These requirements are much needed as your mobile testing would be incomplete without them. Identify your mobile application's crucial flow and do automated tests to ensure mobile app quality.
- Phase your rollout to consumers- Google Play stores and Apple stores enable you to phase rollouts. Phase rollouts are the ability to release your mobile application updates gradually to users periodically. You can start a phased rollout of your new mobile version to one percent of your user base.
- Watch your monitoring and analytics tools- Always pay close attention to various metrics that validate customer experience and quality. It involves top crashes, most-used devices, and most-used IOS devices. Check if it helps provide a more clear picture of where your mobile application is headed.
- End to End Automated tests- It is mandatory to have an end-to-end test automated user interface to save your app from bugs and issues. It should be a part of your CI pipeline. It is high maintenance that means you need to have a good strategy.
Tools for mobile automation testing
Appium- Appium is also an open-source framework for mobile, hybrid, and native mobile apps. It drives Android, Windows apps, and IOS using the Webdriver protocol.
Calabash- Calabash is a mobile automation framework that allows developers who do not have coding skills to execute and create automated tests for IOS and Android applications.
Robotium- Robotium is an open source test framework which makes it easier for developers to write robust and powerful tests for mobile android applications.
Selendroid- Selendroid is an open-source framework interacting with multiple emulators and devices. It is UI-driven by hybrid apps.
Espresso- Espresso testing tools enable developers to write test cases for UI-User interface testing.
XCUITest- XCUITest testing tools enable developers to record transactions with the User Interface-UI or play test code from the start.
TestProject.io- TestProject.io is a free online mobile automation tool designed for developers and testers.
Wrapping up
Mobile automation testing is all about selecting apt mobile simulators, choosing the right testing devices and tools, designing the perfect strategy, and making sure there are no compromises to mobile applications’ safety, security, functionality, and performance. Mobile automation testing is not an easy task, but it has to be done properly. Otherwise, your mobile devices are not ready to be launched into the consumer world.
To ensure that mobile devices are useful and deliver the intended result, mobile automation testing is mandatory. It helps in identifying the defects initially and avoids additional costs. In addition, it will make your device user-friendly. You must know every aspect involved in mobile testing.
At QED42 we check the quality, performance, and functionality of your mobile applications. We are here for you from the beginning till the end. Learn more about our mobile automation testing services here.

Security Testing - A Complete Guide
Security threats can tremendously impact your web and mobile applications. When your mobile and web applications are not secured and safe via security testing, it makes the web apps vulnerable to security attacks like threats, risks, and misuse of data. Users tend to avoid applications with security threats as they are afraid that their data will be misused.
According to recent research, 17% of breaches include malware attacks; 45% were hacking and 22% were phishing attacks.
Hence, security testing is a must to make mobile and web applications safe and user-friendly. Security testing is a type of software testing that helps in discovering threats, vulnerability and risks in mobile and web applications. It is conducted to identify any threat in the application and helps in preventing attacks from intruders.
Security Testing should be a part of your mobile and web application development life cycle as it helps in developing and deploying secure software. The purpose of this is to find out all the weaknesses and loopholes in the system that may result in revenue loss and information loss.
Security testing aims to analyze various security sections by following these six principles: authenticity, availability, continuity, confidentiality, authorization, and non-repudiation. In addition, security testing ensures that the software information and data are protected from any losses.
When we talk about the internet and the web, online security is a matter of concern. If the web or mobile applications cannot protect the data, no one will ever use it. For example, if your site has a payment protocol, then the user’s banking information with his email id data must be secured. If these details reach the wrong hands, the user can get into trouble. Thus, establishing a security system that helps identify the loopholes beforehand saves online businesses or users from security attacks and misuse of sensitive information.
The need for security testing
The security system helps in detecting any threats or risks on the software. In addition, it helps to identify loopholes and risks associated with the software system. When it comes to the web, security is the topmost priority. If, while using an application, your transaction data is not secure, users will think twice before using it. Security testing helps develop solutions around these loopholes through the means of coding and delivering flawless and secure applications. Security testing is needed to make sure all the information and data are secure and safe.
Security testing helps identify the loopholes that were not discovered during the code review, security white box test. In addition, it helps in identifying the applications’ vulnerabilities that were ignored during the first screening test and the development phase of the software.
Security testing works on six principles. These principles help in developing an integrated system that helps in securing the data of the users.
- Confidentiality - This determines whether your user has full control over their information so that only authorized people have access to it.
- Authentication - This is to check whether the user’s identity is correct or not. Sometimes people may put wrong information to get access to the information.
- Integrity - This principle will help in confirming that the information received is correct or not.
- Availability - The data and information on the software should be available to users at any given point
- Non-Repudiation - The web and mobile apps should be able to deny any action that has already taken place.
- Authorization - The user should have permission to do any activity in the software. The user should have permission to use the data and information present on the site.
Types of security testing
There are seven types of security testing mentioned in the Open Source Security Testing methodology manual:
- Vulnerability Scanning - Vulnerability scanning is the first step in security testing that helps to identify known loopholes and signatures.
- Security scanning - Both automated and manual tools are used in security scanning to identify the loopholes. Security schanning is the process of identifying misconfigurations in software, systems, networks, and apps. The outcomes from this test are listed and analyzed in-depth to find the relevant solutions.
- Penetration Testing - It is a process of performing a real-time cyber attack on an application and network software under secure conditions. This test is performed manually by a security expert to check whether the software will be able to handle a cyber attack in real situations. In addition, penetration testing exposes the unknown vulnerabilities of an application.
- Ethical hacking - Ethical hacking is a broader concept than penetration hacking. Here all the hacking methodologies are used to check whether the application, network, or software will handle a cyberattack in real-time. Through ethical hacking, all the misconfigurations are exposed by attempting attacks from within the application and software.
- Risk assessments - Risk assessments, classifies, identifies, and analyzes the security risks.. These risks are classified into low, medium, and large scale. Here, mitigation controls are suggested that are based on priority.
- Posture Assessment - The overall security for any organization is determined through posture assessment. This is an amalgamation of ethical hacking, risk assessment, and security scanning.
- Security Auditing - Security auditing is an internal inspection of systems and applications to check for security flaws. Security audit can be done using the line-by-line inspection of code.
Desktop and mobile security testing
A desktop application should be secured for its access and storage of the data. Likewise, a web application requires even more security than a desktop application for its access and to protect its data. While making a web application, a web developer should ensure that it is immune to Brute Force Attacks, XSS, and SQL injections. In addition, Brute force attacks are dangerous to web applications and desktop software and applications.
How to do security testing?
It is a known fact that the cost of security testing will be more if it is done after the software implementation stage. Hence, it becomes necessary to include security testing in the initial stages of your System Development Life Cycle (SDLC).
Here is the security process that should be adopted for every stage in the SDLC:
- Requirements - Security test analysis for requirements. To check the misuse/abuse case.
- Design- Develop test plans involving security testing. Analysis of security risks for designs.
- Unit and Coding Testing- Dynamic and Static testing + Security White Box Testing
- Integration Testing- Black Box Testing
- System Testing- Vulnerability Scanning and Black Box Testing
- Implementation- Vulnerability Scanning, Penetration Testing
- Support- Analyze the impact of patches
Security testing methodologies
In security testing, several methodologies are followed:
Tiger Box - Tiger box is a type of hacking done on a laptop comprising hacking and OS tools. This methodology for security testing helps security testers and penetration testers to conduct vulnerability attacks and assessments.
Black Box - The tester is permitted to conduct tests related to technology and network topology.
Grey Box - The tester is given partial information about the system, and it is a mixture of black and white box models.
Approaches for security testing
Follow are the mentioned approaches while planning and preparing for security testing:
- Security architecture study - The initial step is to understand the organization's requirements, objectives and security goals.
- Security Analysis - Analyze and understand the requirements of the web application to be tested.
- Classify Security Testing - Collect and classify every information used while developing web application networks and software such as technology, and operating systems.
- Test planning - On the basis of detected risks, threats and vulnerabilities prepare a test plan.
- Reports - Prepare a detailed report of the identified threats, issues and vulnerabilities.
Security testing roles
- Crackers- Crackers usually break into the systems to steal and destroy data.
- Hackers- Hackers access networks and computer systems without any permission.
- Ethical Hackers- They hack software and applications with the authorization of the owner.
- Script Kiddies- These hackers are not experienced and have programming language skills.
Security testing tools
There are many tools available for security testing. Some of them are mentioned below:
Intruder
The intruder is a security testing tool that is easy to understand and use. It is a vulnerability scanner that is enterprise-grade. It conducts over ten thousand high-quality security tests over your IT infrastructure involving application weaknesses, missing patches, and configuration weaknesses. It provides proactive scans and accurate tests. It also helps in saving time and keeps applications safe from hackers.
Owasp
The OWASP: Open Web Application Security Project focuses on improving the security of applications and software. It is a non-profit organization comprising several tools to penetrate many software protocols and environments.
Acunetix
Acunetix is easy to use, and it helps small and medium-sized companies ensure that their web applications are immune to costly data breaches and are perfectly secured. Acunetix detects a wide range of web security threats and issues. It helps developers to detect such issues early to solve them immediately.
Wireshark
Wireshark is a security and network analysis tool also known as Ethereal. Wireshark is a network packet analyzer that provides details about the decryption, network protocols, packet information, and many more. It can also be used on OSX, Linux, Solaris, Windows, NetBSD, and other systems. The results depicted from these security tools can be seen through TTY and GUI.
W3af
W3af is an audit framework and a web application attack. It comprises three different types of plugins: audit, attack, and discovery, which communicate to check any vulnerability on site. For instance, a discovery plugin focuses on several URLs to check vulnerabilities and then forwards it to the audit plugin that uses these URLs to find vulnerabilities.
Burp Suite
Burp suite testing tool which uses PortSwigger's research to help in finding vulnerability and threats in web applications. It provided quicker automated results.
Wapiti
Wapiti is a web application vulnerability scanner that enables users to audit the security of web applications and websites. Wapiti covers errors such as SQL injections, XSS, Shellshock, open redirects, XXE injection and many more.
Myths and facts about security testing
Let’s get to know about the facts and myths about security testing:
Myth1: There is no ROI (Return of Investment) in security testing
Security testing points out areas that require improvements which lead to improved efficiency and web application. Security testing makes your web application secured and immune to various security attacks like SQL injections and Brute Force Attacks. Hence, security testing gives ROI.
Myth2: If someone has a small business, they are not required to have a security policy.
Anyone and everyone is required to have a security policy. Security policies and testing are necessary for every type of organization, whether it is small or big. Security testing helps in finding loopholes that will make your web application better.
Conclusion
Security testing is the most mandatory and necessary type of testing for a web application. It ensures that all the confidential information in an application stays secure. Mobile apps are vulnerable to hacking attacks. We simulate hacking attacks on your app and identify security loopholes along with relevant recommendations. We also provide backend security/server-side security testing for larger applications. Know more about our Quality Assurance services here.

Everything you need to know about Selenium 4
Ever since Selenium 4 was announced in August 2018, the QA testing world was excited and thrilled for the latest enhancement of a QA tester’s best tool. On October 13, 2021, the stable Selenium 4 was officially released after the release of its Alpha and Beta versions. The exciting new features of Selenium 4 are way beyond what anyone could have anticipated and in this blog, this is exactly what we’re going to cover.
New Features
We have explored these new features in our series blogs with code snippets
Relative Locators
Relative locators is the new feature introduced in Selenium 4 to locate WebElements relative to other elements. To deep dive, visit our blog on relative locators
Screenshots
Selenium 4 provides the capability to capture screenshots at different UI levels - element, Section, Full Page. In the screenshots blog, we have covered why we need this feature and how we can achieve it in Selenium 4, with example codes
Window Handling
With Selenium 4, we have a new API to handle the opening of new windows/tabs and switching between windows during test execution. Visit our blog to understand how working with Windows has changed from Selenium 3 to Selenium
Chrome DevTools Protocol
Native support for Chrome DevTools Protocol is one of the major Selenium 4 features. You can refer to this blog to learn more about the implementation of CDP in detail
Deprecated, Modified and New Methods
With the introduction of new features, there has been deprecation and modification of methods on Selenium 4. Explore them in this article.
Note: Find the sample code snippets for these features in the GitHub repository here.
Conclusion
Have you tried Selenium 4? If yes, do let us know what features you liked the most, along with the overall experience of working with Selenium 4!
Happy Testing !!!

Selenium 4 - Deprecated, Modified and New Methods
There are various new features added in Selenium 4. These enhancements are accompanied by deprecations and the addition of some methods. Let’s understand the deprecated methods and their replacement.
Drivers Constructor
In Selenium 3, some driver constructors accept the DesiredCapabilities object as a parameter. DesiredCapabilities is a class that is used to set basic properties of browsers such as browser name, browser version, operating systems etc. to perform cross-browser testing.
In Selenium 4, DesiredCapabilities is replaced with Options. The Options interface provides methods to change the properties of the browser such as cookies, incognito, headless, disable pop-ups, add extensions, etc. Testers can either use only Options or combine Desired Capabilities with Options.
Note: Options are preferably used with Capabilities for customizing driver sessions.

Selenium 3
Selenium 4
- Using Options class only: Create an instance of Options class, set the requirements and pass it to the Driver constructor.
- Combining DesiredCapabilities with Options class: Use the merge(Capabilities) method of the Options class.
New Methods in the Actions Class
Actions class in Selenium provides methods to automate mouse and keyboard user interaction with WebElement of the web application. Selenium 4 provides few additional Actions methods which replace the classes under the org.openqa.selenium.interactions package.
click(WebElement)
In Selenium 3, toGitHub click a webelement we could use either of below two methods:

Selenium 4 provides a new method click(WebElement) in the Actions class which works as a replacement for the above methods.
Snippet
doubleClick(WebElement)
doubleClick(WebElement) method is used to perform double click on a WebElement. This method replaces moveToElement(WebElement).doubleClick() in Selenium 4.

Snippet:
Output

contextClick(WebElement)
contextClick(WebElement) method is used to perform a right click on a WebElement. This method replaces moveToElement(WebElement).contextClick() in Selenium 4.
Snippet
Output

clickAndHold(WebElement)
clickAndHold(WebElement) method is used to perform click action on a WebElement without releasing the mouse. This method replaces moveToElement(WebElement).clickAndHold() in Selenium 4.
Snippet
Output Screenshot: The screenshot after moving the dragbox by some offset using clickAndHold() method

release()
The release() and release(WebElement) methods are used for releasing the depressed left mouse button.
- release() method already exists in earlier versions of Selenium. In Selenium 4 this method is moved from org.openqa.selenium.interactions.ButtonReleaseAction class to the Actions class.
- release(WebElement) method replaces moveToElement(WebElement).release() in Selenium 4

Snippet
Output Screenshot: The screenshot after dragging and releasing the box from source to destination

The sample codes are available at the Github repository here.
Changes in the FluentWait class
FluentWait<T> implements a generic functional interface Wait<T>.
- The Fluent Wait defines the maximum amount of time for the web driver to wait for a condition, as well as the frequency with which to check the condition before throwing an ElementNotVisibleException exception.
- It checks for the web element at regular intervals until the object is found or timeout happens.
- Furthermore, the user may configure the wait to ignore specific types of exceptions whilst waiting, such as NoSuchElementExceptions when searching for an element on the page.
Selenium
- In Selenium 3, the methods withTimeout() and pollingEvery() take two parameters int and TimeUnit.
Selenium 3.11 and above
- With Selenium 3.11 (and above), the methods withTimeout() and pollingEvery() take only one parameter java.time.Duration.
Implicit Wait
Selenium 4 has replaced the TimeUnit with Duration. The Duration class can be imported from java.time package and has methods to represent time duration in nano, millis, seconds, minutes, hours, days and so on. The method implicitlyWait(long , TimeUnit) from the type WebDriver.Timeouts are also deprecated. In Selenium 4, implicitlyWait method takes only one parameter.
FindsBy
The FindsBy interface, part of the org.openqa.selenium.internal package, is deprecated in Selenium 4. The changes are internal to the Selenium framework. Therefore, Selenium users can continue using the FindElement(By) and FindElements(By) as used in Selenium 3.
Conclusion
This article covers the deprecated, modified and new methods in Selenium 4. We need to consider these changes when we are migrating from Selenium 3 to Selenium 4.

Behat for Beginners
Behat is an open-source behaviour driven development framework for PHP. Behat is used to write code in easy human-readable statements for automated functional tests. The framework uses the Gherkin syntax. These statements are simple English text which makes it easier to understand the feature and the automated scenarios.
Following are mostly used gherkin keywords:
- Given - is used to mention the precondition for the test case
- When - is used to define the steps which we are going to perform
- And - is used to avoid writing given/when/then repetitively
- Then - is used to define the result or the outcome of the steps which are performed
Let’s take an example of forgot password functionality in Gherkin language as:
Feature: Forgot password functionality
Scenario: Verify Forgotten Password link
Setting up a Behat project
Step 1: Create a new directory and create a composer.json file inside your directory. So, you can install the dependencies using composer. In composer.json mention the dependency and configuration as mentioned below:
Note: We are using a Drupal extension for setup which will automatically download behat dependencies, you can also use behat, mink, etc. packages directly.
Step 2: Open the terminal and run the following command in your directory:
composer install
It will start installing all the dependencies which are required for behat setup under the vendor directory.
Step 3: Now run the following command to create the default directory structure.
bin/behat --init
This will create a features folder with FeatureContext.php class file in features/bootstrap, where we can keep the custom step definitions and logics required to execute the test cases. The behat directory will look as below:
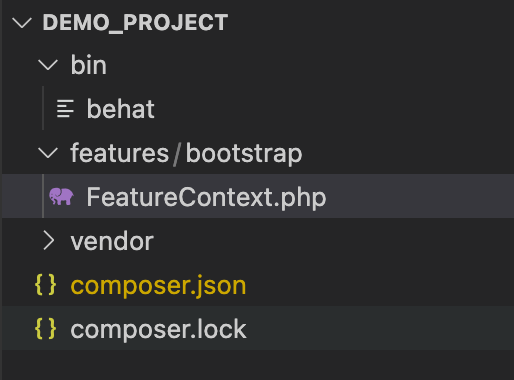
Step 4: Next step is to create a behat.yml file in the root folder, which will be the configuration file from which the behat executor will know about our environment and extensions to be used while executing test cases. Add the following to behat.yml
Step 5: Creating a feature file
What is a feature file?
A feature file is an actual test case that will hold all the scenarios, Let’s say for example - login functionality that needs to be automated, we need to create a login.feature file inside features folder and that will consist of - Feature, Background(optional), Scenario and Steps.
- Feature - It is used for describing the feature which we are going to automate
- Background - it is optional, if there are some set of steps that need to be performed before every scenario then we can put it in the background
- Scenario - It is the description of the test case
- Step - Every line inside the scenario is a step, which has been mapped with a PHP function that gets executed when the step is called
Let’s see an example of a login.feature file:
As you can see, the login feature file consists of two different scenarios for valid and invalid credentials.
Best Practice Tip: do not write XPath or CSS paths in feature files, use labels, id, name or attributes which are easily readable.
Step 6: Execute behat test, you need to run the following command - bin/behat features/login.feature
This feature file will run on the base_url which is mentioned in the behat.yml file.

Yay.! The behat setup is ready
Writing Custom Step Definition
Every PHP function which is mapped to the step in the feature file is called step definition, so wherever a step is executed a mapped PHP function gets executed. Step definition holds the actual code and logic of steps
We are using the Mink and Drupal extension which provides us with most of the predefined steps that can be used to write tests. You can see all available steps using this command - bin/behat -dl
But we might need to write custom step definitions based on our application, in such cases, we can write custom step definitions in FeatureContext.php.
For example, I need to write a logout step for my application, I will create the following step definition in the FeatureContext.php file
To call this step definition we can use And I logout step in the feature file.
Passing data to Step Definition: The step definition can accept parameters that can be used in functions to make it more generic and reusable.
For example, I need a step definition to click a button, I can write a to step definition in the following way by passing a label as a parameter.
In the above way, I can pass the label of the specific input type-button (eg. Save, Submit, Cancel etc) to function and it will get clicked.
To call this step definition we can use And I press the “Save” button step in the feature file where “Save” will be the parameter for your step definition.
Frequently used plugins for Behat
Here is a list of mostly used plugins for behat:
- Drupal Extension: This extension is an integration layer between Behat, Mink Extension, and Drupal. It provides step definitions for common testing scenarios specific to Drupal sites.
- Mink Extension: This extension is used for managing sessions and drivers and also provides predefined step definitions which can be used for writing test cases.
- Bex Screenshot Extension: This extension helps you to capture screenshots, you can use this to debug Behat scenarios by taking screenshots of the failing steps.
- Emuse Reporter: This extension helps you in generating graphical HTML reports from your test executions.
- Dmore Headless chrome: This extension is used for controlling chrome without the overhead of selenium. It supports headless mode.
Conclusion
As we know, automation is the best way to increase the effectiveness, efficiency and coverage of our testing. Behat is easy to set up and gherkin language makes it easier to understand the test cases for non-technical stakeholders, also it comes with extensions like mink and Drupal which provides predefined steps that can be directly used in writing test cases which reduces the time required for custom code.

What is Negative Testing and why is it important?
At the time of writing scenarios, we always tend to write the positive flow to check whether the functionality is working fine and as expected. This is obvious, but as a Quality Analyst do you think this is the right way of adding scenarios? Don't you think we should first try to break the functionality?
Here is where "Negative scenarios" come into the picture.
What is Negative Testing?
Positive testing is to check if the system is working as expected but negative testing is used to determine how the system handles the unexpected behaviour. We should always think about the negative side of the application to break the application. Developers are building the application as per the given acceptance criteria so it is obvious that the functionality will work fine in most cases. So it's the responsibility of the Quality Analyst, to think out of the box in terms of breaking the application.
Negative Testing Scenarios
Consider an example of searching for a product on the website
In this case, we will search for one product (maybe of a single keyword, to finish up my testing) and check if it displays the results or not. Which is what we often do when we try to test something in a positive way.
This is not enough and we should not stop here!
Going further, what if we search for the two words which are not displaying the results as expected. One possibility might be that the keywords are not accepting AND/OR combinations. Or the tester doesn't have the idea of thinking in that way while writing the scenarios.
- What if we add 2 keywords in the search box
- What if we add special characters in the search box
- What if we add numerics in the search box
- What if we add fewer characters in the search box
Consider an example of the image upload functionality of a web application
In this case, if we have a requirement where the image upload field is only accepting file formats like .jpg and .png. Now to break this functionality or check how it behaves if we try to upload files with extensions other than the approved ones mentioned above we should try to upload other files such as:
- Unaccepted image formats like, .jpeg, .webp, .gif, etc.
- Unaccepted file formats, like .pdf, .txt, etc.
Consider an example of the credit card payments
In this case, if we have one of the requirements where it accepts only VISA card, then we should consider below negative cases such as:
- Use other card types like Mastercard
- Add incorrect digits
- Invalid CVV number
- Incorrect expiry date
- Invalid name
Common examples of Negative Test Cases
- Skip the mandatory fields in a web form and try to submit the form
- For date fields in the application, try to enter past dates or invalid dates
- Verify the numeric input ranges for negative values like -1 are acceptable or not
- Verify the phone numbers and pin code inputs when added in a different format
- Enter the larger value than the allowed field size.
Best practices for Negative Testing
When writing negative test cases, we should always consider the boundaries and equivalence partitioning techniques. Set up your requirement test data in positive-negative input values before writing the negative test cases. To think about the negative scenarios, you should have a good understanding of the requirements. Unless and until you don't dig into the requirements, you won't get the negative cases. Always consider the field types for testing negative scenarios. For example, if the input field is accepting only numerics then try to pass the string values.
Conclusion
Negative and positive testing are equally important in building stable and reliable applications. Identifying the negative test cases is a time-consuming process but quite essential. Once you are done with it, the rest is a cakewalk. Thus, Negative testing is a must as it helps in capturing defects before UAT, ensuring a good quality product delivery.

Selenium 4 - Relative Locators
Selenium has always been the most preferred tool suite for automated testing of web applications. Selenium 4 beta comes along with a lot of new features and functionalities. In this blog, we will be exploring Selenium 4’s feature known as Relative Locators (formerly known as Friendly Locators). Relative locators help locate WebElements based on the location relative to other DOM elements.
There are five relative locators:
- above()
- below()
- toLeftOf()
- toRightOf()
- near()
All of these methods are overloaded to accept a By or a WebElement.
Why Relative Locators?
In Selenium 3, when elements were not uniquely identifiable using any of the locator strategies, we used to loop the web elements based on certain conditions and select that required web element. For such scenarios, we can now use relative locators to identify a web element in relation to other web elements.
How to use Relative Locators?
Selenium 4 Alpha
WebDriver::findElement accepts a new method withTagname(). withTagName() is a static method which internally creates a new instance of RelativeBy class and returns the same RelativeLocator.RelativeBy object.
Syntax:
Selenium 4 Beta.3
With Selenium 4 beta.3, Java bindings support with(By) instead of withTagName() allowing users to pick a locator of their choice like By.id, By.cssSelector, etc.
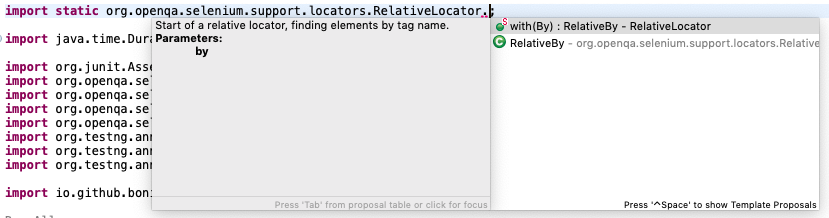
Syntax:
How do Relative Locators work?
To find the location of the element, Selenium leverages the JavaScript function getBoundingClientRect(). This function returns properties of an element like left, right, top and bottom.
There have been changes made to Relative Locator in Selenium 4 beta 3. Elements are first sorted by proximity and then DOM insertion order, to make the result more accurate and deterministic. Proximity is determined using distance from center points of each element’s bounding client rect.
Let us understand each relative locator with an example of a login form.

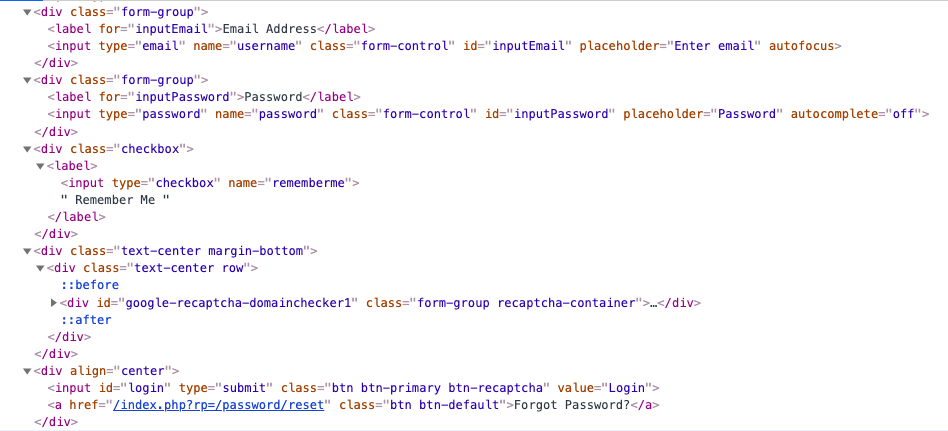
above()
Searches and returns the WebElement, which is above the specified element.
The ‘Email Address’ input element is above the ‘Password’ input element in the login form. So, we can use it as below:
below()
Searches and returns the WebElement, which is below the specified element.
toLeftOf()
Searches and returns the WebElement, which is to the left of the specified element. The ‘Login’ button is to the left of the ‘Forgot Password’ button, so we can use it as below:
toRightOf()
Searches and returns the WebElement, which is to the right of the specified element.
near()
Searches and returns the WebElement, which is at most 50px near to the specified element.
Multiple Relative Locators To Find A WebElement
We could come across a scenario where finding an element using only one relative locator is not sufficient. So, we can use multiple relative locators to find a fixed web element. Consider, we need to locate the 'Remember Me' checkbox in the login form. This checkbox is below the 'Password' field and above the ‘Google ReCaptcha’ field. Here, we can use below() and above() locators as:
Looking at the below screenshot, we can notice that 'Username', 'Password' and 'Remember Me' web elements have the same position on the x-axis. Therefore, we need to use both below() and above() relative locators to find the 'Remember Me' checkbox.
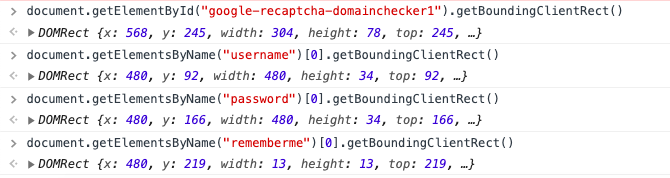
Note: Selenium 4 Relative Locator methods do not work with overlapping elements.
The sample codes are available at the Github repository here.
Conclusion
Relative Locator is an interesting locator strategy added in Selenium 4, using which testers can access web elements with fewer lines of code. Incorporate relative locators in your Selenium automation testing and share your thoughts with us.
Happy Testing!

Selenium 4 API for Chrome DevTools
Chrome DevTools Protocol (CDP) is the new API feature in Selenium 4. DevTools is a short form of Developer Tools. With Selenium 4, QA Engineers can leverage Chrome and Microsoft Edge’s debugging protocol to debug, simulate poor network conditions and emulate geolocation for automation testing. This API would help to identify and resolve critical issues of the web pages with ease.
How does Chrome Debugging Protocol work?
In Selenium 4, both ChromeDriver class and EdgeDriver class extend ChromiumDriver class. ChromiumDriver class extends RemoteWebDriver class. ChromiumDriver class provides 2 methods executeCdpCommand and getDevTools, to control DevTools in Chrome and Microsoft Edge.
- executeCdpCommand: Executes Chrome DevTool Protocol command by passing parameter.
- getDevTools: Returns DevTools


DevTools is a class that provides various methods to handle developer options, such as createSession, addListener, close and send.
Let’s see how we can view console logs, enable network conditions, emulate geolocation and ignore certificate warnings using Chrome DevTools Protocol.
View Console Logs
We can view console messages logged by the browser and get details of the error using the new APIs. This would help us to identify the root cause of the issue. The DevTools in Selenium 4 provides a way to listen to 4 log levels: Verbose, Info, Warnings and Errors.
Let’s consider we need console logs for QED42’s 404 pages. Here, we cannot get the dev tools using the WebDriver instance. Either, we need to cast the WebDriver object to ChromeDriver using ((ChromeDriver) driver).getDevTools or create a ChromeDriver object.
Steps
- Set up the ChromeDriver
- Get the dev tools using driver.getDevTools()
- Create a session in ChromeDriver
- Enable the logs in the Console
- Add a listener to listen to the logs
- Now, Load the AUT
Snippet
Output

Emulate Geolocation
Sometimes, applications have different features across different locations. Using DevTools, we can emulate geolocation by making the browser be in a different location. This is known as geolocation testing.
Emulation.setGeolocationOverride command of CDP is used to override the location and it takes latitude, longitude and accuracy as parameters.
Below is the snippet to override the current location to New York City:
Output

Network Conditions
When testing an application, we need to think about users with a slow internet connection. Chrome DevTools Protocol provides Network.emulateNetworkConditions command to emulate different network conditions. This command takes 5 parameters - offline, latency, downloadThroughput, uploadThroughput and ConnectionType. ConnectionType can be BLUETOOTH, 2G, 3G, 4G, WIFI, ETHERNET and NONE.
Emulate Slow Internet Connection
Let’s write test scripts to emulate slow internet connection and to compare application loading time between slow network and normal mode.
Snippet
Output
- The QED42’s homepage opened in 3295 Milliseconds, the normal way.
- With a slow network enabled, the loading time was longer. It finished in 18837 Milliseconds.

Emulate Offline
Some applications have the functionality to support continuing working offline. Applications can be offline due to many reasons such as bad weather, power outage, etc. Let’s see how we can make the Network offline.
Snippet
Output

Certificate Error Website
Sometimes, you visit websites with SSL issues and browsers give a security warning message. In order to access such websites, you need to approve that you want to continue accessing the website. With Chrome DevTools Protocol, we can ignore these security warnings and load the page.
We will use https://expired.badssl.com/, which generates such security warnings.

Snippet
Output
The chrome browser skips the warning and loads the site.

The sample codes are available at the GitHub repository here.
Conclusion
With Selenium 4, you can use the Chrome DevTools API to test the application by emulating geolocation and varying network connections. This makes the automation tests more flexible by opening possibilities of customization and emulation.
.avif "How to take screenshots in Selenium 4?")
How to take screenshots in Selenium 4?
In this 2nd Selenium 4 article, we are going dive into Selenium WebDriver 4's screenshot feature. While performing automation testing using Selenium, we often need to capture screenshots of the webpage or a particular web element. In Selenium 3, users can only take a screenshot of a web page, not a particular element. But with Selenium 4, we can take a screenshot at the element level, section level and full-page level.
Why take screenshots during automation testing?
- Taking screenshots of tests helps debug and determine whether the issue is with the test script or the AUT.
- Screenshots are useful in understanding the test execution flow of the application and its behaviour.
- Sometimes, we need to see the execution at later stages. These screenshots can help us to avoid the re-execution of tests.
- Screenshots are useful in bug reporting.
How to take screenshots in Selenium 4?
Element Screenshot
In Selenium 4, WebElement has a new method called getScreenshotAs, enabling you to take a screenshot of a specific WebElement. The process consists of finding the required WebElement and then taking a screenshot of it.
Below is the snippet to take a screenshot of the QED42 logo:
Section Screenshot
On the QED42 homepage, there is a section of services and details of each service.
When the QED42 site is launched, there is a cookie consent pop-up and the QED42 Services section appears below the page fold. So, before we take a screenshot, we need to close the cookie pop-up and then perform a scroll down so that the required section is visible.
Below is the snippet to take the screenshot of “QED42 Services” section:
Full-Page Screenshot
With Selenium 4, we can take full page screenshots using the getFullPageScreenshotAs() method. It is only available for the Firefox browser. Here, we need to typecast the WebDriver instance to the FirefoxDriver instance instead of typecasting it to the TakesScreenshot interface.
There is a difference between the existing screenshot feature and the new full page screenshot feature. The existing screenshot feature takes a screenshot of the visible part of the page. The new full-page screenshot feature takes a screenshot of the entire page whether we can see it or not.
Let’s understand the difference between a page and full-page screenshots with an example. Consider we need to take a full-page screenshot of the QED42 homepage.
When the above test snippet is run, two screenshots are captured - QED_Full_Page_Screenshot.png and QED_Page_Screenshot.png.
- QED_Page_Screenshot.png consists of only visible parts of the web page.
- QED_Full_Page_Screenshot.png takes a normal screenshot of the entire page from top to bottom and does not include the browser address bar.
The sample codes are available at the Github repository here.
Conclusion
This article covered the new screenshot feature of Selenium 4 and how we can use it to take screenshots at various UI levels. Testers can use this feature in debugging and bug reporting.
Happy Testing!

5 Opensource accessibility audit tools you must know
Accessibility is the ability to make websites usable by everyone. When a website is not accessible, we are creating barriers and making their impairment a disability. We need to build websites and include accessibility testing in our STLC to cater to people with disabilities for both better business and usability.
Accessibility testing involves checking whether a website abides by WCAG guidelines and accessibility legislation and yields better SEO. It spans both open-source utilities and enterprise-grade platforms.
Open-source tools like Lighthouse, WAVE, Pa11y, and axeTools are widely adopted for their simplicity and community support.
At the same time, platforms like BrowserStack extend coverage with features such as real-device testing, AI-driven detection, and compliance with global regulations.
Let’s explore some widely used accessibility audit tools.
BrowserStack
BrowserStack provides a unified, powerful platform for web and mobile app accessibility testing. It integrates manual, automated, and extension-based workflows to help teams ensure compliance with WCAG standards across real devices, browsers, and environments. While not open source, it offers reliable free plans and enterprise-grade capabilities.
BrowserStack Accessibility Testing (Web)
Though an enterprise-grade tool, BrowserStack Accessibility Testing is built to cater to teams of all sizes to help deliver inclusive digital experiences effectively. It ensures adherence to 10+ global regulations, including WCAG, ADA, EAA, and Section 508. The tool offers automated scans, manual testing capabilities, a real device cloud, and seamless integration into development workflows.
Key features
- Workflow Analyser: Automated detection of common issues like missing alt text, poor contrast, and ARIA misuse, along with scanning through user flows in a single run.
- Assisted Tests: Semi-automated tests that flag complex issues and guide testers through clarifying questions to validate accessibility manually.
- Screen Reader Testing: Manual usability testing using real devices with NVDA (Windows), VoiceOver (macOS), and TalkBack (Android).
- Website Scanner: Scheduled scans to continuously monitor accessibility health and catch new issues proactively.
- Automated Testing: Seamless integration via the BrowserStack SDK, including Spectra™ Rule Engine for embedding WCAG checks into CI/CD pipelines.
- AI Agents: AI Agents for issue detection leverage AI-powered, context-aware intelligence to automatically surface complex WCAG accessibility issues.
BrowserStack mobile app accessibility testing
Beyond websites, BrowserStack also extends accessibility testing to mobile apps. BrowserStack Mobile App Accessibility Testing streamlines accessibility standard assessments on real iOS and Android devices.
Driven by the Spectra™ Rule Engine, it delivers automated, AI-driven detection of 20+ key WCAG success criteria and ensures maximised coverage and accuracy.
Key features
- App Workflow Scanner: Detects violations such as missing labels, inadequate touch targets, or contrast issues across app navigation flows.
- Spectra™ Rule Engine: Offers comprehensive, automated coverage of WCAG criteria; deduplicating and grouping issues with AI-powered guidance.
- Screen Reader Support: Test on real devices using VoiceOver (iOS) and TalkBack (Android) for authentic accessibility validation.
- Plug-and-Play Automation: Integrate with CI/CD effortlessly using the BrowserStack SDK to get detailed, severity-rated, and WCAG-tagged reports.
To use App Accessibility Testing, you can sign up for a free account on BrowserStack.
BrowserStack accessibility toolkit extension
For developers, BrowserStack’s Accessibility Toolkit is available as a browser extension. It integrates directly into Chrome DevTools for fast, in-context testing.
Key features
- Accessed via the Accessibility Toolkit tab in DevTools.
- Offers all core testing modes like Website Scanner, Workflow Analyser, Assisted Tests, and Automated Tests directly within the browser.
- Enables scheduling of scans, manual testing walkthroughs, and integration into automated suites using BrowserStack SDK.
- Results display instantly in the DevTools panel, including flagged issues, severity levels, and WCAG mappings.
How to use the extension
- Add the extension from the Chrome Web Store.
- Open Chrome DevTools.
- Navigate to the Accessibility Toolkit tab within DevTools.
- Run a scan by choosing from modes like Workflow Analyser, Website Scanner, Assisted Tests, or Automated Tests.
- View results instantly in the DevTools panel, including flagged issues, severity levels, and WCAG mappings.
- Re-run or close the extension by switching tabs in DevTools or refreshing the page.
Lighthouse
Lighthouse is an open-source, automated tool that can audit web pages regarding performance or accessibility issues.
Lighthouse audit report consists of accessibility score, rules that elements fail to meet, passed audits, ‘additional items to manually check’ and ‘not applicable audit for the web page’. Audit scoring is done based on the categories mentioned below and a report is generated:
- Navigation
- ARIA
- Names and Labels
- Contrast
- Tables and list
- Best Practices
- Audio and video
- Internationalization and localization
- Additional items to manually check
Lighthouse is available in three workflows:
- Chrome DevTools
- Command Line (Node CLI)
- Chrome/Firefox Extension
A] Chrome DevTools
Lighthouse is built-in the Chrome browser, with no setup or extensions to install, and can be used to test both local sites and authenticated pages. Here’s how you can audit URLs accessibility via Lighthouse Chrome DevTools:
- Launch the URL you want to audit in Google Chrome
- Open the Chrome DevTools (Shortcut - Command+Option+C (Mac), Control+Shift+C (Windows, Linux, Chrome OS))
- Click on the Lighthouse panel
- DevTools shows a list of audit categories
- Select ‘Desktop’, ‘Accessibility’, ‘No throttling’ and ‘Clear storage’ options
- Click ‘Run audits’
- Google Lighthouse gives your page a score out of 100
Attached to each section of the report is a documentation/link explaining why that part of your page was audited and how to fix it.

B] Command Line (Node CLI)
Lighthouse can be configured and reported for advance usage via Node CLI. Follow the below-mentioned steps:
1. Download Node here. If you have it installed already, skip this step
2. Install Lighthouse
3. Run your audit
4. By default, Lighthouse generates the report in an HTML format. The report can also be displayed in JSON format by passing flags.
C] Chrome Extension
- Install the Lighthouse Chrome Extension from the Chrome Webstore
- Navigate to the page you want to audit
- Click Lighthouse Icon, next to the Chrome address bar
- Click Generate report.
Note: “The DevTools workflow is the best as it provides the same benefits as the extension workflow, with the added bonus of no installation needed.”
WAVE
The WAVE tool is a web accessibility evaluation tool, which helps analyze a website for accessibility and compliance with Web Content Accessibility Guidelines (WCAG) standard. WAVE is hosted by webaim.org, and is available as a ‘Website’ and as an ‘extension for Chrome/Firefox browsers’.
A] The WAVE website
- Visit http://wave.webaim.org and enter the webpage URL in the address field and hit “Enter”
- WAVE displays a version of the web page, highlighting essential accessibility information using inline icons
- The WAVE report will be generated with a summary on the left-hand side of the navigation
B] WAVE Browser Extensions
The WAVE Chrome and Firefox extensions allow you to evaluate web content for accessibility issues directly within Chrome and Firefox browsers. The extension checks intranet, password-protected, dynamically generated, or sensitive web pages. It can also evaluate locally displayed styles and dynamically-generated content from scripts or AJAX. Follow these simple steps:
- Add WAVE extension to Chrome/Firefox browser
- Click on the WAVE icon to the right of the browser address bar. (You can also trigger a WAVE report by pressing Control + Shift + U / Command + Shift + U on Mac)
- The WAVE extension will generate an audit report displaying the summary on the left-hand side of the navigation
- Click the icon again or refresh the page to remove the WAVE interface
What does a WAVE Audit Report include?
- Summary - This tab displays the findings of evaluation in six categories - Errors, Contrast Errors, Alerts, Features, Structural Elements and ARIA.
- Details - This tab shows the breakdown of every icon displayed on the page, grouped by category. Clicking on the icon under the details tab will highlight the issue on the page. You can click this highlighted icon on the page to open the tooltip with the issue description, ‘Reference’ and ‘Code’ panel links. In case an icon does not appear within the page, turn off the “Styles” switch to view it.
- References - This tab explains the issue, how an issue will impact users with disabilities, what can be done to fix it, the algorithm used to detect it and links to relevant WCAG requirements. There is also an icon index link that displays all of the WAVE’s icons grouped by category.
- Structural Elements - It displays regions of the page that have been identified with HTML or ARIA. It also displays the heading structure for the page. WAVE identifies hidden page elements, lists the regions and heading and indicates nesting of page elements.
- Contrast panel - It identifies text that does not meet WCAG Level AA contrast ratio requirement of at least 4.5:1. WAVE also provides information for the lower 3:1 contrast ratio requirement for large text.
- Code panel - This panel appears at the bottom of the window. The place in the code where the issue appears is highlighted and marked with an icon. Reviewing the code reveals the cause of the issue and helps in fixing it.
PA11Y
Pa11y is an open-source project that helps designers and developers make their web pages more accessible. There is a range of Pa11y free and open-source tools available.
A] Pa11y
Pa11y is a command-line interface that loads web pages and highlights any accessibility issues it finds. It is useful when you want to run a one-off test against a web page. The Pa11y test result consists of Type, Message, Code, Context and Selector fields.

B] Pa11y CI
Pa11y CI can be used to run accessibility tests against multiple URLs or viewports and highlight the issues. You simply need to add the web page URLs in the .pa11yci JSON file (a config file in the current working directory).

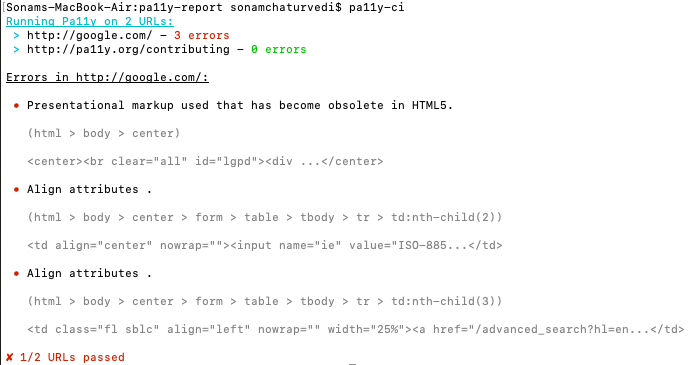
C] Pa11y Dashboard
Pa11y Dashboard is an open-source web interface that helps keep a track of automated accessibility tests over time. It allows users to view, manage audit tasks, trigger audits and generate reports. Follow these steps:
- Create a task by clicking on “Add new URL”
- Enter details of the test URL and save it
- You will be taken to the task page having links: “Edit this task”, “Delete this task” and “Run Pa11y”
- Click “Run Pa11y” and generate the report
- Pa11y dashboard will display the output in three categories - Error, Warnings and Notices. There is a short description of each issue along with its location in the HTML
- You can export reports in CSV and JSON format
- The dashboard also displays a graph that illustrates the delta in errors, warnings, and notices over time
- By default, automated audits are performed daily and can track each audit.
Note: Refer to our Pa11y blog for installation and configuration steps
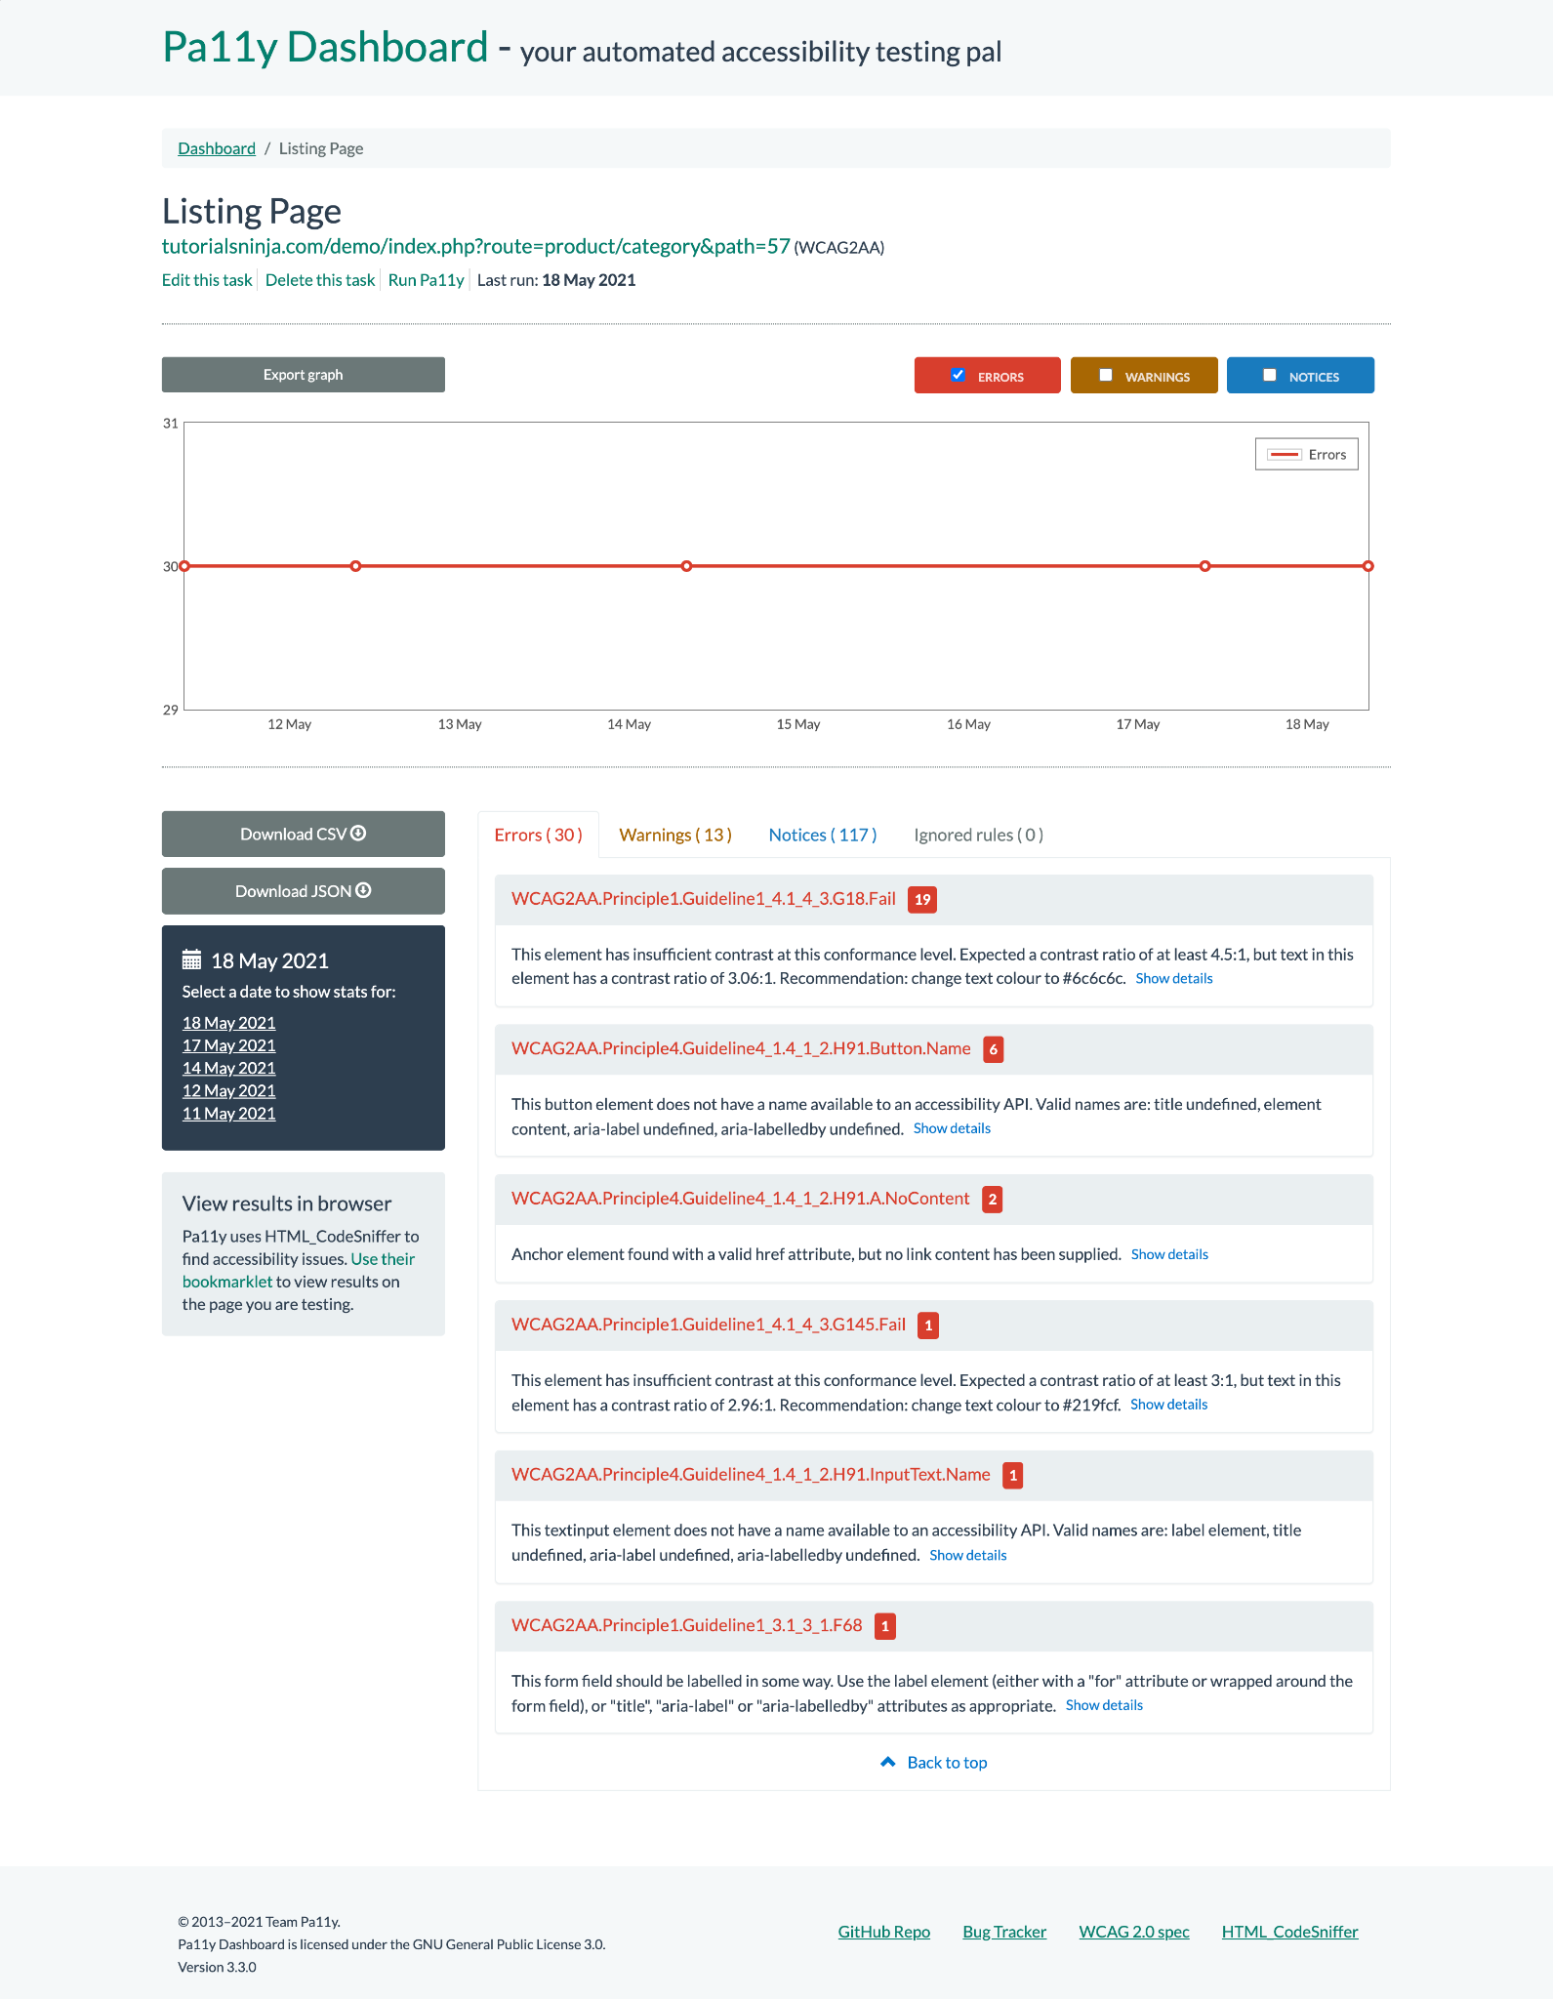
axeTools
A] axe DevTools
axe DevTools is an accessibility testing and audit tool maintained by deque. By using a combination of automated and guided testing, dev teams can catch up to 84% of common accessibility issues without requiring accessibility expertise. Steps to implement axe DevTools:
1. Install “axe DevTools” Chrome / Firefox extension to your respective browser
2. Open the webpage you want to audit
3. Open the browser’s developer tool and click on the “axe DevTools” tab
4. Scan the webpage and audit result will be displayed
5. The audit result contains the issue summary and a detailed description of each issue.
Now save the results
Axe DevTools provides Intelligent Guided Test functionality. These guided tests raise accessibility issues about page content and then build an issue report. This helps developers to identify issues in less time, resulting in cleaner code and a more accessible experience.
Axe DevTools helps present results in a variety of management reports:
- A dashboard view to show accessibility progress
- Using “Export Issues”, you can export reports in JSON and CSV formats (This feature is available with axe DevTools
Project reports for CI tools, such as Jenkins, Bamboo, or CircleCI can include accessibility metrics. (This feature is available with axeDevTools Enterprise plan)
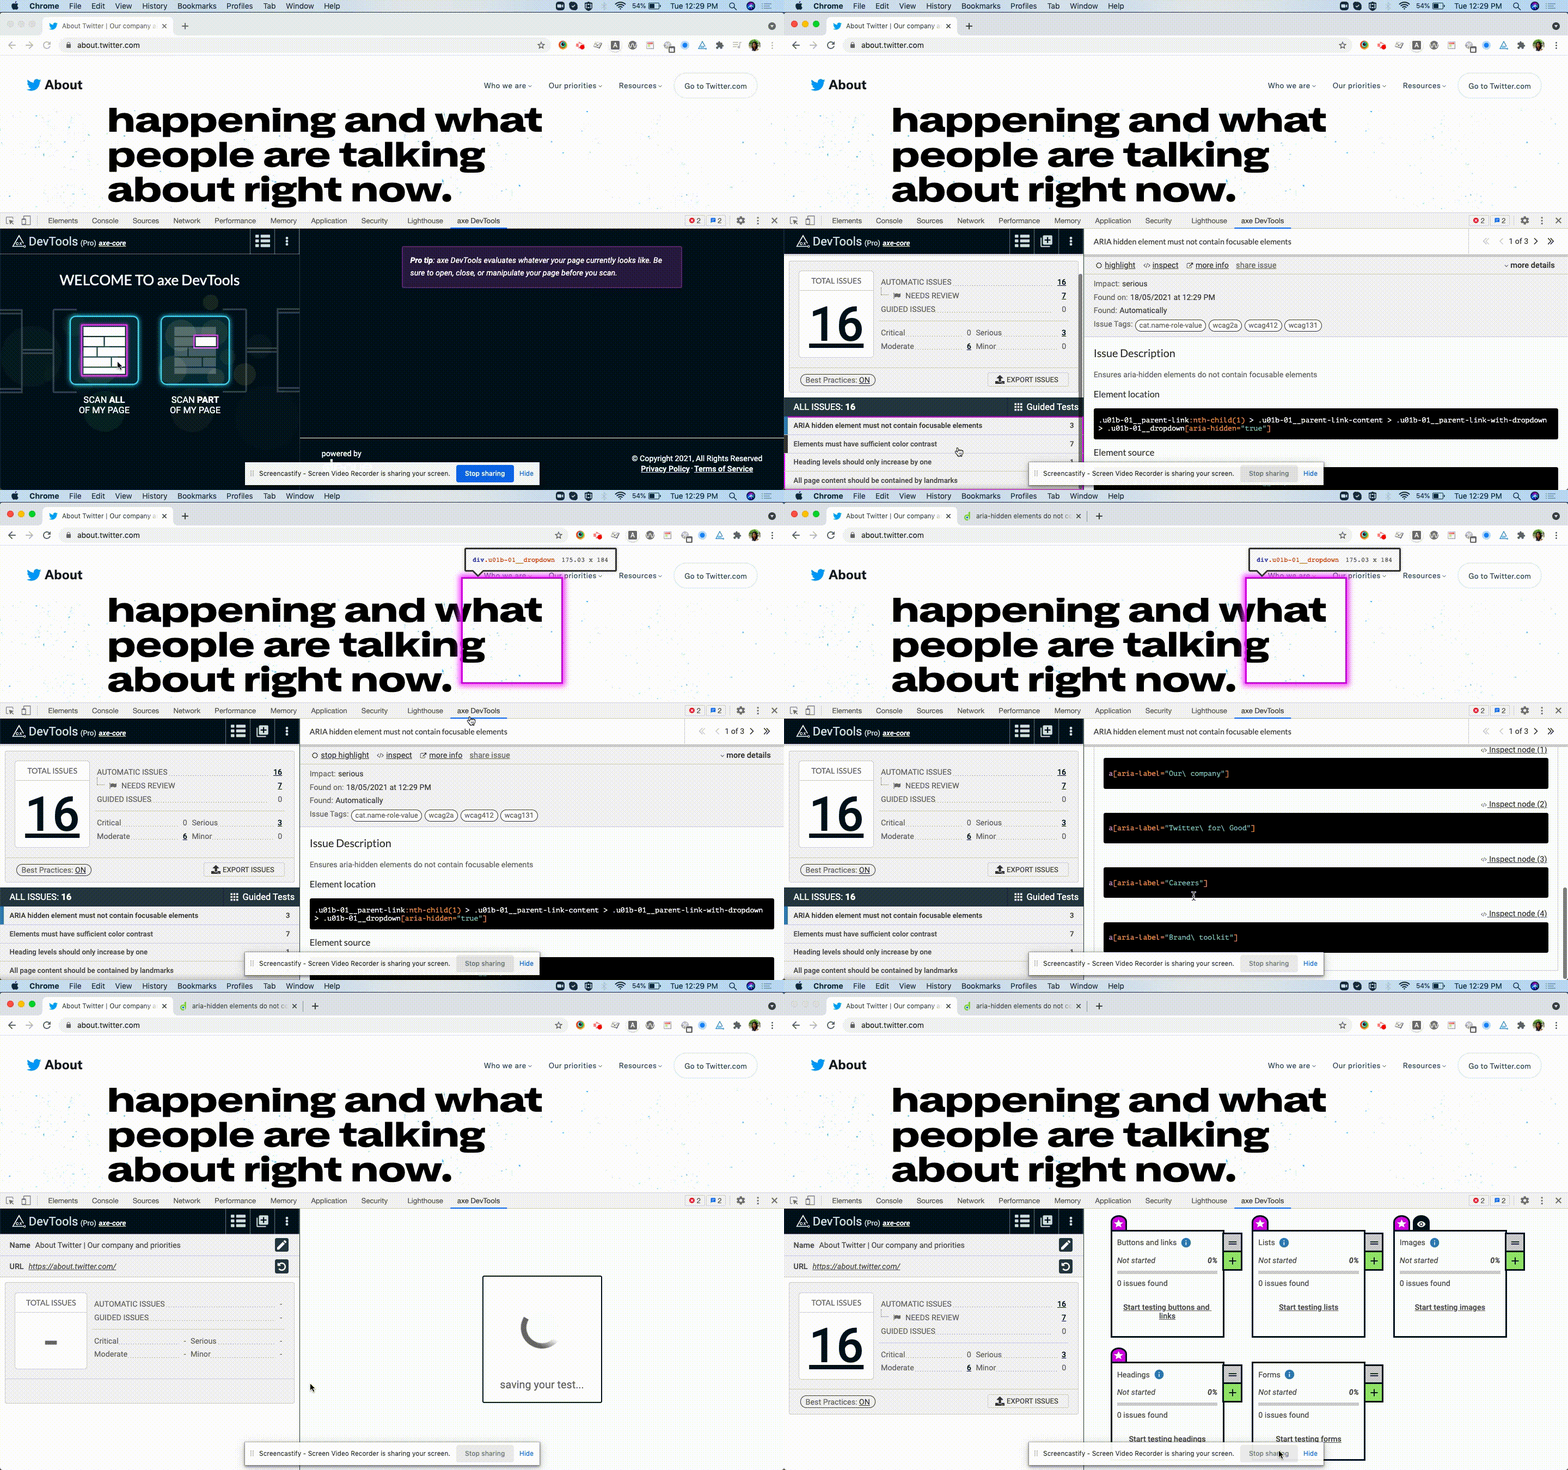
B] axe - cli
axe-cli is a command-line interface for the axe to rapidly run accessibility tests in headless chrome.
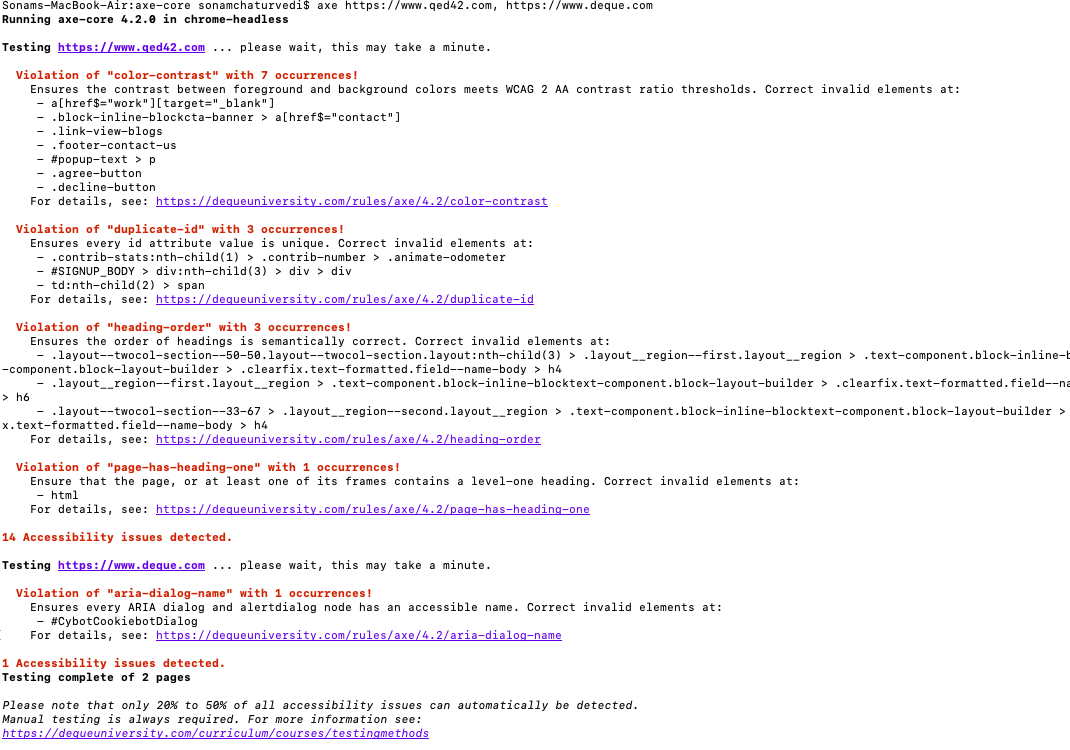
Conclusion
Accessibility testing is most effective when combined with manual testing and an accessibility audit. When you are choosing an A11y audit tool, focus on factors such as how – the tool manages multiple websites, collects accessibility issues and remediates them, how easy it is to use by both technical and non-technical team members and cost. In this way, you can use audit tools in your project and make the website more accessible.
We help build and maintain digital accessibility by embedding testing and best practices into your development process.
Happy A11y Auditing!!!