All blogs

React Native: Endless background process
We will be discussing how we can build an endless react-native process that runs even if the app is killed, suspended, active in the foreground, or when the phone is restarted.
Having a background process can be great when you want some data to be processed or sent to the server periodically. It wasn’t possible earlier to have a background process in React Native using JavaScript code but with their recent HeadlessJS (only supported for Android platforms, for now), we now have a JS runtime available in the background for us to execute the JS code based on our needs. However, it would need to be linked to the Android code natively (using Java).
Let’s get started!
1. Bridging
Our first step is to set up a communication channel between React Native and the native code. Let’s create a module in the native code and link it with the React Native layer. Go to android/app/src/main/java/com/package_name/ and create a new file as ExampleModule.java which will extend ReactContextBaseJavaModule class.
Make sure you import your dependencies right. Methods defined with @ReactMethod are going to be exposed to the React Native layer and the module reference can invoke these functions. We have defined two methods to start and stop a service. A public static variable, REACT_CLASS variable is the name of the module and with which we will be accessing it in our React Native code.
Create a new file in the root directory of React Native as Example.js
You will also need to create a package to make it available inside our JS code. It is done in order for a user to add as many packages as needed.
ExamplePackage.java
2. Create an ExampleService.java to Handle the Task
Our service will be responsible to process the tasks when it is started. We will be making using of an interval and calling a function on those intervals. A Handler instance can be used to process an object and events periodically based on the interval given to it. In order for the React Native layer to know about this, RCTDeviceEventEmitter is used to transfer the events to the React Native layer.
NOTE: In order to have an endless service running, we would need to have that included in the status bar, otherwise the Android OS would clean up the process if memory runs low or if it is consuming too many resources. Keeping it in the status bar would make it as a foreground instance and wouldn’t kill it if resources were constrained. It may take up your battery though if you use/call your functions too frequently.
We would now need to define an entry inside the AndroidManifest.xml
Some of the things are already there which will be covered as we go forward.
Final code for the ExampleService.java (android/app/src/main/java/com/package_name/) is below
3. Create BootReceiver.java to handle the device restarts
There are tons of events emitted by Android OS and we will be focusing on the event BOOT_COMPLETED which will happen when a device is turned on or restarted. In the case of this event, we would fire up our app background process. BroadcastReceiver will help us to accomplish this. It will look for the specific device reboot event and start our service.
The code:
We have already defined it inside our AndroidManifest.xml file along with the necessary permissions.
4. Integration
We are now almost done with the integration. Now you will be able to start and stop the background service through JavaScript as shown in the code snippet below:
After clicking on the ‘Start’ button our service will start and you can monitor that in the adb console as:
5. HeadlessJS integration
Till now, we have all the stuff required for the background process integration. Now we need a JS function to run in the background with this background event. For that, we would need to create a class natively in Android which would extend the HeadlessJsTaskService. The code would look something like the following:
The last part is registering a headless service on AppRegistry and make sure it is coming up before the main app is registered as:
It’s all done now. You can execute your code inside this ExampleTask function which will run in the HeadlessJS background runtime periodically at an interval of 5 minutes and you can do anything you want with it, just make sure your interval is not too short which can cause a phone’s battery to drain pretty quickly.
HeadlessJS is currently only supported in Android and is still under development for iOS. Make some noise and let’s get it ported to iOS too!
Application
QED42 team has integrated this into a real-world application which offers real-time GPS tracking and map-based suggestions to help you keep away from infections in your locality.
This application tracks your GPS location and renders it on the map along with users and keeps you informed about their health and symptoms so that you take an informed decision.
Check state wise live health statistics and see how other states are doing.
Feel free to install and use Hibernate as the app doesn’t require any login or signup and we also don’t monitor or store any critical data.
In addition, a user can always turn off your location service from app settings.

Code references taken from - https://medium.com/reactbrasil/how-to-create-an-unstoppable-service-in-react-native-using-headless-js-93656b6fd5d1
Make sure to comment in case of any issues.The React Native core team has been doing some really great things for people to build an app easily. With that, it’s our responsibility to take it forward by contributing to it as much as possible and move this a step ahead. This blog will revolve around how to implement a React Native: endless background process.

Optimize your React App Performance with Memoization
Memoization in React is a performance feature that aims to speed up the render process of components. We will be exploring this technique in React, with sample use cases along the way.
What is Memoization?
Memoization is the process of caching a result of inputs linearly related to its output. So when the input is requested the output is returned from the cache without any computation. The multiple render() operations for generating the same resulting output for a similar set of inputs can be prevented. We can catch the initial render result and refer to that result in the memory next time.
Memoization is an optimization technique used to primarily speed up programs by storing the results of expensive function calls and returning the cached results when the same inputs occur again.
Note: React.PureComponent performs optimization that uses componentShouldUpdate() lifecycle method that makes a shallow comparison of props and state from the previous render of the component. As shallow rendering only tests state and props of the component and does not test state and props of the child components with React.PureComponent.
React.PureComponent is only restricted for class components that rely on the shouldComponentUpdate() lifecycle method and state.
Memoising can be applied to both functional and class components. This feature implementation has both HOC’s and React hooks. React.memo() performs the same shallow comparison between props of the component and determines if the component should be rendered or not.
Why should we use memo?
Let's take an example of search functionality. In the example below, the App component contains:
- Search input for the fruit name
- A button and a child component where the user search will be displayed
- A count of the number of times a user has clicked the button
Here is the DsiplayFruitname component that will display the searched fruit name if it's available in the given fruits array and we are also consoling the name prop to check how many times the child component gets re-rendered.
Check out the running example here - https://codesandbox.io/s/modest-lake-oo1iy
In the above code, the DsiplayFruitname component will be called for each search value on every button click even if we have searched the same fruit name previously. That does not make any sense. Why would we call the component repeatedly when search prop remains the same and that renders the exact same output?
Using React.memo
React.memo is a higher-order component that renders the component only if props are changed. Hence we wrap our component in a memo()
Try editing the code with and without React.memo here - https://codesandbox.io/s/modest-lake-oo1iy
If the same fruit name appears again as the previous one it will not re-render our DsiplayFruitname component as per the definition of Memoization. We can check this with the count shown on button clicks and how many times the child component actually gets re-rendered. As it memoises the result of the wrapped component and returns that result if the same search appears again.
React.memo also gives us an option to pass our own comparison function as a second argument.
This tells whether component rendering is needed or not.
myComparison() returns true if passing nextProps to render would return the same result as passing prevProps to render, otherwise returns false.
The useMemo hook
Memoization can also be done by using hooks and functional components. We can use inline JSX from the component return and can memoise results in variables as well. We can also memoise callback functions using useCallback hook API. You can further read more about useCallback hook here https://reactjs.org/docs/hooks-reference.html#usecallback
Returning to our previous example, we can use useMemo hook for rendering the fruit name from the child component. We need to use the JSX returned from the child component and use that inside useMemo hook. The parent-call to child component can be changed to useMemo as below
If you have noticed, with different fruit names searched for the child components, react memoization fails at one thing.
Consider if the searched fruit name is an apple, initially it will render the child component. Next button click searches apple again, this time it will not re-render. Yay!! If you search for an orange, the child component will get re-rendered. But later if the user searches for apple again then it will fail and the child component gets re-rendered which it shouldn’t because it has already seen the input before and should return the result as it computed earlier from the cache. This is where React memoization fails.
When and how memoization can be used in our React apps?
- Try to divide a big component into one or more child components to leverage the memoization. For instance, consider a big dynamic component containing static components like buttons, labels, and static UI presentations that needs re-rendering. These can be separated and memorization is possible.
- It's better to remove memoization if you don’t see any performance gain after implementing it, this can free up some memory space too.
Conclusion
We have seen what is memoization and the power of memoization with an example of how it can speed up our React apps.
Memoization may seem to be useful but it also comes with a trade-off. It occupies the memory space for storing the memoised values. It may not be useful with low memory functions but delivers great benefits with high memory functions.

React Native: Do’s And Don’ts
This article is based on the experience gained after completing 2–3 projects, it is assumed that you already have some basic experience around React and React Native. This blog is a brief set of guidelines of best practices which should be kept in mind while working on a project.
The Do’s and Dont’s of React Native
- DO take UI Framework Support if you want to create your app faster
If time is a constraint take the help of a UI Framework that will help you boost your app build process. Take the help of this article to choose one which you are comfortable with. I use Galio.io Framework whenever I want to create something in less time and with selected components. - DO build both platforms simultaneously or go for iOS build first
I know I know - what is the use of the React Native if we go to a specific platform first? Well, the reason behind this is that as opposed to the Android platform iOS dependency modules are less compared to Android or sometimes auto-linking (RN ≥0.60) simply isn’t enough. So check before considering a module, whether that module has both Android and iOS related installation processes, the last time that module was updated and most importantly the Issues Tab. Yup, that’s right because this will give you an idea of what the status of the module is and if you want to contribute to that in order to help our fellow developers. - DON'T put logs in the release build
Having many console.log statements can slow your app down, especially if you are using logging libraries such as redux-logger. Be sure to disable all logs (manually or with a script) when making a release build. - DO use image caching solution
React Native provides an inbuilt Image Component Library which does a great job for displaying images when the number of the images to be shown on the screen is constant. If that is not the case I would prefer using react-native-fast-image. This will help you boost the app even if that is minimal. - DO use Safe Area View
If you want your app to look good on every iOS device you should use SafeAreaView which provides automatic padding when a view intersects with a safe area (notch, status bar, home indicator).

- DON'T use TouchableWithoutFeedback
According to the React Native official docs, all touch elements event should have a decent UI Feedback. Since TouchableWithoutFeedback doesn’t provide that feature keep this in mind when creating the UI elements on the screen. - DO keep folder structuring in mind when creating an app
Folder structuring is an important part while creating a React or React Native app because it makes the project much more maintainable whether the team is small or large or event divided across modules. I personally prefer the Ducks Approach. There are many Ducks versions available in the world but I like to put everything related to UI in the screen folder and all state-related files in the modules. You can refer to this article if you want to learn more about the Ducks Approach. - DO remember the difference in pushing the screen and navigating the screen
Some actions require pushing a new screen to the application stack, while others require going to a screen you’ve loaded before. The push action adds a route on top of the stack and navigates forward to it. The push will always add on top, so a component can be mounted multiple times. This is important for the back action and for the data you want to present. For example, do you want to allow opening one profile from another? You need the push action, because you’re essentially loading the same component twice, with different data, and you want to be able to return to the previous profile with the back button. Navigating the screen, on the other hand, doesn’t have the stack of routes this type of routes are only meant to be used once and should not come up when we do back action for eg ( Login Screen ) - DO choose State Management according to the requirement of the project
From the starting of the project, you should have an idea of what can be the complexity of the project and according to that, you can choose what kind of state management you want. After the release of the hooks, it becomes even easier to choose state management scenario’s - you can either use Redux or (Hooks + Context API) to achieve the somewhat same environment as of Redux or Simple State. I like (Hooks+Context API) because I don’t have to install any library for this. - DON'T Use Expo
You should never use expo in a professional project. The reason is that the entire build is not local but in the cloud. Another big disadvantage is that you can’t use packages with native languages that require linking. If you are still interested in building one with the help of expo you will find this documentation very useful.
I hope you found this article useful.
Let me know in the comments if there is anything I missed and necessary to be added. Peace!!

React Native: Let's Animate the SVGs!
A simpler way to animated SVGs in React Native.
Animations are an important feature that one can include in his/her app. They give a much better user experience and when it comes to SVGs, animations become all the more important. But as you may already know, they are not supported in React Native by default. Which means if you take an online animated SVG and use it in your React Native app, you will not see its animations as you would see on a browser.
This blog is an attempt to work around this shortcoming of React Native. There are a few online libraries available for the same, but none are well explained and there are not many blogs about this. So, sit tight, as we discuss the implementation of animated SVGs via an example.
Prerequisites
- We will be needing some of the properties of the SVG that we need to animate. These can be obtained by opening the SVG file in any code editor or in any SVG to JSX converter available online.
- We will be using an online library react-native-svg-animations with some modifications and hence it should be installed beforehand.
Getting Started
We will choose an animated SVGs from loading.io and understand how its animations will be implemented in React Native. The SVG that we will be implementing is:

Let’s see what properties we will be using. Following is the code obtained as we convert SVG into JSX:
The most important property that is needed is the d prop that is passed on to the <path> component which defines the path to be drawn. It is a list of path commands in the form of letters and numbers.
Apart from this, we will be using the strokeDasharray property for our example which is used to create dashes within a stroke. So, instead of a single stroke completing the animation, there will be multiple strokes with dashes / blank spaces between them. The number and length of strokes are defined by the length and the values of the array that we pass to this property.
Implementation
We need to import AnimatedSVGPath from the module that we installed.
We will be implementing the following render method:
Now if you look at the properties of this component, you will notice that it uses the d and strokeDashArray properties that we obtained earlier from the SVG.
You can read and understand more about this module here
Apart from this, we added an onPress event on <TouchableOpacity> to check whether it hinders the animation of SVG in any way.
Modifications to the Installed Module
While using react-native-svg-animations we faced the following issues :
- ISSUE WITH STROKEDASHARRAY PROPERTY
strokeDashArray was not a part of its props originally, so we needed to modify the original module in order to enable users to pass values on their own. Consider the return method of the AnimatedSVGPath class:
If you look at the strokeDasharray property of the <Path> component, its value was originally [ this.length, this.length ] and the user was not able to define the number of strokes he/she needs in the animation. We modified it by adding a condition { dashArray || [ this.length, this.length ] } to enable users to pass its value through props according to their requirements.
Before and after using strokeDasharray property:
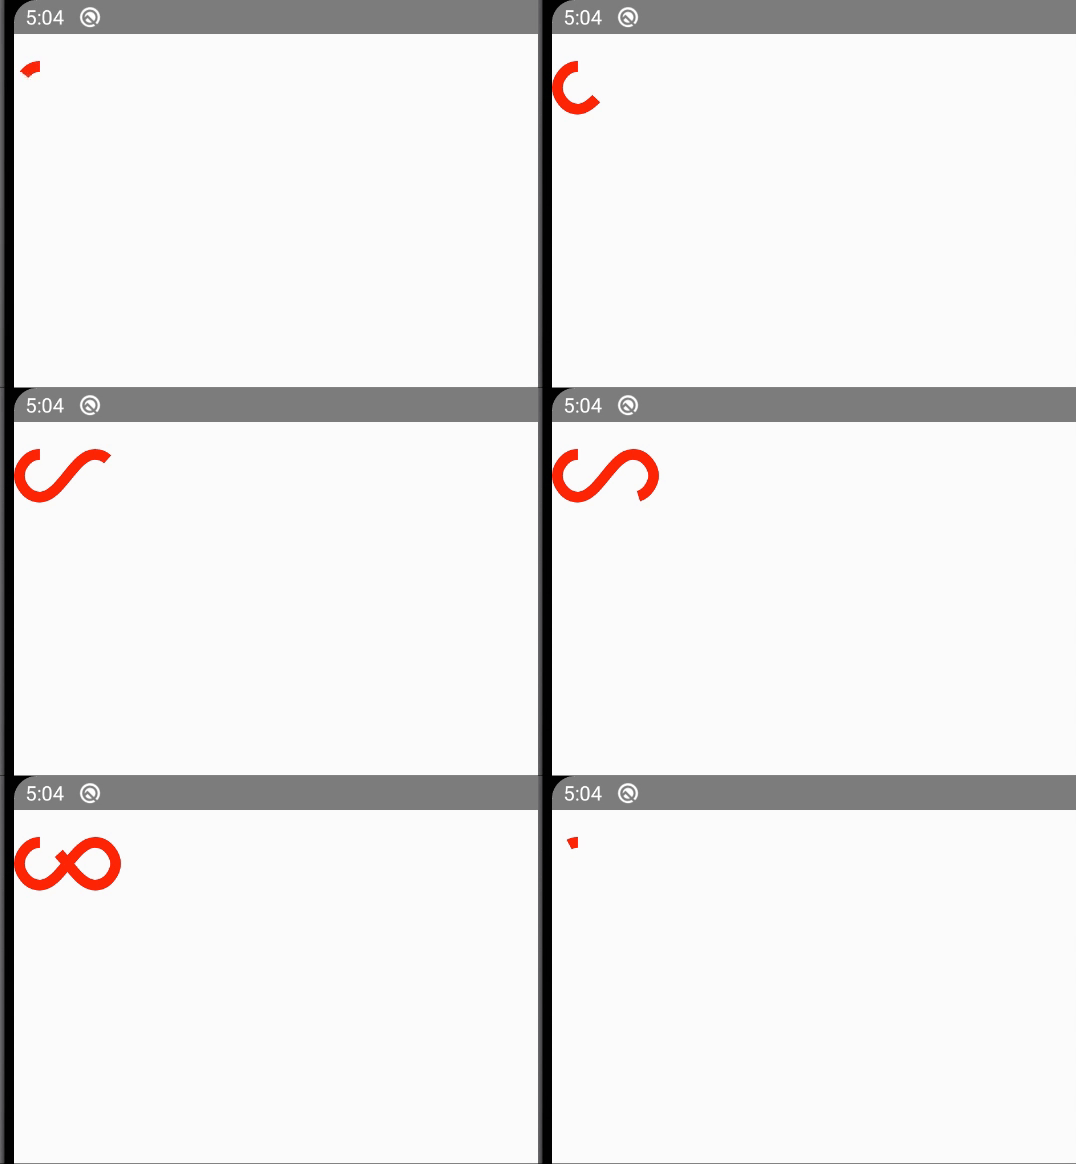
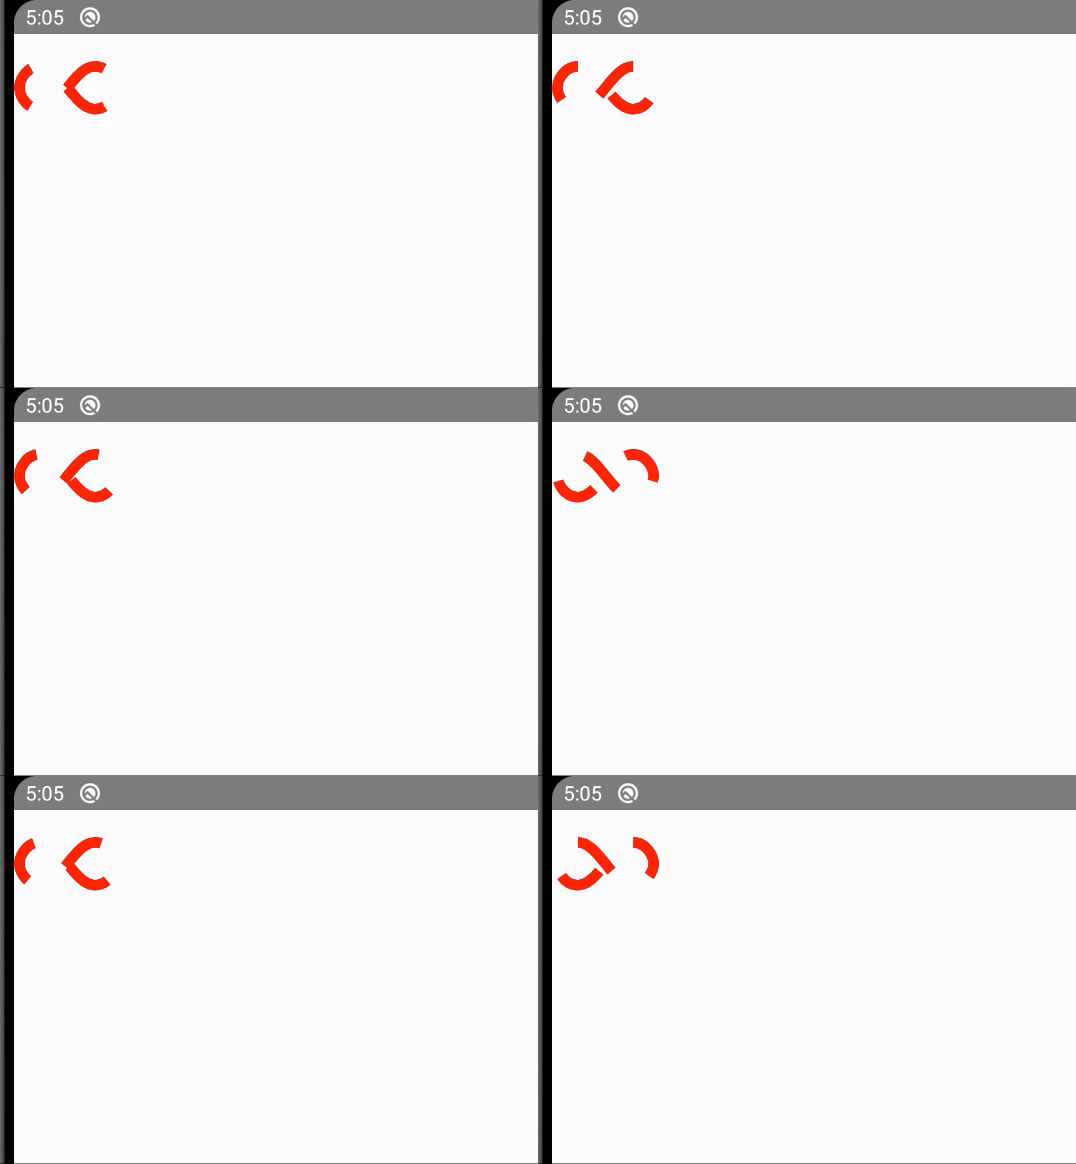
- DELAY ISSUE BETWEEN EACH ITERATION
After solving the first issue and successful implementation of the animations, we experienced a little delay between each iteration of the animation. This can also be seen pretty clearly in the above gif. After some research, we found out that we need to add easing field to the Animated.timing function inside the animate method as shown below:
Easing needs to be imported from ‘react-native’ first and then by providing easing: Easing.linear, the delay between each iteration is eliminated.
Before and after using Easing property:
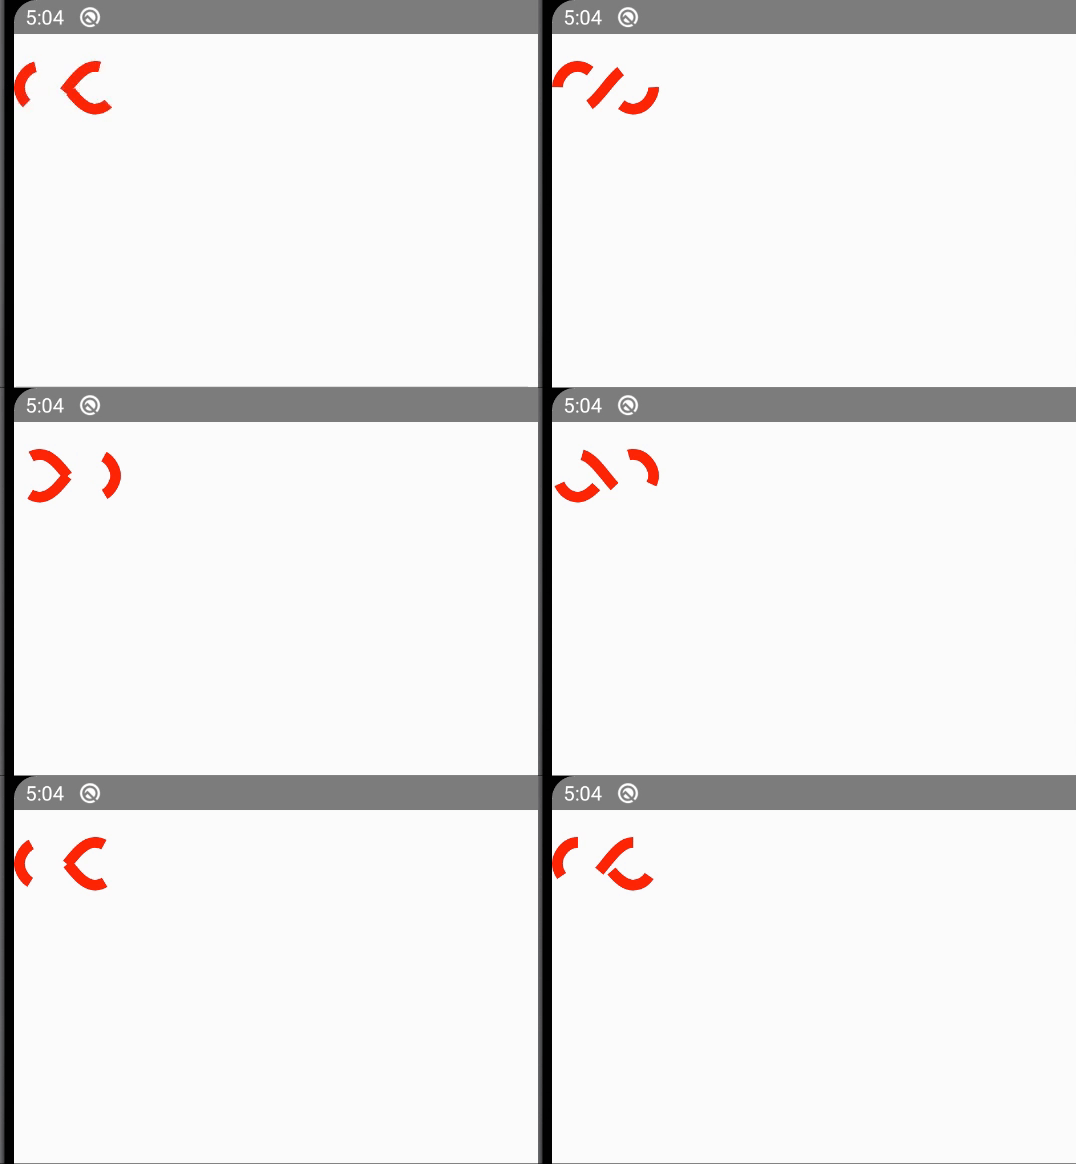
It is clearly visible from the above gifs that the issue has been fixed.
So, these were the two issues that we faced while working with this module. We fixed them and also raised a PR for the same. There won’t be an issue if you intend to use the same library in future.
Wrapping this up!
With the issues fixed and everything explained, now anyone can implement SVG animations in React Native without any hassle. You can check out the example code here in case you wish to have a look at the whole code. This will give you more insight into what we did here.
It was really fun to work on this, learnt a lot and tried out some cool things with SVG animations. I hope this blog sails you through if you ever find yourself in the middle of this ocean!
Keep learning!

Understanding PanResponder with react-native-dragging-list
A simpler way to drag and drop list items.
Nowadays, the internet has solutions to almost all sorts of problems but Alas! This is not the case when it comes to issues related to PanResponder and Animated component/library of React Native. There are very few blogs or even StackOverflow questions addressing these issues and hence this blog.
If you too find yourself in the middle of this, stay put, this blog will help you since this package I build makes good use of these components and a detailed explanation is always appreciated!
Overview
This is a React Native package for dragging and dropping list items provided all list items are of the same height. It mainly makes use of PanResponder and Animated components/library of React Native along with other components like FlatList, etc.
So, let’s begin with an overview of PanResponder and Animated component/library of React Native.
PanResponder
This is a React Native component which enables apps to recognise touch and work upon them. It is created using the PanResponder.create({}) function and includes several predefined methods like -
- onPanResponderGrant: This function accepts 2 parameters - event and gestureState.
Event is a touch event which contains various parameters like the position of the touch, target, timestamp, etc.
gestureState is an object which contains parameters like the latest coordinates of the recent movement, accumulated distance, velocity of the gesture, etc. We can extract out the values of x and y coordinates of a particular item from gestureState.
This function is triggered at the start and can be used to initialise variables with a default value that we want such as the x and y position of the list item. - onPanResponderMove: This function is triggered every time a movement is recognised on the app such as scrolling, dragging irrespective of the above function. This function enables us to track the distance travelled by a particular list item along the x and y-axis which can be stored and worked upon.
- onPanResponderRelease: This function is triggered when the user has released all the touches. So, here we can implement the functionality that we want to execute at the end of the gesture.
You can read more about PanResponder here.
Animated
This React Native library is designed to enable animations in our app easily and effectively. It comes with loads of predefined methods even with start/stop functionality to control time-based animation execution.
Animated provides three types of animations. It essentially determines how the initial value animates to the final value. Following are the methods through which these animations can be implemented
- Animated.decay()
- Animated.spring()
- Animated.timing()
Using Native Driver: Sometimes, using Animated library may lead to a drop in JS frames. We can avoid this by specifying useNativeDriver:true in our animation configuration. It enables the native code to animate on the UI thread and blocks the JS thread once the animation has started without affecting the animation. So the animation will not get affected even if the JS frames drop.
You can read more about this library in detail here.
You can also check out this blog for a better understanding of PanResponder and Animated components and their working.
Getting Started with react-native-dragging-list
Step 1: Import PanResponder, Animated, View, etc. from React Native.
Step 2: Now we need to define some variables that we will be using later in our code:
- point: It is an animated value to keep track of the list item position on the screen. It stores the position in the form of x & y coordinates of the list item.
- scale: It is also an animated value and is set to 1 by default. This will be used to zoom in the list item whenever it is touched and dragged.
- currentY: This variable will store the current/initial position of the list item as soon as it is touched. And since the list item will be dragged vertically, it only stores the y value of it.
- scrollOffset: This variable stores the distance by which a particular list item is dragged w.r.t its initial position. It will help reposition other items with respect to the item which is dragged.
- flatlistTopOffset: This variable indicates the distance of the list from the top of the screen.
- rowHeight: As the name suggests, this variable stores each item’s height which, in our example, is the same for all the items.
- currentIndex: This is the current index of the list item which is touched. This helps set draggingIndex of the item which is dragged. Its default value is set to -1.
- active: This variable stores the boolean value to activate/deactivate PanResponder. By default, it is set to false and will be set to active inside the onPanResponderGrant method.
After this, we need to create our PanResponder inside the constructor and define methods according to our requirement in a similar way as implemented in the links provided above.
The Development Process ft. PanResponder
onPanResponderGrant
In this method, we are storing the currentIndex of the list item that is being dragged and executing an animated event through which we are mapping the y values of the list item as shown below
Animated.timing is one of the three methods of the Animated library which we discussed earlier. It is used to zoom in a particular list item as soon as touch is detected on it by scaling it to a value of 1.2 from the original 1 with a duration of 0.
animateList is a method which returns whenever the active is set to false.
yToIndex is a separate function and gestureState.y0 is passed as a parameter to it and is accessed as y inside the function. This function calculates the currentIndex by adding the scrollOffset to the current y ( i.e. gestureState.y0 ) position of the item and subtracting the flatlistTopOffset ( if any ) and then dividing the whole by the rowHeight.
The values of scrollOffset, flatlistTopOffset are extracted from the event triggered via onScroll and onLayout properties of the <FlatList /> component defined in the return method.
Similarly, rowHeight is accessed from the onLayout property of the list item defined in the renderItem method.
Apart from this, we set the PanResponder as active by providing this.active = true; and updating our draggingIndex with the currentIndex in state and setting dragging: true since touch is recognised and now the item is about to be dragged.
onPanResponderMove
As the name suggests, here we will implement the functionality that we need to execute while the movement is happening on the screen, whether it is scrolling or dragging of an item.
This method is quite similar to the onPanResponderGrant method. Here, we are mapping the currentY to the distance a list item has travelled w.r.t its drag. We are also calculating the newIndex by passing currentY to the yToIndex method. One thing to notice here is that we are updating our data array through the immutableMove function and this method enables other items to change position w.r.t the item which is being dragged around. Since this update is performed in this method, the state will be updated on every movement detected on the screen and hence we will see the items adjusting themselves whether we drag down or up.
onPanResponderRelease
This method is called as soon as the touch is released from the screen. Here, we can define the functionality like resetting all the variables to their default value as they were in the beginning.
As explained, the scaling is set to its default value again so that the list item zoomed out to its original size. Reset method is also called here in which
I think this method is self-explanatory since it is called at the end when the touch is released.
This was the crux of the implementation of react-native-dragging-list as well as React Native PanResponder.
What remains now is defining the render and return method of this package that we are building.
This package uses <FlatList> to display the list and since this component uses renderItem method to map the items, we need to define it inside our render method
Here, <RenderItem /> and <DraggingHandle /> are sent as props by users who will be using this package in their application. The latter component is wrapped inside a <View> to which we have attached our PanResponder. This component enables the dragging of an item.
In return method, the conventional <FlatList> will be rendered along with an <Animated.View> component. The latter component will accept the renderItem method and it will be visible only if dragging is set to true because we need to drag a particular item only if the touch is enabled and dragging is set to true in our onPanResponderGrant method.
The zoom in and out effect is accomplished by the transform property added to the styling of the component.
The <FlatList> will accept the props like scrollEnabled, onLayout, onScroll in addition to the obvious props like data, renderItem, etc.
Be cautious!
Some things need to be kept in mind while using PanResponder and this package in your application:
- The working of PanResponder can hinder the normal scrolling of the FlatList since onPanResponderMove is called even when you try to scroll normally. So, you ought to find a workaround to this problem.
When I faced this issue while building this package, I defined a separate component { <DraggingHandle /> } to handle the PanResponder and a variable { dragging } to keep track whether an item is being dragged or not. - Make sure you understand the working and implementation of PanResponder and other React Native libraries like Animated before you start using them for development.
That’s all!
And this is all PanResponder and react-native-dragging-list is all about.
I hope you were engaged throughout and were able to understand the working of PanResponder and the development process of react-native-dragging-list. This will surely help you in building effective and animation enabled applications using PanResponder and Animated library provided by React Native.
I had a great time building this package. There were a lot of challenges in understanding the functionality of PanResponder and a lot of research had to be done. But learning something from scratch is always fun. It was, no doubt, a great learning experience and fun to implement.
Important Links:
- Since whole code can’t be written here, this is the link to the GitHub repository where you can check out the entire code for this package.
- The following videos helped me out in building this package. You can get an idea of implementation from these but copying and pasting are not recommended since these too have their shortcomings.
Part 1, Part 2
Keep learning!!
.avif "Automated Water Sensor Module")
Automated Water Sensor Module
A bunch of technology enthusiasts started an IoT project to build a water sensor module a few months ago here at QED42. And we would like to share our experience with you.
Water availability has been a pressing concern all over the globe. To counter this, people install water tanks to conserve water. However, currently, a large amount of water and electricity gets wasted due to manual regulation of the water flow via pumps.
This can be improved exponentially if automated. This is where our project steps in. Sophisticated automation tools are available in the market that help control the electrical circuits logically.
| Why an automated water sensor is required?
A traditional water level controller controls the water between two levels with the help of floating balls or a float switch which act as sensors for level detection. Depending on the position of floating balls or the float switch, the electric connection of the pumping motor is switched on or off. However, the controller unit is usually placed at the top of the water tank, where the humidity may corrode the contact points of the sensor switch. This causes the sensor’s switch to malfunction. Meanwhile, since there is no method to detect the water level of the basement water tank, it is possible that the pumping motor will burn if there is a very low/zero water level in the basement water tank.
A traditional water level controller has the advantages of simple structure and low cost but has inherent problems too. Digital electronics to detect and control the water level in an intelligent manner are preferred.
| Water Sensor module
Our team devised a simple yet effective water tank pump switcher circuit. This circuit can be used to maintain the level of water in the overhead water tank within prescribed limits.
| Equipment Used
- Arduino microprocessor - Enables to control the electrical circuits logically. Arduino possesses the main component of an integrated circuit chip that can be programmed using the C++ language.

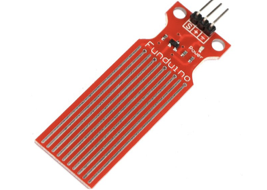
- Water Level Sensor - The water Sensor module is easy to use, compact and lightweight, detects even little moisture, droplets identification and detection sensor. The principle is to measure the size of the trace amount of water droplets through the line with a series of exposed parallel wires.
- Roinco DC Water Pump - A simple aquarium-style pump that uses a centrifugal fan to pull in water and push it up a tube, similar to a propeller in air. These have ratings as to how far they can pump water because if too much pressure is applied, the water will simply come to a standstill or even backwash.
- Other components
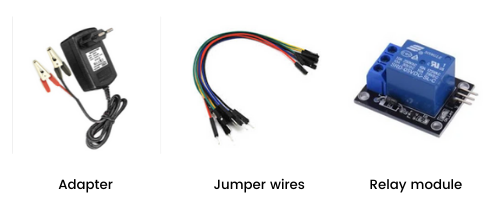
| Water Sensor Module components
Our water sensor module consists of 4 main components:
1. Water Sensor module which mainly has 3 pins(+, -, S)
- The ‘+ pin’ is connected to VCC (5v pin port of Arduino)
- The ‘- pin’ is connected to ground (GND) port of Arduino
- The ‘s pin’ is an analogue pin that sends analogue value which can be connected to any analogue ports in Arduino (currently we are using the A0 port).
2. Arduino Board
We are using 4 ports in the Arduino board: VCC(5v), GND, A0(analogue port), and 7(digital port).
3. Relay SL-C
In the relay, we are using the ground and VCC pins to connect to Arduino. Along with this, we are using the signal port to send signals (pin 7). The relay acts as an electronic switch with 0 as OFF and 1 as ON. There are also NO(Normally Open), NC(Normally Closed), and C(Common Terminal) switches. Here we are using the NO and C ports for our module. We are using the NO switch rather than the NC switch since we want the motor to be operating when the signal is 1. NO switch closes the circuit when the signal is 1.
- NO is connected to the positive terminal of the water pump
- C is connected to the positive terminal of the 12V power source
4. Water Pump
The water pump supplies water whenever it is needed. The positive terminal of the water pump is connected to the NO(normally open) pin of the relay and negative terminal to the 12v power source.
| Code Snippet
| How does it work?
- Water sensor’s analogue pin gives an analogue value that approximately ranges from 0 to 1000 according to the water level (value increases as the water level increases).
- Our first aim was to decide a threshold for this range so that we can start and stop the motor accordingly i.e. the motor will fail to run when the value given out by the sensor is less than the threshold.
- To apply this logic we are using an Arduino which decides when to start and stop the motor. The code snippet for this is given below.
- We are using a relay to turn the motor on and off. When the value given by the sensor is less than the threshold we send a positive signal (1) to the relay, which turns on the motor and turns the motor off after it crosses the threshold which is also managed by the Arduino.
| Benefits
- Reduces water and electricity wastage exponentially - Living in an age where we need to be more conscious of the energy that we use, a water level controller is ideal at saving power. Normally, regulating water levels results in high wastage of electricity and water. However, with automatic controllers, the electricity usage is limited as well as less water is needed to regulate the supply.
- Automatically detects the water levels. Requires zero manual intervention - Another notable advantage with these devices is that they regulate on their own. Eliminating manually operating and monitoring water tanks with a timer switch. The water level is maintained thanks to the automatic operations of these devices.
- Saves money - A water level controller helps save money by limiting excessive water and electricity consumption. These devices accurately regulate how much energy is used to prevent unnecessary water/electricity usage. Hence money saved is quite substantial.
- Multiple applications - households, industrial, agricultural, and more.
- Avoids malfunctions compared to the manual systems.
| The Iot Team
- Abhishek Lal
- Abhishek Mazumdar
- Vrushali Bhosale
- Meena Bisht
- Sumit Madan

Quick and easy steps to optimize your React App
React (a JavaScript library) has been around in the market for around a decade and it is the first choice for most of the developers. React is performant but at times one would like to optimize their apps as the app size grows.
If you are using the create-react-app tool to get started with your react apps then this article will surely interest you. Most of the methods for optimizations generally deal with changing webpack’s configurations. You will not have access to these configurations until you eject your app using ‘npm run eject’, after which you have to directly configure the webpack.
Let us explore 2 easy steps of optimization:
- Tree Shaking
- Code Splitting
In order to optimize we need a current representation of our app which will help us in executing the required steps.
Prerequisites
1. Add ‘source-map-explorer’ as a dev dependency.
2. Edit your package.json file and add “analyze”: “source-map-explorer ‘build/static/js/*.js’” to your scripts property.
3. Run command 'yarn build'.
4. Then run 'yarn analyze'. This may take a while, depending upon your app size.
5. Once the analysis is complete, a new tab will open in your browser, where the production bundle is displayed.
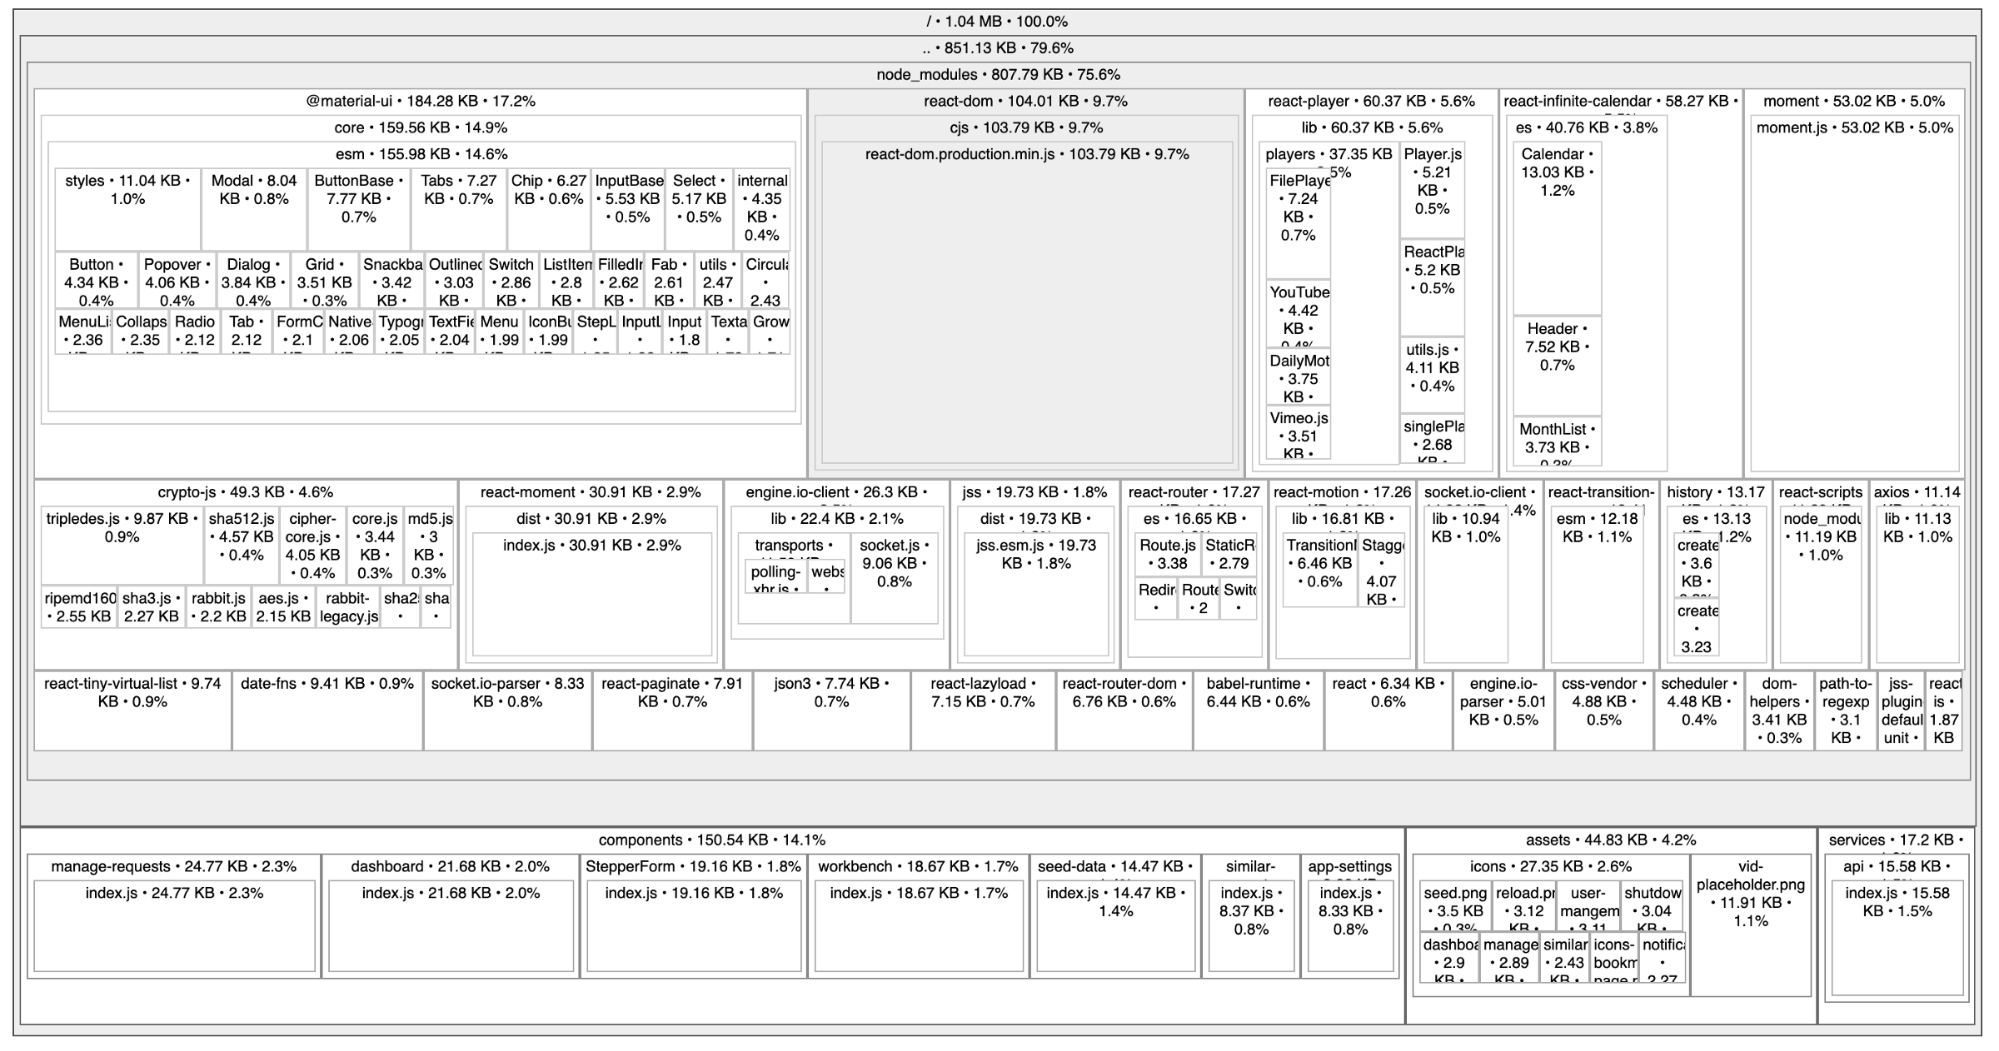
Step 1: Tree-Shaking
The above image is a representation of how much size is occupied by each library. We won’t be using all the functionalities of libraries having bigger footprints. Thus, it's better to exclude unwanted components and libraries. In my case, it’s material-ui a UI library from which only selected components were used. Instead of importing the whole library and extracting components using destructuring, you can directly import the components from their libraries by simply replacing:
with
Once the above steps are performed for all the components that were imported improperly. Build your App again and run ‘yarn analyze’.
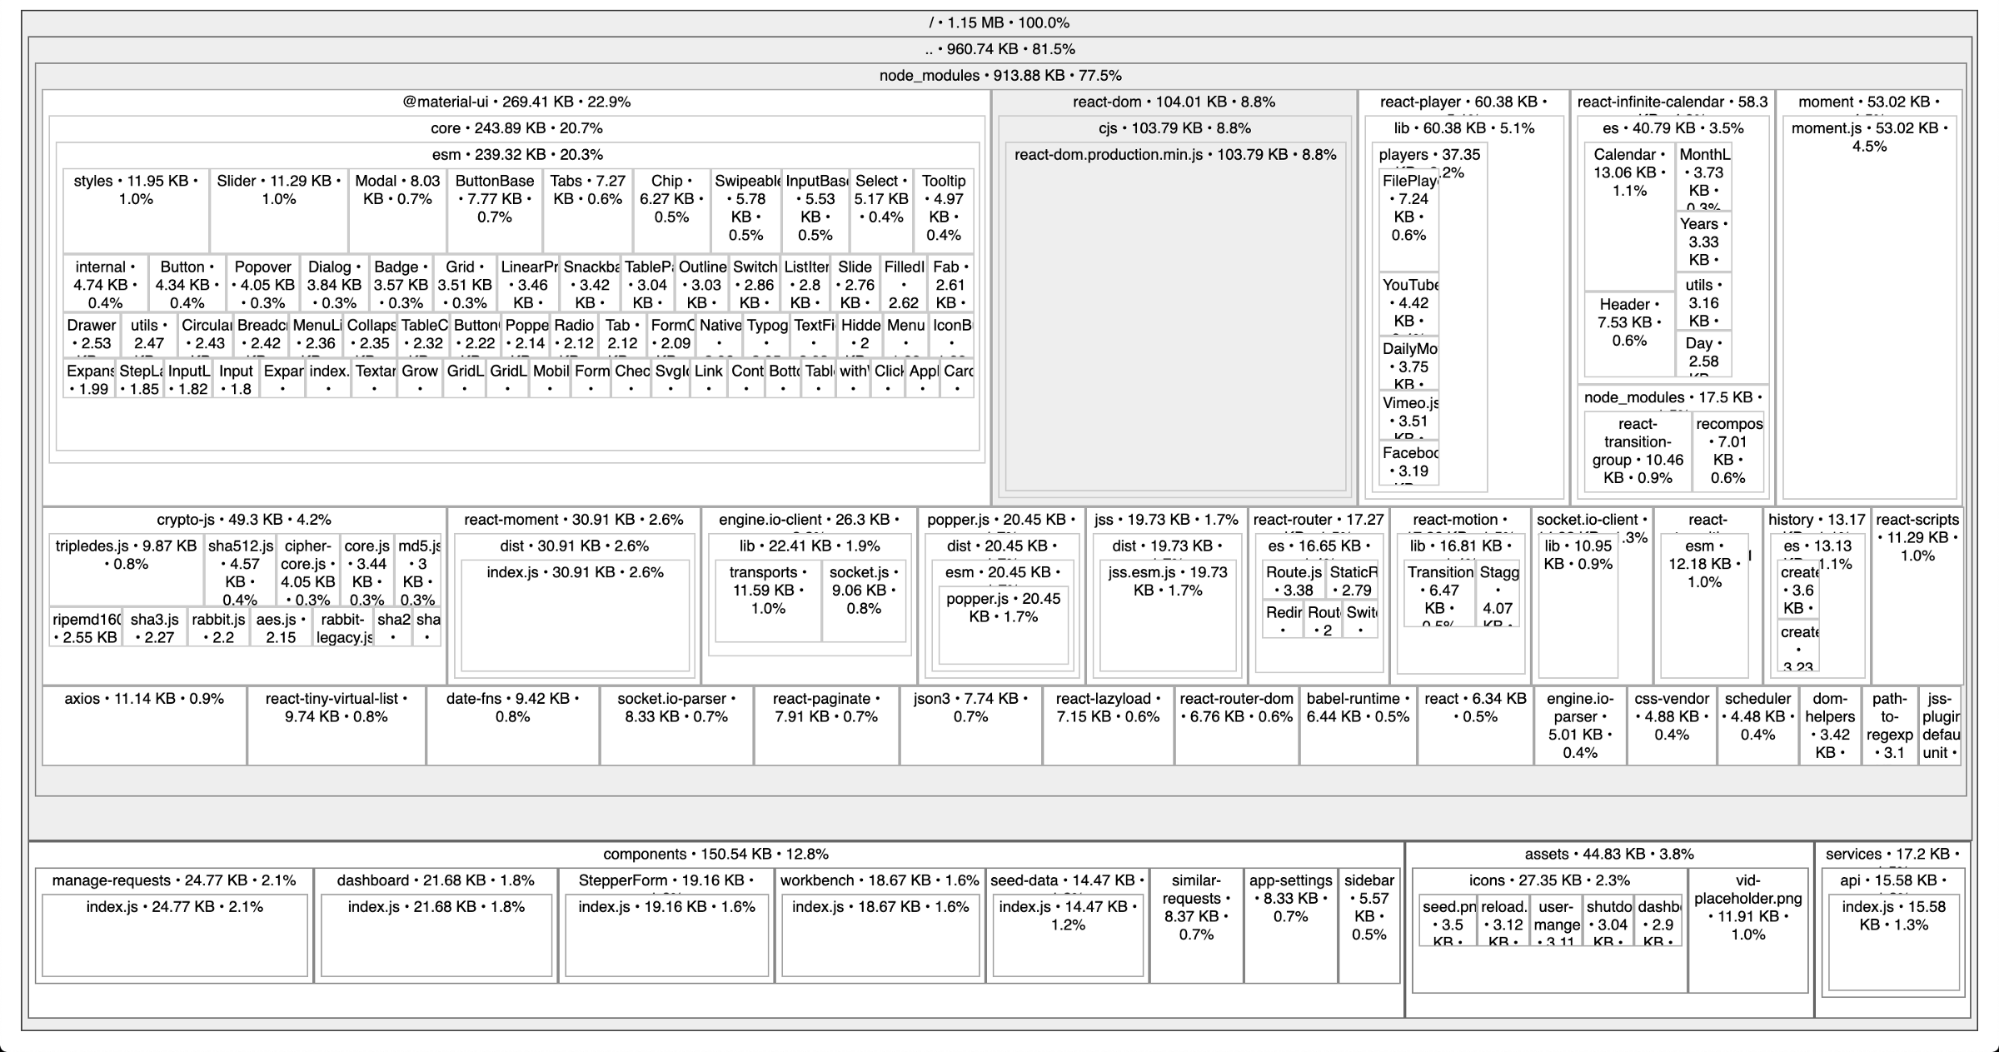
From 269KB down to 184KB, pretty impressive right?
After getting rid of all the unused imports and only having used components in our build, the next step that makes sense would be to chunk certain parts of our app bundle that are not critical for the first load.
Step 2: Code Splitting
We will split our app’s main bundle using React.lazy and React.Suspense which enables us to lazily load our components.
In this case, react-infinite-calendar is a module for filtering some data and is not frequently used. So, it's better to load it when required.
- Import Lazy and Suspense in your component.
- Lazy load your component.
- Wrap your component around Suspense and don’t forget to provide a fallback component.
Note: You will have to lazy load all the instances of the component you have chosen. In my case, there were 3 files where I was using react-infinite-calendar.
After this, your component will be available as a different chunk file which will only load when required. Look at the network inspector.
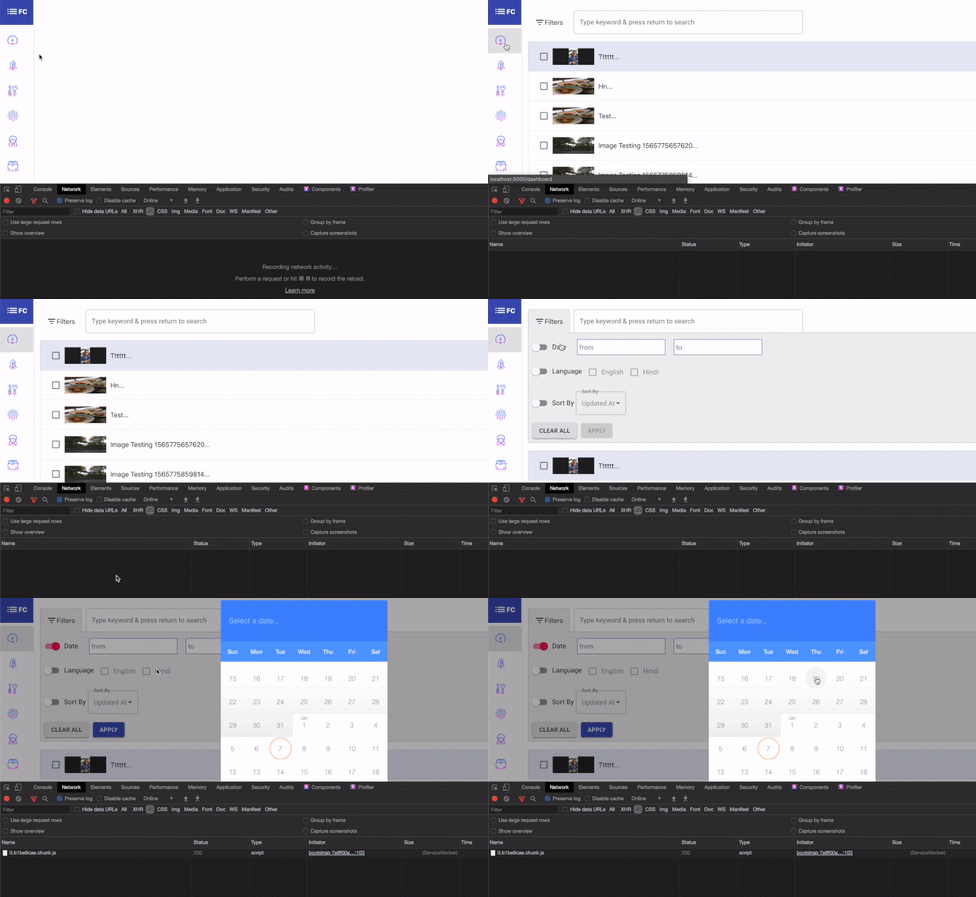
There are different ways of optimizing an App, and they can vary depending on the architecture, use-cases, and a lot of other things. The above-mentioned steps are the simplest and applicable for any React App.

Optional Chaining Operator in JavaScript
Property chaining challenges:
Working with JSON structure involves a lot of conditional checks, accessing nested properties of JSON, and checking multiple And operators (&&) to verify whether the given value exists or not. If it does exists then retrieve the value of that attribute.
While accessing or mapping an object’s properties we came across this error:
TypeError: Cannot read property ‘********’ of undefined.
In JavaScript, we use the && operator as a fallback option.
The cool thing about this operator is that the second expression is never executed if the first expression is false. This has some practical applications, for example, to check if an object is defined before using it we can first check if an object exists, and then try to get one of its properties:
Even if a car is null, we don’t get errors and the colour is assigned a null value.
We can go down multiple levels:
In some other languages, we use the && operator to determine true or false, since it’s usually a logic operator. But not in JavaScript and this allows us to do some really amazing things.
In JavaScript, an object can have a very different nested structure of objects. Let’s look at an example:
Obj can have a different set of properties during runtime:
Thus we have to manually check the property’s existence:
That’s a lot of overlapping code.
Performing checks on every single field of JSON becomes tedious This is where the Optional Chaining feature of JavaScript comes in.
Optional chaining, as a part of ES2020, changes the way properties are accessed from deep objects structures.
What is Optional Chaining?
Optional chaining allows us to check if an object exists before trying to access its properties. In simple words, we need not validate for null or undefined while accessing each property on the hierarchy.
“?.” is used as the optional chaining operator.
Syntax :
Let’s see how we can handle multiple ways of accessing the properties of an object:
We can soon rewrite the above line as:
The basic rule is if any of the values after ‘a?’ are null or undefined, then the statement will return null or undefined without throwing an error.
An alternative for not repeatedly adding the ‘?’ operator at every level provided we are confident that every user has an address but uncertain if the user exists is:
We need to check the existence of objects or arrays prior to accessing its properties and if while iterating over an array too.
For example:
If the data variable is null or undefined?
We would get an error - type error: cannot read property ‘data’ of undefined.
The solution to this is to check whether our data exists and isn’t empty, this can be determined by checking the array.length.
Or
We can improve the code with a simple question mark.
Let's take another example:
In order to access the values of this object (the object can be undefined or null)
Using optional chaining we can:
Using optional chaining with function calls causes the expression to automatically return ‘undefined’ instead of throwing an exception if the method is not found:
Optional chaining brings a lot of benefits, by reducing the complexity and making the code readable.
.avif "Dynamic Routing in Gatsby")
Dynamic Routing in Gatsby
During my internship, I was developing a project named Group Expense, which required the implementation of dynamic routing. Let us understand what dynamic routing is all about.
What is dynamic routing?
Dynamic routing means there is only one page to which all the links are routed but the content and path of this page are dynamic for each and every link that is listed. The unique content and path are achieved by the unique identifier that is associated with each link.
In my project, I needed to create an Expense page with dynamic content and path for each listed group. In my case, I had the group IDs as a unique identifier for each group through which I enabled dynamic routing.
It was quite a challenge as I was unable to grasp the concept at first but ultimately it was fun to learn and was implemented successfully.
Let’s understand Dynamic Routing’s implementation in a manner that even an inexperienced developer can understand and implement it without any hassles.
1. Gatsby-node.js
In order to make dynamic routing or dynamic pages, we have to explicitly tell Gatsby that the path of these pages should be dynamic.
For that, we have to add the following configuration to gatsby-node.js. One can easily find this file in their project folder.

Here, in the createPage function, there are 3 parameters passed:
- path - Defines the initial path of the page.
- matchPath - It is the actual path which will be displayed in the URL and the ‘*’ at the end denotes that this path is dynamic and this ‘*’ will be replaced by the unique identifier (in my case the group ID) associated with each link ( in my case group ) whenever that link will be clicked.
- component - It denotes the path of the page where our imported components will be rendered.
2. Groups.js
This is just a file in the src folder of the project. It contains all the imported components that need to be rendered.
Here we need to import Router from ‘@reach/router’


I have imported 2 components, HomePage and Expense wrapped inside the Router.
The HomePage renders a list of groups which are actually links and Expense contains the expense data of those respective groups.
Since we have a single Expense component for all the groups, only the content rendered inside the Expense component and its path will be dynamic. If you notice the path provided to the Expense component, there is this ‘:id’ which will replace the ‘*’ in the configuration file and ultimately, the group ID will replace it.
We have now set up our gatsby-node.js configuration for dynamic paging and the components that need to be rendered.
Let’s render the groups on the HomePage file now:
3. Setting up a clickable link
We need to wrap each group’s name in Link component on the HomePage.js where the list of groups is rendered. Link is basically used for navigating between internal pages of a Gatsby site. We need to import it from Gatsby.

After this, each group name needs to be wrapped inside the Link component in return() method.

Please note that { groupData[item].name } is nothing but the group’s name.
Here, ‘item’ denotes the group ID and as one can see it is passed on to the path making it dynamic and unique for each group name.

So, in this way, the path is made dynamic and this group ID is also passed on to the Expense component enabling the content of that particular group to be fetched and rendered.
Dynamic Routing Workflow:
- As soon as a link/group is clicked in the HomePage.js file, it checks the gatsby-node.js file for the page to be rendered.
- From there it finds that the components to be rendered are available in Groups.js file.
- In Groups.js, it finds the path to Expense component and as the unique ID/ group ID is already passed to the Link component, it appends this ID to the path of Expense page and routes to it with content fetched in accordance to that unique ID and if you see the URL of that page, you will find /groups/{ group ID }.
I have 2 groups listed in this screenshot:

Now if I click on the first group, the URL of the Expense page opened is:

Similarly, if I click the second group, the URL is:

So, one can see clearly that the group ID is appended in the URL depending upon which group is clicked. And the data corresponding to this ID is fetched and rendered inside the Expense component of the Expense page. The unique identifier for the links can be anything that you define.
In this way, a single page rendering a single component i.e. Expense component is created each time a link is clicked. The content rendered inside that Expense component is dynamic in accordance with the unique ID of that link ( group in my case ).
This is what Dynamic Routing in Gatsby is all about, I hope it was easy to understand.
Keep learning!

GatsbyJS Plugin Alert - Simplify data navigation
A few weeks back we started working on a POC around GatsbyJS and Drupal commerce. While building the listing pages we ran into an issue due to the current entity type and bundle route pattern provided by the JSON:API module. Drupal provides the ability to create numerous bundles of entity types to match the user data model. These different bundles need to be displayed on the listing pages.
Implementing this is easy with Drupal’s views module, but a challenge with JSON: API, given that it is oriented more toward serving entities of a single type or bundle from its collection resources.
To build a listing page of products we wrote a GraphQL query that fetched all types of products then looped over the product types and added all the products in an array. Once this was done, we performed the sorting and filtering operations. This process makes the code lengthy and complex. GraphQL queries are recommended for filtering and sorting of data. However, we were not able to accomplish this. We were looking for a better solution to achieve this. We surfed through many blogs and tutorials but they all dealt with a single content type. So we started to look for a more generic approach that everyone can use.
While going through the above phase we came across a tweet by Centarro (@CentarroHQ). API-First Initiative who built a module that adds cross-bundle resources collection for Drupal's JSON:API module.
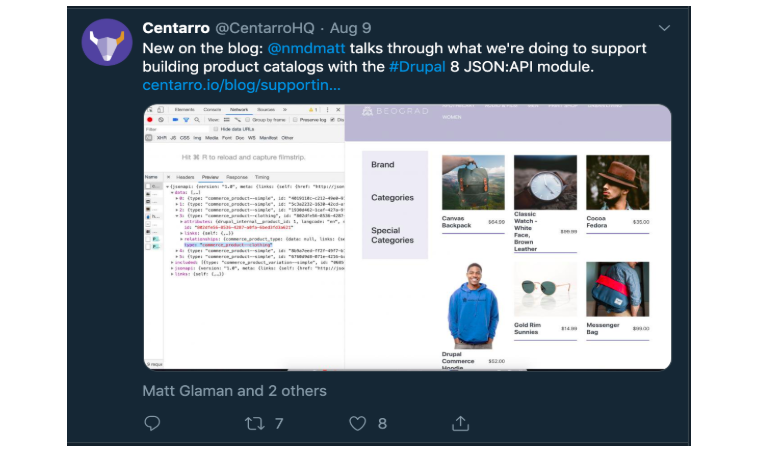
At first, we thought our problem was solved, we just needed to enable this module and gatsby-source-drupal would take care of fetching the resources. But, the resources provided by this module did not show up in GraphiQL.
We discovered that the gatsby-source-drupal plugin was trying to create the same node twice. One with the API provided by JSON:API module, and the other with the API provided by JSON:API Cross Bundles module. As per our knowledge, Gatsby does not create a node twice with the same node ID and type. And thus the resource did not show up inside the GraphiQL explorer.
To get these resources incorporated inside Gatsby we decided to work with a separate plugin. Allowing the users an option to use the plugin.
We used the gatsby-drupal-source plugin as a starting point and made a couple of tweaks to it. We were then able to fetch resources provided by the JSON:API Cross Bundles. Here we are indexing all the content entities with bundles and user entity as it’s required to add author to contents (not config entities) in GraphQL, so if you are looking for just content on the Gatsby side this plugin will fulfill your requirements.
We are adding 'cross_bundle--' as a prefix in bundle type name allowing users to make use of this plugin along with gatsby-source-drupal. To identify the bundle type of content. We added a new property to the node object drupal_type. This acts as a true source of the bundle type.
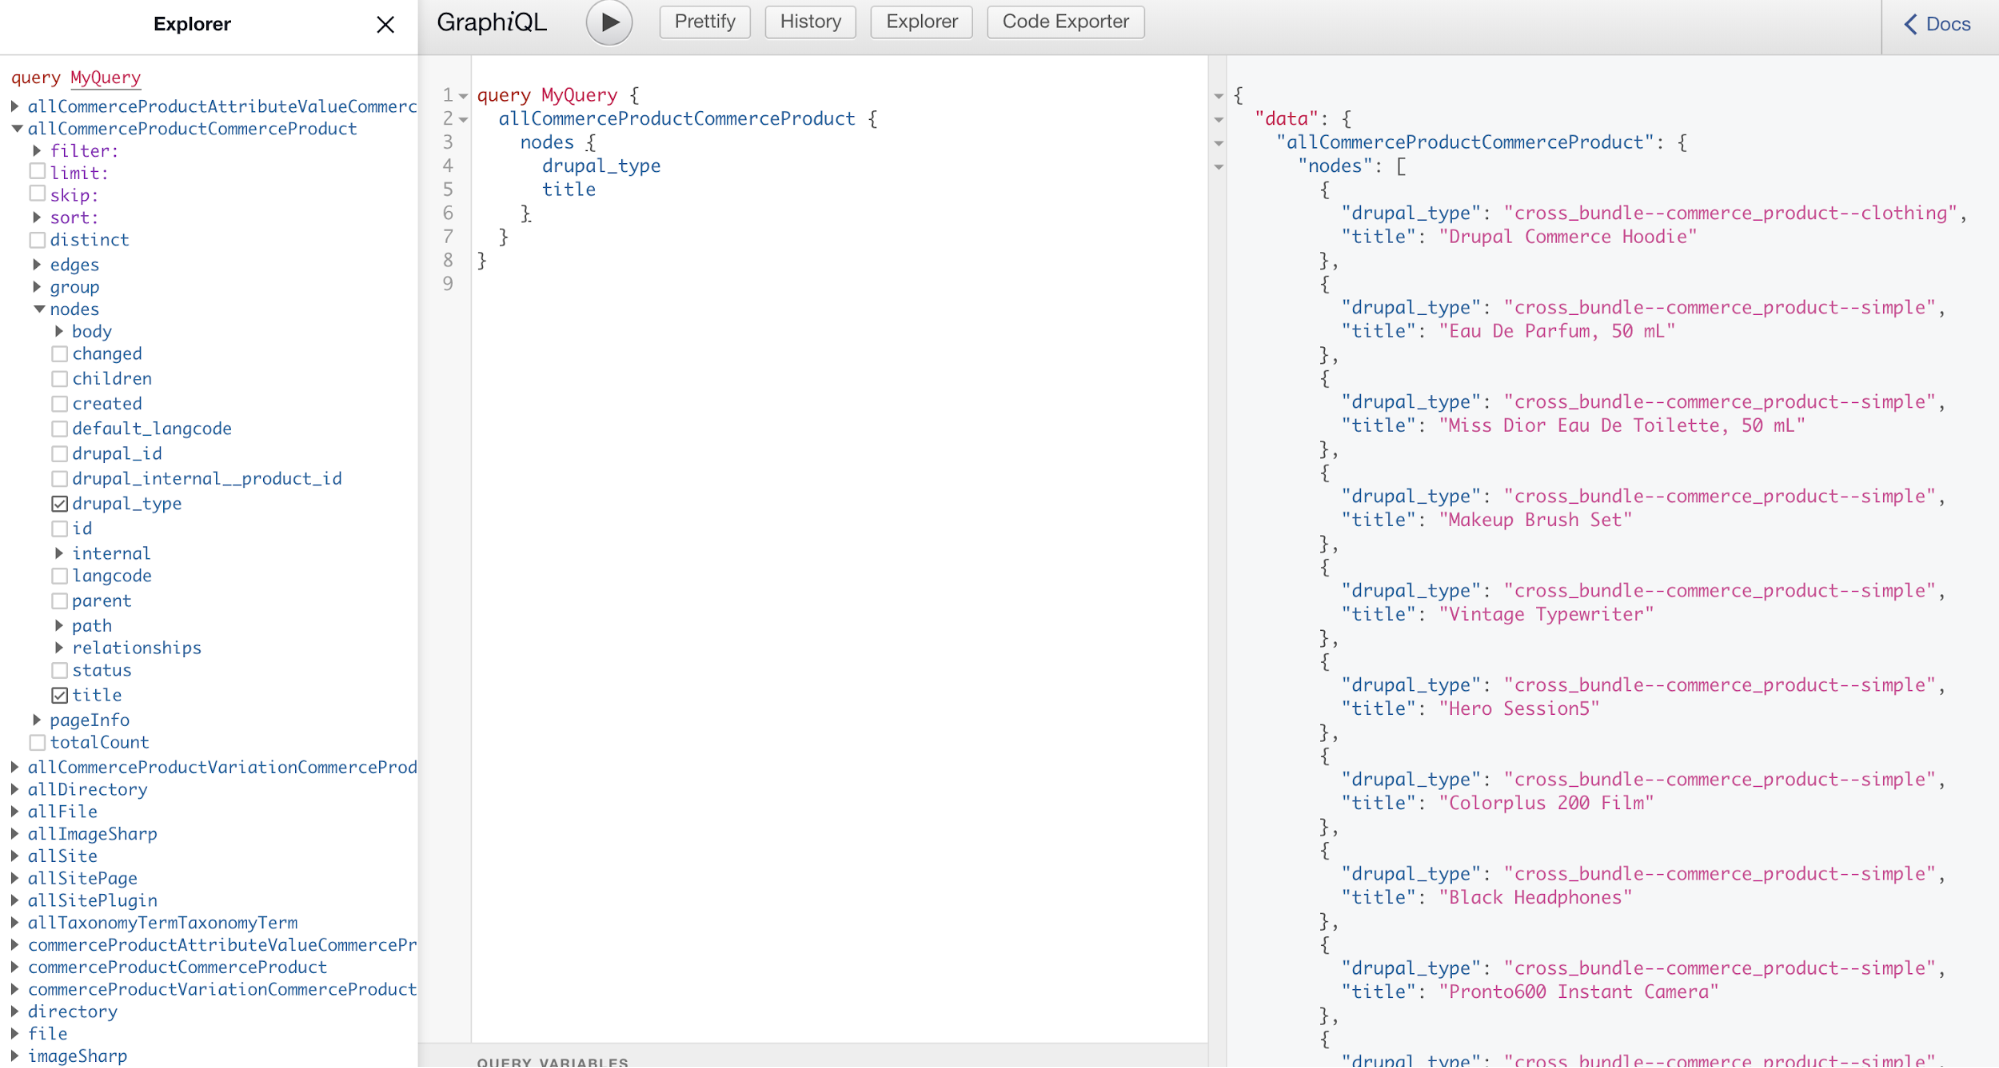
Installing gatsby-source-drupal-cross-bundle
How to use it
How to query it
This how we resolved the problem and the plugin is available at gatsby-source-drupal-cross-bundle.
Demo
We implemented the gatsby-source-drupal-cross-bundle plugin to create an e-commerce site with GatsbyJS and Drupal commerce.

We would love to hear your feedback!
Looking to create a blazing fast e-commerce portal or a site? Drop a word at business@qed42.com.
.avif "Building powerful custom properties with CSS Houdini")
Building powerful custom properties with CSS Houdini
Introduction
In these series of blogs, we will talk about Houdini - the new era of CSS. Before jumping right into CSS Houdini, let’s first understand what the word Houdini means.
Houdini means, an expert in the art of escaping. So what are we trying to escape here? We are trying to escape the chained process of CSS properties. Being a Frontend developer, we think how nice it would be if we had the power to create our CSS properties.
Frontend Ninjas, your wait is over!
What is CSS Houdini?
Houdini is a collection of low-level APIs for CSS. Using these, the browser APIs user can access the browsers’ CSS Engine. All these APIs can be accessed through JavaScript which made it developer-friendly.
The 7 APIs we can access are:
- Typed OM API
- Properties & Values API
- Paint API
- Layout API
- Animation worklet
- Parser API
- Font Metrics API
Before we delve deeper into CSS Houdini APIs, we should understand the basics of how CSS works.
How CSS Works?
- Browsers load the HTML received from the network
- Browsers convert HTML into the DOM and stored in Computer’s memory
- Browser fetch assets like CSS which are connected via HTML document
- The browser parses the fetched CSS. Based on the selector it finds, it applies the rules to the relative node in the DOM and applies a style to them.
- Then a render tree is laid out and a DOM tree is created (This is going to be explained next)
- The display is then presented on the screen

Let’s first understand how the rendering pipeline works and how the DOM will be created.
Rendering Pipeline:
Rendering pipeline is a process which carries the basic structure of a website. Which includes:
- Parsing of the HTML to DOM
- Render tree construction
- Display (laying out) of the render tree
- Painting the render tree
The question persists, how to apply a hook into the existing rendering pipeline process for modifying the regular flow? Nowadays, the answer to every problem in the web world is Javascript, just as the answer to everything in the universe is 42. :)
As promised at the beginning of my blog, let’s look at how CSS Houdini works:
- Hook into the chained process
- Javascript plays a key role in this Hook process
- Using JavaScript Typed OM, Custom Properties, Paint, Layout and Animation APIs can be hooked.
- There are 2 other APIs: Parser API and Font Metrics API. These can be used to register new things related to CSS.

User-Agent Challenges:
Challenges while theming the select box are very common. Despite the numerous advances in technology, we cannot directly theme the default select box. To theme it, we require the basic CSS code and a lengthy JS polyfill code.
If overriding is possible with JS polyfill then what is the difference between JSPolyfill and Houdini?
JS Polyfill V/S Houdini:
For styling an element using CSS property we have to write JSPolyfill code. This is how it will work:
- The browser goes through this parser
- set and reads DOM and CSS Object Model cascade, layout, paint & composite process
- The browser then repaints it all over again with JS polyfill since we are re-applying style to the element which has already been applied.

This is not the case with Houdini. With CSS Houdini we can hook the CSS parsing process and apply the styling with our defined properties.

Conclusion
CSS Houdini is a blessing for frontend developers, especially from a CSS code management perspective. Here’s why:
- Browser APIs are now open for developers
- JavaScript can be used to hook into the chained process of CSS properties
- Frontend developers can register their properties
- Using Parser, Font, Paint, Layout, TypedOM, and Custom Properties APIs eliminates the need for JSPolyfill, making the code more performant!
Now that you are well versed with what CSS Houdini is and its applications. My next blog in this series will talk more about the APIs, challenges faced with CSS, how to overcome those challenges, and the current state of CSS Houdini.

GraphQL - Beginner's Guide
To understand what GraphQL is we need to understand why GraphQL was created.
Before you go any further. This blogpost is aimed at all the beginners like me to get familiar with some very basic terminologies of GraphQL. Enjoy!
A Bit of History
GraphQL was created by Facebook in 2012 and open-sourced later in 2015.
The systematic industrial shift from desktop, computer, and browsers towards mobile demanded some technical level architectural change as well. This made Facebook rethink its mobile strategy of how to adopt HTML5 on mobile apps. In this advent of this industrial shift towards mobile technology, Which demanded a more efficient data loading approach. Facebook decided to rebuild it’s Facebook iOS App from scratch.
The problem that led to GraphQL
As the development of Facebook app progressed with its initial stage implementation of Newsfeed(which is the first thing that you see when you open a Facebook app), which was backed by the Restful APIs. A lot of issues were encountered.
Slow on Network: Each network request needed to coordinate with multiple linked data models which led to multiple roundtrip requests. There was no hierarchical model for this. It was rather interconnected, nested and recursive. The network requests took a lot of time to resolve which led to poor user experience.
Fragile client/server relationship: Any change to the API needed to be carefully carried over to client code. Which often blocked the client work. This would also cause the App to crash if the changes weren’t carried out properly.
To tackle all these and multiple other issues Facebook decided to develop GraphQL.
So what is GraphQL?
GraphQL is a query language that describes how to fetch data from one or more data sources. It is a strongly typed language. As the official website for GraphQL puts it,
“Describe your data, ask for what you want, get predictable results.”
One way to understand GraphQL would be to distinguish it from REST. Which is of course why it was invented in the first place. But that is a topic for another day.
For now let’s try to understand some core concepts/keywords in GraphQL:-
1. Schema:
We can define Schema as a contract between frontend and backend which is to say contract for client-server communication. As mentioned above GraphQL is a strongly typed language. It has it’s own type system that is used to define the schema of an API. The syntax for writing schema is called SDL(Schema Definition Language). To understand this let’s define two simple types:-
We just defined two types Person with 2 fields and Book with a single field. The exclamation mark at the end specifies that the field is required.we can also define a relationship between these types.
- Relation
To define a relation between the 2 types we just defined above let’s consider this use case. Say a person can be an author to multiple books. We can establish this relationship with the below implementation
The Square Bracket [] syntax around the book in the Person type is how we specify a list.
2. Queries:
At it’s simplest Queries are how we get/fetch data in GraphQL. To illustrate this let’s write some queries to access the data defined as per the above schema.
Notice the `person(name: mac)` above this is how we pass arguments to in a query.
To expand a bit on this say with age we also need all the books written by the person. Cool! We can do this by a simple query as :
That is the simplicity and power behind this language. We get what we need. No more multiple roundtrips and requests. No more unwanted data.
3. Mutations:
Other than requesting data from the backend you might also want to manipulate the data stored on the backend. No problem.
GraphQL provides you with 3 kinds of mutations:
- Creating new data.
- Updating existing data.
- Deleting data.
Mutations follow the same syntactical structure as queries except they always need to start with a mutation keyword.
Similar to the query that we wrote above this mutation also has a root type called createPerson with name and age field. In this case, the createPerson takes two arguments that specify the new person’s name and age.
While writing a mutation we can also access the different properties of the new person object. Notice how we are asking for name and age above. This is a cool feature where rather than making multiple queries for the same you can achieve this in a single roundtrip.
The output of the above mutation will look as follows:
4. Subscriptions:
The most important requirement for many applications today is to have a real-time connection to the server to get immediate updates. For this requirement, GraphQL introduces us to the concept of Subscriptions. Whenever you subscribe to an event it will initiate and hold that connection as long as the subscription is active. Consider the below snippet:-
Note: Similar to the query that we wrote above this subscription also has a root type defined.
In the above example, we are subscribing to an event to get informed whenever a newBook is being created. Unlike Queries and Mutations that follow a typical request and response cycle. The subscriptions follow a continuous stream of data i.e, whenever any changes are made on the server-side which is to say in our case that whenever a new book is created we will get updated about the same as long as our subscription is active.
Conclusion:
- Define a schema- A schema is a collection of Root types that act as an entry point for the API.
- Define Root types. We have multiple root types i.e: Query, Mutation, Subscription.
- Root types have different fields on them. Define all the fields.
P.S - That is all for the basics. Hope you understood the basic concepts. Will follow this up with the full-stack implementation of GraphQL.

Integrating Headless Drupal with Gatsby (JSON:API)
What is Gatsby?
Gatsby a free and open-source framework based on React, which comes with several data plugins that allow you to pull data from different sources, one of which is the Drupal Content management system. I have been working with Drupal for almost 4 years, and have been a part of several headless Drupal projects. Knowing the efforts it takes to build every page and component on the frontend, it excites me to check the new tool, Gatsby.
Takeaways from this article:
- Understanding Gatsby
- Drupal Integration with Gatsby
- Setting up and creating a sample site using Gatsby and Drupal with JSON:API module
Creating a Headless Drupal site
Let's create a content type called Recipe with following fields:
- Title
- Banner Image
- Summary
- Ingredients
- Steps
- Time to prepare
- Tags
This is how the content creation form will look like:

Now let's create content and enable the JSON:API module, and then access the <base_url>/jsonapi link to view all available entity, bundles, etc. that will be exposed as rest API using JSON:API module by default.
If you access <base_url>/jsonapi/node/recipe it will list down all the nodes of recipe content type, we will be using the same API endpoint to build our site.
Now we have completed the Drupal part, let us start building the frontend using Gatsby.
Building frontend using Gatsby
Gatsby provides a CLI tool, which helps you build and run your Gatsby application. So let us install the Gatsby CLI tool.
Installing a new site using the Gatsby CLI tool.
Above command will create a new folder named cookbook-site with the default starter kit provided by Gatsby.
Gatsby also provides you a development server which will host your local site using Gatsby CLI. To start your local site, get into your site directory and start the development server.
It will compile your project and host your local site at port number 8000, this is how your site should like.

Now open /src/pages folder in your directory, this folder contains the files which will be served as a webpage. Open /src/pages/index.js which is your current homepage showing Hello World!
Let us update the content on the homepage( /src/pages/index.js) with the following code to check how it works.
Now the webpage will look like this:
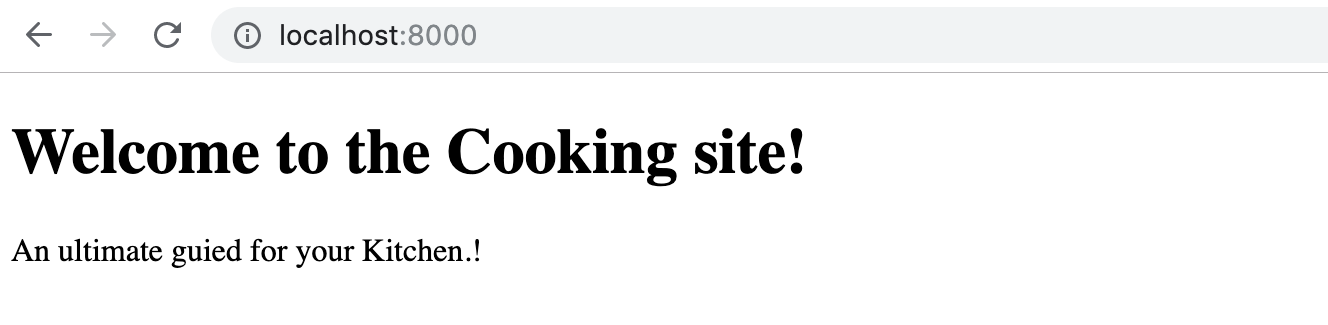
Now let us create a new page were all recipes will be listed, create a new file - recipes.js inside /src/page/. This page will list down our all recipes; add following code to it:
Now let us visit and verify the page. Access - http://localhost:8000/recipes on your browser, the page should look like:

Here we have not created any routes, Gatsby does is automatically for you and loads the page from /src/page/
Fetching Drupal Data
To fetch the data from API we will be using the Gatsby plugin and GraphQL. GraphQL server can be accessed at http://localhost:8000/_graphql
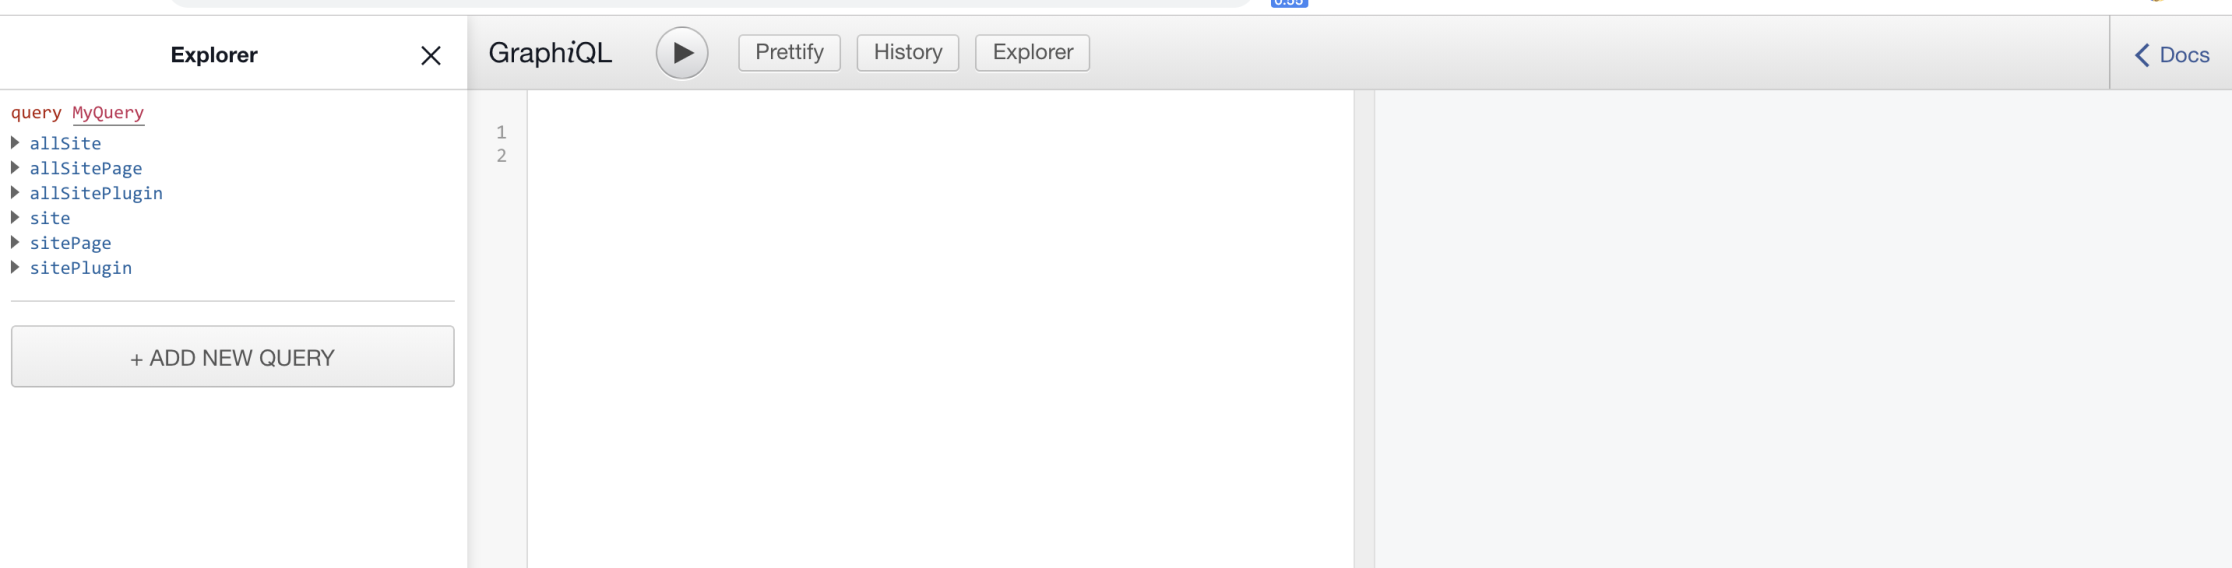
But before we begin with GraphQL we need to add the Drupal plugin of Gatsby.
This will add a plugin provided for Gatsby to access data of headless Drupal, once we have the plugin, we need to configure it to start using it. To configure the plugin you need to add the following code in the gatsby-config.js
Once you add above code, just restart the Gatsby server. (gatsby develop). After restarting the server visit http://localhost:8000/_graphql and you will see data been fetched from Drupal.
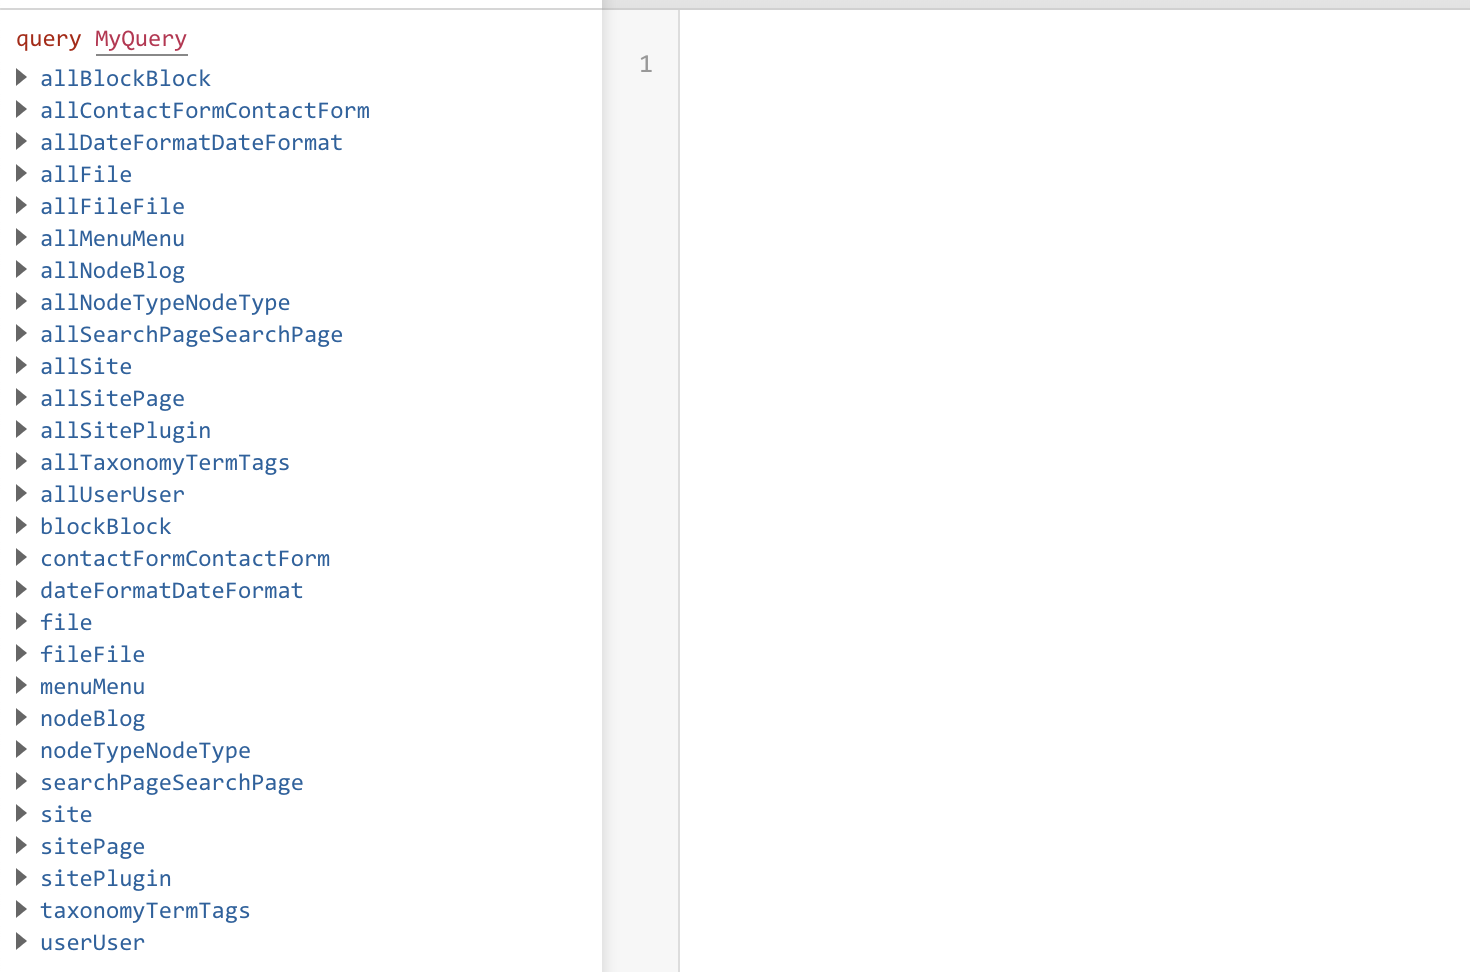
You will see the nodes of the recipes content type allNodeRecipes which will list node of recipe content type and nodeRecipe which will show you particular node with given node id. Now lets us start writing GraphQL queries and integrate it with our application.
First, we will write GraphQL query in which we will retrieve following fields to display it on our listing page /recipes
- Title
- Summary
- Banner Image
- Authored By
Selecting appropriate fields using GraphQL explorer will auto-generate a query for you. Here is the query which will provide us the above-required data.
On executing the above query in GraphQL it will show you the list of all recipes and its data for selected fields.
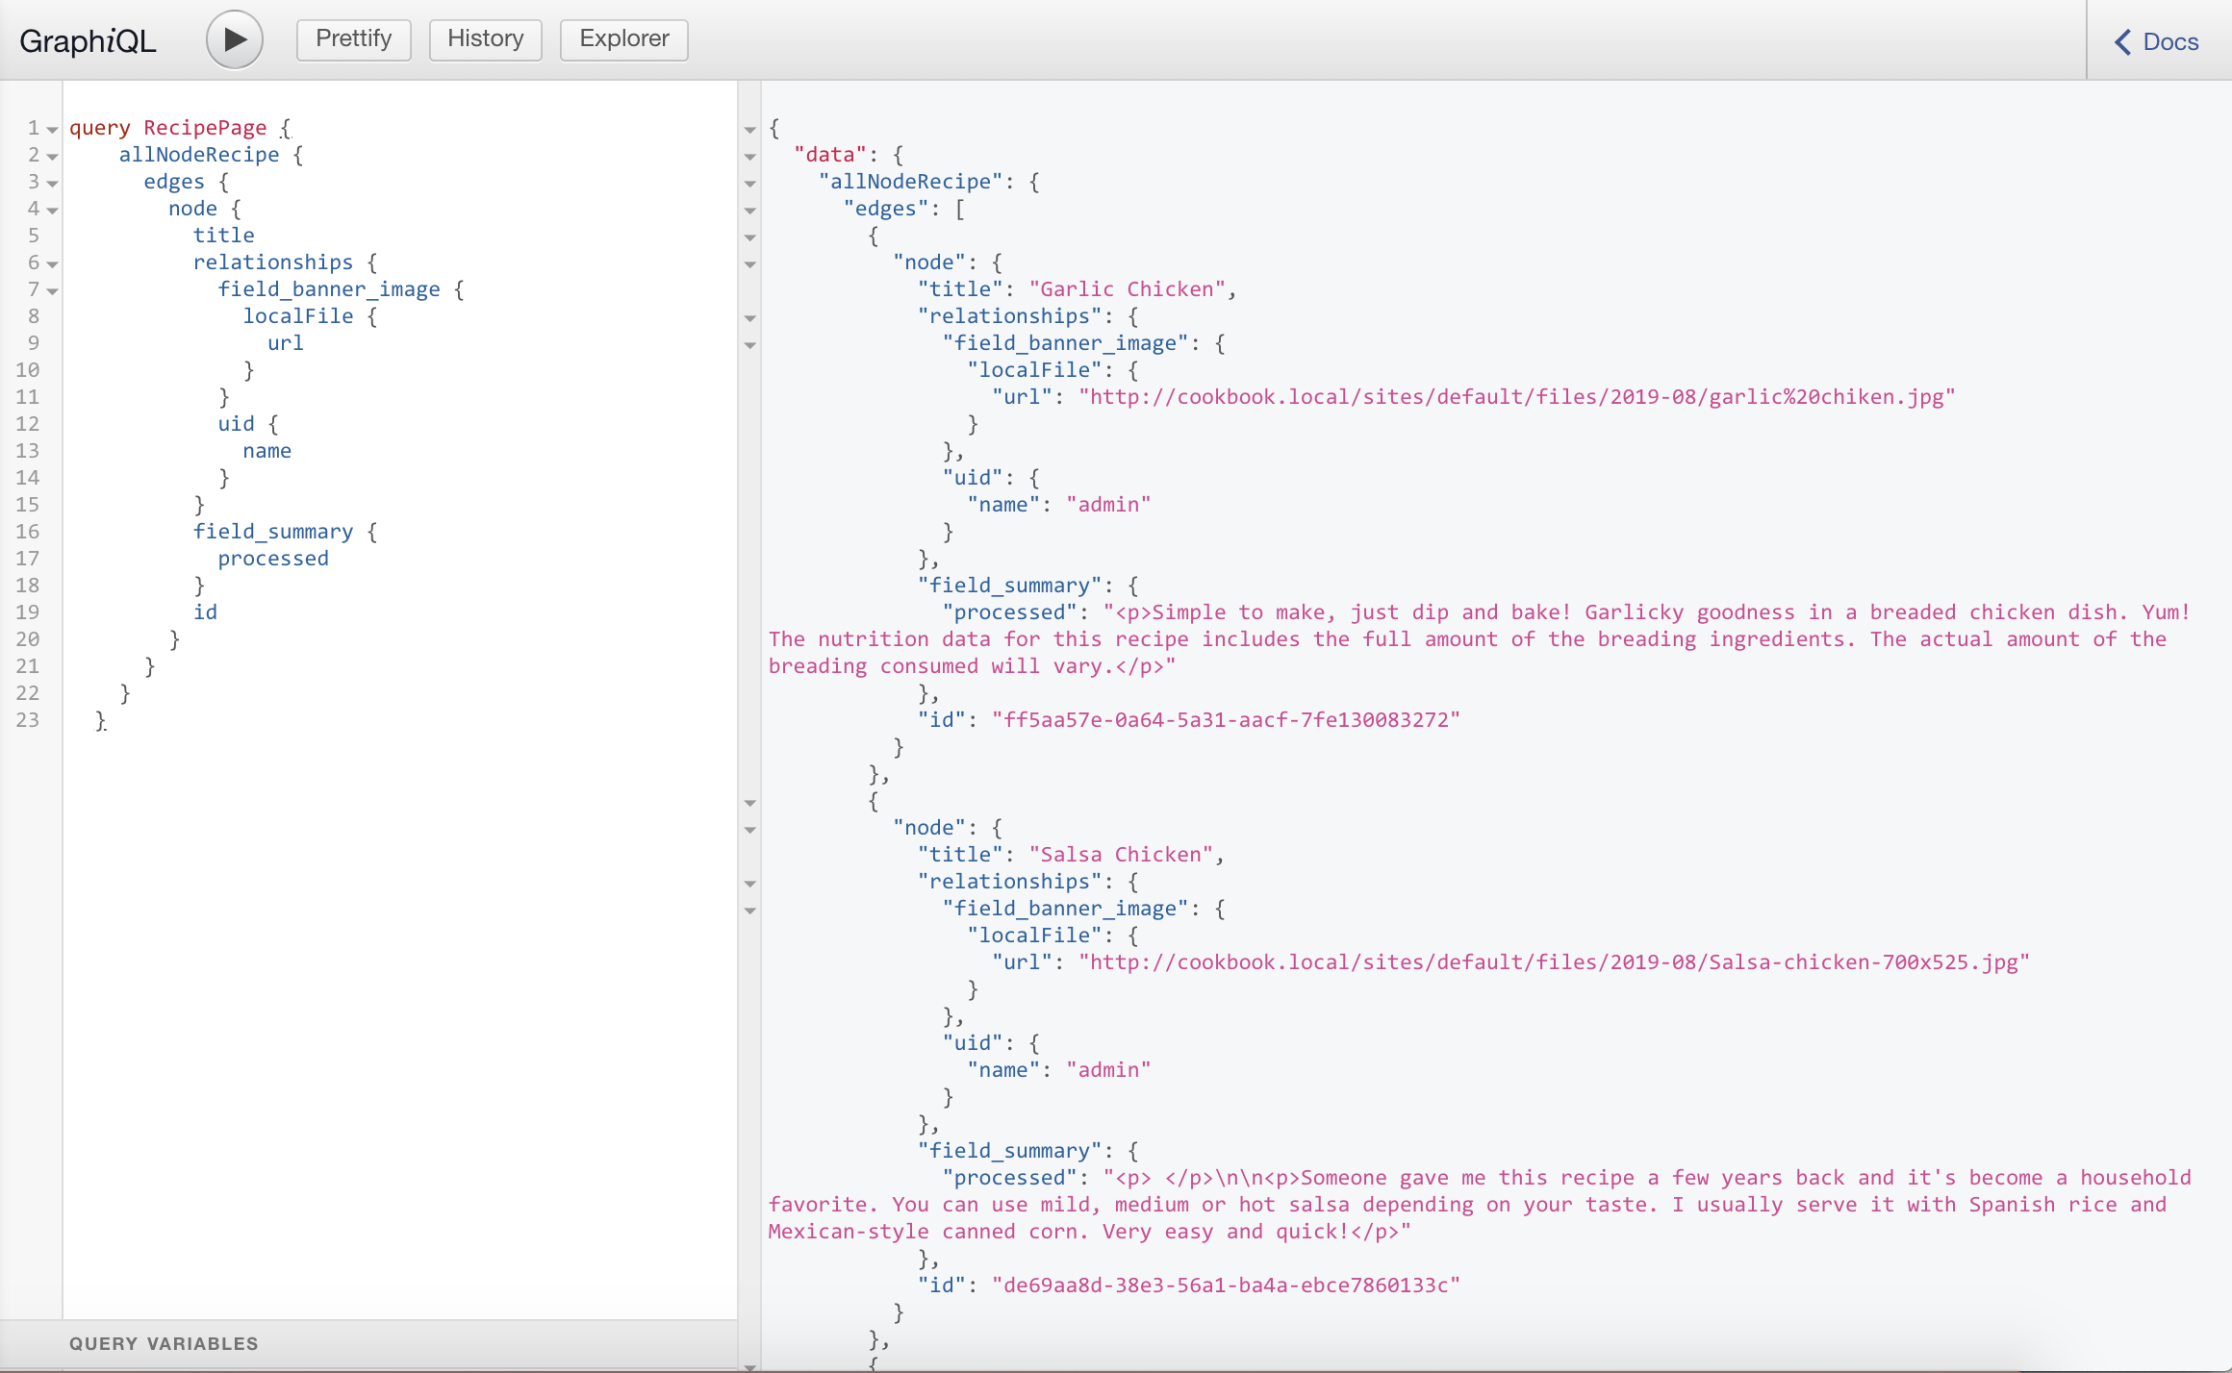
Now let is start creating /recipes page. We will have to update our existing /src/pages/recipes.js file, which will include a GraphQL query and HTML components rendering the data fetched using GraphQL query. Update the recipes.js with following code.
As shown in the above code we have used the GraphQL query which was created earlier and those results are accessible to the React components. Note that the <Link> component used in the code is a Gatsby component which is used to access the internal pages. Following is how our Page will look like:

Wohh.!! Site is using Drupal data now. Now let us add some styling to it. Create a folder named styles inside /src directory and then create a file inside /src/styles called global.css and add following code to it.
Now to let Gatsby know about your CSS file, create a file called gatsby-browser.js in the root directory and import the CSS file by adding the following code to the file.
After doing this restart your Gatsby server by executing gatsby develop and your site should look like this:
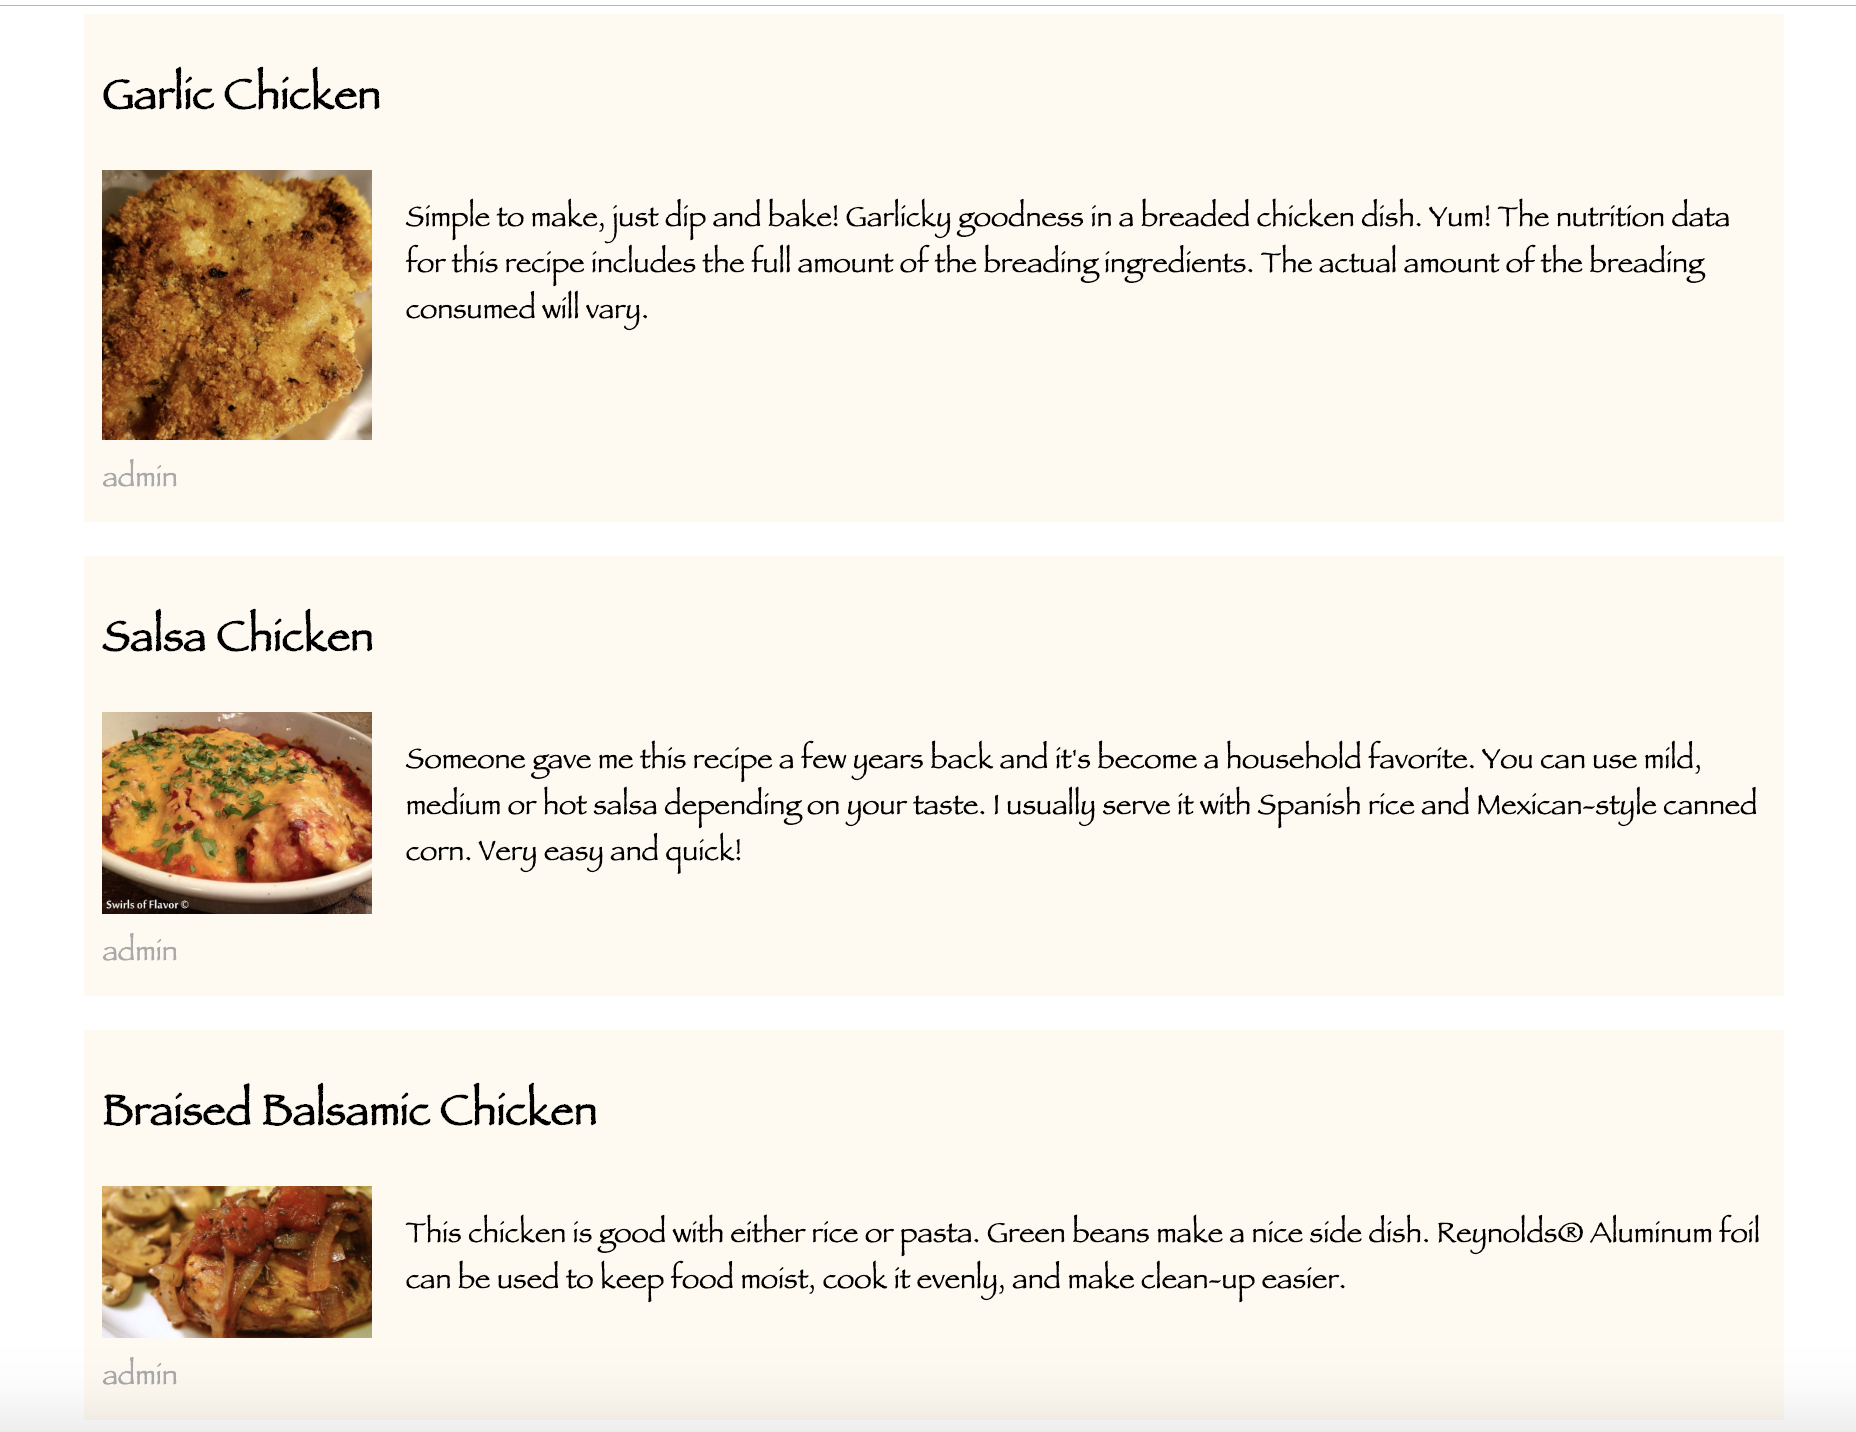
Yeah! Wasn't that simple?
I will be sharing the Dynamic page creation using Gatsby in Part 2 of this blog series. Stay Tuned! For more information around Gatsby and Headless Drupal you can write to us at business@qed42.com.

Progressive Decoupled Drupal Setup
In the era of a realtime, fast, performant web application, one cannot overlook the superpowers of ReactJS and the wonders it can do when used right.
The beauty of ReactJS is that it can be easily integrated with any other framework. Let’s have a look at how to integrate ReactJS with Drupal 8 and Drupal 7.
We rely on ReactJS to handle the heavy UI and leave the rest to Drupal.
These are the steps we will follow. [The steps will be elaborated later in the blog]
- Create a custom module that creates a custom block. The custom block has the codebase for ReactJS.
- Develop your React application.
- Once done, run
- This will create a build folder with the root directory.
- This build directory has minified files that can be used as static files.
- The custom block must have a div with id “root”.
- If you want to give it a different id, update /src/index.js to
DRUPAL 8 SETUP


- Include min files in the mentioned order.
- I have renamed the generated files to runtime.js, chunk.js, and main.js.
- The generated files have self-generated names concatenated with runtime, chunk or main.
- Add other third party CSS libraries you want to include in the way it is demonstrated above.
- Lets Automate:
Add the following in the ‘scripts’ package.json
Your package.json should now look like this:
Voila!!!
After creating this, I enabled the module that I created programmatically. Then in the Block Layout in the Content region, I placed this custom block.

Once all of this is done, visit the respective drupal page. It should have the React application within. Theme the block and React application as you wish. You have now completed the basic setup of Progressively Decoupled Drupal 8 with ReactJS.
DRUPAL 7 SETUP
.avif)
Note: notice
array(‘scope’ => ‘footer’)
It is important to load the JS files at the footer of the block or else it will be added at the beginning of the block. It will look for a div with the respective id and since the HTML is not yet rendered, it won’t find one resulting in `Uncaught Invariant Violation: Minified React error`
notice array(‘scope’ => ‘footer’)
Loads the JS files at the footer, avoiding the above-mentioned error.
.avif)

Resolving Network Error in Android app development

What do these errors indicate?
These errors state that the request you tried to make did not reach your remote server. Be it a hosted API or your local machine. These errors may occur under the following scenarios:
Scenario 1
If we want to serve the mobile app with your local machine’s REST endpoint which has the local server up and running. We must choose “public IP” of the local machine to be the endpoint.
Scenario 2
You can access APIs over HTTP pointing to a domain name or an IP. However, these approaches are not suggested as you wouldn’t want your APIs to be unsecured or the server’s IP to be used as an endpoint.
Scenario 3
If you access the API over HTTPS with a domain name and receive a “Network Error”. Try checking the access logs and error logs of the servers to check if the API messed up with the “request” or did the request never reach the server. If the request did not reach the server, this indicates the REST endpoint is rejected to be served by the Android itself.
Solution
To resolve this issue check if your SSL certificates on the servers are correctly installed. Go to: https://www.ssllabs.com/ssltest/ to find more about your SSL certificate.

If you get the warning “certificate chain is incomplete” and the overall rating is below “A+”. Try resolving the issue by installing the complete certificate chain on the respective server and check for the ratings again.
If things are done right the ratings should be increased to A+

Now your mobile application should be able to access the API over HTTPS with a domain main.
Facing any other issues related to Android applications? We would like to hear about them. Drop us a word at business@qed42.comWhile accessing an API within the Android application you might be haunted with the ‘Network Error`:
.avif "JAMStack Conference London 2019")
JAMStack Conference London 2019
Attended my first ever JAMStack conf in London last week and there is a lot I can’t wait to share. For those who are wondering what JAMStack is, it's a modern architecture for building fast, secure, and dynamic apps with JavaScript, APIs, and pre-rendered Markup, servers without web servers. For more Why and Hows, refer https://jamstack.org/.
The event was JAM-packed with designers, front-end developers, and experts around the JAMStack domain. All conversations were majorly focused on static-site generators and going serverless - how it impacts performance, cost, and business by reducing the infrastructure cost by a great deal. A great venue and welcoming people from the community, made my first experience at JAMStack conf comfortable and enthusiastic.

This being my first-ever JAMStack conf, my focus was more on interacting with people, and getting to know what are the best practices followed across the globe. Coming from Drupal background, it was pretty interesting to see how everyone is using the features of CMS and at the same time leveraging JAMStack for the end-user-facing sites. An amazing time at the conf with a pool of friendly and enthusiastic people, discussing ideas and their pain points.
Key Takeaways:
Sarah Drasner, Netlify: State of the JAMstack Nation
Sarah talked about how JAMStack changes the way we have been traditionally thinking about web apps, servers, infra, and scalability required to handle huge traffic. The talk was followed with a very convincing demo of an e-commerce site hosted statically on Netlify, built using Nuxt with Stripe integration and Lambda functions for functional points. Code reference link: https://github.com/sdras/ecommerce-netlify
Lightning Talks:
Matt Biilmann, Netlify: Netlify pushes analytics tracking live
Nelify CEO Matt Biilmann deployed analytics live tracking with Netlify during the event. This enables faster and more accurate statistics - https://twitter.com/paulmaunders/status/1148896750561873920
Knut Melvær, SanityCMS: Transforming the Json - GROQ (and Sanity CMS)
Previously available within Sanity CMS, GROQ is now open-source. The talk showcased advantages over GraphQL. A detailed article on Sanity CMS Blog - https://www.sanity.io/blog/we-re-open-sourcing-groq-a-query-language-for-json-documents
Ben Edwards, Stack bit
Ben showcased an interesting way of building JAMstack websites in minutes by combining themes, site-generators, and CMS without complex integrations. The project would generate a YML config file which will be processed by an adapter for the CMS(if supported). The adapter also covers REST APIs for the CMS.
Ives van Hoorne, CodeSandbox: Making development more visual
Shared the story of how he started with expensive servers during his college days and scaled things better by using JAMStack. How they moved from 10 users with hosting cost of 100$/month to 100K users with 100$/month. The story highlighted the speed, cost, scalability, and most importantly the offline capabilities.
Vitaly Friedman, Smashing Magazine: Smashing Magazine’s story around moving to JAMStack
With ad-blockers disrupting their business model, they decided on a new model of paid membership. The shift was a complete UX overhaul and the transition also included moving to JAMStack. In turn, the performance peaked at to load time of 1s on slower internet connections. Smashing Magazine is hosted now on Netlify and uses markdown files in Github.
Ramin Bozorgzadeh, WeWork: WeWork’s Journey to JAMstack
Ramin shared his experience around WeWork running on monoliths earlier. Which meant that if one system went down, all would. He also explained how moving to JAMStack not just allowed them to have micro-apps, but at the same time improve performance in all aspects that Google lighthouse performs checks on. Performance is directly proportional to their lead conversions was showcased via A/B tests.
Ramin also talked about their stack being based on Gatsby and how the live preview plugin helps them to preview the content before taking it live.
He concluded the talk with better sleep and vacations after the switch.
Una Kravets, Google: CSS Houdini Today
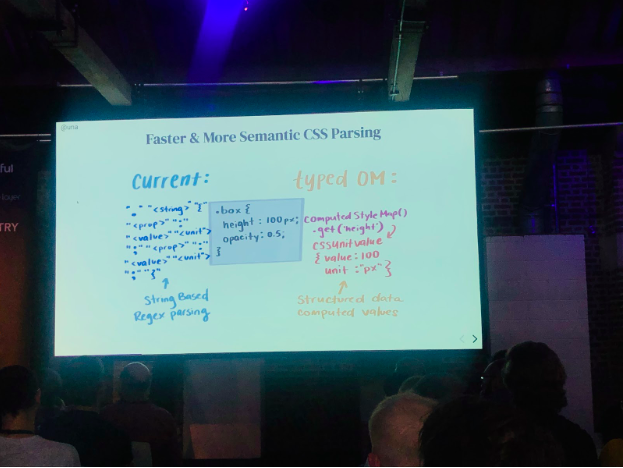
Things went to the next level and probably the most astonishing talk for me was when Una Kravets displayed the new CSS spec, Houdini. “You can write JS in CSS” - something that blew my mind.

Una talked about low-level browser APIs similar to service workers for CSS. A couple of cool demonstrations around the paint API followed, which seemed pretty impossible with CSS earlier. The talk concluded with a small library demo using features from Houdini built using Gatsby and hosted on Netlify.
Simona Cotin, Microsoft: Serverless can do that?!
Simona showcased the capabilities of Serverless in her talk. The talk revolved around evolution from web-servers to serverless: with initial servers in facilities, then in VPS and now we don’t need to manage anything. Just write our functions and the service takes care of the rest. With pay-per-use, the cost reduces immensely now, given that we are not paying for the entire web server now. This makes computing super cheap. Simona exemplified it with the use case of Squarespace where they needed 20k for 2 servers initially and still were not able to cater to huge traffic. Today, with a shift to serverless, the same cost would serve the traffic of almost 1 million requests for free, 2 million would cost ~5$ a month which is equivalent to a Starbucks coffee.
The talk answered What, Why, and How around serverless with really good and real examples.
Jake Archibald and Surma: Google Setting up a static render in 30 mins.
Jake Archibald and Surma rocked the stage with an interesting demo around reducing the TTI for an application from ~12s to 2s. The application demo involved optimizing an app similar to Minesweeper under 2G and 3G network loads. They explained how simple and important it is to write a plugin in Rollup, rather than relying on huge plugins, in cases where you don’t need a lot of features from those plugins. Optimizations during the demo included the following:
- Load visible elements first and things like animations could be loaded later making sure users don’t see a blank screen for a very long time.
- Made use of Preact which is a much smaller library compared to React.
- Optimize web font size by using google web fonts and trim their size down by only including the characters needed by the app. This trick helps reduce font-file size from 10 kb to a few bytes: https://fonts.googleapis.com/css?family=Literata&text=ABCD
- Multiple gzip compressions. Use Brotli as compression in place of gzip.
Code for the app is available here: https://github.com/GoogleChromeLabs/proxx
Conclusion
Thanks to the amazing organizing team who put together the event and the sponsors for making this event successful. Overall the event was a great learning activity for me. Meeting people and hearing from them about practices and tools used while going serverless, building rich static websites. Many experiences were gathered which I would like to take back to implementation now. Facing a problem and want to discuss why/why not around static site generators? Feel free to drop in a comment below.

State Management in React
What is State? And why do you need to manage it?
The State is an important concept in React that stores data and displays the behavior of a component. People choose different approaches for managing State in React. Let us delve into the basics of React State and different ways to manage it.
Updating the State of a component is easy. But what if you want to update it in child component? This is where it becomes tricky.
In React, State is immutable. It should not be altered directly. For updating the child component, you need to pass a function to the child as props, which will then update a parent State. It cannot be mutated directly in the child. This approach is efficient if the scope of the project is smaller. Whereas, in large project component structure (a project heavy on hierarchy), it would be a repetitive job which makes no sense.
The ultimate objective is to improve the performance of an application. As a React user, your objective is to minimize the use of State and it’s mutation.
State management can be omitted. One can build an application in a much better manner without using State management too. Here are the scenarios where people may need to manage application State:
- Updating parent State
- Maintaining the code structure of a complex project(Redux)
- Dynamic updates of components (Observables)
- Increasing performance and reduce redundant work
- Storing variables in one place(Store) enables easy access and code quality is maintained. It also makes it easy for other developers to understand project structure
- Easy Dom rendering
Tools of State management
1.Services
What is a Service?
Service is nothing but a set of functions at one place. You can store variables and functions that are needed by more than one component in the Service. Service can be accessed directly by importing it in the required components, or by providing it to a parent and passing as props to other children.
Example: This is one of the simple solutions that we have tried with to manage State instead of having other complex State management tools.
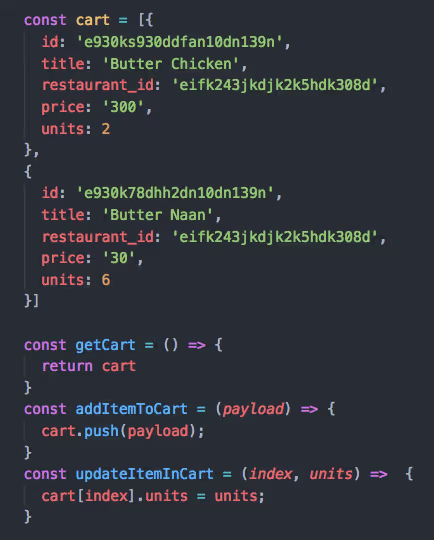
Above example contains a service consisting JSON array of an e-commerce cart with data and functions to access or update the cart.
Using Service is a good approach to maintain the component State but it also restricts the use of other React features like observables.
2.Redux
Redux is a design pattern used to structure your application. It maintains a single immutable Store and a function that returns a new State on every action.
Redux structure:
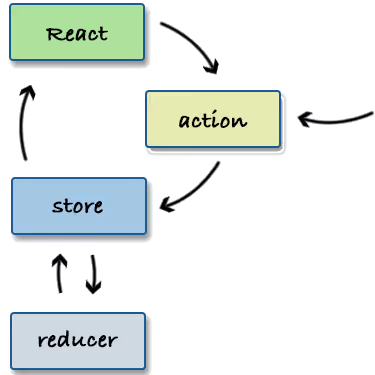
The three concepts used in Redux are:
- The Store is simple ES6 class where variables are placed.
- Actions are the user events that occur and are passed to the Reducer function as an argument.
- Reducer is a simple function which takes two input parameters as; ‘store’ and ‘type of action performed’ and mutate Store values.
The interesting part of Redux is that the changes will only affect the initiated component and respected variables from the Store. Applications without using Redux need to change everything in the component hierarchy. On the other hand, Redux mutates the Store values and reflects those variables of the Store directly in the components which are using those. It will not check the hierarchical function of components to change the State of that particular component. To learn more about Redux please refer - https://redux.js.org/introduction/getting-started
When to use Redux?
- Multiple props need to be passed to many components
- Structured code is required
- Need to store global variables in one place
- Large team looking for a maintainable code
- For complex applications
When not to use Redux?
- Projects of higher magnitudes should not use Redux since it is difficult to manage. Redux makes it more complex to handle and to understand.
- For every change made to the Store, one has to access updated Store values on UI.
3.Mobx
Mobx has two parts:
- Stores: Unlike Redux, Mobx can have multiple Stores in a project
- Observables: Store exposes observable fields and an observer which react upon changes made to the Store
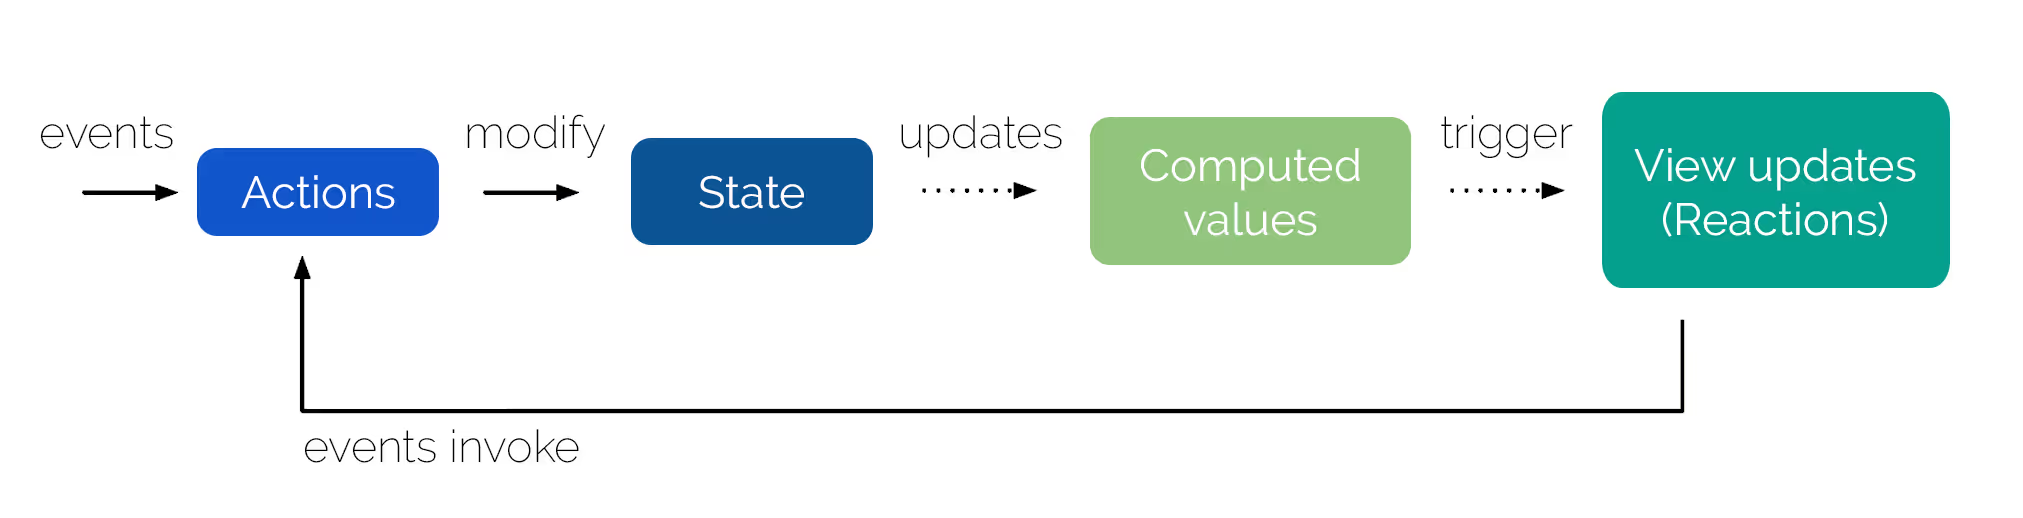
Why Mobx?
- Since data is observable, the observer will react to it automatically
- No need to manually access Store variables for the UI components
- Increases performance
- More data abstraction
When to use Mobx?
- For small and simple applications
Mobx is much easier to learn because the majority of JavaScript developers are familiar with OOP. There is a lot of abstraction in Mobx and is easy to test. To learn more about Mobx refer - https://medium.com/react-native-training/ditching-setstate-for-mobx-766c165e4578
4. Context API
Context API is used to share data between components without explicitly passing props to every level of the component tree. It is suggested to use props if a project has few levels of children.
Concepts used in Context API:
- Context Object
- Context Provider
- Context Consumer
5.Hooks
As an application grows managing Stateful components become difficult. Hooks allow us to break components into smaller functions. You can also write a custom hook. To learn more about hooks please refer - https://reactjs.org/docs/hooks-overvie
Conclusion
Complex applications lead to complex State management. Cases where multiple components need to be handled and could increase in time, you may choose any of the React State management tools. Since a simple and easy application is always desired, avoiding State management would be advised. However if in case a project needs to have component State then it needs to be handled properly. The more you care about State management the more complexities arise.
Credits
Abhay Kumar.

A Guide to Functional and Reactive Programming
New to JavaScript or need to brush up your concepts? This blog reviews the fundamentals of Functional Programming and Reactive Programming, the driving shift, what you need to know and which path is optimal for your requirements.
Functional Programming
Functional programming is a programming paradigm - Way of building a structure by composing functions to avoid change in State and mutable data.
Read more about why to use functional programming - http://bit.ly/2La6oVu
Features of Functional Programming:
- Functional programming is the process of building software by composing pure functions, avoiding shared state, mutable data, and it’s side-effects.
- They are declarative and not imperative.
What is Imperative and Declarative programming?
Imperative Programming: Type of programming which uses statements that change the current State of an application.
In this example, we have an array of objects with property names and it’s pages. Here we are using the for loop for iterating over an array, to add a new key - lastread with a date and display it on the console. Iterating this array using the for loop we are explicitly describing the logic to change the State.
Declarative Programming: Type of programming which expresses the logic of a computation without describing its control flow.

In this example, we have the same array of objects. Here we are using the map() function instead of for loop for iterating over the array. map() inbuilt iterates over an array and adds a new key which is displayed over the console. This program focuses on building the logic of software without actually describing its flow.
- Functional programming does not have any side effects because they are pure functions.
- Functional Programming distinguishes between pure and impure functions.
5 Concepts of Functional Programming:
- Pure Function
- Side Effects
- Shared State
- Immutable Data
- Function Composition
1. Pure Function - To understand what pure functions are let us compare them with impure functions. A pure function is a function which gives the same output for the same input arguments. Whereas an impure function is a function which gives a different output for the same input argument.

- sum() function has 2 parameters and it returns the addition of these parameters.
- It does not depend on any State, or data changed during a program’s execution. It only depends on its input arguments.
Impure function
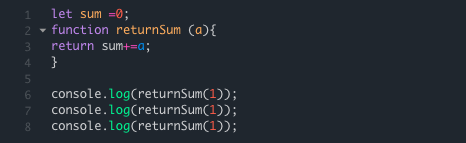

- In the example, we have declared a variable - sum outside the function, and are adding that variable with the function's parameters.
- When we call the returnSum() function with the same argument it always returns a different output.
- In this impure function example, the variable sum is a side effect for that function.
2. Side Effect - Side effects may include I/O(input/output), modifying a mutable object, reassigning a variable, etc. Side effects are avoided in functional programming, which makes the effects of a program much easier to understand, and to test.
Functional programming does not have any side effects. It uses pure functions and pure functions are always side effect free. It does not depend on any State, or data change during a program’s execution. It only depends on its input arguments.
3. Shared State - What is a State? State is the attribute of a component at a given time.
Example - Consider, the strength of an office is 100 employees. At a given time there are only 50 employees present. So, the State of the office is 50 people.
Shared State is a State which is shared between two or more functions or components.
Example - A joint bank account shared between 2 people with the balance amount being 50,000/- rupees. This is a State. The 2 people are the components. If 1 person withdraws money from the bank, the updated amount will be reflected in the components. Therefore, the shared State is affecting the State of both components.
Thus, Functional programming avoids shared State.
4. Immutable data - Immutable means unchangeable.
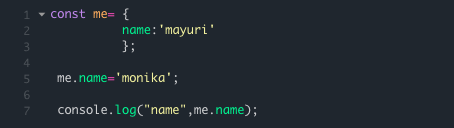

- We are using const in this example, const does not make our object immutable.
For making an object immutable we have to use an Object.Freeze() function. Object.freeze() is used to freeze objects.
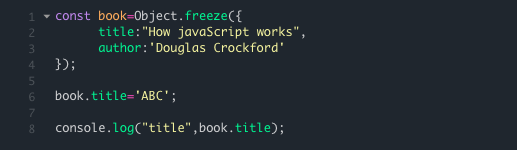

A frozen object can no longer be changed. Properties can’t be added or deleted. So, the object becomes immutable. There are 2 methods for changing the properties of immutable data:
Object.assign() - In this function, we create a new object and clone the properties of the old object with changed properties/values.
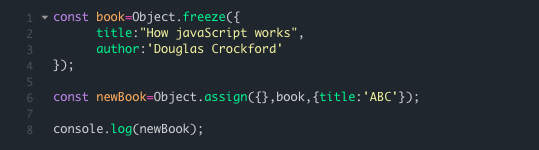

spread operator{...} - The 3 dots are the spread operator.
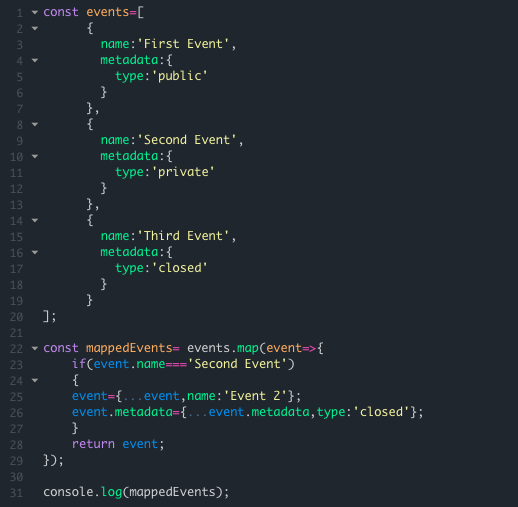
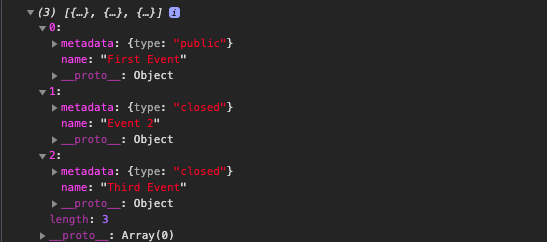
5. Function Composition - Function composition is a mathematical concept that allows us to combine two or more functions into a new function.
Example: f(g(x))
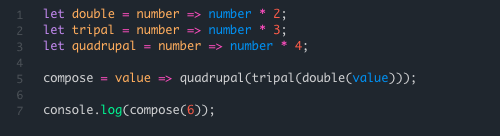

- Here we have four functions, the output of one function is used as an input for another function.
- When we call compose() function with parameter we get a cumulative output for all functions.
We use higher-order functions for the function composition. A higher-order function is a function that accepts other functions as an argument or returns a function as a return value. The best example of higher-order functions in JavaScript is that of Array.map(), Array.filter(), Array.reduce().
- map()- transforms an array by applying a function to all of its elements and returns a new array as an output.
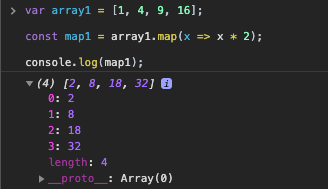
- filter()- is used for filtering an array.
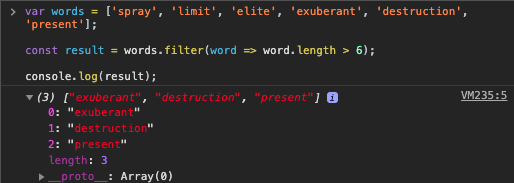
- reduce()- builds value by repeatedly taking a single element from the array and combining it with its current value. When adding numbers, it starts with zero and adds that to the sum.
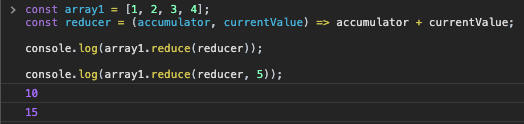
Reactive Programming
Reactive programming is mainly concerned with asynchronous data streams.
Example: HTTP requests, or multiple repeatable actions (like keystrokes or cursor movements)
Observable, Observer, and Subscriber are the concepts of Reactive Programming.
Stream - A stream is a sequence of ongoing events ordered in time. It can be anything like variables, user inputs, properties, data structures, etc. It can emit three different things: a value (of some type), an error, or a 'completed' signal.
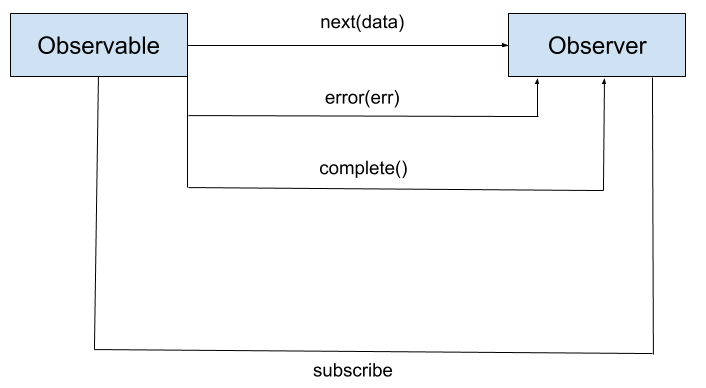
Observable, Observer, and Subscription:
- An observable is a function that produces a stream of values to an observer over time.
- When you subscribe to an observable, you are an observer.
- An observable can have multiple observers.
- An observable is a wrapper around a stream of values.
- They are lazy. They emit functions only when a value, error or complete signal is passed.
- They do not start producing data until we subscribe to it.
- An observer subscribes to the observable by calling the subscribe() method.
- Observables emit data and send it to the observer.
- Once again, observers read values coming from an observable.
- An observer is simply a set of callbacks that accept notifications coming from the observer, which include: next, error, and complete
Conclusion
One can use Functional programming or Reactive programming. It depends on the application you want to build and its requirements. Functional programming paradigm is built upon the idea that everything is a pure function. Reactive programming paradigm is built upon the idea that everything is a stream observer and observable philosophy.