All blogs

AI in Drupal: a focused guide to practical implementation
Slowdowns happen across teams. Editors rewrite content. Developers repeat code. Marketers wait on creatives. What if your Drupal site could take on some of that work?
Drupal AI gives you that option. It adds tools inside the CMS so teams can draft, review, generate, and automate without leaving Drupal. You can connect to providers like OpenAI, Anthropic, or Google Gemini, or run open-source models on your own.
This blog walks through how Drupal AI works, the modules it offers, and how teams who build, write, review, or manage can start using it right away.
What is the Drupal AI Framework?
Drupal AI is more than a module; it’s a complete framework for adding AI capabilities to your Drupal site. It simplifies how you connect with different AI services, making it easy to use providers like OpenAI (ChatGPT, DALL·E), Anthropic (Claude), Google Gemini, and Hugging Face.
It also works well with open-source models hosted on platforms like Ollama, LMStudio, and Hugging Face, giving teams flexibility and control over where and how their data is processed.
Why should you care?
- For Clients: Enhances user experience, and improves SEO, while automating repetitive tasks.
- For Marketers & Sales Teams: Creates content faster, scaling multilingual effortlessly.
- For Developers & Site Builders: Creates powerful apps without worrying about complicated setups.
- For Administrators: Simplifies workflows, along with making your site smarter with minimal effort.
Key Features of Drupal AI Modules
- AI Core: a foundation that connects any AI provider
- AI Explorer: safe space to test prompts and outputs
- AI Automators: automate field population, data extraction, and workflows
- AI Search: semantic and RAG-powered search for better discovery
- AI Assistants and Chatbots: configurable chat interfaces
- AI CKEditor: in-editor help for grammar, tone, and translations
- AI Content Tools: auto alt-text, taxonomy suggestions, moderation checks
- AI Translate: one-click multilingual content
- AI Logging and Validation: auditing and validation features
Let’s get deeper into what makes the Drupal AI framework so versatile and powerful:
1. Unified framework for multiple AI providers
The core strength of the Drupal AI framework lies in its abstraction layer. This enables seamless integration with third-party AI providers such as:
- OpenAI (ChatGPT, DALL-E)
- Anthropic (Claude)
- Google Gemini
- Hugging Face
- Mistral , Fireworks , and many others.
Additionally, you can host open-source models using platforms like Ollama, LMStudio, and Huggingface, giving you full control over data privacy and security.
2. Submodules tailored to your needs
The Drupal AI framework includes submodules designed for various roles and needs:
AI core
This acts as the foundation, allowing modules to swap out any model they need. It ensures flexibility and scalability for future-proof solutions.
AI explorer
An admin interface where you can experiment with text generation prompts. Perfect for testing ideas before implementing them on your live site.


AI automators
Automate tasks like populating fields, scraping websites, extracting text from files, and chaining workflows. These automators are ideal for creating dynamic AI-powered applications.

AI search
Transform traditional search functionality with semantic search powered by AI. Use Retrieval Augmented Generation (RAG) techniques to provide context-aware results directly from your content database.

AI assistants API + chatbot
Configure chatbots tailored to your needs. Integrate these bots into your site to answer queries, guide users, or perform searches intelligently.
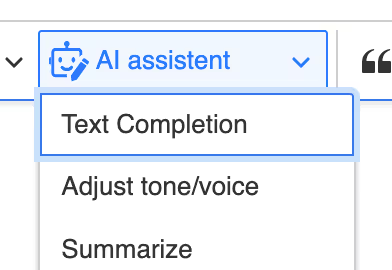
AI CKEditor

Add an AI assistant within CKEditor 5 for spell checks, translations, tone adjustments, and summarizations—all at the click of a button.
AI content
Streamline content creation with features like tone adjustment, taxonomy suggestions, moderation checks, and automatic alt-text generation for images.

AI validations
Works with field_validations so you can use AI/LLM prompts to validate text.

AI logging
Keep track of all AI requests and responses for auditing purposes.

AI translate
Enable one-click translations for multilingual sites, ensuring global reach without manual intervention.

How different personas can benefit
For clients: elevate your website’s capabilities
As a client, you want your website to stand out and deliver exceptional value to visitors. With the Drupal AI framework, you can:
- Generate high-quality content automatically.
- Improve accessibility with AI-generated alt texts.
- Offer intelligent search functionalities that understand user intent.
For marketers & sales teams: drive engagement and conversions
Marketers will love how easy it is to leverage AI for their campaigns:
- Automatically generate SEO-optimised content.
- Easily run campaigns in multiple languages.
- Provide instant support through AI-powered chatbots.
For developers & site builders: build smarter applications faster
Developers can focus on innovation rather than wrestling with APIs:
- Integrate multiple AI services without juggling keys.
- Extend the functionality with custom automation and workflows.
- Experiment with pre-built modules like AI Agents and Recipes.
For administrators: simplify operations
Administrators gain peace of mind knowing they have:
- Centralised logging for transparency.
- Flexible configurations for various AI-powered features.
- Tools to ensure compliance with moderation checks.
Extending AI capabilities with contributed modules
One of the standout aspects of the Drupal AI framework is its extensibility. There are numerous contributed modules already available that integrate seamlessly with the AI framework to extend its capabilities.
Here’s a closer look at some additional modules and recipes that enhance the functionality of the Drupal AI framework:
- AI Agents & evaluations recipe: Provides agents in a Chatbot UI where you can ask them to manipulate the website. It also includes an evaluation framework, allowing you to rate and export responses for further optimisation of prompts.
- AI image Alt text: Adds a button to automatically generate alt text for images, improving accessibility and SEO.
- AI summarise document: An AI CKEditor plugin that summarises PDF documents, making it easier to extract key insights from lengthy files.
- Auto translation: Automates translations, ideal for multilingual websites.
- AI SEO: Offers SEO analysis directly within the node view, helping you optimize content for search engines.
- AI image: Enables image generation (using DALL-E, Stable Diffusion, or other models) directly in CKEditor. A version of this module supports the AI framework.
- AI media image: Allows for image generation directly into the media library, streamlining workflows for content creators.
- ECA and widgets: Extend functionality further by creating complex workflows or embedding helpful AI widgets inside your content.
- AI translation management: Integrates with the Translation Management module (TMGMT), using the AI framework as a translation provider.
- ai.txt: Facilitates communication with data miners, enabling advanced data extraction and processing.
These modules and recipes demonstrate the flexibility of the Drupal AI framework, empowering developers and site builders to tailor AI-powered solutions to their specific needs.
Real-world examples of the Drupal AI framework in action
Example 1: CKEditor assistant
Imagine having an assistant inside your editor that suggests improvements, corrects grammar, and translates text instantly. That’s exactly what the AI CKEditor submodule does!
Example 2: Multilingual translations
With the AI Translate submodule, translating entire pages becomes as simple as clicking a button. Ideal for businesses targeting international audiences.
Example 3: AI-Powered validations
Use AI prompts to validate form inputs, ensuring accuracy and reducing errors.
Getting started with the Drupal AI framework
Ready to harness the power of AI? Here’s how to get started:
- Install the AI Framework: Download it from Drupal.org.
- Set Up Keys: Use the Key module to manage API credentials securely.
- Choose Submodules: Select the ones relevant to your project goals.
- Experiment with AI Explorer: Test prompts and workflows before deploying.
- Extend Functionality: Leverage additional modules like AI Agents or AI Images for specialised tasks.
Conclusion
The way we build digital experiences has changed. What used to be side experiments is now part of everyday work inside Drupal. From drafting to translations to search, it all happens in the CMS without extra tools or lock-in. The result is less waiting, less rework, and more time for teams to focus on what actually moves projects forward.
FAQs
What AI modules does Drupal offer?
Drupal AI includes core modules like Explorer, Automators, Search, CKEditor, Translate, and contributed modules such as AI Agents, SEO, and Media integrations.
What are the benefits of AI modules in Drupal?
They save time, improve accuracy, enable multilingual publishing, and bring intelligent features like semantic search and validations into the CMS.
Can you create an AI assistant in Drupal?
Yes. The AI Assistants API and chatbot module let you build assistants to answer queries, support users, and guide navigation. Link the phrase See Drupalize.me’s guide to: https://drupalize.me/blog/drupal-ai-how-set-it-and-try-it-out
Is it possible to use open-source AI models with Drupal AI?
Yes. The framework supports self-hosted models via Ollama, Hugging Face, and LMStudio for teams that prioritise data privacy and control.

Visualizing data in Drupal with highcharts
Data visualization adds meaning to numbers and trends, simplifying the reading of difficult sets of data. Picture a Drupal site showing raw statistics—without visualization, the statistics could be daunting.
Highcharts, an adaptable JavaScript charting library, converts that data into dynamic and interactive charts, making patterns stand out and insights deeper.
Consider a nonprofit tracking donations over the years, a university mapping student composition, or the newsroom display of election votes. All become effortless, dynamic, and helpful with Highcharts embedded in Drupal. Users get to interact, analyze trends, and even spot real-time results—all within website content.
This blog steps through the process of how to integrate Highcharts with Drupal, from initializing the required modules through to displaying customized charts that flex to suit your data requirements.
Highcharts
Highcharts make complex data more approachable by transforming numbers into interactive visuals that are easy to grasp.
These charts help users spot patterns and make informed decisions without sifting through raw data.
Types of Charts
- Line Charts: useful for tracking progress over time, such as website traffic or monthly revenue.
- Bar Charts: great for comparing different categories, like sales performance across multiple regions.
- Pie Charts: show proportions at a glance, such as how different marketing channels contribute to conversions.
- More: scatter plots, area charts, and a range of advanced options offer even deeper insights.
Here are some specific issues it addresses:
- Enhanced data visualization: Drupal websites often need to display data meaningfully. Highcharts provides a wide variety of chart types that can be embedded directly into Drupal content, making it easier to represent data visually.
- User engagement: Interactive charts can significantly enhance user engagement on a Drupal site. Highcharts allow for interactivity such as tooltips, zooming, and clickable data points, making data more engaging and easier to explore for users.
- Real-time data display: For Drupal sites that need to display real-time data (e.g., financial data, live event statistics, IoT data), Highcharts can dynamically update charts without needing to reload the entire page, providing a seamless user experience.
- Custom reporting: Organizations using Drupal often need to generate custom reports. Highcharts can be used to create customizable charts and graphs that can be embedded in these reports, offering a visual representation of data that is easy to understand.
- Responsive design: Highcharts are designed to be responsive, meaning charts will look good on any device, whether it's a desktop, tablet, or smartphone. This is particularly important for Drupal sites that need to provide a consistent experience across different devices.
- Data exporting: Highcharts include features that allow users to export charts to various formats (like PNG, JPEG, PDF, SVG), making it easy to include these visualizations in external documents or presentations directly from the Drupal site.
By solving these problems, Highcharts enhances the data visualization capabilities of Drupal, making it a powerful tool for any website that needs to present complex data clearly and engagingly.
Highcharts In Drupal
- The Highcharts module is a Drupal API that integrates with the Highcharts JavaScript library.
- It includes functions to load appropriate library files and initialize and render multiple Highchart charts. It enhances performance also and reduces the Server load
- Line charts: To show trends over time.
- Bar charts: To compare different groups or categories.
- Pie charts: To show the proportions of a whole.
- More: There are also scatter plots, area charts, and many other types.
How to configure the highcharts module in the Drupal site?
- Adding data: You have data you want to show on your Drupal website, like sales figures, survey results, or event attendance over time.
- Creating charts: Highcharts can turn this data into visual charts that make it easier to see patterns, compare values, and understand the information at a glance.
- Embedding in content: These charts can be embedded into pages, articles, or reports on your Drupal website.
Pie, Line, Bar, Column, Area, or Scatter charts all charts are available using the charts module
Step-by-step guide
Step 1: Install the required modules
- Install the charts module:
- Download and enable the Charts module from Charts(https://www.drupal.org/project/charts)
- Download and enable the Charts module from Charts(https://www.drupal.org/project/charts)
- Install the required library:
- The Charts module supports multiple libraries like Highcharts, google_charts, etc.
- Download highcharts.js from the official highcharts website.
- Extract the highcharts.js library into the libraries directory in your Drupal root. The path should be libraries/highcharts.
Step 2: Configure and enable the charts module
Step 3: Create a view
- Create view
- Go to structure > Views > Add view.
- Name your view
- Choose to show the content of the type you want to chart (e.g., Articles).
- Select the "Table" format for now.
- Click Save and edit.
- Add fields to the view:
- In the view configuration, add the fields that you want to include in your chart.
- For example, add "Content: Title" and "Content: Created date" fields.
- Change the format to chart:
- In the view configuration, click on the Format settings.
- Change the format from "Table" to "Charts".
- Configure the chart settings:
- Type: Column
- X-axis: The field that represents the categories (e.g., Content: Title).
- Y-axis: The field that represents the data values (e.g., count or sum of values).
- Save the View
Step 4: Create a block using the view
- Create a block display:
- In the view configuration, add a new display type by clicking Add > Block.
- Configure the block display settings as needed.
- Configure the block display format:
- Ensure the block display format is set to Charts.
- Configure the chart settings
- Type: Column
- X-axis: The field that represents the categories (e.g., Content: Title).
- Y-axis: The field that represents the data values (e.g., count or sum of values).
- Save the View
Step 5: Place the block
- Place the Block:
- Go to Structure > Block Layout.
- Find the region where you want to place the block and click Place block.
- Search for the view block you created, click Place block, and save the block configuration.
Step 6: Test the block
- Navigate to the page
- Navigate to the page where your block is displayed.
- You should see the column chart rendered with the data from your view.
By following these steps, you can create a column chart in Drupal 9 using a block without writing any custom code. The Charts module, combined with Views, provides an easy way to visualize your data in various chart formats.
Some charts, such as radar, stacked column, group bar, tree, and box plot charts require custom code instead of Views.
Here are some steps on how to create custom charts using external libraries.
Create a custom module
- Add required files like .info.yml, libraries.yml, .module, etc…
- Need to install some required external libraries via composer in the libraries folder
- Add those libraries and dependencies in the libraries.yml file
- /libraries/highcharts/highcharts.js: {}
- /libraries/highcharts_more/highcharts-more.js: {}
- /libraries/highcharts_exporting/exporting.js: {}
- /libraries/highcharts_export-data/export-data.js: {}
- /libraries/highcharts_accessibility/accessibility.js: {}
- /libraries/highcharts_3d/highcharts-3d.js: {}
- Create a custom block: ‘/src/Plugin/Block/’
- In that custom block, we need to get the data that we want to show in the chart
- Attached the library
- Pass the variables to drupalSettings
- Create a js file in the js folder: ‘/js/’
- Get all the variables in js using the drupalSettings syntax
- Then need to write JS code for the chart
- i.e: Column stacked chart
- We can get the js series code from https://www.highcharts.com/demo/highcharts/column-stacked
- Also, we can get the other charts example from here: https://www.highcharts.com/demo/highcharts
- Check the codepen and understand how to display highcharts using custom code.
- Create block twig and add HTML div class for showing highcharts (Check example from below highcharts demo link)
We can get more examples check and test the highcharts from this link: https://www.highcharts.com/demo and implement as per our requirements.
Conclusion
Merging Highcharts with Drupal converts raw data into understandable, interactive visualizations that make users' interactions with information more effective.
A nonprofit can provide trends in donations over a while, making fund-raising more open. A university can display enrollment data, enabling stakeholders to comprehend demographic changes. A news website can provide up-to-date election results, keeping viewers informed in an entertaining manner.
By using the steps in this blog, you can easily integrate Highcharts into your Drupal site so that data can be interacted with instead of merely displayed. With multiple types of charts and options for customization, Highcharts allows you to easily create visuals that meet the particular requirements of your project—be it a basic line graph or an advanced interactive dashboard.
As data is presented in a way that means something, it is no longer simply numbers—it is now a narrative that people can relate to and comprehend instantly.

Migrating relational data into Drupal paragraphs
In our last blog, we covered how to migrate data from a MySQL database into Drupal. That approach went without a hitch when transferring data from one source table into Drupal's content types. We're now considering another scenario—when connected data is stored in several tables.
Consider a recipe as an example, one table may be used to store the title and description, while another stores multiple rows of ingredients for the recipe, each row with information such as ingredient name and quantity. Such relational design is good for storage but makes it difficult for managing content when pieces that are related need to be displayed together.
In Drupal, we try to condense this dispersed, composite data into one using paragraphs. Paragraphs provide a malleable solution, enabling us to package complicated data, such as an ingredient list with its additional attributes into a single unit. These paragraphs are subsequently linked to the parent recipe content type, collating all the ingredients with their information into one convenient piece per recipe.
To do this, we take two key steps:
- Restructuring one-to-many relationships using SQL so that all related data appears in a single row
- Using Drupal’s Migrate API and the entity_generate plugin to create paragraph entities
This blog builds on the previous migration process, showing how to organize and structure data for a smooth transition into Drupal.
Part 1: Combining related data with MySQL
During migration of content into Drupal, data has to be restructured.
Take recipes, for instance. In MySQL, the details of a recipe may be stored in one table and the ingredients in another, connected by Recipe ID.
This is fine in a relational database but must be modified for Drupal, where each recipe would have its ingredients as paragraph items.
If migrated straight, each ingredient is still stored separately but the ingredient usage information is unique to a recipe.
Understanding the data structure:
Assume two tables:
1. Recipe Table: Contains basic information about each recipe.
2. Ingredients Table: Lists ingredients associated with each recipe.
The goal is to migrate this data into a Drupal content type called "Recipe," where each recipe's ingredients will be stored as individual paragraph items.
Creating the migration query
Now that we understand the data structure, the next step is writing a migration query that consolidates recipe details and their related ingredients into a format Drupal can work with.
Since the ingredients are stored separately in a one-to-many relationship, a direct migration won’t group them under the same recipe. To fix this, we need to write a MySQL query that pulls all ingredients for each recipe and presents them as structured data.
To do this, we’ll create a source database plugin for the Recipe content type in Drupal. This plugin will ensure that:
- Each recipe remains a single content entity
- Ingredients are grouped correctly as paragraph items within the recipe
Let’s dive into the query structure and see how we can transform the data for Drupal’s migration process.
Step 1: Querying the recipe table
We start by selecting fields from the recipe table
/**
  * {@inheritdoc}
  */
 public function query() {

   // Source data is queried from 'recipe' table.
   $query = $this->select('recipe', 'r')
     ->fields('r', [
       'RecipeId',
       'Name',
       'Description',
       'Status',
       'Created',
     ]);


   return $query;
 }
Step 2: Joining the ingredients table
Next, we perform a left join with the ingredients table to associate ingredients with their respective recipes:
/**
  * {@inheritdoc}
  */
 public function query() {


   // Source data is queried from 'recipe' table.
   $query = $this->select('recipe', 'r')
     ->fields('r', [
       'RecipeId',
       'Name',
       'Description',
       'Status',
       'Created',
     ]);

   // Left join ingredients table.
   $query->leftJoin('ingredients', 'i', 'i.RecipeId = r.RecipeId');


   return $query;
 }
Step 3: Using GROUP_CONCAT to consolidate data
Since multiple rows for ingredients exist for each recipe, we can use MySQL's GROUP_CONCAT function to concatenate ingredient names and quantities into single strings
/**
  * {@inheritdoc}
  */
 public function query() {


   // Source data is queried from 'recipe' table.
   $query = $this->select('recipe', 'r')
     ->fields('r', [
       'RecipeId',
       'Name',
       'Description',
       'Status',
       'Created',
     ]);

   // Left join ingredients table.
   $query->leftJoin('ingredients', 'i', 'i.RecipeId = r.RecipeId');
   $query->addExpression("GROUP_CONCAT(i.IngredientName SEPARATOR '|')", 'IngredientName');
   $query->addExpression("GROUP_CONCAT(i.Quantity SEPARATOR '|')", 'Quantity');


   return $query;
 }
Expected output
The output of this query will yield a single row for each recipe along with its associated ingredients:
Part 2: Generating paragraph entities using entity_generate
Structuring data into Drupal paragraph entities
Now that we’ve used SQL’s GROUP_CONCAT to combine recipe and ingredient data into a single row, the next challenge is migrating this structured data into Drupal.
Unlike taxonomy terms or basic entity references, paragraphs in Drupal require both an entity ID (target_id) and a revision ID (target_revision_id). This adds a layer of complexity to the migration process.
Why are paragraphs tricky
Drupal paragraphs are revisionable identities, so they record changes over time. In contrast to regular entity references, paragraph migrations involve handling both:
target_id: The paragraph entity's unique ID
target_revision_id: The ID of the particular revision being referenced
Having both requirements doubles the complexity. The traditional approach tends to need a two-step process—first creating paragraph entities and then referencing them to their parent content.
Without both IDs being handled properly, references will be broken, and we end up with missing or uneditable content.To ensure that this migration is smooth, we require a systematic approach that builds paragraph entities with proper references.
Let's dissect how we can do it using Drupal's Migrate API.
Solution: Generate paragraphs during parent migration
To streamline the migration process, we can use the entity_generate plugin from the Migrate Plus module.
This allows us to create paragraph entities dynamically while migrating the parent Recipe node—eliminating the need for a separate preprocessing step.
With this approach, we can:
- Generate paragraph entities during the migration process
- Automatically link them to the correct recipe using target_id and target_revision_id
- Ensure the structured data remains intact in Drupal
This method simplifies the migration workflow, reducing manual steps and ensuring a clean, structured import. Let’s walk through how to implement it in the migration configuration.
Step 1: defining fields in prepareRow
In the migration’s prepareRow method, set the concatenated fields as an array to ensure correct formatting for processing into paragraph entities.
/**
  * {@inheritdoc}
  */
 public function prepareRow(Row $row) {


   // Prepare Recipe ingredients fields.
   $recipe_ingredients_fields = [
      'IngredientName',
     'Quantity',
   ];
   $row->setSourceProperty('RecipeIngredientsFields', $recipe_ingredients_fields);


   return parent::prepareRow($row);
 }
Step 2: Structure data for paragraphs
A custom process plugin transforms these arrays into a format compatible with paragraphs:
<?php


namespace Drupal\test_migrate\Plugin\migrate\process;


use Drupal\migrate\MigrateExecutableInterface;
use Drupal\migrate\ProcessPluginBase;
use Drupal\migrate\Row;


/**
* Recipe Ingredient mapping.
*
* @MigrateProcessPlugin(
*   id = "recipe_related_table_fields_aggregator",
*   handle_multiples = TRUE
* )
*
* @package Drupal\test_migrate\Plugin\migrate\process
*/
class RecipeRelatedTableFieldsAggregator extends ProcessPluginBase {


 /**
  * {@inheritdoc}
  */
 public function transform($value, MigrateExecutableInterface $migrate_executable, Row $row, $destination_property) {


   $recipe_related_fields = [];


   foreach ($value as $field_name) {


     $field_values = explode("|", $row->getSourceProperty($field_name));


     foreach ($field_values as $key => $field_value) {
       $recipe_related_fields[$key][$field_name] = $field_value;
     }
   }


   return $recipe_related_fields;
 }
}
The custom process plugin converts concatenated fields like:
'Flour|Sugar|Cocoa Powder|Baking Powder', '2 cups|1 cup|1/2 cup|1 tsp'
Into an array format as follows:
[
   0 => [
       'IngredientName' => 'Flour',
       'Quantity' => '2 cups',
   ],
   1 => [
       'IngredientName' => 'Sugar',
       'Quantity' => '1 cup',
   ],
   2 => [
       'IngredientName' => Cocoa Powder,
       'Quantity' => '1/2 cup',
   ],
   3 => [
       'IngredientName' => Baking Powder,
       'Quantity' => '1 tsp',
   ],
]
Step 3: Generate paragraphs with entity_generate
In the migration YAML, use sub_process and entity_generate to create paragraphs and reference them in the Recipe node:
process:
 _recipe_ingredients:
   plugin: recipe_related_table_fields_aggregator
   source: RecipeIngredientsFields
 field_ingredients:
   - plugin: sub_process
     source: '@_recipe_ingredients'
     process:
       _ingredient_name: IngredientName
       _quantity: Quantity
       target_id:
         plugin: entity_generate
         source: IngredientName
         entity_type: paragraph
         bundle: recipe_ingredient
         value_key: field_ingredient_name
         bundle_key: type
         values:
           field_ingredient_name/0/value: '@_ingredient_name'
           field_quantity/0/value: '@_quantity'
       _revision_id_value:
         plugin: entity_value
         source: '@target_id'
         entity_type: paragraph
         field_name: revision_id
       target_revision_id: '@_revision_id_value/0/value'
Breaking down the migration: how everything comes together
Turning a concatenated string into structured data: recipe_related_table_fields_aggregator
A recipe’s ingredients might be combined into a single string using GROUP_CONCAT:
"Flour|Sugar|Cocoa Powder", "2 cups|1 cup|1/2 cup"
Since Drupal paragraphs need each ingredient as a separate entry, this custom process plugin restructures the data into an array, making it ready for migration:
[
['name' => 'Flour', 'quantity' => '2 cups'],
['name' => 'Sugar', 'quantity' => '1 cup'],
['name' => 'Cocoa Powder', 'quantity' => '1/2 cup']
]
Processing each ingredient separately: sub_process
Drupal 9+ replaced the iterator plugin with sub_process, which iterates over the structured ingredient list and processes each one individually.
Instead of treating all ingredients as a single text field, this step ensures each ingredient is handled as a separate paragraph entity.
Generating paragraphs on the fly: entity_generate
Rather than migrating paragraphs separately, the entity_generate plugin from Migrate Plus dynamically creates paragraph entities as part of the parent migration. It:
- Assigns each ingredient to a paragraph bundle (e.g., ingredient)
- Maps the ingredient name and quantity to their respective fields
- Returns the target_id (paragraph entity ID) for linking
Linking paragraphs to recipes: target_id and target_revision_id
Once the paragraphs are created, they need to be connected to the correct Recipe node.
- target_id: The unique ID of the paragraph entity, automatically assigned when saved.
- target_revision_id: Since paragraphs track changes over time, this ID ensures the correct version of each paragraph is referenced. It’s handled using the entity_value plugin, which fetches the latest revision.
Bringing it all together
By combining these components, the migration process turns relational data into structured Drupal content, while each ingredient is linked to its recipe as a separate paragraph, keeping everything organized and easy to manage.
Conclusion
Moving relational data into Drupal paragraphs becomes complicated when working with revisionable entities requiring both target_id and target_revision_id. If done incorrectly, the references are broken, and content structures are inconsistent.
A more efficient method? Reshape the data up front. Employing SQL methods such as GROUP_CONCAT, we bring together related data in one row for easier manipulation.
Afterwards, Drupal's Migrate API and the entity_generate plugin continue the job, dynamically generating paragraph entities and referencing them back to their parent recipes—all in one organized workflow.
This method is seamless, effective, and simple to manage. Rather than migrating paragraphs separately, it is all done in one pass.
In my experience, this minimizes errors and keeps content organized, editable, and ready for future modifications. With the proper approach, even intricate relational data slots easily into Drupal's paragraph system, making it a solid option for dynamic content management.

So, we went to a Drupal meetup

After joining QED42, we kept hearing about Drupal meetups—what they were like, who showed up, and what kind of conversations happened there. And then, eventually, we walked into one.
A room full of people who care about this open-source tech at an almost unreasonable level.
Well, we were there for a few reasons. To listen. To learn. To see if Drupal, AI agents, Recipes, and Distributions are as interesting in conversation as they sound in documentation. Spoiler: they are!
First impressions
Walking into our first Drupal Meetup, we stepped into a space filled with developers, designers, and open-source enthusiasts.
Conversations sparked over coffee, ideas flowed, and within minutes, we weren’t just attendees anymore—we were part of the conversations, part of the momentum—loved it.
Drupal — more than a CMS
Yes, AI is a big deal right now and we love everything about it too, but what really stood out at the meetup was the people. The energy, the passion, the way everyone brought something to the table—it’s what makes Drupal and any tech community what it really is.
That’s the real hook that keeps people coming back to these meet ups. Maybe it’s also the modularity, the way Drupal CMS lets you shape content however you want. Maybe it’s the Entity System, which doesn’t just store content but structures it in ways that make scaling easy.
Or maybe it’s the fact that Drupal isn’t just for websites anymore. It powers applications, manages content across platforms, and handles workflows that most CMS platforms can’t or the fact it's always evolving, accepting changes and being relevant with what people really need today.
So that being said, Drupal is more than a CMS. It’s a way of thinking. A way of building. A way of solving problems.
And behind that? Thousands of people. The energy they bring into the room is something you have to experience firsthand.
A focus on discussions

1.AI agents in Drupal: What’s actually happening?
AI is everywhere. But the real question is: how is it being used in Drupal?
The discussion around AI agents wasn’t about hype—it was about real implementation. Things like:
- Chatbots that go beyond basic automation and understand user intent.
- Personalized content that adjusts dynamically based on user behavior.
- Automated moderation that filters content efficiently, reducing manual work.
AI isn’t something that might be useful in the future. It’s already here. The only question is how far teams will take it.
2.Drupal recipes and distributions: Because no one likes starting from scratch
Abishek Mazumdar (Drupal and Mautic Engineer at Dropsolid) walked us through Drupal Recipes and distributions, which, in simple terms, make building a Drupal site feel less like setting one up from scratch.
- Recipes – Prebuilt configurations that developers can drop into a project to speed things up.
- Distributions – Full pre-packaged versions of Drupal with everything set up for specific industries (publishing, community platforms, etc.).
If you’ve ever spent hours setting up Drupal from scratch, you understand why this matters.
Not to be redundant—but the people make all the difference
Drupal has been around for years, and there’s a reason it continues to thrive. It’s not just the software (while that’s great too). It’s the community.
The best part of the meetup wasn’t the talks. It was the conversations in between—people sharing real experiences, problems they’ve solved, things they’re still figuring out.
The kind of knowledge you don’t get from documentation.
Final thoughts
We left with a better understanding of Drupal’s future, AI’s role in content management, and why meetups like this are worth attending.
If you’re working with Drupal, thinking about it, or just curious—go to a meetup. It’s where ideas turn into projects, and where open-source really comes to life.
Thank you for reading!

Migration from a MySQL source database in Drupal
Moving a MySQL database in Drupal is about keeping everything structured while upgrading, switching servers, or merging databases.
A well-planned approach ensures a smooth and well-executed transition.
Preparation is key:
- Backup the data to keep everything secure.
- Understand the database structure to map fields correctly.
- Choose the right migration method based on the site's needs. Some databases work with a simple export/import, while others benefit from structured migrations.
Drupal provides tools like Drush and the Migrate API to simplify the process. The right approach depends on the site's size, structure, and hosting environment.
With careful planning and the right tools, the migration process keeps everything intact and running smoothly.
Let us walk through the key steps to ensure a seamless transition.
Understanding the source data
Before migrating, take a close look at the database. Check how tables are organized, how they connect, and where different fields come from. A clear database map helps everything move smoothly.
Start by identifying tables, primary keys, and relationships. Some data, like user accounts and content, is easy to migrate, while others—like custom fields, revisions, or module-specific tables—might need extra attention.
Look at the code and configurations to see where certain data is stored. If custom modules save information in unique ways, noting these details early makes the migration process easier.
Finally, match the source tables with Drupal’s content types, users, taxonomy, and configurations. This ensures everything ends up in the right place, keeping the site running as expected.
Setting up the migrate source database
Since the data is coming from a MySQL database, Drupal’s database source plugin allows for direct migration.
To get started, the source database needs to be added to Drupal’s configuration, ensuring that the migration process has access to both the original and destination databases.
This setup involves defining key details such as the database name, username, password, host, and driver. Once these details are configured, Drupal can connect to the source database and pull data without affecting the live site.
With the source database properly set up, the next step is to configure the migration to map data correctly from its current structure to the new one in Drupal.
$databases[migrate]['default'] = array(
 'database' => "source_database_name",
 'username' => "source_db_user",
 'password' => "source_db_password",
 'host' => "source_db_host",
 'driver' => "source_db_driver",
 'port' => "source_db_port",
 'prefix' => "",
);
Source database structure
Assume the source database has the following tables and fields:
articles Table
Target Drupal content type
In Drupal, the target content type for articles will map to the following fields:
Title: Mapped from articles.Title.
Article Type: Mapped from articles.ArticleType.
Body: Mapped from articles.Body.
Status: Mapped from articles.Status.
Defining the source database plugin
To migrate an article table into Drupal’s article content type, a source database plugin is needed. This plugin connects to the source database, retrieves the data, and prepares it for migration.
It ensures that each field from the original database matches the right place in Drupal. If the data structure is different, the plugin helps adjust it so everything fits correctly.
Once the plugin is set up, the migration process can use it to pull data smoothly, making sure nothing is missed or misplaced.
Here's how to properly define the source database plugin in src/Plugin/migrate/source/Article.php:
<?php


namespace Drupal\non_drupal_source_migrate\Plugin\migrate\source;


use Drupal\migrate\Plugin\migrate\source\SqlBase;


/**
* Article migrate source plugin.
*
* @MigrateSource(
*   id = "article",
*   source_module = "non_drupal_source_migrate"
* )
*/
class Article extends SqlBase {


 /**
  * {@inheritdoc}
  */
 public function query() {


   // Source data is queried from 'Articles' table.
   $query = $this->select('Articles', 'f')
     ->fields('f', [
       'Id',
       'ArticleType',
       'Title',
       'Status',
       'Body',
     ]);


   return $query;
 }


 /**
  * {@inheritdoc}
  */
 public function fields() {
   $fields = [
     'Id' => $this->t('Id'),
     'ArticleType' => $this->t('ArticleType'),
     'Title' => $this->t('Title'),
     'Status' => $this->t('Status'),
     'Body' => $this->t('Body'),
   ];
   return $fields;
 }


 /**
  * {@inheritdoc}
  */
 public function getIds() {
   return [
     'Id' => [
       'type' => 'integer',
       'alias' => 'f',
     ],
   ];
 }
 }
Setting up the migration plugin
To migrate data from the source database, a custom source plugin needs to be set up. This helps Drupal recognize and process the data correctly.
- Namespace and dependencies
The migration plugin needs a namespace and should use Drupal’s SqlBase class. This allows it to connect with the source database and retrieve data. - Annotations
- @MigrateSource tells Drupal this is a migration plugin.
- id is a unique name for the plugin.
- source_module is the name of the custom module handling the migration.
- Methods to handle data
- query(): Defines how data is selected from the source database.
- fields(): Lists all fields being migrated, with names and labels.
- getIds(): Defines the unique identifier (like an ID field) to keep track of records.
Once these steps are in place, the plugin can pull data smoothly and ensure everything is migrated properly into Drupal.
Define the migration YAML file
With the source database connection and plugin set up, the next step is creating the migration YAML file. This file outlines how data will be moved from the source database to Drupal, specifying the structure and field mappings.
The YAML file includes:
- Migration ID – A unique name for the migration.
- Source settings – Defines where the data is coming from (using the custom source plugin).
- Destination settings – Specifies where the data will be stored in Drupal (such as content types or taxonomy terms).
- Field mappings – Matches source fields to their corresponding Drupal fields.
This file is placed in the module’s config/install directory. Once configured, it allows Drupal’s migration system to understand how to process and transfer data efficiently.
id: article
label: 'Article'
migration_group: non_drupal_migration
source:
 plugin: article
 key: migrate
process:
 title: Title
 field_article_type:
   plugin: static_map
   source: ArticleType
   map:
     1: regular
     2: expert
 body/value: Body
 body/format:
   plugin: default_value
   default_value: enriched
 moderation_state:
   plugin: static_map
   source: Status
   map:
     0: archived
     1: published
     2: draft
destination:
 plugin: 'entity:node'
 default_bundle: article
ID and label:
- id: Unique identifier for the migration .
- label: Human-readable name for the migration.
Migration group:
- migration_group: Groups related migrations together. Ensure this matches the group you have defined.
Source:
- plugin: The ID of the source plugin defined earlier (article).
- key: The database connection key from settings.php (migrate).
Process:
- Maps source fields to destination fields in Drupal. Uses various plugins for data transformation.
- title: Direct mapping from Title field.
- field_article_type: Uses static_map to map ArticleType values to specific terms (regular and expert).
- body/value: Direct mapping from the Body field.
- body/format: Sets a default format for the Body field using default_value.
- moderation_state: Maps Status values to moderation states (archived, published, draft) using static_map.
Destination:
- plugin: Specifies the destination as an entity of type node.
- default_bundle: Specifies the content type (article).
Running the migration
After setting up the migration YAML file, the next step is to import the configuration and run the migration using Drush.
First, import the migration configuration so Drupal recognizes it.
Then, check the list of available migrations to ensure everything is set up correctly.
Once confirmed, run the migration to transfer data from the source database into Drupal.
This process moves the content while keeping its structure intact, ensuring a smooth transition.
Import the migration configuration
Use the following drush command to import the migration configuration:
drush cim --partial --source=modules/custom/non_drupal_source_migrate/config/install/
Run the migration
Execute the migration with the following Drush command:
drush migrate-import article
Verifying the migration
Once the migration is complete, check your Drupal site to make sure everything has been imported correctly.
Go to the content listing page and look for the migrated articles. Verify that all the data is there and matches the source database.
This step ensures that the migration was successful and that the content appears as expected.
Quick recap
- Analyze the source data – Understand table structures and relationships.
- Set up the source database – Add the database configuration in settings.php.
- Define the source database plugin – Create a class that extends SqlBase.
- Create the migration YAML file – Structure the migration and map fields.
- Run the migration – Use Drush commands to import and execute the migration.
- Verify the migration – Check the imported content in Drupal to confirm everything is in place.
Wrapping up
Migrating a MySQL database to Drupal is all about taking it step by step. With a clear understanding of the data structure, a well-planned migration setup, and the right tools, the process becomes smooth and predictable.
Each migration brings something new—sometimes a unique data structure or an unexpected format.
These details help refine the approach and build a deeper understanding of how data moves. Over time, recognizing patterns makes migrations even more efficient.
Here’s something useful: Drupal’s migration system is repeatable, allowing multiple test runs before finalizing, ensuring accuracy and fine-tuning the process without affecting the live site.
Next, we’ll look at one-to-many relationships in migrations— Migrating relational data into Drupal paragraphs.

An internship, a community, and a ticket to DrupalCon
Some moments in life make you pause and think about how it all began. Sitting on my flight home from Singapore, still buzzing from an incredible experience at DrupalCon, I found myself tracing back the steps that led me there.
It’s funny how things unfold.
In 2021, fresh out of college, I joined QED42 as an engineering intern. I had heard of Drupal but barely knew anything about it. If I’m honest, I was a little nervous—new job, new technology, new world. But curiosity has a way of keeping you going. I dived into the work, slowly unravelling the power of this open-source CMS that runs websites across the globe.
And then, I found something even better—the Drupal Pune community.
There’s something special about being surrounded by people who genuinely want to help each other grow. The meetups, the discussions, the encouragement—it all shaped my journey in ways I hadn’t imagined.
It wasn’t just about learning Drupal—it was about being part of something bigger. The support from QED42 and the encouragement from the community set everything in motion.
That journey led me to DrupalCon 2024, a major milestone. The experience, the insights, and the people I connected with made it unforgettable. But getting there wasn’t just luck—here’s how it all came together.
DrupalCon Singapore 2024
This was a surreal experience, packed with everything I love—tech, conversations, food, and the thrill of being in a new city with like-minded people.
Highlights:
- Two days of sessions that left my brain overflowing with technical takeaways.
- A casual chat with Dries about photography—though I might have tested his patience with my enthusiasm.
- The food? Great. The desserts? Even better.
- Wandering through the streets of Singapore with fellow community members, soaking in the city's energy and making memories along the way.
- A major highlight? QED42 won the Splash Award! A moment of pride, excitement, and a sense of being part of something truly remarkable.
- And of course, we wrapped it all up with a short, loud, and unforgettable party.
And if there’s one thing I’ve learned, it’s this—sometimes, all it takes is a bit of curiosity, a great community, and the willingness to take that first step. The rest? It finds its way. Now let me take you through the journey that made this happen.

(Left) Holding the Splash Award won by QED42 for our work with Diabetes.org (Right) QED42 team at DrupalCon Singapore.
Getting started with Drupal Pune
August 2021. I started my internship at QED42, and Drupal was everywhere. Projects, open-source, blogs—it wasn’t just another tech stack; it felt like this whole new culture. People spoke about it with a kind of energy that felt different. At first, I was just going through the motions, trying to keep up. But I could tell there was something more to it.
Then came DrupalCamp Pune, March 2022—my first in-person event.
Walking into that room, I knew this was where things would change. The energy was real. Conversations weren’t just technical; they were passionate. People debated modules like they were life choices, joked about content types, and shared insights like they had been waiting all year for this moment.
One session on Drupal’s caching system hit me hard. It was practical, useful, the kind of thing that makes you rethink how you approach development. By the time it ended, I was thinking differently. That session was a turning point.
After the sessions, I joined conversations about Drupal 10 and the future of open source. And this time, I had something to say.
In the months that followed, I kept showing up. Meetups, discussions, late-night Slack threads. The more I engaged, the more I realized—Drupal is about building, learning, and growing with a community that actually cared.

(Left) Drupal Camp Pune group picture (Right) Presenting a session at the monthly Drupal Pune Meetup.
At first, I was just another face in the crowd—listening, learning, absorbing everything I could. By 2023, I wanted to contribute, to be part of what made this community thrive.
Volunteering at DrupalCamp Pune 2023 was my first real step in that direction. I started at the registration booth, expecting a simple task—handing out badges, directing people, and helping with logistics. But it turned into something more. I found myself in conversations with first-time attendees, answering questions, and sharing my own experiences. In the same way, Drupal Pune had once welcomed me, I was now helping others find their place. That sense of connection—that feeling of belonging—was something I hadn’t expected, but it stuck with me.
Soon after, I took on something that had once felt completely out of reach: presenting at the monthly Drupal Pune meetups.
The first time was overwhelming, standing in front of a room filled with experienced developers, and sharing my own insights, I questioned whether I had anything valuable to say.
But the moment I started speaking, I saw the same curiosity in their eyes that I had felt during my first sessions. The conversations that followed, the questions, the discussions—it made me realize something important.
It was about growing with the community, about sharing what I had learned so someone else could take their next step, just like I had.
Those sessions improved my public speaking. They made me an active part of the space that shaped me—and still does.

Drupal Pune members planning Drupal Camp Pune 2024 at the February meetup.

Presenting a session on Transform API at Drupal Pune’s monthly meetup.
A dream came true – winning a ticket to DrupalCon Singapore!
By 2023, I was part of what made Drupal Pune events happen. Presenting at meetups, volunteering at DrupalCamp Pune 2023, and working on a headless Drupal project—each step deepened my connection with the community.

(Left) Drupal Pune monthly meetup at QED42 office (Right) Presenting a session on Headless Drupal at PHP Camp 2024.
In 2024, I wanted to push further. This time at DrupalCamp Pune, I took on a new role—photographer. Capturing the energy of the event felt different, like seeing the community from a whole new perspective.

(Left) Drupal Pune group photo in March 2023 (Right) As a photographer at Drupal Camp Pune 2024.

Some clicks from Drupal Camp Pune.
During the camp, I joined a community-led contest, thinking it would be fun. I didn’t expect to win. But when my name was announced as the recipient of a ticket to DrupalCon Singapore 2024, it felt like everything I had worked toward had led to this.
It was a celebration of the experiences, contributions, and connections that shaped my journey. And it left me even more excited for what’s ahead.
Attending DrupalCon Singapore 2024
On December 8, 2024, a bunch of us from work hopped on a flight to Singapore.
It was my first international trip, and I could barely contain the excitement. I’d only seen Singapore in movies, and in just a few hours, I was about to experience it for real.
Attending DrupalCon Singapore felt like a dream. – sessions, contributions, and an unforgettable experience
The first two days of DrupalCon Singapore were a whirlwind of sessions, discussions, and some seriously good food.

(Left) At Marina Bay Sands in Singapore (Right) QED42 won the Splash Award for our work with Diabetes.org in the Non-Profit category.
Some of the sessions that stood out for me:
Server-side rendering a Drupal site with Next.js
Since I work extensively with Headless Drupal, this session felt like it was made for me. It covered both core concepts and the latest Next.js features, making it a solid learning experience.
DriesNote – The MAIN event!
Dries Buytaert himself took the stage to present the much-awaited DriesNote, focusing on the recent updates in Drupal CMS (Starshot). Watching it live, I couldn’t help but reflect on how much Drupal has evolved since I first started working with Drupal 9 during my internship.
The CMS has transformed into a smoother, more intuitive experience, making everything feel new again.
After DriesNote, it was time for the legendary group photo—and I was in it!
Other sessions I attended:
Building the Future of Drupal: 11, 12, and Starshot
Level Up Your Impact: Building Socially-Driven Projects with Drupal as a Digital Public Good
What, Why, and When for Recipes & Distributions with Starshot
Day 3: The contribution sprint was a surreal experience. Developers, initiative track leads, and community members gathered to tackle open-source issues, strategic initiatives, and code contributions.
I contributed to the Experience Builder Initiative (XB) and had a great discussion with Lauri, the track lead. I also got to see Jess (xjm) in action as she demonstrated how contributor credits are distributed while solving an active issue.
Sitting in a room full of Drupalers working together on something bigger than themselves was a powerful moment. It reminded me why communities like Drupal Pune and events like DrupalCon matter so much. They go beyond coding—they’re about connection, growth, and collective success.
After the contribution day, we wrapped up the trip with some sightseeing in Singapore—a perfect way to celebrate an unforgettable experience.

(Left) View from the top of Marina Bay Sands (Right) Photo with Drupal community members.

(Left) An evening stroll at Fullerton Pavilion (Right) At Sentosa Island with QED42 folks.
Final thoughts and stepping out of my comfort zone
Well, to sum up, a long story about an internship, a community, and a ticket to DrupalCon—every milestone, from volunteering to presenting and attending, pushed me beyond my comfort zone. I’ve always been more of an introvert, but being part of Drupal Pune changed that.
The support, encouragement, and shared passion helped me embrace new challenges and grow in ways I never expected. Looking back, joining Drupal Pune was one of the best decisions I’ve made. It opened doors I never saw coming, introduced me to incredible people, and helped me recognize my potential.
Whether you’re just starting with Drupal (or any other tech) or have years of experience, being an active part of a community can change everything. For me, it turned a growing interest into an unforgettable journey to one of the biggest Drupal events in the world.
You never know where one little step in the right direction might take you. For me, it led to growth, friendships, a ticket to DrupalCon, and so much more that words can't capture. Truly, if you're on the fence about joining a tech community, I’d say just go for it.
.avif "The case for centralized content systems in modern digital strategies")
The case for centralized content systems in modern digital strategies
As businesses grow, so does their digital presence. This often involves launching multiple websites and platforms to support new products and services or address different market segments. Many businesses manage these sites with separate systems, creating a fragmented content management system (CMS).
A fragmented CMS can be defined as a system where content is spread across multiple disconnected platforms that do not work well together. This makes accessing and managing content inefficient, resulting in duplicated efforts, inconsistencies, and increased complexity in workflows.
As a result, collaboration between teams becomes difficult to sustain, often leading to internal challenges that make scaling digital presence and operations more demanding.
These disconnected systems also lead to the creation of content silos—isolated pockets of information that are difficult to share or synchronize. Content silos increase operational costs and demand significant resources to manage multiple systems.
This blog addresses the problems caused by fragmented CMS setups, details the benefits of adopting a centralized content management system, and provides actionable steps for making the transition.
What is Centralised Content Management?
Centralised content management is an approach where content is created, governed, and maintained in a single system and then distributed across multiple digital channels from that one source.
Instead of managing separate copies of content across websites, mobile apps, campaigns, and internal platforms, teams work from a shared content hub. This hub acts as a single source of truth, ensuring that updates, approvals, and governance rules apply consistently everywhere the content appears.
In a centralised model, content is structured and reusable. The same core content can be delivered to different channels without duplication or manual rework. Access controls, workflows, and publishing rules are defined centrally, reducing the risk of inconsistency, outdated information, or compliance issues.
For enterprises managing content at scale, centralised content management is less about a single tool and more about an operating model. It supports consistency, governance, and long-term scalability while allowing teams to move faster without losing control.
The hidden costs of a fragmented CMS
Relying on multiple disconnected content management systems creates challenges that go beyond inconvenience.
Here’s how these issues become tangible obstacles:
Inefficiency and duplicated efforts
Managing multiple CMS platforms demands excessive effort. Routine tasks like content updates, security patches, or maintenance require separate attention for each platform. What should be a simple update becomes a time-consuming and resource-heavy process.

Inconsistent user experience
Visitors navigating between websites may encounter irregularities, leading to confusion and reduced engagement. This fragmented experience diminishes customer satisfaction and impacts overall brand perception.
Escalating operational costs
Each CMS system comes with its own maintenance, licensing fees, and infrastructure requirements. As the number of systems grows, so do the costs, diverting resources from strategic initiatives like innovation and business expansion.
Challenges in scaling
Expanding a digital presence becomes cumbersome. Each new development requires platform-specific customization, slowing growth and increasing expenses, making it harder to meet market demands efficiently.
Missed business opportunities
Fragmentation isolates content and data, leading to missed opportunities. Teams working in silos struggle to respond quickly to market trends, customer feedback, or advertising needs, directly affecting revenue and competitive positioning.

Delayed marketing efforts
Cross-platform marketing campaigns become complex and slow. Lack of coordination between systems and teams leads to delays and missed opportunities, weakening campaign impact and sometimes directly impacting the ROI.
Centralising content management is more than simplifying processes—it is a fundamental requirement for businesses looking to stay competitive and achieve growth.
Centralised vs. Decentralised content management
In a decentralised setup, content is managed across multiple systems or teams. Each platform maintains its own versions, workflows, and updates. This often leads to inconsistent messaging, duplicated work, and slower updates as content needs to be changed in many places.
Centralised content management brings content into a single system where it is created, governed, and maintained. Updates are made once and reused across channels, helping teams stay aligned and reducing manual effort.
Governance is another key difference. Fragmented systems make it difficult to apply consistent approvals, access controls, and content standards. Centralised systems enforce these rules at the source, improving clarity, accountability, and compliance.
As organisations scale, decentralised setups become harder to manage and more costly to maintain. Centralised content management is designed to scale across teams and channels while keeping control, consistency, and security intact.
Benefits of centralising your content
- Improved collaboration across teams
Shared workflows and content models reduce duplication and misalignment between teams. - Stronger content governance and compliance
Centralised access control, approvals, and auditability make it easier to meet regulatory and organisational requirements. - Faster time-to-market
Content updates and launches no longer require repetitive changes across multiple systems. - Omnichannel delivery from a single source
Create content once and publish it consistently across websites, apps, and other digital touchpoints.
Features to Look for in a Centralised CMS
When evaluating a centralised content system, enterprises should look beyond basic publishing capabilities and focus on features that support scale and governance:
- Headless and API-first architecture to deliver content across multiple platforms
- Role-based access control (RBAC) to manage permissions across teams
- Workflow automation for reviews, approvals, and publishing
- Digital Asset Management (DAM) for structured handling of media and files
- Audit trails and governance controls to track changes and ensure accountability
- Integration capabilities to connect with existing systems and tools
These capabilities enable centralised content management to function as a reliable, long-term foundation rather than a short-term consolidation exercise.
How to successfully transition to a centralised CMS
Centralised CMS provides a solution to simplify processes, unify workflows, and prepare for business growth. Successful implementation requires collaboration between technical and business teams to ensure the system aligns with organisational objectives. Here are the steps to approach this effectively:
Conducting a detailed system audit
Begin by analysing your current CMS platforms, workflows, and content assets. This process not only identifies inefficiencies but also reveals alignment gaps between teams using these systems. A thorough understanding of what needs to be migrated, updated, or retired provides the foundation for centralisation.
Defining business-aligned goals
Clearly defined goals should balance business priorities and operational needs. For instance, maintaining a cohesive brand experience might be as critical as enabling faster updates or localizing content for specific markets. Engaging key stakeholders early ensures the CMS serves broader organizational objectives.
Prioritizing scalability from the outset
Scalability isn’t just about technical growth; it’s about creating a platform that adapts to evolving business demands. A system that supports new integrations, content reuse, and seamless expansion will reduce friction as the organization grows.
Establishing a data migration strategy
Data migration requires both technical precision and strategic alignment. While mapping and cleaning data is essential, considering how different teams will interact with the new system ensures a smoother transition. Proper planning for redirects also minimizes disruptions for end-users.

Building for security and governance
A centralized CMS simplifies governance by providing a clear framework for permissions and workflows. Security protocols, like role-based access, ensure teams have access to what they need without creating vulnerabilities.
Testing the system before launch
Testing should include not just technical evaluations but also user testing to align workflows with team requirements. Validating compatibility with existing tools and testing under different conditions ensures the system is ready for real-world demands.
Managing change and training teams
Introducing a centralized CMS requires buy-in from all involved. Training sessions and clear documentation help teams adapt to new workflows while reinforcing collaboration across departments.
Monitoring and optimizing post-migration
Continuous monitoring post-launch allows for refinement based on real usage patterns. Listening to feedback from both internal teams and end-users helps adapt the system to meet ongoing business needs
A case study—ADA’s journey to a centralized CMS
The American Diabetes Association (ADA), committed to improving the lives of people with diabetes, faced operational inefficiencies due to disconnected content management systems (CMS). Their primary website, diabetes.org, operated on Drupal 9, while other platforms relied on outdated systems like Drupal 7 and custom-built solutions. This fragmented setup led to inconsistent branding, slow content updates, and high maintenance costs.
To overcome these challenges, ADA partnered with us to consolidate all their websites onto a single, unified multisite platform powered by Drupal 10. This move streamlined website management ensured design consistency, and enabled faster, more efficient content updates.
By centralizing their CMS, ADA significantly reduced maintenance costs and established a scalable digital infrastructure. This transformation allows the organization to focus on its core mission of supporting people with diabetes, rather than grappling with technological inefficiencies.
Read the full case study for a detailed look at this transformation.

Conclusion
Fragmented CMS is not just a technical problem—it’s a signal of misaligned processes and priorities within a system.
Yes, centralizing content management is a technology upgrade, but more importantly, it’s a solution to align workflows, reduce complexity, and enable teams to focus on meaningful outcomes.
Our association with diabetes.org and other platforms under the management of the American Diabetes Association (ADA) is a testament to how problems can be solved. It also spotlights how businesses can set themselves up for success in the way they envision it.
While the shift requires careful planning, the result is more than worth the effort. It creates a foundation for seamless collaboration, better resource allocation, and a sharper focus on delivering value to users.
The decision is not just about fixing what’s broken—it’s also about building a system that supports and empowers sustainable success.
Frequently Asked Questions
What is centralised content management?
Centralised content management is an approach where content is created, governed, and maintained in one system and then reused across multiple digital channels from a single source.
How is centralised content management different from a traditional CMS?
Traditional CMS setups often manage content per site or platform. Centralised content management focuses on reuse, governance, and consistency across many channels instead of managing content in silos.
When does centralised content management make sense for an organisation?
Centralised content management is most useful when teams manage large volumes of content across multiple platforms, regions, or teams and need consistency, governance, and scalability.
Does centralised content management slow teams down?
No. While governance is centralised, teams often move faster because updates are made once and reused, reducing duplication and manual coordination.
Is centralised content management only for large enterprises?
While it is most common in enterprises, any organisation dealing with multiple platforms, contributors, or compliance requirements can benefit from a centralised approach.

Implementing OTP-based login and registration in Drupal with Twilio and SMS framework
With the rise of security concerns, traditional username and password systems are often insufficient to protect user data and prevent unauthorized access. Passwords can be easily forgotten, stolen, or hacked, leading to a high risk of breaches, especially in applications handling sensitive or personal information.
Benefits of Implementing an OTP-Based Login Flow in Drupal
This OTP-based login flow is beneficial for users who prefer or require mobile authentication, providing an added layer of security. It reduces the risk of unauthorized access and allows users to bypass traditional password-based login if they wish, which can be especially helpful for those who struggle with password management.
By setting up this flexible, secure OTP verification system, you’re making your Drupal site more secure and appealing, catering to a broader audience that values security and ease of use.
Implementing an OTP-based registration and login system in Drupal addresses several key issues
- Enhanced security
OTP adds a layer of security by requiring users to verify their identity through a code sent directly to their mobile phone. This is known as two-factor authentication (2FA), which greatly reduces the chances of unauthorized access. - Reduced dependence on passwords
Users often struggle with remembering complex passwords, which may lead to weak, reused, or forgotten passwords. OTP systems help minimize this by providing a code that’s valid only for a short duration and used only once. - Improved user experience
For users who have limited access to email or prefer not to receive emails for verification, SMS-based OTP provides a convenient alternative. It's faster, more accessible, and doesn’t require an additional app or service for most users. - Prevention of fake registrations
By requiring a mobile number for verification, this system ensures that users provide valid contact information, helping to filter out fake accounts and spam registrations. - Accessibility for mobile-first users
Many users are more likely to register using their mobile numbers rather than email, especially in regions where mobile internet access surpasses desktop or email usage. OTP-based registration caters to this audience, increasing the accessibility and reach of your application.
In summary, an OTP-based registration and login system in Drupal offers enhanced security, user-friendly registration options, and an improved experience for mobile-first users. Leveraging Twilio and the SMS Framework makes it easy to implement this secure and flexible registration system in Drupal.
Prerequisites
- Twilio SMS framework
Twilio is an API-driven service that can send SMS messages to users, perfect for delivering OTPs. - Drupal modules
Install and configure the SMS Framework and the Twilio modules in Drupal to manage and send SMS messages.
System overview
This solution covers:
- User login/registration
Users can log in or register with an OTP verification process. - Form redirection and validation: Redirect users to a verification form after submitting their mobile number and verify the OTP within a 10-minute window.
- Custom messages: Users receive feedback on whether their code is valid, expired, or incorrect.
User registration flow
To add the "Registration Type" field to the user registration form, you can follow these steps:
- Create the registration type field
- Go to /admin/config/people/accounts/fields.
- Add a new field named "Registration Type".
- Choose List (text) as the field type and label it "Registration Type".
- Configure two options:
- mobile with label "Mobile"
- email with label "Email"
- Save the field.
- Display the field on the registration form
- Once the field is created, go to the Manage form display tab for the user entity.
- Set the "Registration Type" field to be visible on the registration form.
- Custom logic in registration
- In a custom module, use form alter hooks to intercept the registration process:
- Add custom logic to check the "Registration Type" selection.
- If "Email" is selected, proceed with the normal email-based registration.
- If "Mobile" is selected, integrate your OTP logic to send an SMS and redirect to OTP verification.
- If you click on Create account using mobile will create a user account with mobile number and user redirect to otp verification.. If otp verify, user set active
- In a custom module, use form alter hooks to intercept the registration process:
/**
* Form alter for user register form.
*/
function register_user_form_alter(&$form, FormStateInterface $form_state, $form_id) {
 if ($form_id == "user_register_form") {
   $form['account']['mail']['#states'] = [
     'visible' => [
       ':input[name="registration_type"]' => ['value' => 'email'],
     ],
   ];
   $form['actions']['submit']['#states'] = [
     'visible' => [
       ':input[name="registration_type"]' => ['value' => 'email'],
     ],
   ];
   // Add a new submit button create new account using mobile.
   $form['actions']['create_account_using_mobile'] = [
     '#type' => 'submit',
     '#value' => t('Create new account'),
     '#submit' => ['register_user_mobile_number_submit'],
     '#name' => 'mobile-otp-button',
     '#states' => [
       'visible' => [
         ':input[name="registration_type"]' => ['value' => 'mobile_number'],
       ],
     ],
   ];
}
/**
* Custom submit for user register with mobile.
*/
function register_user_mobile_number_submit(array &$form, FormStateInterface $form_state) {
 $mobile = $form_state->getValue('field_mobile_number');
 if ($mobile) {
   $mobile_number = $mobile[0]['value'];
   $otp = register_user_generate_login_otp();
   // Send otp and verify in the redirected url.
   $twilio = \Drupal::service('twilio.sms');
   $message = "Your login code is: " . $otp . " Don't share this code with anyone;";
   $mobile = '+1' . $mobile_number;
   $sid = $twilio->messageSend($mobile, $message);
   if ($sid == 'not send') {
     \Drupal::messenger()->addError(t('Failed to send SMS.'));
   }
   else {
     // Create a new user.
     $user = User::create();
     $current_ts = strtotime('now');
     // Set the required fields for the new user.
     // Use mobile number as username.
     $user->setUsername($mobile_number);
     // Set the mobile number for email field initially.
     $user->set("init", $mobile_number);
     $user->set("field_mobile_number", $mobile_number);
     $user->set('field_otp_verify', $otp);
     $user->set('field_otp_generate_timestamp', $current_ts);
     // Save the user.
     $user->save();
     // Temporary store mobile number to render on otp verify page.
     $temp_store_factory = \Drupal::service('tempstore.private');
     $temp_store = $temp_store_factory->get('register_user');
     $temp_store->set('mobile_number', $mobile_number);
     // Redirect to an otp verify form.
     $form_state->setRedirect('register_user.user_otp_verify_form');
   }
 }
}
/**
* Function to generate 6 digit random OTP for user varification.
*/
function register_user_generate_login_otp() {
 return str_pad(mt_rand(0, 999999), 6, '0', STR_PAD_LEFT);
}
This setup will add the "Registration Type" field to the registration form and enable conditional handling based on the selected option.
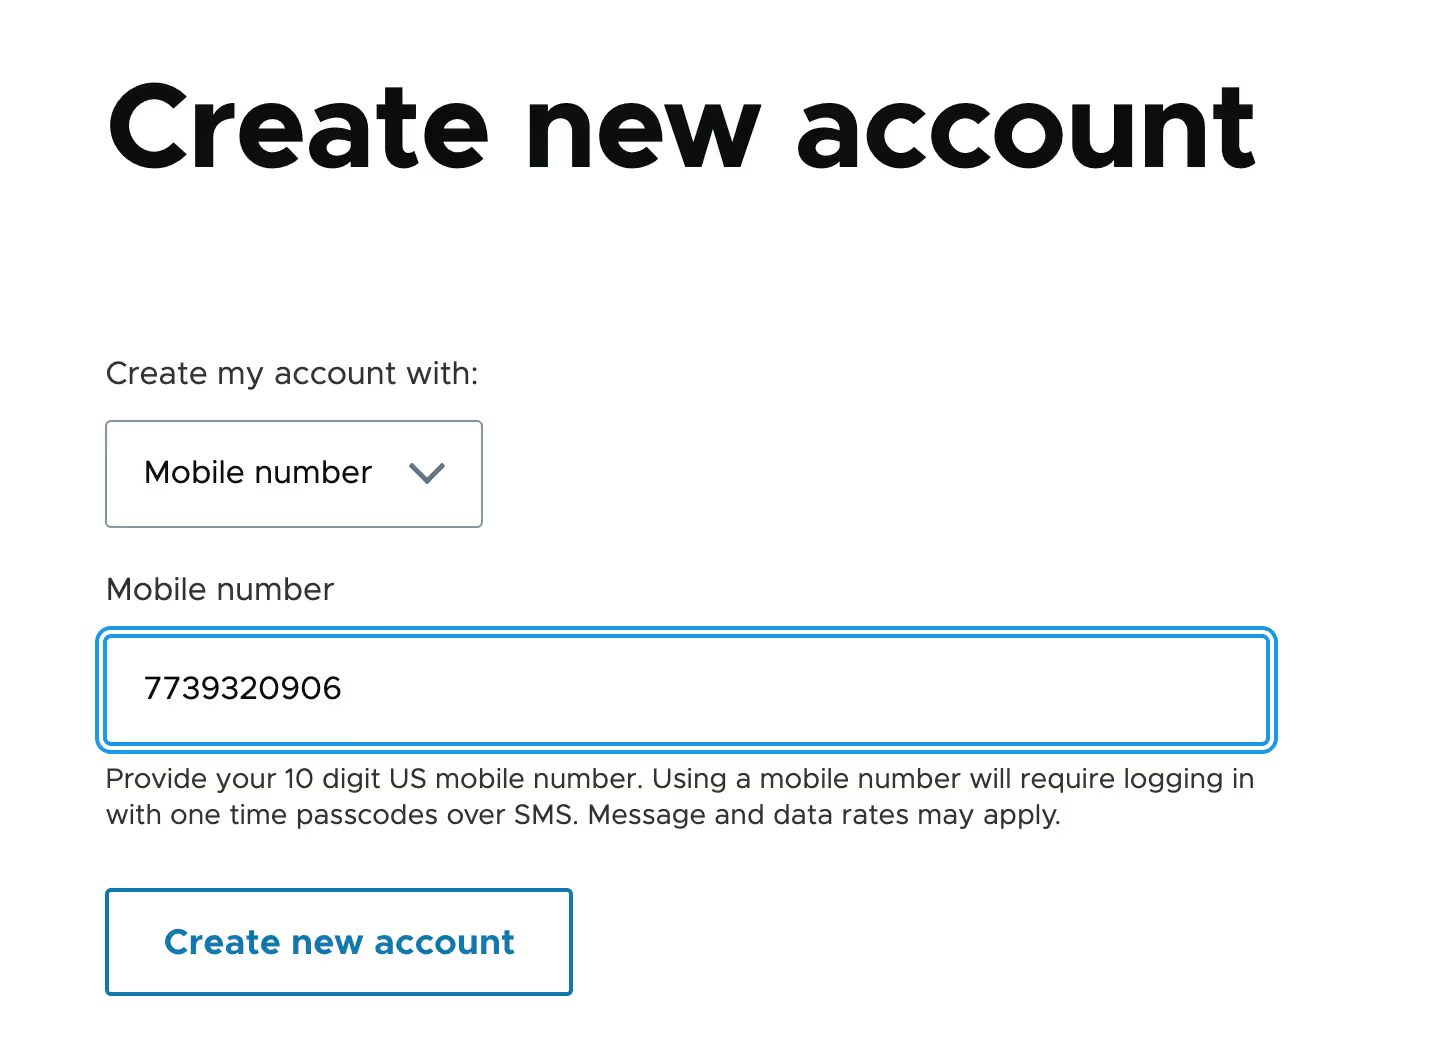
User OTP verification in Drupal
This covers the essential steps to create an OTP verification form in Drupal, with functionality to handle OTP input, validation, and verification using Twilio for SMS.
1. Form setup: UserOtpVerifyForm
- Create a form class to handle OTP verification.
- Define fields for Mobile Number and OTP, with a submission button and a Resend Code option.
2. Form validation
- Ensure the mobile number is in a valid 10-digit format.
- Verify that the OTP is entered.
3. OTP verification logic
- Retrieve the OTP associated with the user's account.
- Check if the OTP matches and is within a 10-minute validity window.
- If valid, activate the user’s account and redirect them to the profile page.
4. OTP resend functionality
- Generate a new OTP and save it to the user's profile along with a timestamp.
- Use Twilio to send the new OTP to the user’s phone.
For full code implementation, check out the GitHub repository.
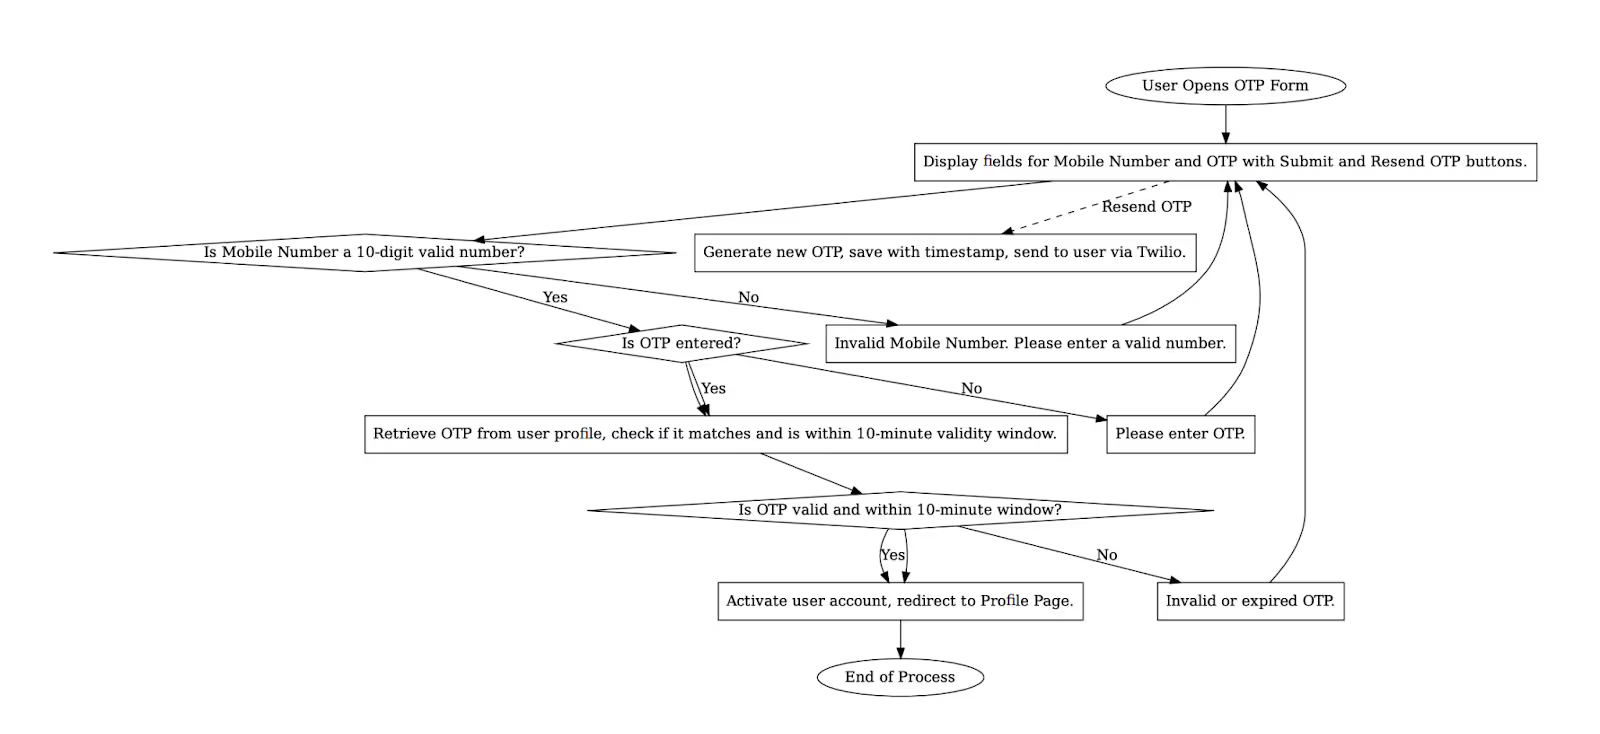
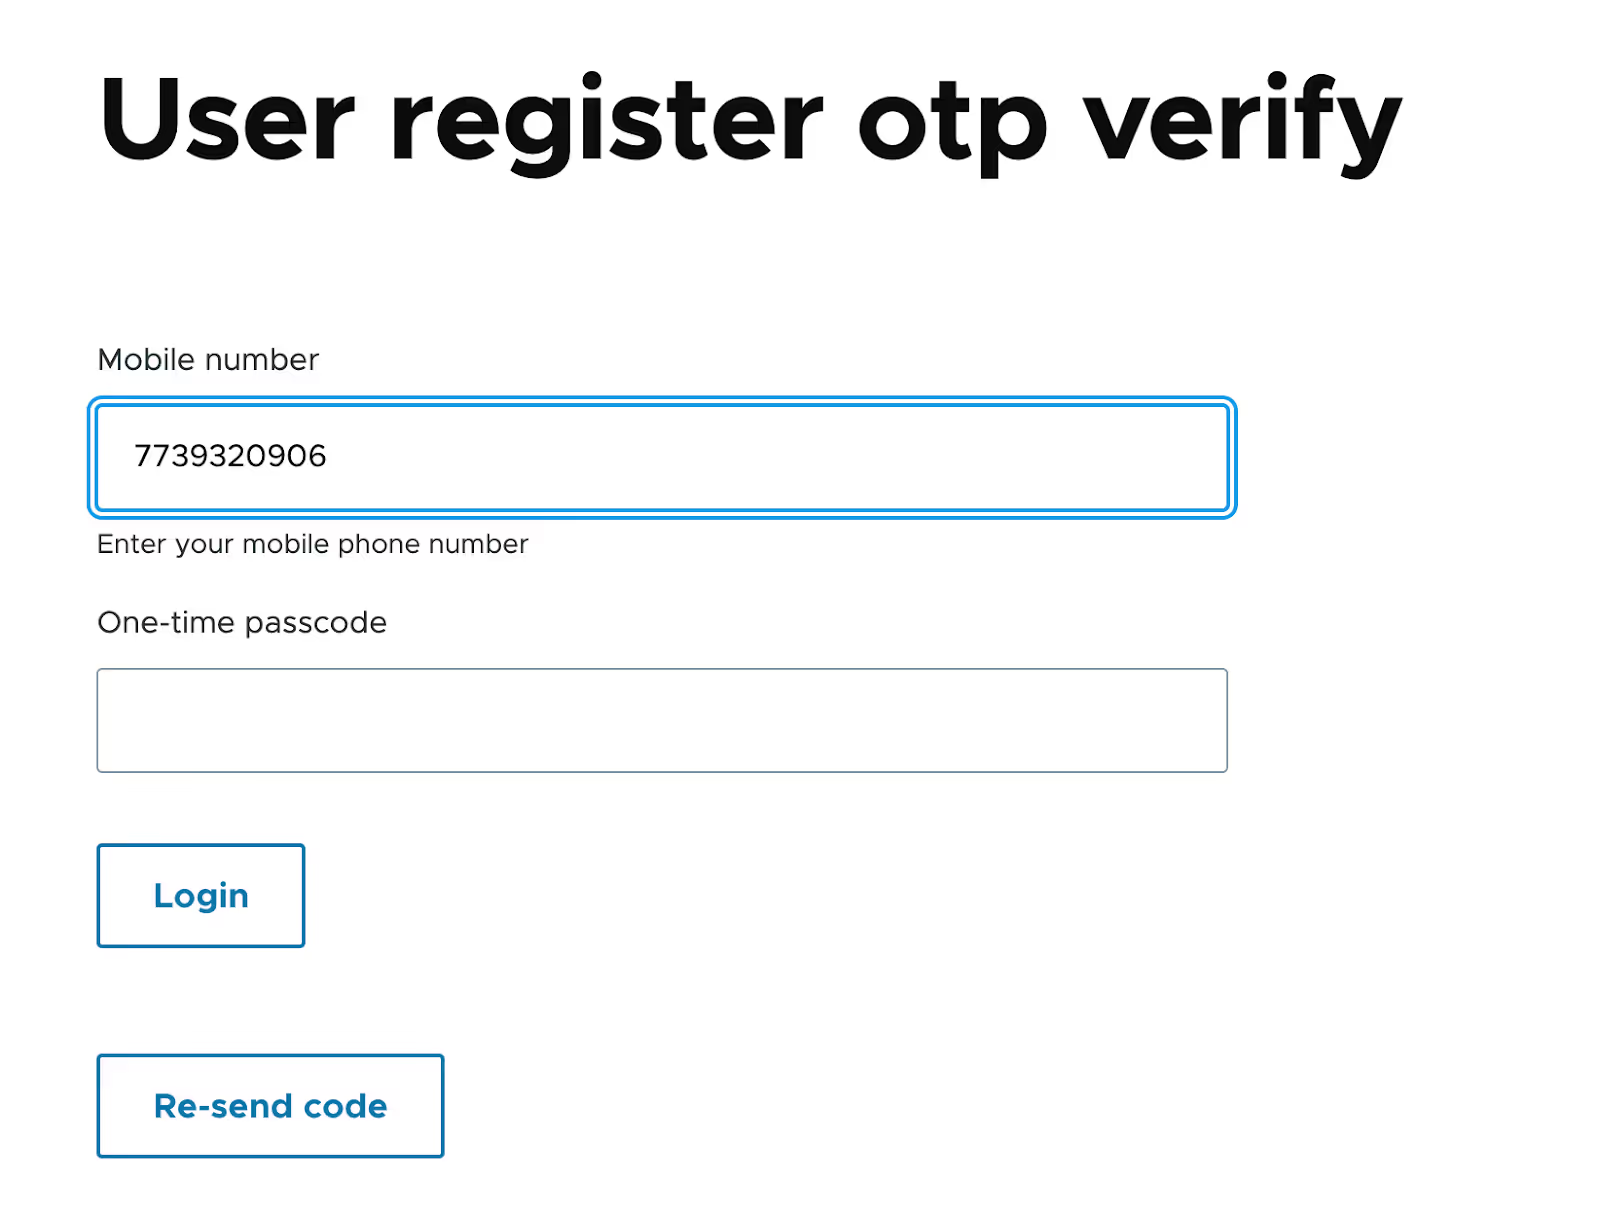
User login flow
In today’s digital landscape, offering multiple secure authentication options enhances user experience and strengthens security. Implementing an OTP-based login in Drupal is a fantastic way to provide flexibility for users who prefer mobile authentication.
Leveraging Twilio with the SMS Framework, we’ll set up a login workflow that allows users to log in with a mobile number and OTP (One-Time Password). Below, I’ll walk through each component of this setup to outline the OTP-based login flow and provide code snippets to integrate this feature into your Drupal site.
1. Adding an OTP option to the standard login form
The login form starts with the usual Drupal username and password fields but includes an additional link labeled “Login with Mobile & OTP.” When clicked, this link takes users to a form designed specifically for mobile-based login. Here, users have the choice to either continue with the standard method or authenticate via OTP, which is ideal for those who prefer mobile-based access.
/**
* Form alter for user register form.
*/
function register_user_form_alter(&$form, FormStateInterface $form_state, $form_id) {
 if ($form_id == 'user_login_form') {
   $forgot_password_link = Link::fromTextAndUrl(t('Forgot password?'), Url::fromRoute('user.pass'))->toString();
   $mobile_login_link = Link::fromTextAndUrl(t('Use my mobile instead'), Url::fromRoute('register_user.otp_login_form'))->toString();
   $form['pass']['#suffix'] = '<div class="form-item forgot-password"><p class="forgot-pass">' . $forgot_password_link . '</p></div>';
   $form['actions']['#suffix'] = '<div class="form-item use-mobile"><p class="mobile-login">' . $mobile_login_link . '</p></div>';
 }
}
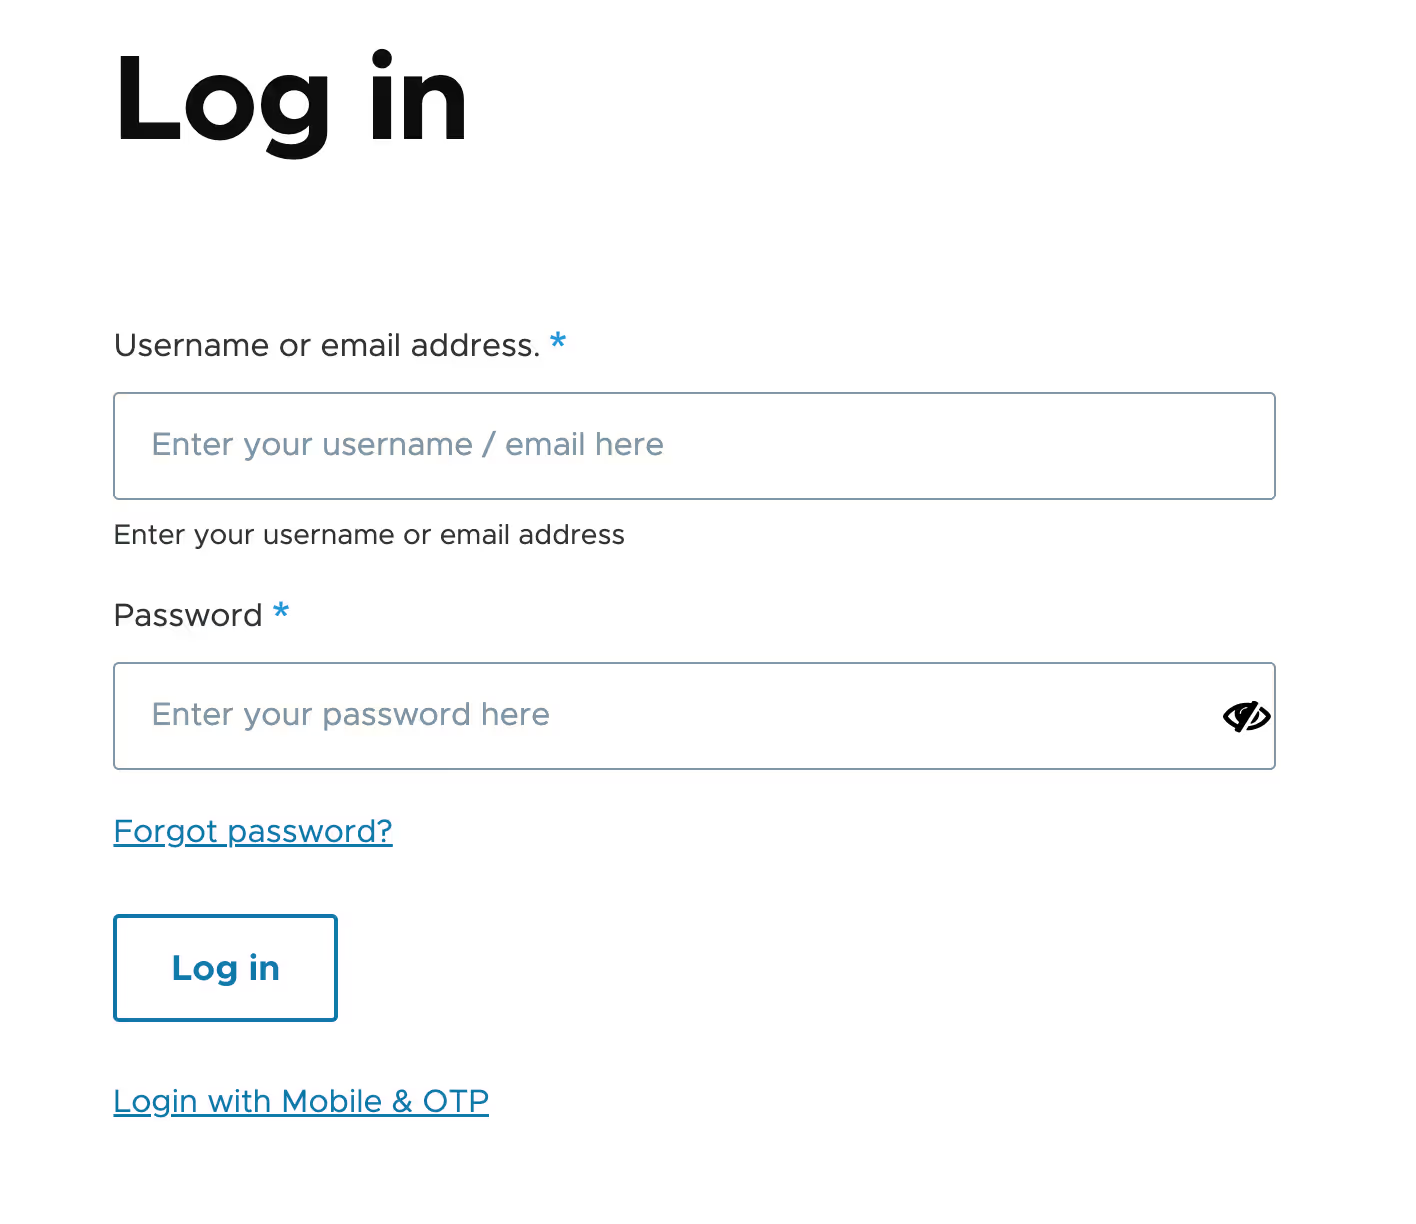
2. Entering the mobile number and sending OTP
On the OTP login form, users are prompted to enter their registered mobile number. After inputting their mobile number, they click “Send OTP.” This triggers a process where an OTP is generated and sent directly to their mobile number via Twilio using the SMS Framework. Once the OTP is sent, the system redirects the user to the OTP verification page to ensure a seamless experience.
Form setup: OtpLoginForm
- Create a form class to handle OTP Login.
- Define fields for Mobile Number with a submission button (Get one-time code.)
- validation for mobile number, also send otp in form submit (Refer git repo for code.)
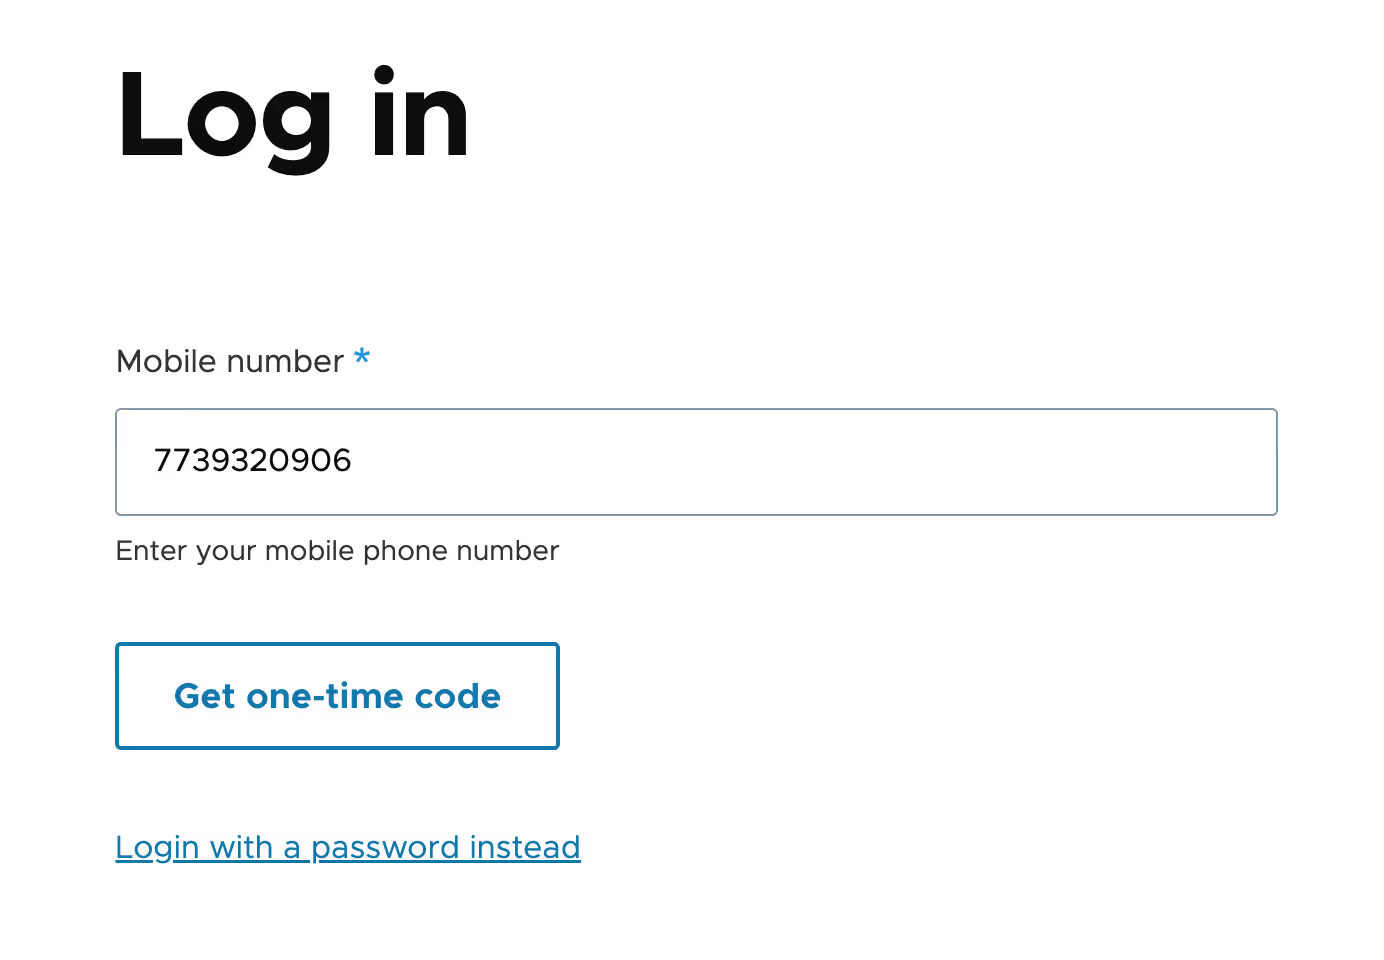
3. OTP verification
On the OTP verification form, users are prompted to enter the OTP they received on their mobile phone. The form validates the OTP and checks if it’s entered within the required time window (typically 10 minutes). If the OTP matches and is within the validity period, the user is logged in and redirected to their account page or a designated landing page.
We have used the same logic that has been used in the user register OTP verification form.
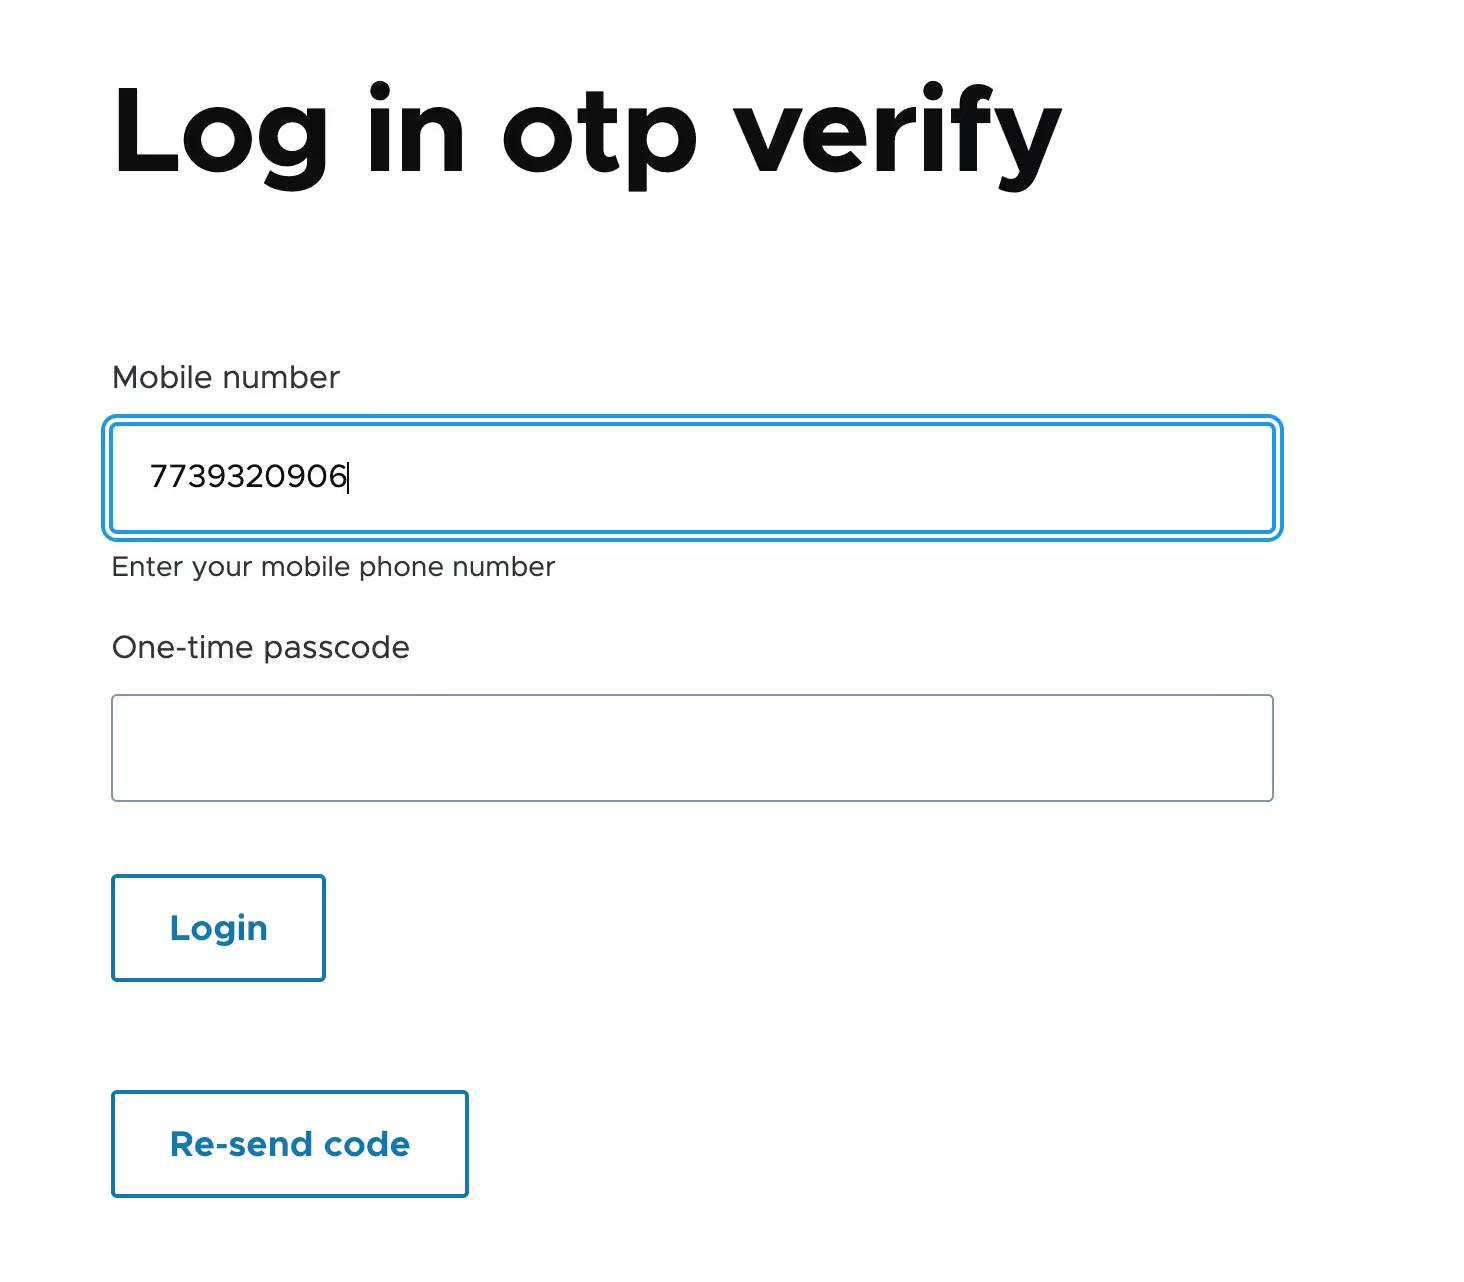
Conclusion
Incorporating Twilio and the SMS Framework into Drupal unlocks the potential for a secure and user-friendly OTP-based login and registration system. This approach not only bolsters security by adding an additional layer of verification but also streamlines the user experience by offering an alternative to traditional password-based methods.
Implementing this system reflects a forward-thinking commitment to both usability and security, catering to the growing demand for seamless, mobile-first solutions. By prioritizing accessibility and protecting against unauthorized access, you enhance trust and engagement among your users.
This guide serves as a foundation to help you develop and customize an OTP verification system tailored to your Drupal site’s unique requirements. The benefits extend beyond immediate security gains, fostering a modern user experience that resonates with today’s mobile-savvy audiences. As digital threats evolve, taking such proactive measures ensures your platform remains relevant, secure, and user-focused in a competitive landscape.

Converting Twig to SDC made simple with code-gen tool by QED42
Devs working with Drupal and Twig templates know the effort it takes to convert these into Single Directory Components (SDC). The process can often be manual and time-consuming, involving the creation of multiple configuration files. To streamline this, we’ve introduced a code-gen tool designed to simplify and speed up the conversion of your Twig components into SDC format.
SDC started as an experimental feature in Drupal, gaining traction with each release. This shift ties directly into the Experience Builder, which will rely on SDC as the standard for future page-building within Drupal. As this approach becomes essential for developers, our tool helps to get you future-ready, making it easier to transition and work easily with the upcoming changes.
Here’s a closer look at how the tool works and why it’s set to change the dev workflows.
What is Twig and SDC?
We don't really need to get into too much detail here, but it helps set the stage for the rest of the blog. So, Twig is a widely-used templating language in Drupal that makes it easier to manage the display of your website’s frontend. While Twig helps with organizing HTML templates, moving to Single Directory Components (SDC) introduces another layer of complexity. SDC requires separate configuration files, usually in YAML format, that define the properties and structure of each component.
Manually creating these files can be a hassle, especially for larger projects. That’s where the code-gen tool comes in.
Introducing the code-gen convertor
This tool was created with a few key goals in mind—coding isn’t just a technical process, it’s a creative one. Devs worldwide are constantly working on tight deadlines, and we wanted to give our code friends a way to save time. Whether they’re looking to speed up the conversion of Twig templates into SDC or simply take a break to explore what’s latest in AI.
The Twig to SDC Converter simplifies the conversion of existing Twig templates into SDC-compatible components, saving time and reducing manual effort. By analyzing the provided Twig code, the tool automatically generates the .component.yml file, eliminating the need for manual setup entirely.
Here’s how it works in a few easy steps:
Upload Your component files
Simply zip your component folders, which may include Twig files, CSS, JavaScript, and other assets. You can upload multiple components at once, simplifying the process and saving time.
Automated processing
Once uploaded, the tool gets to work. It analyzes and processes each component, automatically generating a .component.yml file that includes all necessary properties, example values, and configurations for the component to work seamlessly within SDC.
Download the results
After the conversion is complete, you can download your components along with their newly generated .component.yml files. You also have the option to delete your uploaded files right away, and for added security, any remaining files will be automatically deleted after 24 hours.
Smart features
The tool uses built-in intelligence to:
- Identify component properties and types based on your Twig code.
- Generate example values that can be used within Experience Builder.
- Keep you informed with real-time progress logs as it processes your components.
For example, if you upload a Button component, the tool can detect props like variation and label, along with any default values.
Bringing it all together
While the tool streamlines the conversion process, it might not cover every scenario perfectly. Some props or specific cases may need a little extra attention, which is why we recommend reviewing the generated files to ensure everything fits your unique project requirements.
Think of our Twig to SDC convertor as a helpful assistant that takes care of the heavy lifting, while you fine-tune the details where needed.
Give the Twig to SDC Converter a try and see how it can streamline your workflow. We’d love to hear feedback and ideas from the community—whether it’s suggestions for this tool or thoughts on future automation tools you’d like to see!

Introduction to the Policy Based Access Checking in Drupal 10
Traditionally, access control in Drupal was primarily 'role-based.' The site owner would define various roles and assign specific permissions to each. These roles would then be assigned to users. If a user’s role included the necessary permission to perform a certain task, access would be granted; otherwise, it would be denied.

Despite being simple and straightforward, this way of access checking had a lot of limitations.
- Permissions were always linked with ‘User Roles’. There was no way to dynamically add/revoke permissions based on context such as the time of the day.
- Implementing use cases such as allowing edit permissions only if the user has 2FA enabled or only during office hours required writing a lot of code.
- User 1 had full access which might not be desirable in some cases
The Policy Based Access Checking was introduced in Drupal 10.3 to overcome such limitations of the traditional access control.
“Policy Based Access Control is a type of system where people gain or lose access based on certain predetermined scenarios or policies”
-Kristiaan Van den Eynde
How it works

The Access Policy API is the core of the Policy Based Access Checking(PBAC).Access policy is a tagged service that can add or remove permissions for a particular user, based on globally available context data such as the domain, time of day, current user's field values, etc. So, to create an access policy, create a service that extends the class \Drupal\Core\Session\AccessPolicyBase, and then add the ‘access_policy’ tag to the service.
The access policy calculates the permissions in 2 phases: The Build phase and the Alter phase.
Build phase
- During the Build phase, the core access policy processor invokes all the access policies defined in the codebase, based on priority.
- Each of these access policies update the permission based on context and return an instance of \Drupal\Core\Session\RefinableCalculatedPermissionsInterface that holds the permissions and the relevant cache metadata.
The following example illustrates the build phase of an access policy that gives additional permissions to the user based on the user’s timezone.
The calculatePermissions() method returns an object of type RefinableCalculatedPermissionsInterface. Since the access varies based on the user’s timezone, the getPersistentCacheContexts() method returns the ‘timezone’ context.
Alter phase
- The accesspolicy processor combines(Merge or Overwrite based on the overwrite parameter) all the permissions and cache metadata from all such access policies and generates a Drupal\Core\Session\RefinableCalculatedPermissions object.
- The ‘Alter phase’ allows other policies to alter these fully built permissions.
- This allows other modules to alter core’s (or any other module’s) access policies.
- The “RefinableCalculatedPermissions” object is converted to an immutable Drupal\Core\Session\CalculatedPermissions object after this phase.Properties of the CalculatedPermissions object cannot be changed later.
- Finally, the permission data is cached using the variation cache.
The following example illustrates how to revoke certain permissions from a user based on the user’s email domain, during the ‘alter’ phase.
This policy checks the email domain of the user and grants only authenticated user permissions, if the email domain is ‘example.com’. Note that the ‘overwrite’ parameter is set to ‘FALSE’ to fully change the permissions. The getPersistentCacheContexts() returns a custom cache context that depends on the user’s email domain.
Scopes and identifiers
Both ‘Scopes’ and ‘Identifiers’ help to increase the specificity of access policies.
- The scope is a string that identifies the context in which the policy is applied, like a group, a domain, a commerce store, etc.
- The identifier is a string that identifies the specific value within the scope (like the group ID, the domain ID, etc).
- Within Core, both scope and identifier default to AccessPolicyInterface::SCOPE_DRUPAL
Consider a simple scenario where the user should have access only to the ‘English’ translations of ‘Recipe’ contents. The scope can be defined as ‘recipe’ and the identifier as ‘en’.
The applies() method ensures that the above access policy is only applicable in the ‘recipe’ scope. The ‘scope’ and ‘identifier’ values are also passed along with the permissions to edit and create ‘recipe’ contents. This policy can be then invoked in the following way.
/**
 * Implements hook_node_access().
 */
function test_access_policy_node_access(NodeInterface $node, $operation, AccountInterface $account): AccessResultInterface {
  if ($node->getType() == 'recipe') {
    // Get the access policy for the given scope and identifier.
    $item = \Drupal::service('access_policy_processor')
      ->processAccessPolicies($account, 'recipe') // Gets all access policies in the 'recipe' scope.
      ->getItem('recipe', $node->language()->getId()); // Scope = 'recipe', Identifier = language of the node.

    if ($item && $item->hasPermission('edit any recipe content')) {
      return AccessResult::allowed();
    }
  }
  return AccessResult::forbidden();
}
In this way, The ‘edit any recipe content’ permission would be available only if the node’s language is ‘en’ so that non English recipe contents won’t be editable by the user.
Conclusion
The new access policy is definitely a worthy addition to the ever-evolving Drupal core. It’s more robust and efficient than the existing systems, and I hope this blog has given you a better understanding of it. Here is a quick summary of all topics explored in this blog.
- Role Based Access Checking and it’s limitations.
- Access Policy API and how it works.
- How to use Build Phase and Access Phase to dynamically update the permissions.
- Scopes and Identifiers and how to use them.
The code used in this blog can be found at: Github Link
.avif "Your guide to contributing a Drupal open-source module")
Your guide to contributing a Drupal open-source module
Drupal, like any open-source platform, evolves and improves through the contributions of its community.
The best part of being involved is that every effort counts, whether you're fixing bugs, writing documentation, reviewing updates, creating modules or themes, promoting Drupal, or organizing events. This article will guide you on how to contribute a module to Drupal and share it on Drupal.org.
Why and when to create a contributed module
If you notice that the CMS is missing a feature that others benefit all Drupal users, creating a contributed module can be valuable.
This is especially true if you’ve already developed a custom solution for a common problem or added features that existing modules don’t cover. By sharing your module, you help other developers facing similar challenges and expand Drupal’s functionality.
Contributing also leads to more collaboration—others can build on your work, suggest improvements, and help keep it updated with the latest Drupal versions.
It’s a rewarding way to share your expertise with the entire Drupal community, support the people who are a part of it, and promote good practices in open-source development. For more reasons to host your project on Drupal.org, visit "Why host your project on Drupal.org."
How to contribute a module : Step by Step guide
Step 1: Identify a problem and create a module for the purpose
The first step in creating a contributed module for Drupal is to thoroughly identify and understand the problem or gap in functionality that you aim to address. This involves a combination of research and analysis to ensure that your module will be both useful and relevant. Here’s a more detailed approach to this process:
- Research
Look for issues that people have encountered while using Drupal, or identify a feature that could benefit Drupal users. For instance, if multiple users ask for a specific feature or integration that isn’t currently available, this could be your chance to create a module. To find these contribution opportunities, you can explore drupal.org, community forums, and discussion boards
- Review Existing solution
Review existing modules and their documentation to understand their capabilities and limitations. Identify any gaps or areas for improvement. Review existing modules to ensure your idea is not a duplicate or already covered.
- Define Your Module’s Purpose
Clearly define the problem your module will solve or the feature it will provide. Make sure that the problem is significant enough to warrant a new module and that your solution will offer tangible benefits to users. Document the module’s functionality and objective clearly to keep your development focused and aligned with the identified needs.
By researching and engaging with the Drupal community, you can make sure your module meets a real need and offers valuable functionality. After identifying the problem and defining what your module will do, you can start creating it by following the steps in the Drupal documentation on creating modules.
Step 2: Preparing the module for drupal.org contribution
If the module you created in the last step improves the functionalities of drupal, you can go ahead with contributing the module. Ensure the module is generic and free of hardcoded configuration values. Include the following files:
- README.md: Provide detailed documentation in README.md file. This should contain an introduction , Installation guide, Post Installation configuration, Requirements, etc. For comprehensive instructions and a sample template, refer to the Drupal documentation on creating a README.md file.
- composer.json: Use this file to declare your module’s dependencies on third-party libraries. This ensures that when someone installs your module using Composer, all required libraries will be automatically downloaded and installed. For a practical template, refer to the Composer template for a Drupal 10 project. This template provides a comprehensive example of how to structure your composer.json file for Drupal projects.
- .gitignore: When there are third-party libraries included in your module, use this file to make sure that the actual third-party libraries are not included in your repository. This is because libraries should be managed by Composer and not be part of your module’s codebase.
Step 3: Create a new project in drupal.org
- Go to the Add a New Project page on Drupal.org. You need to be logged in with your Drupal.org account to create a project.
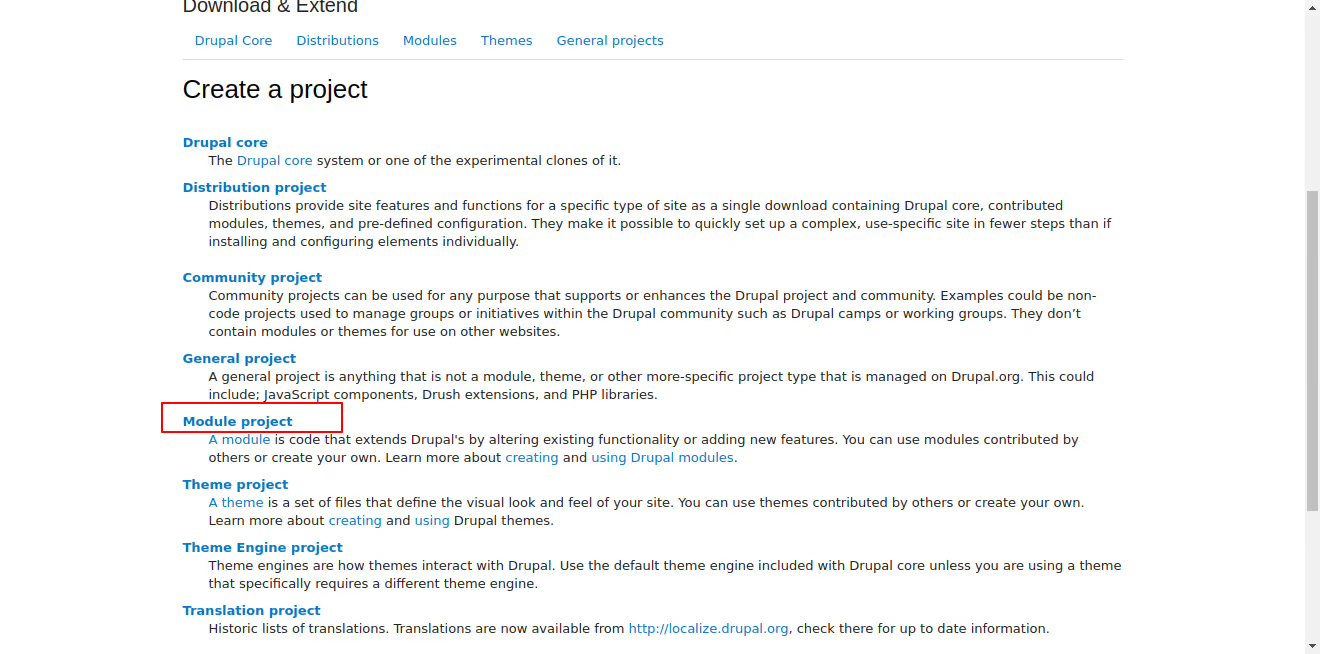
2. Choose the 'Module' project option. This specifies that you are creating a new module, as opposed to a theme, distribution, or other project types.
3. Fill Out the Project Form:
- Name *: Enter the name of your module. This should be clear and descriptive. Example: Field Display Toggle.
- Project Type *: When creating a new project on Drupal.org, you can select 'Full project' to indicate that your module is fully developed and ready for use. Sandbox projects, which were used for experimental and developmental purposes, are now deprecated. For more information on the differences between sandbox and full projects and to learn how to promote a project from sandbox to full, visit this guide on Drupal.org.
- Short Name *: Provide a machine-readable short name for your project. This is usually a lowercase version of the project name with underscores instead of spaces. Example: field_display_toggle.
- Maintenance Status *: Select the appropriate maintenance status from the options provided:
- Actively maintained
- Minimally maintained
- Seeking co-maintainer(s)
- Seeking new maintainer
- Unsupported
- Development Status *: Choose the current development phase:
- Under active development
- Maintenance fixes only
- No further development
- Obsolete
- Module Categories: Select up to three categories that best describe the functionality of your module.
- Ecosystem: If your module is part of an ecosystem (e.g., it provides plugins for Views or enhances Organic Groups), list the relevant projects here.
- Images: Upload any relevant images to showcase your module. Files must be less than 50 MB and can be of types: png, gif, jpg, jpeg.
- Replaced By: If your module replaces an older project, list the old project here.
- Description *: Write a detailed description of your module. This should include:
- Introduction and Summary: A brief introduction that summarizes the purpose and function of the module. Focus on new Drupal users. (The first 200 characters will be shown when browsing projects.)
- Features: Explain the basic functionality and unique features. Provide use cases.
- Post-Installation: Describe what users need to do after installing the module. Include configuration steps and special considerations.
- Additional Requirements: List dependencies such as other modules, libraries, or APIs.
- Recommended Modules/Libraries: Mention any modules or libraries that enhance or improve your project.
- Similar Projects: Compare your module to similar ones, highlighting what makes yours unique.
- Supporting this Module: Provide links to Patreon, OpenCollective, etc., for supporting development.
- Community Documentation: Add links to external documentation, YouTube walkthroughs, or a demo site.
- File Attachments: Upload any additional files necessary for your project (up to 1 MB, allowed file types: jpg, jpeg, gif, png, txt, xls, pdf, ppt, pps, odt, ods, odp, patch, diff, test, info, po, pot, psd).
- Supporting Organizations: Name any organizations that have supported the development of your module and describe their contributions.
- Issues *: Ensure the issue tracker is enabled for your project to manage bug reports and feature requests.
- Components *: Classify different aspects of your project (e.g., Code, Documentation, User Interface).
- Now you will be redirected to the project page. To ensure you provide all the necessary information, visit the Project Page Template for detailed guidance on what needs to be included.
Step 4: Upload source code to project in drupal.org
- In the project page created in step 3, click on the tab ‘Version Control’. Here you can find git commands for working with project’s source files.
- Use the Git commands provided in the Version Control tab to clone your project's repository to your local machine. This repository is where you'll upload your module's source code.
- You can also upload code to drupal.org from your local repo, github/gitlab repo.
- After running the git push command (as per the documentation), go back to the project page in drupal.org to confirm that your code has been uploaded.
Step 5: Add automated tests and pipeline
Automated testing and continuous integration are essential for keeping your Drupal module reliable and high-quality. Setting up a pipeline with GitLab CI will automatically test and validate every change to your module. Here’s a step-by-step guide on adding automated tests and configuring a pipeline for your module on Drupal.org:
- Navigate to the Source Code Section: On your module's project page on Drupal.org, click on the ‘Source Code’ link under the development menu. This will redirect you to the project's source code repository.
- Create a New File for GitLab CI Configuration: Click on the ‘+’ icon next to the project name and select option ‘New File’.

- Add the GitLab CI Configuration File: Add file name ‘.gitlab-ci.yml’ and now an option to select template appears. Select the option ‘template.gitlab-ci. This template provides a basic configuration that can be customized according to your needs.
- Customize the GitLab CI Configuration: The template provides a basic structure for the pipeline. You can modify this configuration to include various stages such as build, test, and deploy. For a detailed process on customizing the automated tests and pipeline, visit Guide on Gitlab CI.
- Commit the Changes: Commit the changes and now the pipeline will be executed . The pipeline will run the specified stages, including building the project, running tests, and any deployment steps you have configured.
- Running PHPUnit Tests: To integrate PHPUnit tests within this pipeline, refer to the official Drupal documentation on running PHPUnit tests. This guide provides a comprehensive overview of how to set up and run PHPUnit tests in a Drupal environment, including configuring the necessary dependencies and understanding the test output.
Conclusion
Contributing a module to Drupal.org is a great way to support the community and apart from that by creating something useful, you're helping both the Drupal community and the businesses that rely on it. It's also a chance to share your work, get feedback on it, and be part of open-source development.
Enjoy the process, knowing that your efforts make a difference to Drupal as a digital public good and benefit everyone who uses it.

How to use Git in VS code
Visual Studio Code is a popular, lightweight, and open-source code editor that provides a wide range of features for coding, debugging, and version control. One of the most powerful features of VS Code is its integration with Git, a popular version control system. In this blog, we'll explore how to use Git in VS Code, covering the basics of Git and how to perform common Git operations within the VS Code environment.
How to set up Git in VS code
To use Git and Github in VS Code, you first need to install Git on your system. Once done, sign into VS Code with your GitHub account by clicking on the Account button at the lower right side, then click on the “Sign in to sync settings” button.
This will redirect you to your browser where you can click on the “Authorize visual-studio-code” button. After this, you can clone repositories from GitHub in VS Code.
Open Git repository in vs code
To clone a repository from GitHub, execute the Ctrl + Shift + P keys and type “git clone:” in the search bar. You will see the option “Clone from GitHub” in the drop-down menu. Click on it to show all the repository URLs, then select clone and pick a folder. VS Code will open the folder once the repository is cloned on your local machine.
Git add, commit, and push in vs code
Now that your local Git repository is in VS Code, any changes you make to the repository folder will appear on the left side in the source control section. This section provides the file list of all the changes.
To add a file to the stage, click on the “+” sign as shown in the screenshot. This will move all your files into the staged area.
Next, type the commit message in the message box and click the checkmark “✓” button to commit the changes. To push the code, click on the “More actions” button (which looks like “…”), then select “Push” from the dropdown menu.
Git stash in vs code
When switching between branches or tasks, the git stash command comes in handy. It allows you to temporarily store your uncommitted local changes and re-apply them at any branch. To stash your changes, go to the source control on the left side of VS Code and click the ‘more actions’ button (represented by “…”). Then select Stash > Stash (Include Untracked) and add a relevant message before pressing enter. This will stash your file changes locally.
To bring the stash changes to your branch, go to source control and click on the “…” button, then select Stash > Apply Latest Stash.
What is the difference between “Stash” and “Stash (Include Untracked)”?
- “Stash” saves only modified file changes.
- “Stash (Include Untracked)” saves all file changes, including untracked files and modified files.
What is the difference between “Apply Latest Stash” and “Apply Stash”?
- “Apply Latest Stash” applies the last stash to the current working branch and saves the topmost stash on the stash list, so you can use it later.
- “Apply Stash” provides a list of stashes, and you need to select which stash changes you want to include in your working branch.
What is the difference between “Pop Latest Stash” and “Pop Stash”?
- “Pop Latest Stash” applies the last stash to the current working branch and removes the latest or topmost stash.
- “Pop Stash” removes a specific stash from the list when you select the changes you want to include in your working branch.
What is the difference between “Drop Stash” and “Drop All Stashes”?
- “Drop Stash” allows you to drop a specific stash from the list.
- “Drop All Stashes” removes all stashes.
Note that you can apply stashes to any branch it is not specific to the branch where the stash was created.
Git cherry pick in vs code
Git cherry-picking is a process of selecting one or multiple commits from one branch and applying them to another branch. Let’s say you have a project with two branches: master and develop. The master branch has three commits (DEV-001, DEV-002, DEV-003), and the develop branch has two commits (DEV-004, DEV-005).
Now, if you want to transfer the DEV-005 branch code from the develop branch to your master branch, you need to checkout to the master branch and go to the branches section and right click on the DEV-005 commit that you want to cherry-pick, and select “cherry-pick commit”.
The cherry-pick was successful and DEV-005 commits are now visible in the master branch. Hopefully, this overview has helped you understand the basics of using Git and GitHub in VS Code.
Conclusion
Using Git integration in Visual Studio Code seamlessly incorporates version control into your development process. The built-in Source Control panel and terminal allow you to efficiently manage everything from initializing a repository to pushing changes to a remote repository without leaving the editor.
Hope this information helps, Happy Coding :)
.avif "How to integrate SSO with Drupal using miniOrange Module")
How to integrate SSO with Drupal using miniOrange Module
What is SSO
Single Sign-On (SSO) is an authentication process during which a user is provided access to multiple applications and/or websites by employing a single set of login credentials (such as username and password).
This prevents the necessity for the user to log in and out separately into the various applications. Single Sign-On (SSO) addresses the challenge of maintaining the credentials for every application separately, streamlining the method of signing-on without the need to re-enter the password. SSO is a crucial aspect of the many Identity and Access management (IAM) and security control solutions.
When a user signs into a service with their SSO login, an authentication token is created and stored either in their browser or in the SSO solution’s servers. Any app or website the user subsequently accesses will check with the SSO service, which then sends the user’s token to confirm their identity and provide them with access.
Architecture
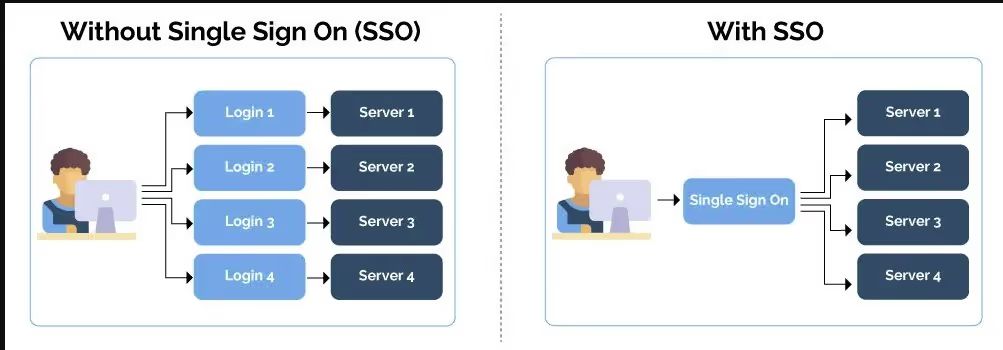
Image by : Diego Pozag
SSO Workflow

Image by : Manish Harsh
Workflow of SSO in Drupal
- User requests access to their desired website, That website is from the Service Provider.
- The APP/website (Service Provider) redirects the SSO request to Identity Provider for authentication.
- The user signs in with their Identity Provider credentials.
- The Identity Provider sends back the Single Sign-On Response to the Service Provider.
- On receipt of the SSO Response, the user is granted the access to log in and access the resource or application.
- Now the user can access all the other applications/websites from the Service Provider which are configured for SSO-Single Sign-On
Drupal as IDP and SP
1) Drupal as a SAML SP : Allow your users to login into your Drupal site using their IDP ( Identity Provider ) Credentials.
2) Drupal as a SAML IDP: Allow your users to login to any SAML complaint application using their Drupal site credentials.
Guide for Drupal Single Sign On (SSO) using Drupal 9 as Identity Provider (IDP) and Service Provider (SP)
Drupal IDP Modules used for SSO
Requirements before initiating SSO in Drupal
- For Drupal as IDP , If you have a requirement of mapping the user data between SP and IDP drupal sites or need multiple SPs login then you have to use the Paid version of module where cost can be found here.
- To get a paid version of the module you can contact info@xecurify.com or call on +1 978 658 9387 (US) and +91 97178 45846 (India) for a trial of 7 days or more.
- Here I have demonstrated a paid version of the IDP module.
Configure SSO module in Drupal as IDP
- To install free version using composer and Enable it using drushsome text
- composer require drupal/miniOrange_saml_idp
- drush en miniOrange_saml_idp
- In case of the paid version of the module create an account here or you can directly install free version of module and Go to the miniOrange SAML IDP module configuration and click onRequest 7-days Trial button.
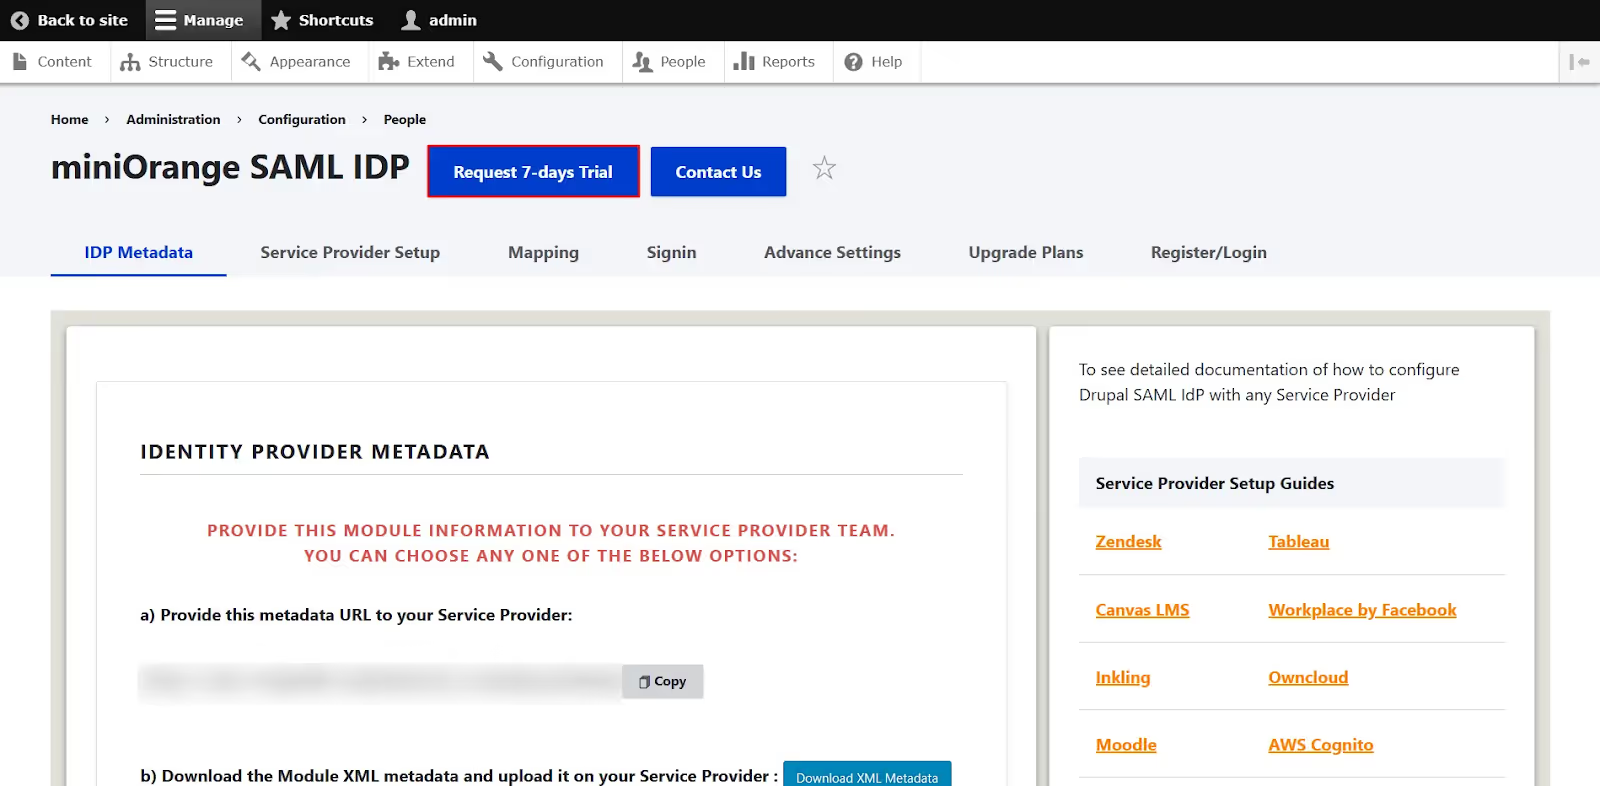
- Enter your email, number of users, service provider name, and any use case specific requirement. Click on the Submit button.
- Once you have submitted the request, You will receive mail from above listed contact details with the module's zip folder and with further guidelines of installation.
- After downloading and enabling the licensed version of the module Go to the configuration of the module. (/admin/config/people/miniOrange_saml_idp/customer_setup).
- It will ask for login details and license key , Enter them and the below page will be shown.
- Go to the IDP metadata tab (admin/config/people/miniOrange_saml_idp/sp_setup). You can download your IDP metadata to share with SP site for setting up connection.
- Go to Identity provider Setup tab (admin/config/people/miniOrange_saml_idp/idp_setup)
- Click on ‘Add new SP’ button and upload SP metadata over there and save .(once you setup Drupal SP site you can download SP metadata from the SP site)
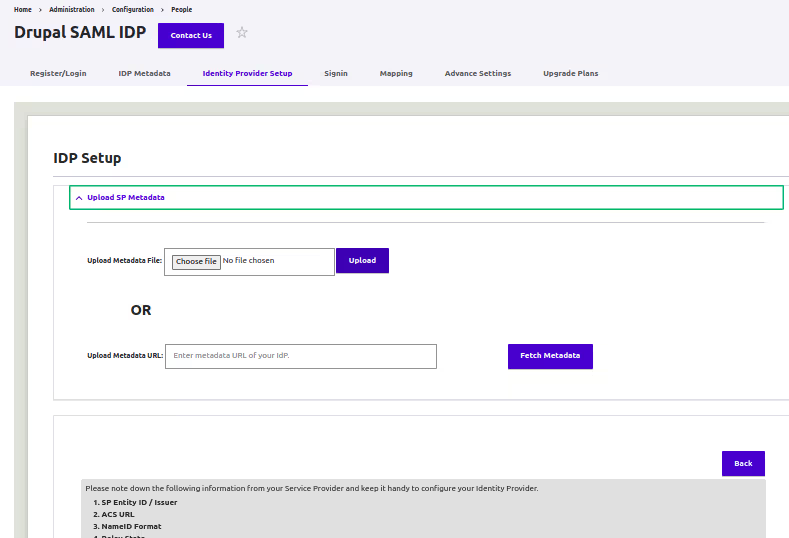
- On clicking Save you can test the configuration if it works or not by clicking Test here.You should be redirected to SP site directly without login.
- If you want to redirect to a specific page of SP site you can update your Login initiated URL by adding &RelayState=<URL to which the user is to be redirected> at the end of URL.
- Login initiated URL can be found from here (admin/config/people/miniOrange_saml_idp/signon_settings)
- For eg: https://my.idpsite.com/saml_user_login?sp=ServiceProvider&RelayState=https://my.spsite.com/about-us
- Now this URL can be used anywhere in the IDP site to initiate SSO login
- By default IDP only send email of user but additional information can be passed on to SP via XML using Mapping feature (admin/config/people/miniOrange_saml_idp/Mapping)
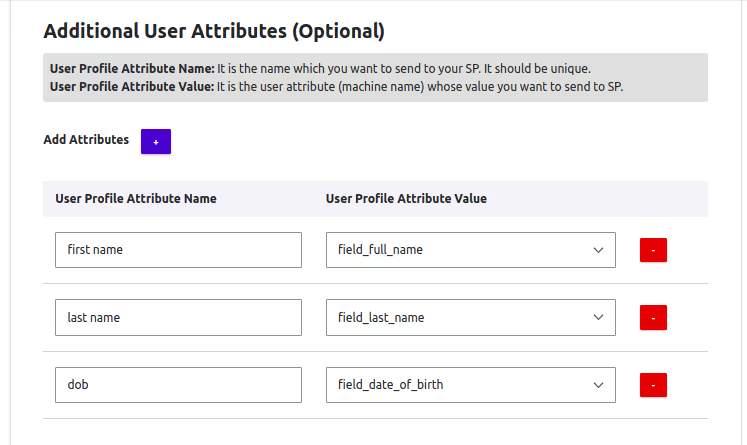
- So here first name,last name and dob string will store values of drupal idp user and send them to SP site. SP site should have this same string names for mapping correct user values.
- Using SAML tracer we can identify which values are being passed while login so for testing purposes it is better to open SAML tracer while testing SSO and check correct values are passed in tracer or not.
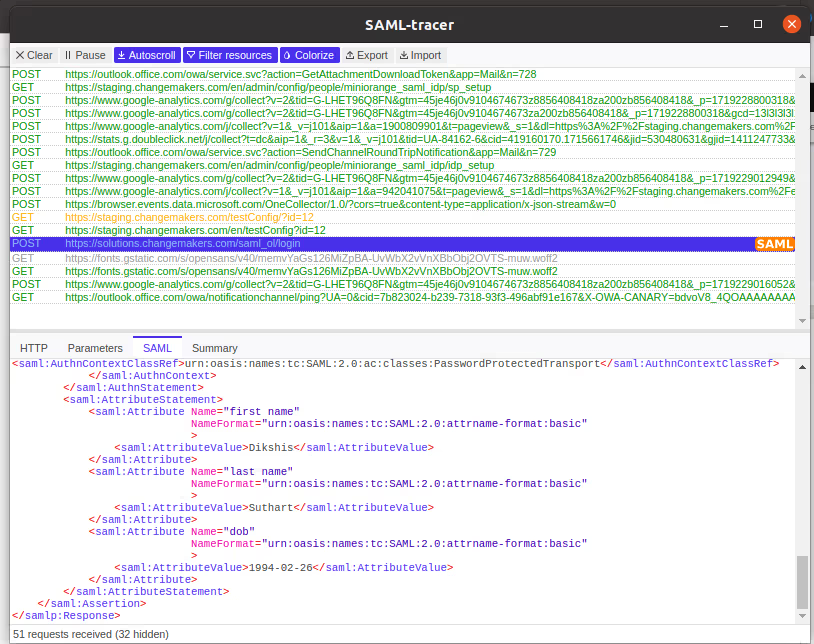
Notes:
- Make sure that your site does not have any login or logout redirection related module (eg: Login Destination) or any custom redirect for login/logout as they will conflict with this setup.
Configure miniOrange SP module Settings in Drupal
- Composer require drupal/miniOrange_saml
- Go to the Drupal site and run the update script using this drush updb
- Install the module: drush en miniOrange_saml
- Configure the module at /admin/config/people/miniOrange_saml/idp_setup and download your SP site meta data which will need in setting up IDP site
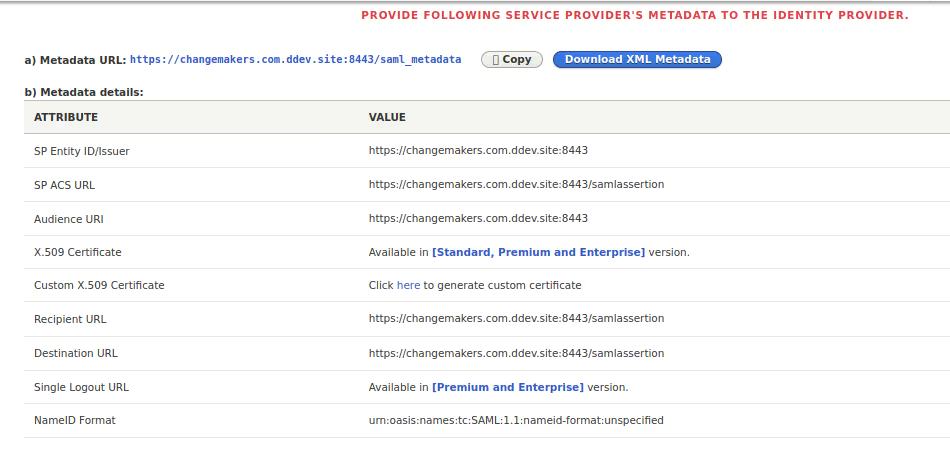
- Go to admin/config/people/miniOrange_saml/sp_setup and upload IDP site metadata

- Make sure in your site’s service.yml has allowed URL of IDP site as shown below:
allowedOrigins: ['https://my.idpsite.com']
Testing Tools
We will use the following tool to debug our SAML request as parameters are properly being transmitted from IDP to SP or vice-versa.
- SAML Tracer for Mozilla Firefox.
- SAML Tracer for Google Chrome.

Drag-and-drop made easy in Drupal with core's sortable.js
Creating a seamless and interactive user experience is more important than ever. One powerful tool for achieving this goal is drag-and-drop functionality, which Improves user engagement by allowing intuitive manipulation of elements directly on a webpage.
Drupal 10, renowned for its flexibility and robustness as a content management system (CMS), Uses Sortable.js—a JavaScript library designed to simplify the creation of drag-and-drop interfaces.
This blog explores Sortable.js in-depth, covering its functionality, benefits, and practical steps for implementing and customizing it effectively within Drupal projects.
What is sortable.js?
Sortable.js is a JavaScript library that facilitates drag-and-drop sorting for various web elements. It supports touch devices and provides various customization options, making it a flexible choice for developers.
Key features
Drag-and-drop functionality for sorting items.
- Touch support for mobile and tablet devices.
- Customizable options for enhanced flexibility.
- Event handling to trigger custom actions during drag-and-drop interactions.
Sortable.js is built into Drupal 10 core, enabling developers to implement drag-and-drop functionality effortlessly without requiring additional libraries or complex configuration. This integration streamlines the process and ensures seamless compatibility with other Drupal features. Notably, Sortable.js is utilized in Drupal's Layout Builder, enhancing the flexibility and user-friendliness of the layout design process within the core system.
Benefits
Enhanced user experience
Drag-and-drop interfaces offer a more interactive and engaging user experience. Users can effortlessly reorder items, manage lists, and complete tasks intuitively, improving your website's overall usability.
Flexibility and customization
Sortable.js provides a wide range of customization options, enabling developers to adapt the drag-and-drop functionality to their specific requirements. From defining draggable elements to customizing animations, Sortable.js equips developers with the tools to craft unique user experiences.
Ease of implementation
With Sortable.js integrated into Drupal, adding drag-and-drop functionality becomes a breeze. Developers can quickly incorporate this feature into their projects without extensive coding or configuration, saving both time and effort.
Implementing Drag-and-Drop with sortable.js in Drupal
- Step-by-Step Guide:
1. Using sortable.js as a dependency in .libraries.yml
library-name:
  version: 1.x
  js:
    js/js-name.js: {}
  dependencies:
- core/sortable- Attaching the library to specific pages or blocks
- Creating Draggable Elements
Define the HTML structure of the elements you want to make draggable:
<ul id="sortable-list">
  <li class="sortable-item">Item 1</li>
  <li class="sortable-item">Item 2</li>
  <li class="sortable-item">Item 3</li>
</ul>
Initialize sortable.js on the container element:
var el = document.getElementById('sortable-list');
var sortable = new Sortable(el, {
  animation: 150,
});

Restricting Drag-and-Drop in specific containers
In certain scenarios, you may want to restrict drag-and-drop functionality within specific containers to maintain order or prevent unintended actions.
Implementation guide:
- Container identification: Identify the containers where you want to restrict drag-and-drop functionality. Assign unique IDs or classes to these containers.
- Using sortable.js options: Utilize sortable.js options to enforce restrictions. For example, to prevent dragging items out of a specific container:
var container1 = document.getElementById('container1');
var container2 = document.getElementById('container2');

var sortable1 = new Sortable(container1, {
  group: 'shared',
  animation: 150,
});

var sortable2 = new Sortable(container2, {
  group: {
    name: 'shared',
    pull: false,
    put: true
  },
  animation: 150,
});

In the above example, the user can drag an item from Container 1 to Container 2 but vice versa is restricted so the user is not able to add the item to Container 1 from Container 2
Advanced customizations and tips
Custom animations and effects:
Enhance the drag-and-drop experience by adding custom animations and effects using CSS and JavaScript. Sortable.js allows you to specify animation durations and easing functions for smooth transitions. For example:
/* Custom CSS for animation effects */
.draggable-item {
  transition: transform 0.2s ease-in-out;
}

.draggable-item.dragging {
  opacity: 0.7;
  transform: scale(1.1);
}
// JavaScript to apply custom animations
var container1 = document.getElementById('container1');
var container2 = document.getElementById('container2');
var sortable1 = new Sortable(container1, {
group: 'shared',
animation: 150,
onStart: function (/**Event*/evt) {
evt.item.classList.add('dragging');
},
onEnd: function (/**Event*/evt) {
evt.item.classList.remove('dragging');
}
});
var sortable2 = new Sortable(container2, {
group: {
name: 'shared',
pull: false,
put: true
},
animation: 150,
});

Handling events
Sortable.js provides various events such as onStart, onEnd, onAdd, and onRemove. Use these events to trigger custom actions during drag-and-drop interactions, such as updating the database or modifying other elements on the page. Here's an example:
var container = document.getElementById('container');

var sortable = new Sortable(container, {
  animation: 150,
  onAdd: function (evt) {
    console.log('Item added:', evt.item);
    // Custom action, e.g., update the database
    updateDatabase(evt.item);
  },
  onEnd: function (evt) {
    console.log('Drag ended:', evt.item);
    // Custom action, e.g., modify other elements on the page
    updateUI(evt.item);
  }
});

function updateDatabase(item) {
  // Example function to update the database
  console.log('Updating database with item:', item);
}

function updateUI(item) {
  // Example function to modify UI elements
  console.log('Updating UI for item:', item);
}

- Performance optimization: For complex projects with numerous draggable elements, optimize performance by debouncing event handlers, minimizing DOM manipulations, and leveraging Sortable.js's built-in options for efficient rendering.
Conclusion
Sortable.js, integrated into the Drupal core, offers a powerful and flexible solution for implementing drag-and-drop functionality in your projects. By enhancing user experience, providing customization options, and simplifying implementation, Sortable.js empowers developers to create intuitive and engaging interfaces. By leveraging the power of Sortable.js and Drupal, you can create dynamic, user-friendly web applications that stand out in today's competitive digital landscape.

Exporting and emailing Drupal nodes as PDFs with Entity print
Sending emails with attachments is a common requirement for any website. Entity print is a widely popular module that helps to export any Drupal entities as PDFs instantly. Using this module, users can either download an entity as pdf or view the entity as PDF in their browser instantly.
However, in some cases, you might want to send the PDF version of a node/entity as an attachment in an email to the user. Entity print module does not support this out of the box. But we can easily reuse the services provided by the module to build this functionality.
Prerequisites
- A fresh/existing Drupal website.
- Entity print module downloaded and installed using composer.
- A PDF generation library configured on the server.
- Working SMTP configuration with support to send email attachments.
The Goal
Any node can be instantly downloaded as a PDF by accessing the path /print/pdf/node/[node_id] using the Entity print module. We plan to extend this functionality and build a custom module that will
- Print any node as PDF by accessing the path ‘/email/pdf/node/[node_id]'.
- Save the generated PDF in the ‘emailed_pdfs’ folder under the ‘sites/default/files’ directory.
- Send a mail to a given mail id with the generated PDF attached.
- Add the generated PDF to a queue for deletion, after the mail has been sent.
- Redirect back to the node with a status message once the mail has been successfully sent.
The Plan
- Create a Controller with a method process() that will get invoked when the path /email/pdf/node/[node_id] is accessed.
- Create a queue worker plugin which will process items added to the queue during cron.
- Within the process() method:
- Call the prepareDirectory() method first to create the ‘emailed_pdfs’ folder under ‘sites/default/files’.
- Call generatePdfFromNode(), responsible for generating and saving the PDF in the ‘emailed_pdfs’ folder.
- Call sendMail(), responsible for creating the PDF attachment and sending the email.
- Implement hook_mail() to map the email parameters.
- Add the uri of the pdf to the queue for clean up, once the mail has been sent.
- Note: Queues can also be used for generating the PDF in high traffic sites.
The Implementation
- Create the controller ‘EntityPrintMailController’.
- Inject the following services to the controller.
- Now define the generate() method.
 /**
  * Build the response.
  */
 public function process(NodeInterface $node_id) {
   // Prepare the destination folder if it does not exist.
   if ($this->prepareDestinationFolder()) {
     // Generate the PDF from the node.
     $data = $this->generatePdfFromNode($node_id);
     if (!empty($data)) {
       // Pass the 'uri' and 'print engine' values to attach the pdf and send
       // the mail.
       $result = $this->sendMail($data['uri'], $data['print_engine']);
       // If $result = TRUE, Mail has been sent successfully.
       if ($result) {
         $message = $this->t('Email sent successfully');
         $this->messenger()->addStatus($message);
         // Add the generated file's uri to the queue so that it can be
         // deleted later.
         $queue = $this->queueFactory->get('my_module_pdf_remover');
         $item = new \stdClass();
         $item->uri = $data['uri'];
         $queue->createItem($item);
       }
     }
   }
   // Redirect back to the node.
   return $this->redirect('entity.node.canonical', ['node' => $node_id->id()]);
 }
- The prepareDestinationFolder() method uses the ‘prepareDirectory()’ method provided by the ‘file_system’ service to create the ‘emailed_pdfs’ folder.
 /**
  * Prepares the folder to store the generated PDFs.
  */
 public function prepareDestinationFolder() {
   $destination_folder = 'public://emailed_pdfs';
   // Try to create the directory.
   if ($this->fileSystem->prepareDirectory(
        $destination_folder, FileSystemInterface::CREATE_DIRECTORY |
        FileSystemInterface::MODIFY_PERMISSIONS)
   ){
     // Return 'TRUE' if the folder was successfully created.
     return TRUE;
   }
   else {
     // Return 'FALSE' in case of any error.
     return FALSE;
   }


 }
- Once the folder is created, generatePdfFromNode() method converts the node entity to PDF..
 /**
  * Generates the pdf from the node.
  */
 public function generatePdfFromNode(NodeInterface $node) {
   // Define the name of the pdf.
   $file_name = 'emailed_pdfs/' . $node->label() . '.pdf';
   // Generate the pdf.
   $print_engine = $this->pluginManagerEntityPrintPrintEngine->createSelectedInstance('pdf');
   $file_path = $this->entityPrintPrintBuilder->savePrintable([$node], $print_engine, 'public', $file_name);
   if ($file_path) {
     return [
       'uri' => $file_path,
       'print_engine' => $print_engine,
     ];
   }
   return [];
 }
- Appending ‘/emailed_pdfs’ to the file name ensures that the file gets saved in the ‘emailed_pdfs’ folder.
- Both the uri and binary data of a file are required to attach it in an email.
- The binary data of the file can be obtained from the print engine object.
- So, once the file is saved, an array containing both the file uri and print engine object are returned.
 /**
  * Send the mail with the given file as attachment.
  */
 public function sendMail(string $file_uri, PrintEngineInterface $print_engine) {
   $module = 'my_module';
   $key = 'node_pdf_mail';
   $to_mail = 'test@test.com';
   // Create the file attachment.
   $attachment = [
     'filecontent' => $print_engine->getBlob(),
     'filepath' => $file_uri,
     'filemime' => 'application/pdf',
   ];
   $params['attachments'] = $attachment;
   $params['message'] = 'Mail subject';
   $params['subject'] = 'Mail body';
   $langcode = $this->languageManager()->getCurrentLanguage()->getId();
   // Send the mail.
   $result = $this->pluginManagerMail->mail($module, $key, $to_mail, $langcode, $params, NULL, TRUE);
   return $result;
 }
- The ‘sendMail()’ method accepts the file uri and the print engine object.
- ‘$print_engine->getBlob()’ returns the binary data of the pdf.
- Then hook_mail is added to properly map the mail parameters.
/**
* Implements hook_mail().
*/
function my_module_mail($key, &$message, $params) {
 switch ($key) {
   case 'node_pdf_mail':
     $message['from'] = \Drupal::config('system.site')->get('mail');
     $message['subject'] = $params['subject'];
     $message['body'][] = $params['message'];
     $message['params']['attachments'][] = $params['attachments'];
     break;
 }
}
- Finally, the uri of the file generated is added to the ‘my_module_pdf_remover’ queue for deleting it.
/**
* Defines 'my_module_pdf_remover' queue worker.
*
* @QueueWorker(
*   id = "my_module_pdf_remover",
*   title = @Translation("Pdf remover"),
*   cron = {"time" = 60},
* )
*/
final class PdfRemover extends QueueWorkerBase implements ContainerFactoryPluginInterface {


 /**
  * Constructs a new PdfRemover instance.
  */
 public function __construct(
   array $configuration,
   $plugin_id,
   $plugin_definition,
   private readonly FileSystemInterface $fileSystem,
 ) {
   parent::__construct($configuration, $plugin_id, $plugin_definition);
 }


 /**
  * {@inheritdoc}
  */
 public static function create(ContainerInterface $container, array $configuration, $plugin_id, $plugin_definition): self {
   return new self(
     $configuration,
     $plugin_id,
     $plugin_definition,
     $container->get('file_system'),
   );
 }


 /**
  * {@inheritdoc}
  */
 public function processItem($data): void {
   // Get the uri of the file to remove.
   $uri = $data->uri;
   // Delete the file.
   $this->fileSystem->delete($uri);
 }


}
Verify the Result
- Create a node titled ‘Awesome node’.
- Update the 'to' address in the ‘sendMail()’ method to your email address..
- Assuming the node id is ‘1’, access the path ‘/email/pdf/node/1’.
- You will be redirected to the 'Awesome node' page with a success message stating 'Email sent successfully'.
- Check the folder ‘/sites/default/files/emailed_pdfs’. You will find the generated PDF named ‘Awesome node.pdf’ there.
- If SMTP is configured for your site, you will receive the PDF as an attachment in the email.
- Running the cron would remove the PDF from the folder
A Quick Recap
Hope this blog has given you a basic understanding of how to export a node as a PDF and attach it to emails. Here is an overview of all the things covered in this blog.
- Created a controller that will accept any valid node ids and export that node as PDF.
- Reused services provided by the Entity print module to save the PDF in a separate folder.
- Learned how to add file attachments in emails.
- Created queue workers to clean up the unwanted files.
GitHub URL

Essential CSS for perfect PDF rendering in Drupal
Creating PDFs from web content is a frequent necessity, and Drupal provides powerful tools. However, a lot of attention to CSS is essential to achieve a polished and professional appearance in your PDFs. This blog post will talk about the critical CSS properties that ensure your PDFs render flawlessly in Drupal.
Proper CSS implementation can transform a simple document into a well-structured, visually appealing PDF. From controlling page breaks to embedding fonts, the right CSS techniques make all the difference.
Whether you need to generate reports, invoices, or any other type of document, understanding these CSS properties will help you create high-quality PDFs that meet your needs.
Why CSS Matters in PDF Generation
CSS is crucial in PDF generation because it defines the appearance and structure of your document, controlling layout, font styles, spacing, and more. It ensures content is organized and visually appealing by managing margins, padding, and alignment.
Properly applied CSS maintains consistent styling, improves readability, and supports brand identity with web-safe or embedded fonts. CSS also effectively handles page breaks, preventing awkward splits in content, and allows media-specific styles using @media print for optimized print layouts.
By enhancing tables and images, CSS ensures they are clear and appropriately sized. Ultimately, CSS transforms plain documents into well-structured, professional, and readable PDFs, making it indispensable for high-quality PDF rendering in Drupal.
Essential Tools for PDF Generation in Drupal
Before exploring CSS properties, it's essential to have the necessary tools for PDF generation in Drupal. Several libraries and modules enhance the PDF generation process:
DOMPDF is a PHP library that converts HTML content into PDF format and supports many CSS properties, making it suitable for simple to moderately complex PDFs.
TCPDF is known for its extensive feature set and flexibility, supporting a wide range of PDF functionalities and advanced layout options, including digital signatures and barcodes. The PDF API module provides a general framework for using various libraries like DOMPDF and TCPDF within Drupal, offering customizable templates and integration with different content types.
Entity Print is a versatile module that allows you to generate PDFs from any Drupal entity, such as nodes, users, comments, and custom entities. It integrates well with these PDF generation libraries, supports Views integration for creating PDFs from view displays, and offers customizable templates for different entity types.
Additionally, Entity Print supports batch processing, making it efficient for generating multiple PDFs at once. These tools, used together, provide a robust solution for all your PDF generation needs in Drupal.
Essential CSS Properties for PDF Styling
1. Page Breaks
Controlling where pages break is crucial for readability. Use the following CSS properties to manage page breaks:
CSS
page-break-before: always; Before starting each page, insert a page break so that it begins on a new page.
page-break-after: always;After ending each page, insert a page break so that the next content begins on a new page.
page-break-inside: avoid;The CSS property page-break-inside: avoid; instructs web browsers and PDF renderers to prevent breaking a box, such as a table, across pages.
This ensures that the entire content of the box stays together without being split between two pages, as shown in the example below where the property is applied to a table so instead of starting on the first page as per content it starts from the second page.
2. Media Queries for Print
Applying print-specific styles can greatly enhance the appearance of your PDFs. Use the @media print query to tailor styles for PDF output:
CSS
@media print {
  body {
    font-family: Arial, sans-serif;
  }
  .print-section {
     margin: 20mm;
     padding: 10mm;
  }
3. Fonts and Typography
Using web-safe fonts or ensuring fonts are embedded in the PDF is critical. Define print-specific fonts to maintain consistency:
CSS
@media print {
  body {
    font-family: 'Times New Roman', Times, serif;
  }
}
4. Headers and Footers
Adding headers and footers to each page can provide context and improve navigation. Use fixed positioning for consistent placement:
CSS
@media print {
  @page {
    size: A4;
  }

  header, footer {
    position: fixed;
    left: 0;
    right: 0;
    height: 20mm;
    background: #f1f1f1;
    padding: 5mm;
  }

  header {
    top: 0;
  }

  footer {
    bottom: 0;
  }

  .content {
     margin-top: 30mm;  /* Space for header */
     margin-bottom: 30mm;  /* Space for footer */
  }
}
5. Styling Tables
Tables often present challenges in PDFs. Ensure they are styled for clarity and avoid breaking across pages:
CSS
@media print {
  table {
    width: 100%;
    border-collapse: collapse;
  }

  th, td {
    border: 1px solid #000;
    padding: 4px;
    text-align: left;
  }

  tr {
    page-break-inside: avoid; /* Prevents breaking rows across pages */
  }
}
6. Image Rendering
Ensure images fit within the page and retain their aspect ratio:
CSS
@media print {
  img {
    max-width: 100%;
    height: auto;
  }
}
CSS Properties to Avoid
When generating PDFs from HTML content, certain CSS properties do not translate well and can cause issues with the final output. Here are some CSS properties to avoid:
Animations and Transitions
Animations and transitions are designed for interactive web pages and have no place in static PDF documents. They are not supported in PDF rendering engines and will be ignored, potentially leading to unexpected layout issues.
Dynamic Layout Properties
While position: fixed can be used for headers and footers, it should be used sparingly as it might not be handled consistently by all PDF rendering engines. Properties like float and clear can cause elements to be positioned incorrectly or overlap in PDFs, as the rendering logic for these properties may not align with web browsers.
Interactive Elements
The pseudo-classes: hover, focus, and: active are meant for interactive elements on web pages and do not apply to static PDF documents. Any styles applied using these selectors will be ignored in the PDF, leading to inconsistencies between the web version and the PDF.
Backgrounds and Gradients
Background images and gradients are often not supported or poorly rendered in PDFs. This can result in missing or distorted backgrounds, which detracts from the professional appearance of the document.
Conclusion
By applying these essential CSS properties, you can ensure that your PDFs generated in Drupal are professional and easy to read. Focus on controlling page breaks, using print-specific media queries, embedding fonts, adding headers and footers, styling tables correctly, and managing image rendering.
Avoid properties that do not render well in PDFs to maintain the quality of your documents. With these tips, your PDFs will not only look great but also enhance the overall user experience, providing clear, well-structured content every time.

How to alter the exception message thrown from core REST API
Introduction
Recently, I was working with a REST API where I needed to register a user account. I decided to reuse the core user registration REST API, however, the only problem was that the error messages were not user-friendly.
At that time, I felt the need to alter the exception messages thrown by the core REST API. I got the opportunity to explore the REST API workflow and discovered the 'Event Subscriber' approach that could be used.
Example
Let’s take a very generic scenario: a user tries to create an account with an email ID that already exists. When the REST API endpoint is hit at the backend, a more user-friendly exception message is thrown from the core user registration API using the 'Event Subscriber' approach through customization.
Default core user registers Rest API thrown error message:
"message": "Unprocessable Entity: validation failed.\nmail: email address nia@gmail.com is already taken.\n"s
Custom thrown error message for core user register REST API: By using event subscriber approach: see attached screencast for demo:
"message": "The email address nia@gmail.com is already taken."

Steps to alter error messages thrown from core REST API
Steps to alter the error message thrown from core REST API by using the “event subscriber” approach:
1. Create a new service: “custom_rest_validation.custom_rest_validation_subscriber” in which tags key pass event_subscriber & class key pass name of the class that needs to call when this specified event subscriber calls.

Note: Services are defined in a file called 'custom_rest_validation
.services.yml', assuming that your module is named 'custom_rest_validation. This file should be located in the root directory of your module project.
2. Create an event subscriber class that is attached to the newly created service in the above-mentioned step.

Here, getPriority() handles the exceptions we want for JSON calls before core subscribers (with priority -70/-75). Therefore, it is given a higher priority value (-69) than the core subscriber.

Here, onException() handles errors for this subscriber and is used to throw custom exception messages. A condition is added so that the custom exception is thrown only for the user registration API and for the email field.

Here call the custom parseErrorMsesage($msg) conditionally, which returns a human-readable user-friendly error message “The email address example@gmail.com is already taken.” if the user enters an existing email while creating a new user account.

Note: The event subscriber class CustomExceptionSubscriber.php will be placed in the following folder structure: root_folder_module/src/EventSubscriber/.
We can alter the exception message of the core REST API by extending an "event subscribe" approach.
Conclusion
This approach allows you to utilize the core REST API implementation and integrate desired functionality to provide more human-readable, user-friendly exception messages to end users, thereby enhancing the user experience. The following actions are implemented using the REST API:
- Get data from the endpoint (GET request)
- Create data at the endpoint (POST request)
- Update data at the endpoint (PATCH request)
- Delete data from the endpoint (DELETE request)
Reference links
For more details about the REST API, you can follow the GitHub demo link. For example, in this demo, I have altered the error message of the core user registration API. If a user enters an existing email ID, a custom exception message will be thrown instead of the default error message from the core REST API for user registration.
Rest API: documentation

Exploring the new "#config_target" option in Drupal 10
Have you ever created a configuration form? It is one of the first things that we learn as Drupal developers. We use configuration forms to store values in configuration and then build functionalities based on those stored values. A good example is the ‘Basic site settings’ where we add the site name, site email, front page etc.
What is configuration validation?
Let's go back to the ‘Basic site settings’. Go to the ‘Error pages’ section, add ‘/i-love-drupal’ as the ‘Default 404 (not found) page’ and try to save the configuration.
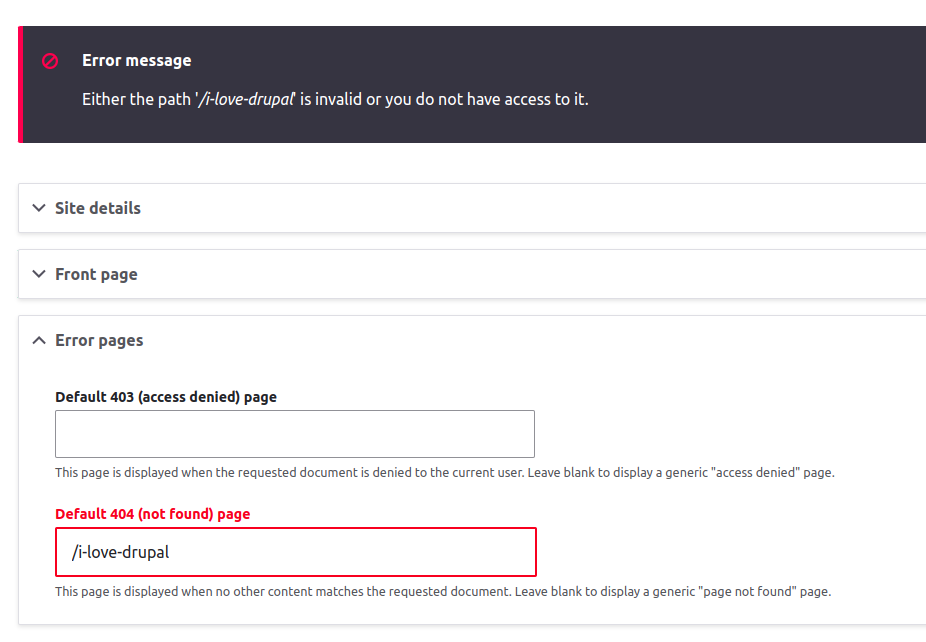
You will get an error message saying that the path is not valid. Now create a page in your site with the alias ‘/i-love-drupal’ and try to save this configuration again.
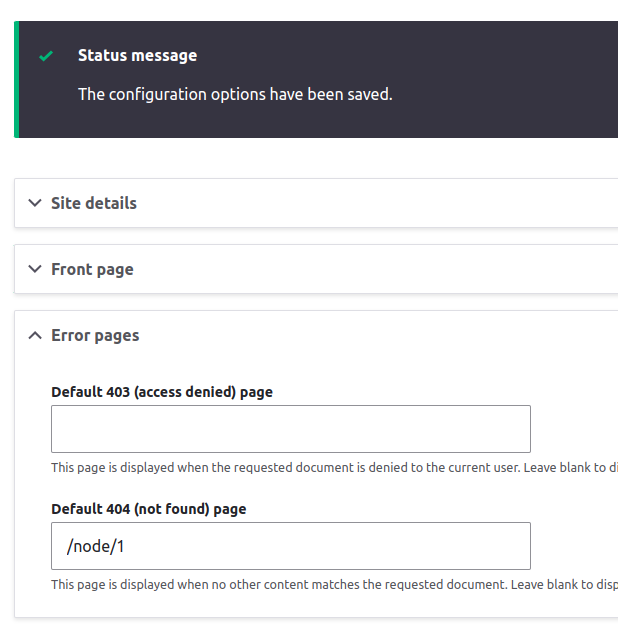
You will be able to save the configuration now. What happened here? Drupal expects a valid URL as the ‘default 404 page URL’. So the user input is checked before the values are saved to the configuration to ensure that the value given is a valid URL. If it’s not, the configuration is not updated and an error message is displayed to the user.
Usually, such validations are added from the form class using the validateForm() method.
But now, we can also add such validations from the schema.yml file by using constraints, without using validateForm() method. A new property ‘#config_tagret’ was introduced in Drupal 10.2 to support such config validations.
How does it work?
- Create a simple configuration form with one text field. Keep it as a non-mandatory field.
- Values submitted by the user would be stored in my_custom_module.settings.yml.
- Now assume that when a user adds a value to the ‘name’ field, it should be stored under the ‘username’ key in my_custom_module.settings.yml. Traditionally, we use $config->set(‘username’, $form_state->getValue(‘name’)) In submitForm() method to do this. Now we can do this directly from the buildForm() method itself, by using the new ‘#config_target’ option.
- Create a schema file for this configuration.
- Add ‘#config_target’ property to the ‘name’ form element.
- '#config_target' => 'my_custom_module.settings:username' tells the form to store the value from the field under the ‘username’ key in my_custom_module.settings configuration.
- Now, open the form. Add a name and submit it.
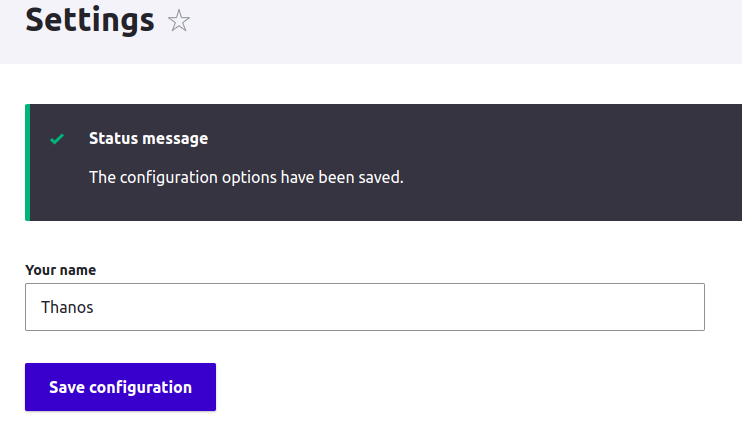
- You will see that the value has been submitted.
- Export the configuration and check my_custom_module.settings.yml. The submitted value will be stored under the ‘username’ key.
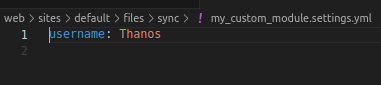
- The field even renders the submitted value as the default value, even though we have not explicitly provided the ‘#default_value’ property. We haven’t even added the validateForm() and submitForm() methods. Isn’t that cool?
This looks great. But how to validate the user input?
- Validations are added using the constraints key in the schema.yml file.
- We can use the NotBlank constraint to make the name field a mandatory field.
- Now try to save the form without adding any value in the name field. The form will throw an error
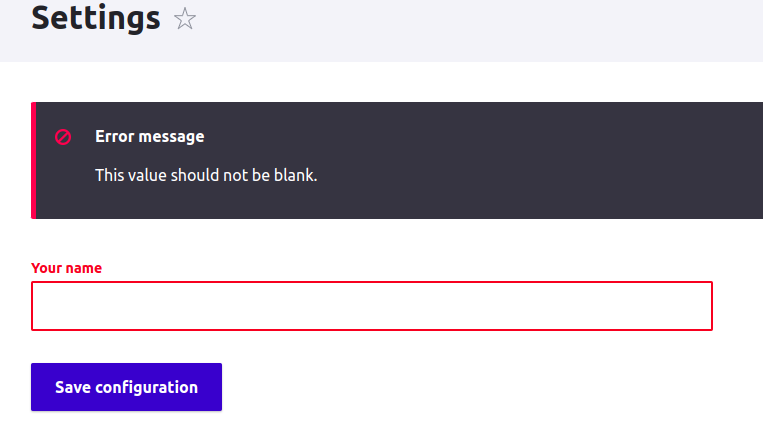
- We could even customize the error message.
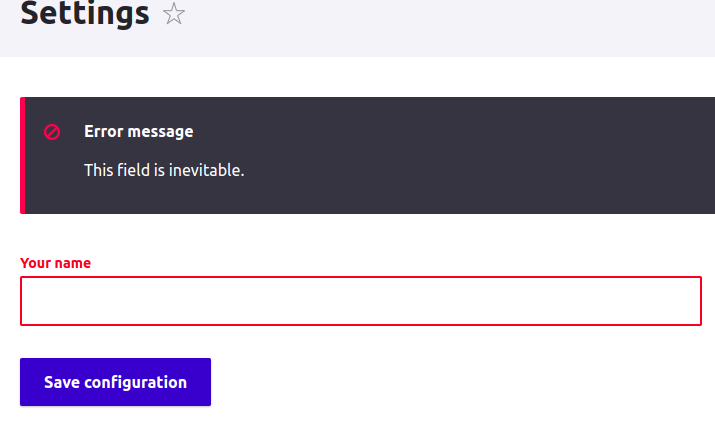
- Let's add one more text field ‘purpose’ to the form. The value from this field should be stored under the ‘purpose’ key in the ‘my_custom_module.settings’ config. So the config target will be ‘my_custom_module.settings:purpose’.
- Update the schema file and include data corresponding to this field. This time, let's add another validation constraint Choice to restrict the values to a specific set.
- Now, if you try to save the ‘purpose’ field with an invalid value, you will get an error.
- There are many more types of constraints available such as Regex, NotNull, email, Length, etc. Multiple constraints can be added to validate a single field as well.
Eg:
- Commonly used constraints could be found in web/core/config/schema/core.data_types.schema.yml. We could also create our own constraints which we will explore towards the end of this blog.
Transforming config values using ‘#config_target’
- As we saw earlier, when '#config_target' => 'my_custom_module.settings:username' is added to a form field, it takes the user input and saves it under the ‘username’ key in ‘my_custom_module.settings’.
- But what if we want to transform the value before saving it in the config and vice versa? Let's check with an example.
- Add a checkbox field ‘future_plan’ and map it to the ‘future_plan’ key in the configuration.
- By default, when the user submits the form, either 1 or 0 would get saved in the configuration. We could also change it to ‘TRUE’ or ‘FALSE’ by changing the type to ‘boolean’ in the schema file.
- But what if we want to store something else in the config? For example, what if we need to store ‘YES! I WILL CONTINUE TO EXPLORE THE UNIVERSE’ when the user checks the checkbox and ‘NO! I WILL DESTROY THE STONES, RETIRE, AND BECOME A FARMER’ if the user doesn’t.
- To do such transformations, we could create a ConfigTarget object and assign it as the value of ‘#config_target’.
- The ConfigTarget constructor accepts 4 arguments.
- Config name (Required): The name of the config object being read from or written to, e.g. `my_custom_module.settings`.
- Property path (Required): The property path(s) being read or written, e.g., `username`
- fromConfig (Optional): A callback that transforms the value stored in the configuration before it gets displayed in the form.
- toConfig (Optional): A callback that transforms the user input in a field before it gets saved in the config.
- Lets us create the ConfigTarget object for our checkbox field. First let's create the callbacks
- If the user checks the checkbox, we need to store ‘YES! I WILL CONTINUE TO EXPLORE THE UNIVERSE’. Otherwise, we need to store ‘NO! I WILL DESTROY THE STONES, RETIRE, AND BECOME A FARMER’. So our toConfg callback can be written as
- Similarly,if the value present in the config is ‘YES! I WILL CONTINUE TO EXPLORE THE UNIVERSE’, the checkbox should be checked when the user views the form. Else checkbox should be unchecked. So most simply, our fromConfig callback can be written as
- So, the ‘future_plan’ field can be rewritten as:
- We need to update the schema file as well. Let us keep the type as ‘string’ since we are saving a string in config.
- Load the form again and try updating the checkbox. You will see the ‘future_plan’ key getting updated in config depending upon the state of the checkbox and vice versa.
Adding a custom validation constraint
- Adding a custom constraint involves 2 steps.
- Creating a validation constraint.
- Assigning the validation constraint to the field in the schema file
- Add a radio field to our form.
Since everyone loves Iron Man, let's add a custom validation constraint to force the user to select ‘Yes’ always.
- First, create SaveIronmanConstraint in my_custom_module/src/Plugin/Validation/Constraint/SaveIronmanConstraint.php and add the error message there.
- Then, create the ‘SaveIronmanConstraintValidator’ in my_custom_module/src/Plugin/Validation/Constraint/SaveIronmanConstraintValidator.php
- Finally,assign the id of our custom constraint to the ‘save_ironman’ field in the schema file.
- Load the form now and try to save it by selecting ‘Seems suspicious’.
You might feel skeptical about using the ‘#config_target’ property in config forms for multiple reasons. One of the reasons could be that when we add validations at the form level, all the logic would be under the same form class, which is convenient in most cases. However, validations added at the form level would only work when the user saves the form. In contrast, the new config validation would work in other scenarios, such as when applying recipes to the site, when saving configurations programmatically, etc. Many forms in Drupal core have already adopted the ‘#config_target’ approach to validation. It's an integral part of many ongoing and upcoming Drupal initiatives as well. So, adopting it is definitely a step forward that will keep our module ready for future Drupal releases.
A quick recap of all the things we explored in this blog
- The new ‘#config_target’ property and how to use it.
- Commonly used validation constraints (NotBlank, Choice, Regex etc.)
- Transforming the form values before saving to configuration and vice versa.
- Creating custom validation constraints.
- Advantages of the new configuration validation.