All blogs

A checklist for web form testing
Web forms are fundamental components of web development, facilitating user data input and submission through web pages. They encompass various input fields like text fields, checkboxes, radio buttons, and dropdown lists, serving diverse purposes such as contact forms, registration forms, surveys, etc.
A web form is a medium that allows your visitors to get in contact with you and to send information, such as an order, a query, etc. which is passed on to your database. The smallest error in the web form execution can lead to a huge loss of data or communication
Checklist for Web Form Testing
General Test Scenarios:
- Verify readability and clarity of labels on the web forms.
- Ensure visibility of asterisk (*) or "Required" for mandatory fields.
- Check data integrity: Validate that submitted data is stored accurately in the database.
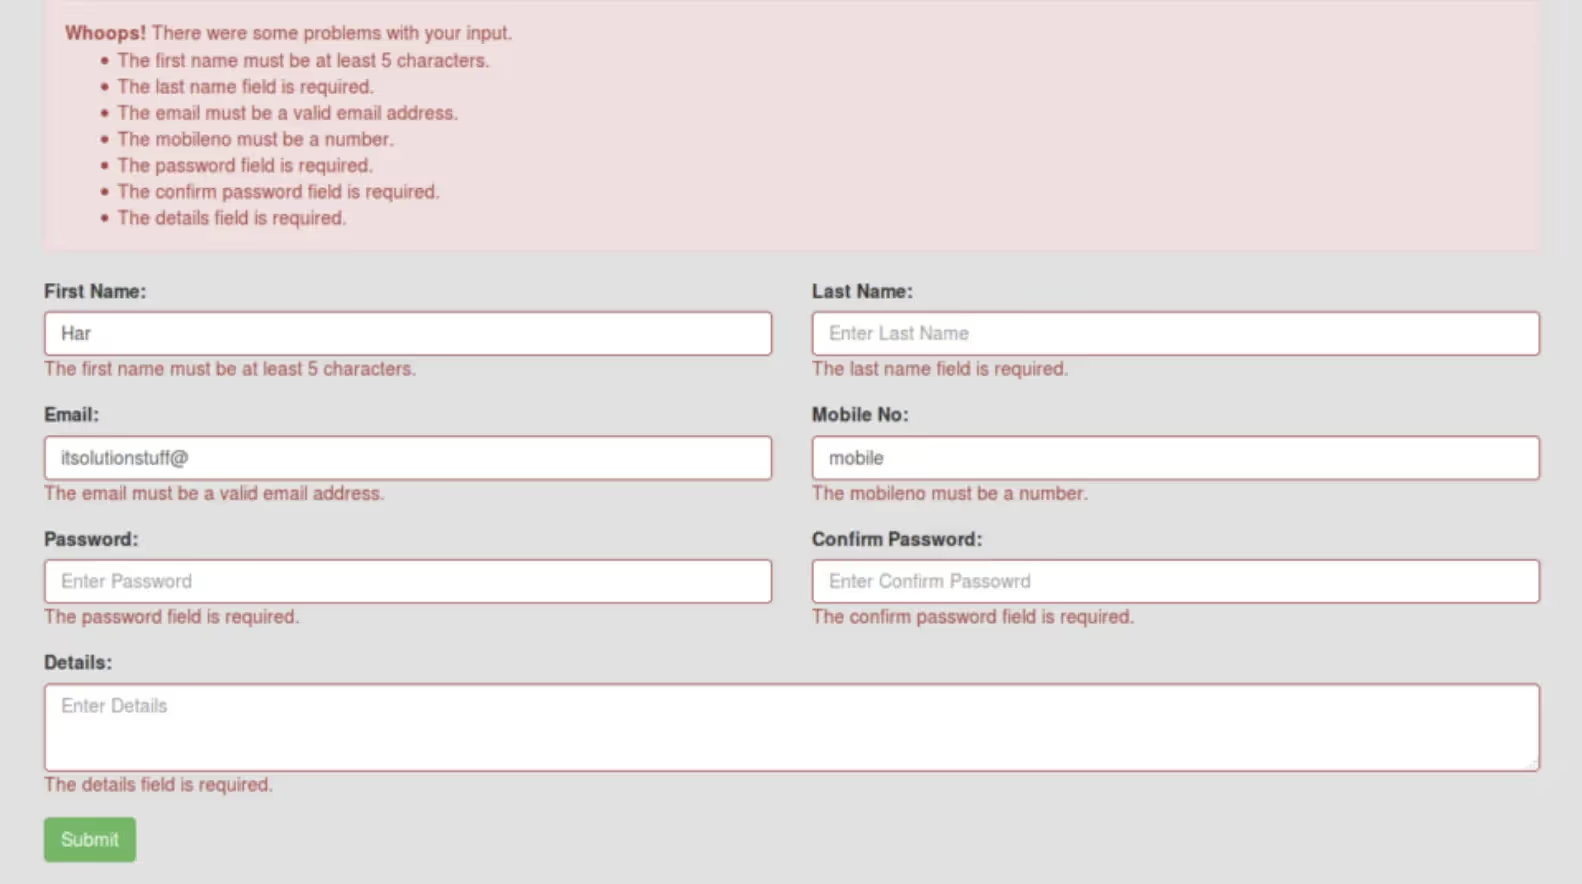
- Test with empty fields: Confirm appropriate error messages are displayed.
- Validate handling of partially submitted forms.
- Ensure optional fields do not trigger errors.
- Test accessibility with assistive technologies.
- Verify cross-browser compatibility.
Web Forms with Input fields:
- Validate submission with incorrect data / invalid data types.
- Validate submission with correct data.
- Validate with special characters and long strings for proper validation
- Verify numeric field limits (minimum and maximum).
- Ensure that an error message appears when the user attempts to input more characters than the specified maximum limit in a text field, such as 150 characters.
- Check for input format enforcement (e.g., phone numbers, credit card numbers).
- Validate with variations in formatting (e.g., spaces, dashes) to check if the input field handles them appropriately.
- Validate if the input field provides auto-completion or suggestions based on previous inputs or a predefined list.
- Verify that auto-completed values are accurate and relevant.
- Validate the input field using screen readers to ensure it's accessible to users with disabilities.
- Verify that the placeholder text (if used) disappears when the user starts typing.
- Check if the placeholder text is correctly formatted and provides clear instructions to the user.
- Validate the tab order to ensure users can navigate through input fields using the keyboard efficiently.
- Verify multilingual support.
Web Forms with Email Field:
- Validate with various valid email formats.
- Validate error messages for missing "@" symbol, domain, or top-level domain.
- Validate email length limits.
- Validate support for special characters.
- Validate multiple email addresses input.
- Verify case-insensitive validation.
- Verify backend interaction with entered email addresses.
- Validate multilingual support.
- If the password field is part of the webform, make sure initially it is displayed as ***** and that “Show Password” option is by default unchecked
Web Forms with Password Field:
- Confirm password field masking and "Show Password" functionality.
- Validate with valid password criteria.
- Validate minimum length requirement.
- Validate password complexity requirements.
- Validate password length limits.
- Validate password strength indicator.
- Verify password visibility toggle.
- Validate copy-paste functionality.
- Confirm error messages for invalid passwords.
- Validate backend interaction with passwords.
Web Forms with File Upload Field:
- Test with allowed file types and sizes.
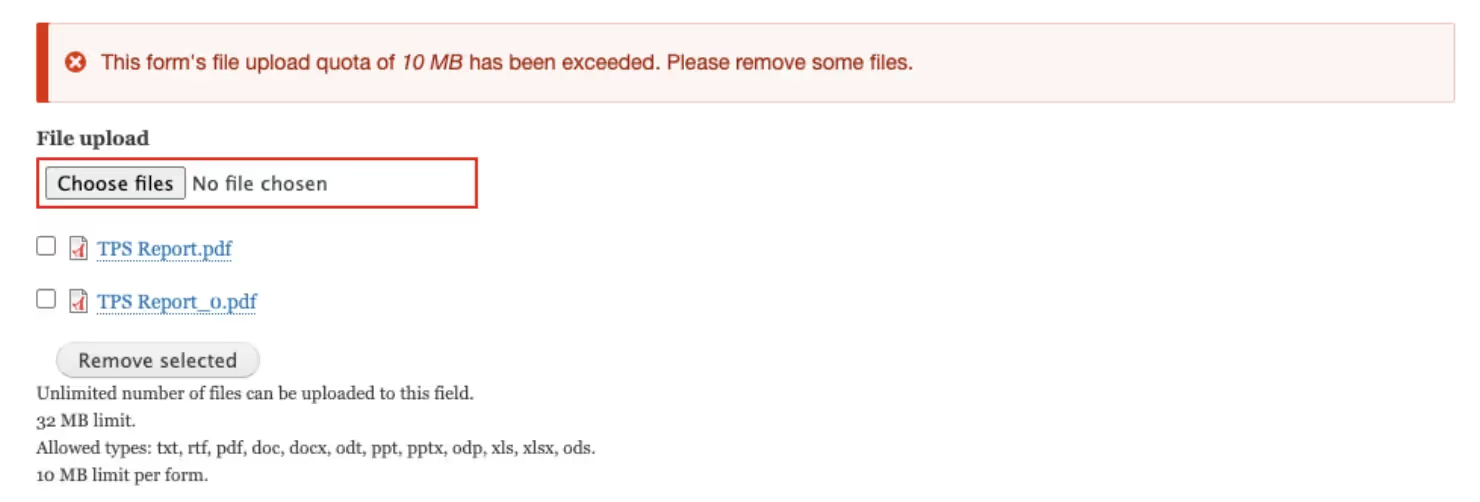
- Validate error messages for invalid file types.
- Test file size limits.
- Verify handling of empty files.
- Test filename handling.
- Confirm multiple file upload support.
- Test upload progress indicator.
- Validate cancel upload functionality.
- Test backend processing of uploaded files.
- Ensure accessibility and cross-browser compatibility.
- Test file uploads across different web browsers to ensure compatibility and consistent behavior.
- Test the file upload functionality with large files to ensure that it performs efficiently and doesn't cause performance issues for users.
Web Form with Invalid File Upload:
Web Forms with Media Upload Field:
- Validate supported image types, video formats and sizes.
- Test error messages for invalid file types.
- Verify image /video size limits.
- Test filename handling.
- Confirm multiple image / video upload support.
- Validate upload preview functionality.
- Test backend processing of uploaded images / videos.
- Ensure accessibility and cross-browser compatibility.
Web Forms with Dropdown Field:
- Verify default option selection.
- Test visibility and accessibility of dropdown options.
- Validate scrolling functionality.
- Confirm selection behavior.
- Test multi-selection support.
- Validate option order.
- Test dynamic option loading.
- Verify disabled option handling.
- Test clearing selected options.
- Validate keyboard navigation.
Web Forms with Checkbox
- Verify default checkbox states.
- Validate individual selection behavior.
- Validate multi-selection support.
- Validate deselection behavior.
- Verify disabled checkbox handling.
- Confirm error messages for required selection.
- Validate performance with large options.
Web Forms with Radio Buttons
- Verify default selection state.
- Validate selection behavior within the group.
- Validate single-selection constraint.
- Confirm error messages for required selection.
- Validate disabled radio button handling.
- Verify performance with large options.
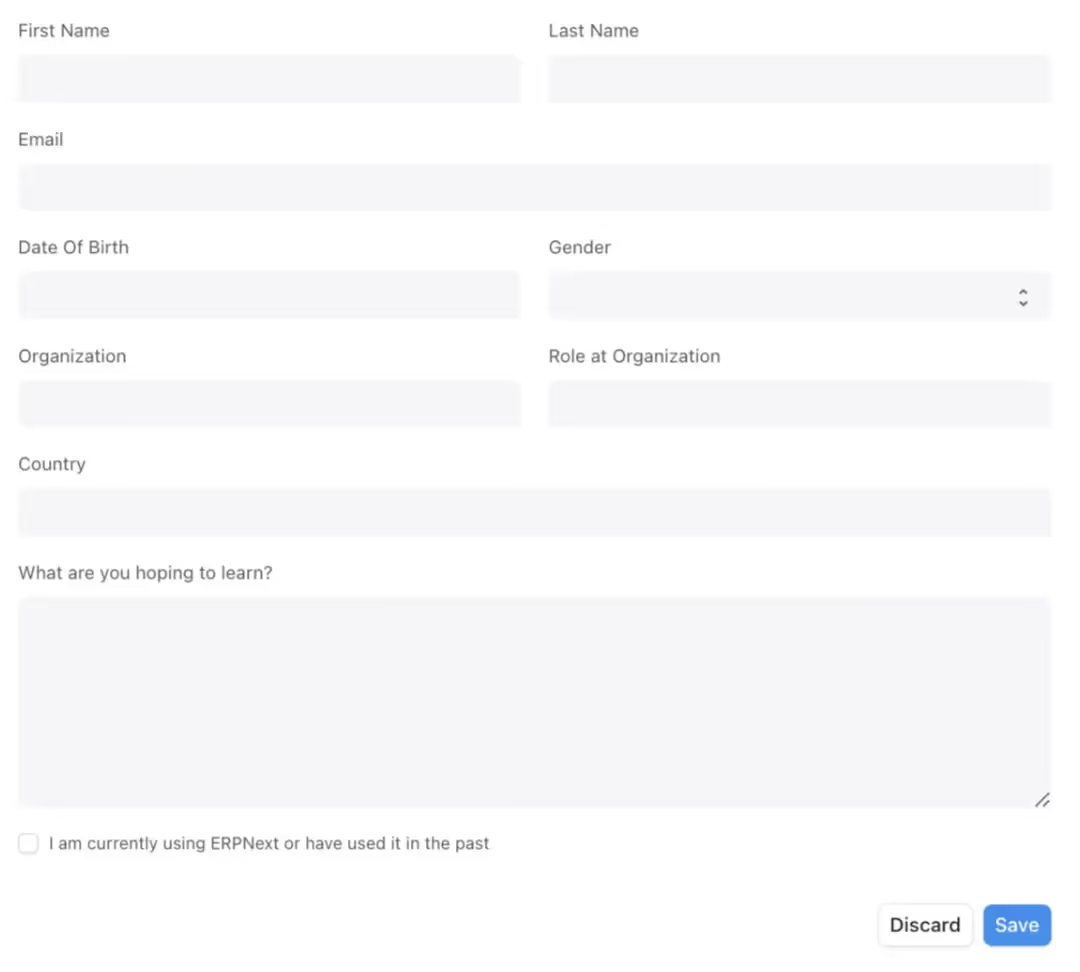
Web Form with different fields:
Web Form with Validation/Error Messages:
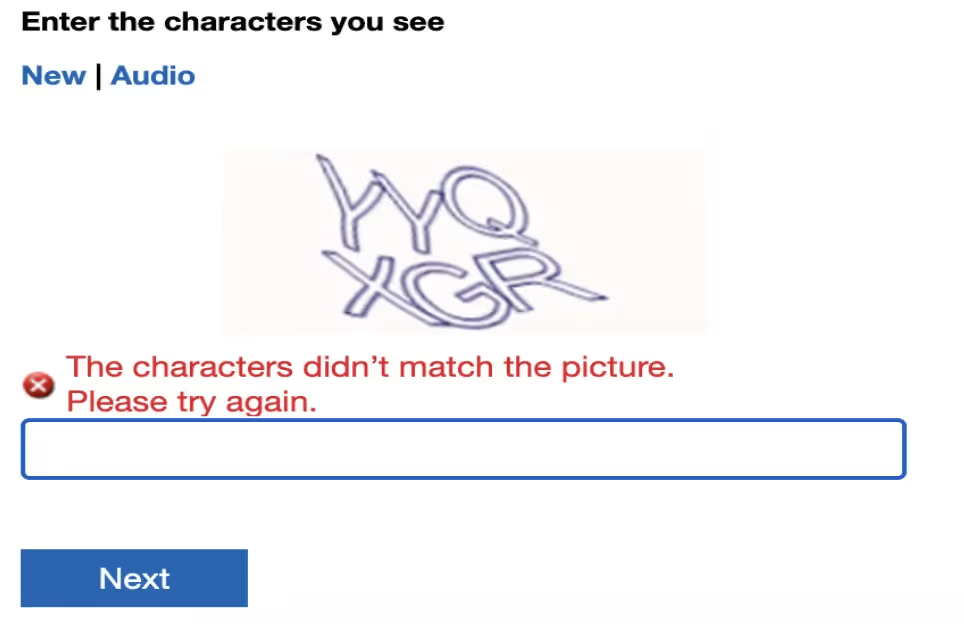
Web Forms with Recaptcha:
- Validate presence and visibility of reCAPTCHA.
- Validate user interaction with reCAPTCHA.
- Verify submission prevention without completing reCAPTCHA.
- Validate submission after completing reCAPTCHA.
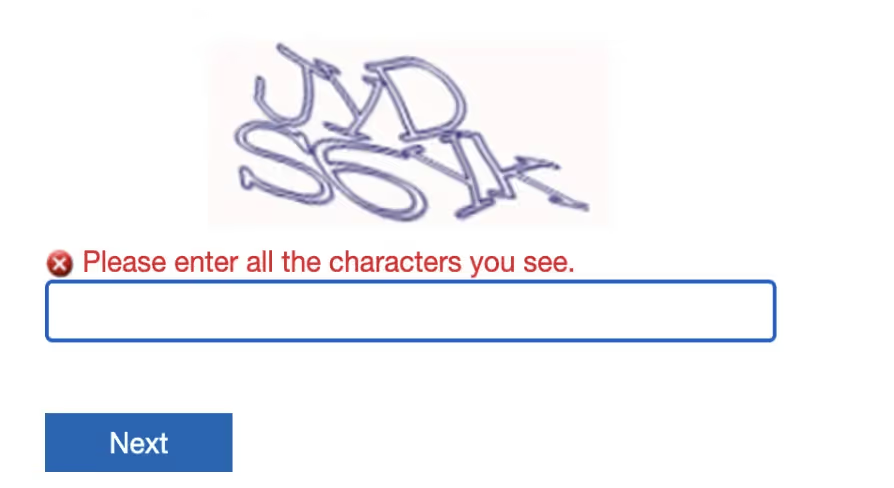
- Validate error message handling.
- Validate multilingual support.
- Check performance impact.
Recaptcha form with error messages:
Conclusion
In the digital landscape, web forms serve as fundamental tools for gathering information, enabling interactions, and facilitating transactions. From contact forms to registration pages, these elements are ubiquitous across the web, serving as gateways for user engagement.
Throughout this blog, we've explored the intricate world of web forms, delving into their various components, functionalities, and best practices. We've learned that a well-designed web form goes beyond mere aesthetics; it embodies usability, accessibility principles to ensure a seamless user experience.
Happy Testing!

UI Testing Checklist
The Graphical User Interface of an application is very important and therefore UI testing is even more important. If the UI of an application is tested accurately, the usability of that application becomes effortless. However while doing so you may face various challenges like time required for testing is more, complex UI workflows, constant UI changes, etc.
There is a high probability that most of the common checks are skipped during this process. Thus I have created a list of common checks that will be useful for QAs during UI testing. This article's sole purpose is to make sure UI issues are not missed and comes with a takeaway for the QAs - a handy checklist facilitating faster UI testing.
Here's a list of the UI checks one should perform:
1. Font styles - Font size, colour, and family
2. Check CSS properties of an element
3. Check if the images are not breaking and don’t have any watermarks
4. Check if elements are not breaking or distorted on different browsers and screen resolutions
5. Check if the label text is clearly readable
6. Check if the error and validation messages are displaying correctly
7. Check if there are no spelling mistakes in the field labels and web page headings
8. Check if the disabled fields are not accepting any input
9. Check if the links are visible and distinguishable from the other text
10. Check if the social networking icons are rightly placed on sites
11. Check if there are no broken links on the web page
12. Check if there are no unnecessary blank spaces between the elements on the web page
13. Check if the horizontal and vertical scrollbars are appearing wherever necessary
14. Check if site logo is visible and clickable
15. Check if the web elements are not overlapping anywhere on the web page
16. Check if banner images or any other large images are not exceeding the screen limit
17. Check if the Privacy policy links are readable and clickable
18. Check if the Cookie policy section is visible with buttons and contents
19. Verify if elements in the dropdown are not overlapping
20. Check if the menu or submenu that is selected remains highlighted
21. If there are any country fields or phone number fields, check if the country codes are displayed correctly
22. Check if autofill function is working as expected and that there are no UI issues
23. If there are any maps on the site, check if the user is able to zoom in and zoom out the map without any UI distortion. Check if the user is able to see the locations on maps
24. For any reports or charts check if the figures are displayed accurately
User Interface is the most crucial part of an application and hence it becomes essential to keep such checks handy to avoid any UI issues being missed during testing.
Happy Testing!

Cypress - Automation tool for modern web
With the evolution of development tools, the testing tools are evolving too, thereby supporting and strengthening the Quality Assurance process. One of them is automation testing when we talk about automation testing, we cannot ignore the most popular, open-source, and reliable tool called Selenium. Time’s have changed and the tools in automation are changing at a rapid pace, today we have numerous automation tools that can be used as a part of your automation process. This article focuses on the most promising and featured packed tool, Cypress.
Cypress?
Cypress is an End-to-End javascript Testing framework, which comes with a lot of inbuilt features that you will require in any automation tool. Cypress uses Mocha testing framework and chai assertion library in its framework and mainly it's not built on top of selenium, it's a new driver that operates within your application and this allows very good control over your frontend and backend of the application.
Cypress is Package
Unlike other tools, where we have to maintain and integrate multiple libraries to support your automation framework, increasing the effort and cost required to maintain those libraries. With Cypress, you don’t have to worry about any of these things, since most of the things which are required come along with Cypress itself.
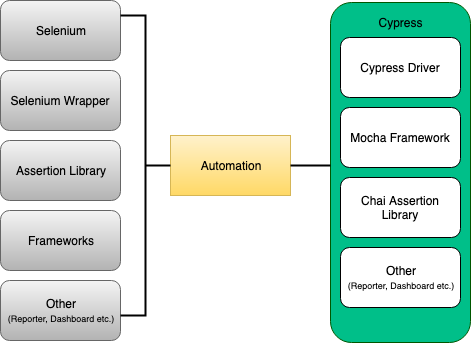
Features of Cypress
- Easy Setup
Setting up and running test in Cypress just requires 3 steps:
1. Download Cypress
2. Open Cypress GUI
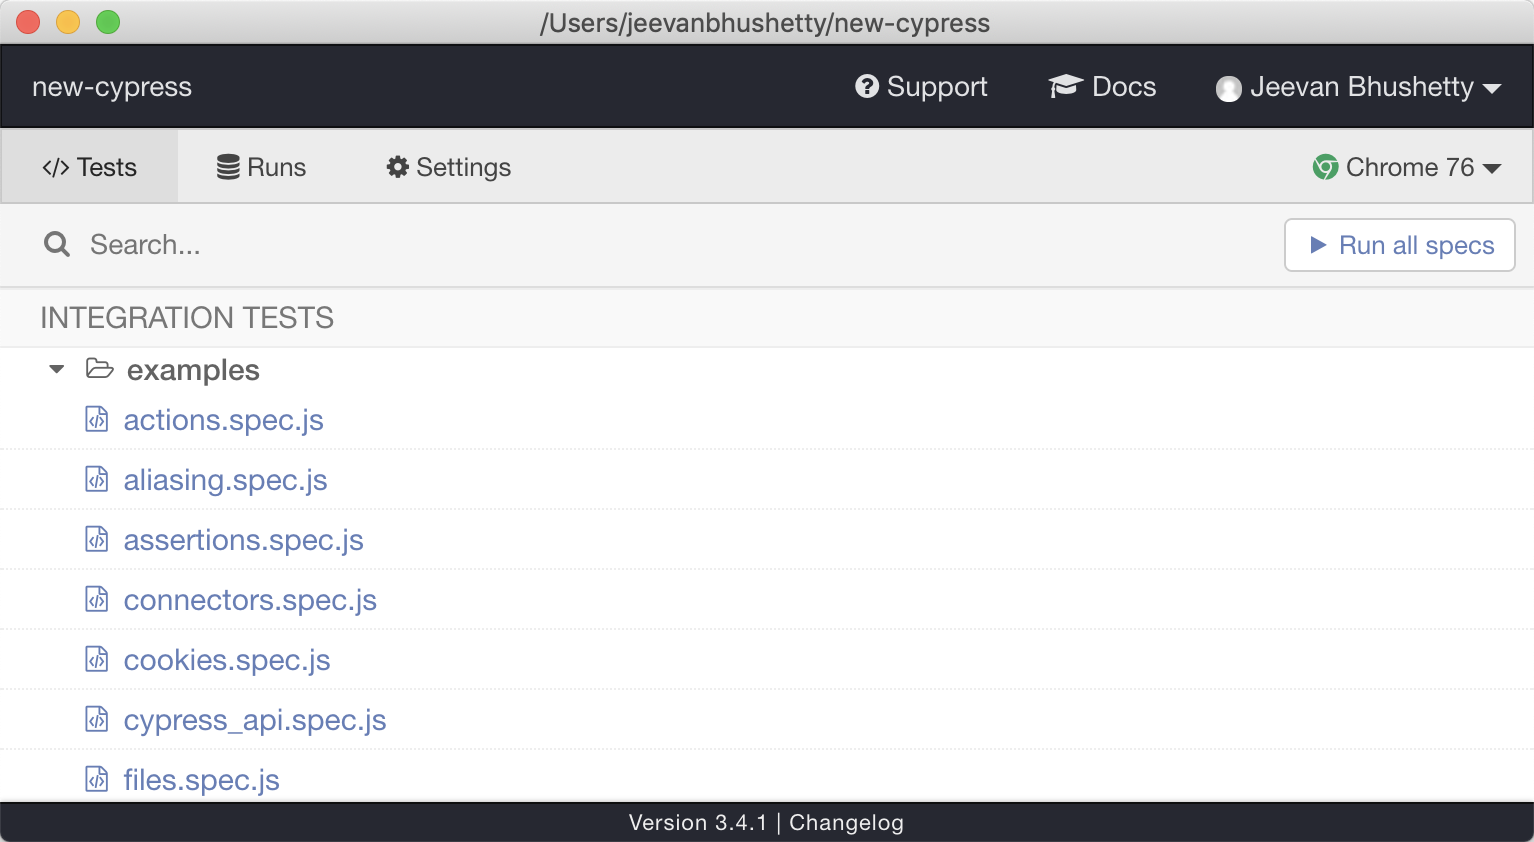
3. Run test
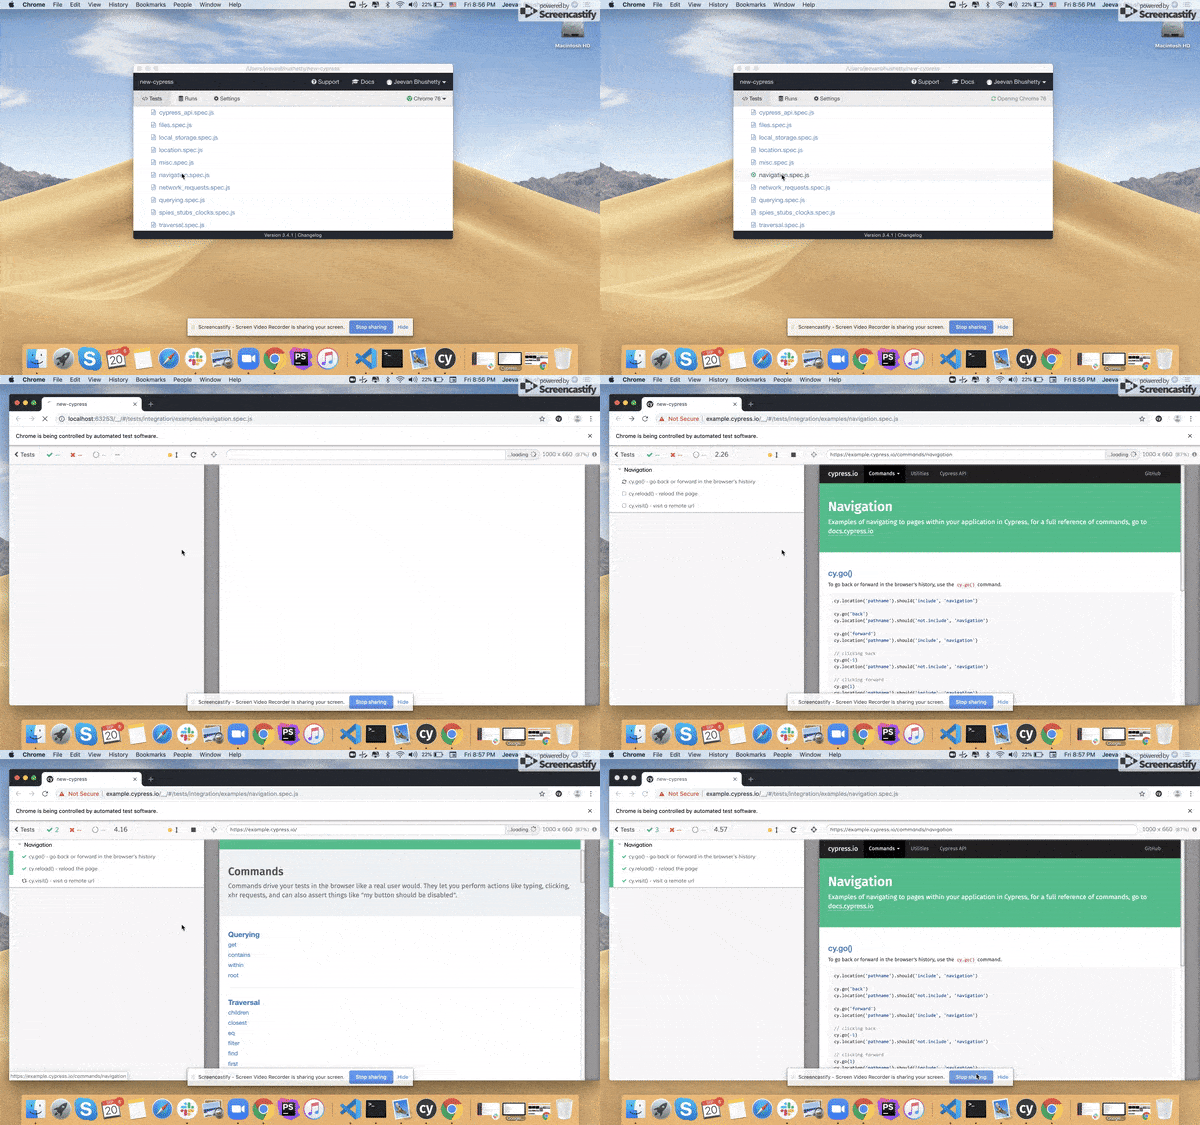
Cypress provides example tests that will be listed on your Cypress GUI tool, these tests are executed by merely clicking on the test. You can also execute a test using the command-line tool by executing the following snippet.
Lets us write the first script
Create a folder test under cypress/integrations/ now create a spec file named login.spec.js and add the following code to it.
You will see the test listed in the GUI tool
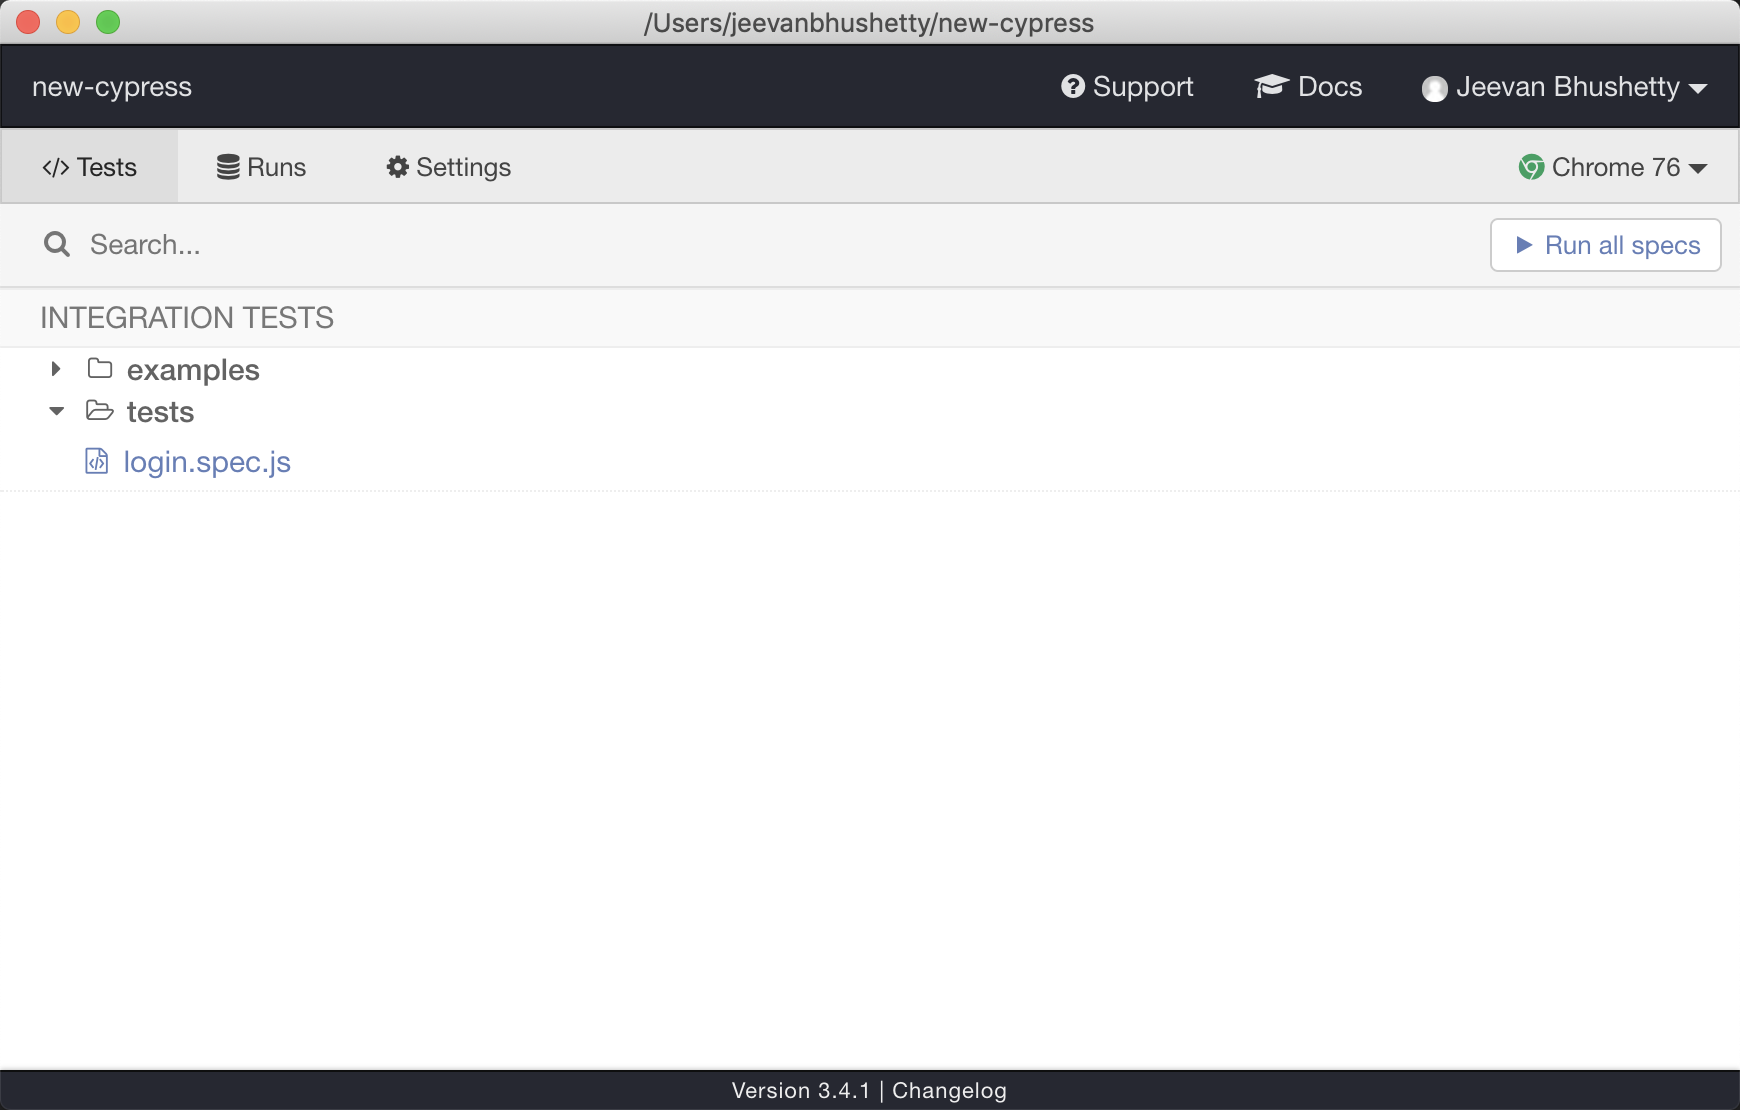
Click on login.spec.js to execute the test.
No more Flaky Tests
Most of our time is spent on making test execution smoother, we often run into situations where actions are performed on web elements even before the web element is in a state to act. Cypress is very good at handling flakiness, it adds the default timeout (defaultCommandTimeout) before any command is performed and this is done using its algorithm to identify if the element is ready to perform actions. Let us check the following example.
Here, the snippet .get() is a command to find an element by providing a CSS selector and chained with click() command to perform click on an element. So before clicking, cypress will by default wait for 4000 milliseconds and perform all following checks before any actions are executed:
- Scroll to the element
- Check if the element is visible
- Check if the element is not disabled
- Check if the element is not ReadOnly (for input type elements)
- Check if there is no animation being performed on the web element
- Check if the element is not covered by any other element
- Scroll the page if the element is covered by the fixed positioned element
- And then trigger the action
This algorithm ensures your tests are executed smoothly and actions are performed only when elements are ready to receive the actions. The above default timeout of 4000 milliseconds can also be modified globally through Cypress configuration or on command level by using the snippet.
GUI Tool
Cypress provides you the GUI tool to view/execute your tests, view your configuration, and view the tests executed from dashboards. Moreover, you can watch your tests running and get more insights into your test run.
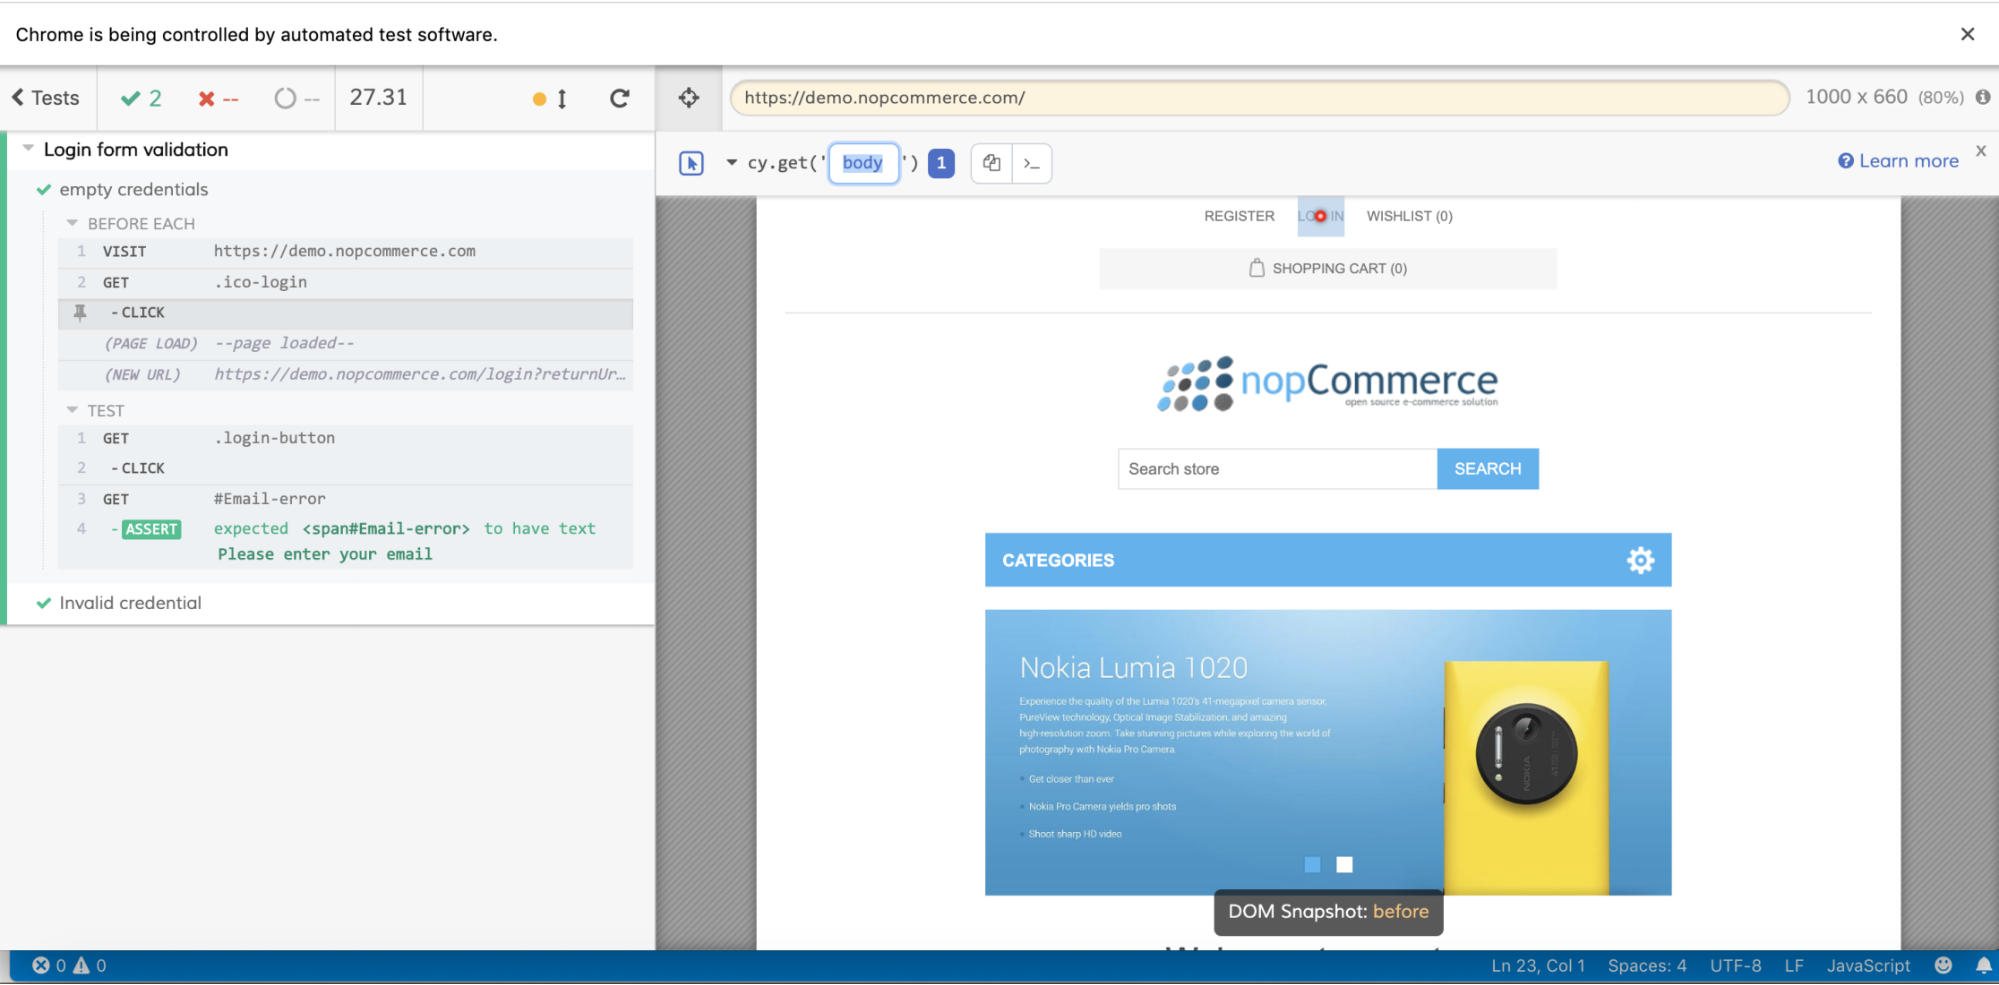
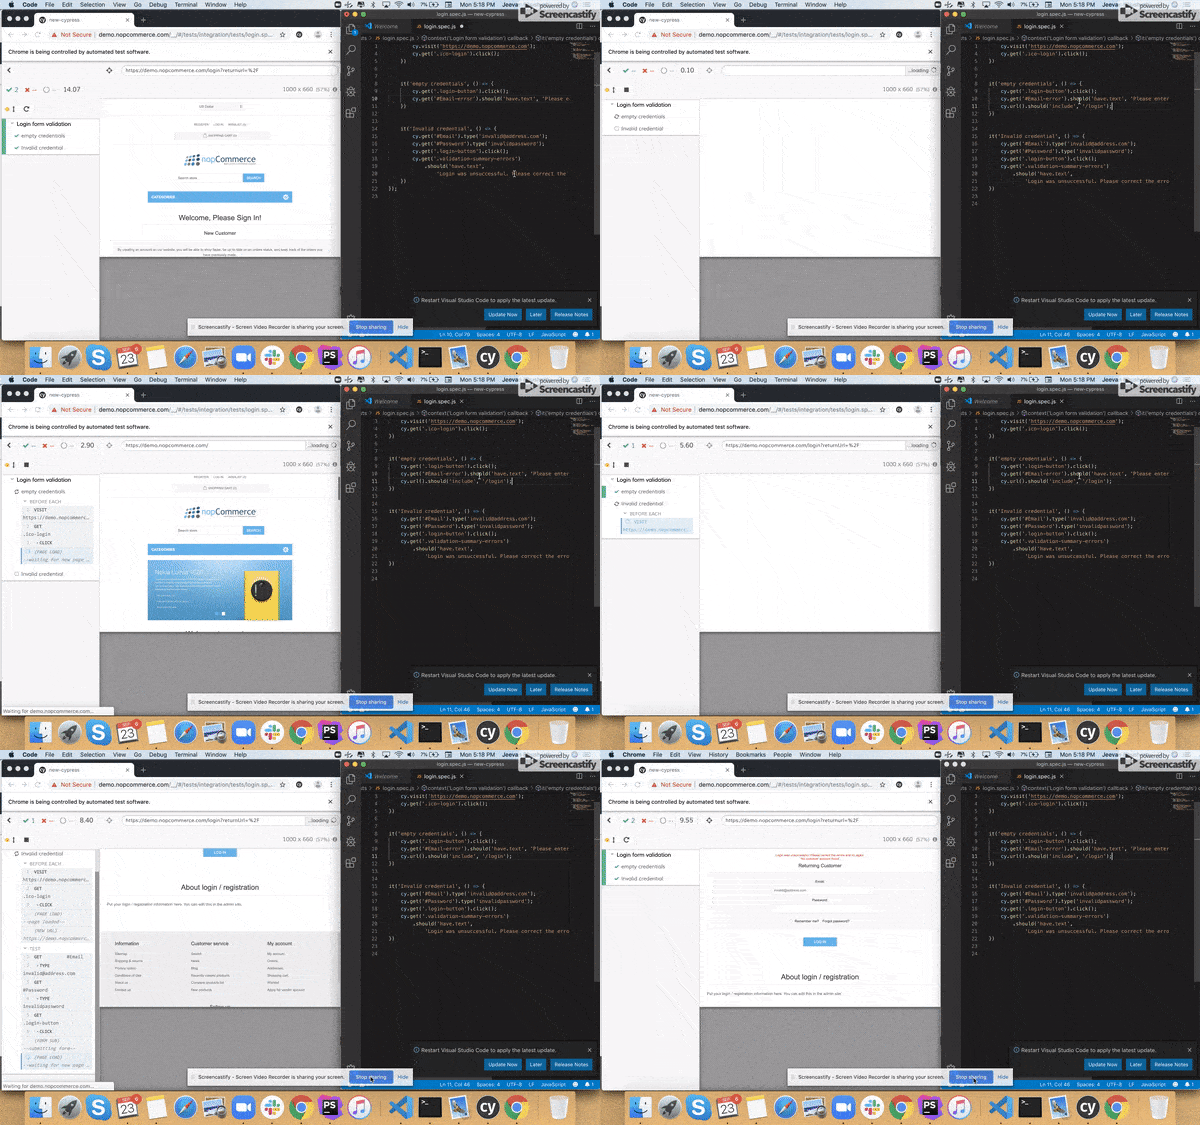
When we hover each step will give you more insights into a particular step and also provides you DOM snapshot before and after performing actions. This helps to understand and debugging your test in more detail, another cool feature is updating and saving your test will automatically re-run the test on GUI tool.
Awesome Dashboard
Another amazing feature of Cypress is its dashboard(https://dashboard.cypress.io), which gives you a summary and insights about your tests executed across CI/CD tools. The dashboard is just like any other dashboard provided by CI/CD tools, which gives you logs and execution details of your tests.
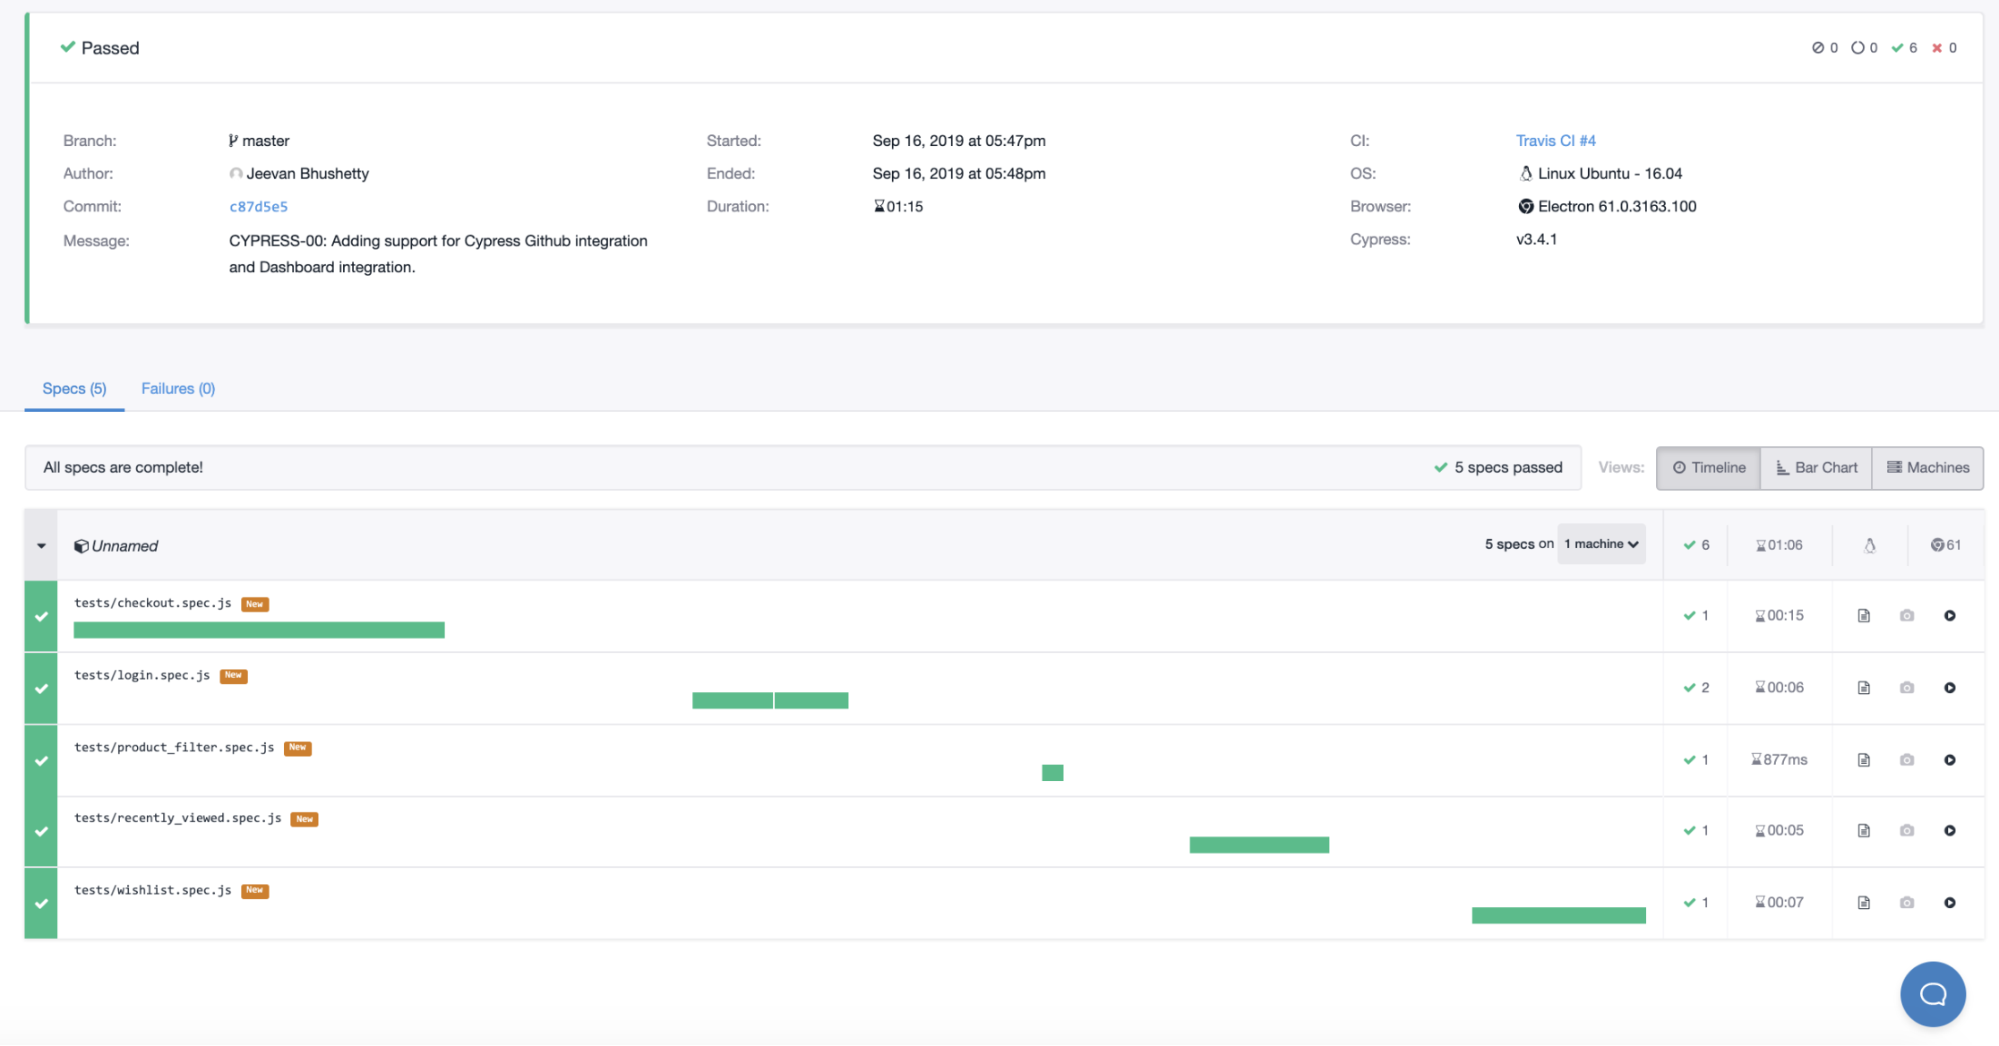
Moreover, you also have a default option to record your test and watch the videos of your recorded test on the dashboard. Identifying exactly how your tests were executed in CI and understand the point of failures.
- Cypress Plugins - More than UI Testing
Cypress is not just a UI testing tool, Cypress also has a plugin ecosystem where you can integrate any plugins provided by Cypress or create your plugin and extend the behavior of Cypress. Following are a few examples of what you can be done on Cypress apart from functional testing:
- Unit testing - Yes! you can perform unit testing using Cypress plugins for Angular, React, Vue, etc.
- Visual Testing - Keep an eye on your UI, Cypress already provides plugins for most popular visual testing tools like AppliTools, Percy, etc.
- Accessibility Testing - cypress-axe plugin can be used for accessibility
- API Testing and many more, keep exploring.
Things you should know about Cypress before adopting:
- Supports only JavaScript scripting
- The dashboard is not free - which makes sense! But it also provides you basic free plan.
- Currently, Cypress only supports Canary, Chrome, Chromium, and Electron - though they have cross-browser support on their roadmap.
- Supports only jQuery selector
- Writing a test in Cypress is fun! We are sure you will enjoy it.
- A completely new architecture, life beyond selenium.!
This is not an end there are more features that Cypress provides, stay tuned for more blogs around Cypress!