We are all familiar with Acquia Site Studio, a low-code tool for creating digital experience platforms. While working on Site Studio developers mostly work on the site-building part instead of writing code in the CSS or JS files. However, at times, there are cases where you can’t achieve expected things using Site Studio because there is no way to access that particular thing in Site Studio.
For instance the Drupal maintenance page can’t be themed in Site Studio because there is no access of Site Studio on these pages, another example if we require some custom things like JS/CSS, we can’t do in Site Studio using site-building because of restricted access, in such cases, we need to set up Site Studio theme architecture to achieve expected things with minimal files, code and overwrite.
Site studio theme architecture will be based on below things:
Base theme
- Site Studio minimal (machine name: cohesion-theme)
- Directory: docroot/themes/contrib/cohesion-theme
Sub-theme
- Fluffiness (default theme) (machine name: fluffiness)
- Directory: docroot/themes/custom/fluffiness
Page regions
- Header
- Featured
- Content
- First sidebar
- Second sidebar
- Footer
- Site Studio hidden region
Template file naming
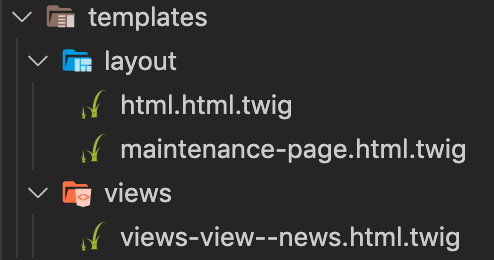
- Directory: docroot/themes/custom/fluffiness/templates
- Drupal standard naming convention with modular structure as per URL: https://www.drupal.org/docs/theming-drupal/twig-in-drupal/twig-template-naming-conventions
Site Studio Components
- We can also create Site Studio components from scratch by navigating URL admin/cohesion/components/components and click on +Add component
Note: The existing components which come with the UI kit can be edited as per project requirements.
CSS management (e.g. Gulp + SCSS)
- Since we are using Site Studio, we are following a component-based approach with minimal CSS overwrite.
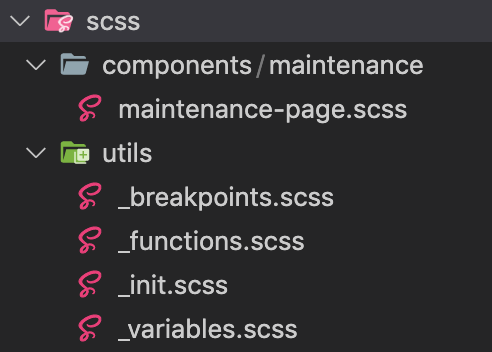
- Directory: docroot/themes/custom/fluffiness/scss
Adding new CSS
- Inside the docroot/themes/custom/fluffiness/scss/components/ directory, create a new directory as per component requirements. Inside that new directory, create a .scss file.
- Example: new directory for scss/components/maintenance with file scss/components/maintenance/maintenance-page.scss
Compiling SCSS to CSS
- Open the terminal and from project, root navigate to sub-theme directory cd /docroot/themes/custom/fluffiness
- Run npm install and then npm run build It will compile all the assets(CSS & images) to dist/directory
- To use compile CSS file from dist/directory Create library inside fluffiness.libraries.yml file like below:
- And use created library inside respective template file using
- Continuous scss file watch, npm run watch OR gulp watch
Sass Variables and Partials
The scss/utils/ directory has Sass partial files like _variable.scss, etc.
JS management
- Directory: docroot/themes/custom/fluffiness/js
- We have global custom js with minimal js requirements inside global.js
Image management
- Directory: docroot/themes/custom/fluffiness/images
- We are having a gulp task to optimise images. To run the image optimise task,
- Open the terminal and from project, root navigate to sub-theme directory cd /docroot/themes/custom/fluffiness
- Run gulp images it will optimise all the images to dist/images directory
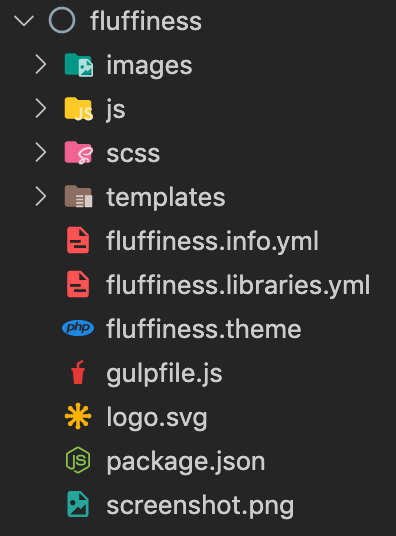
With all minimal files and folder, your new sub-theme(fluffiness) will look like the below screenshot,
Adding Drupal Blocks to Site Studio Components
- To access blocks navigate to Admin > Structure > Block layout (/admin/structure/block).
- If you want to use any Drupal block or custom block (except menu & breadcrumb) in Site Studio component/template/views template then first you need to place that particular block in the Site Studio hidden region

- You can now add or drag & drop a particular block into Site Studio component, template, or views template using the Drupal core elements block element from the sidebar panel.
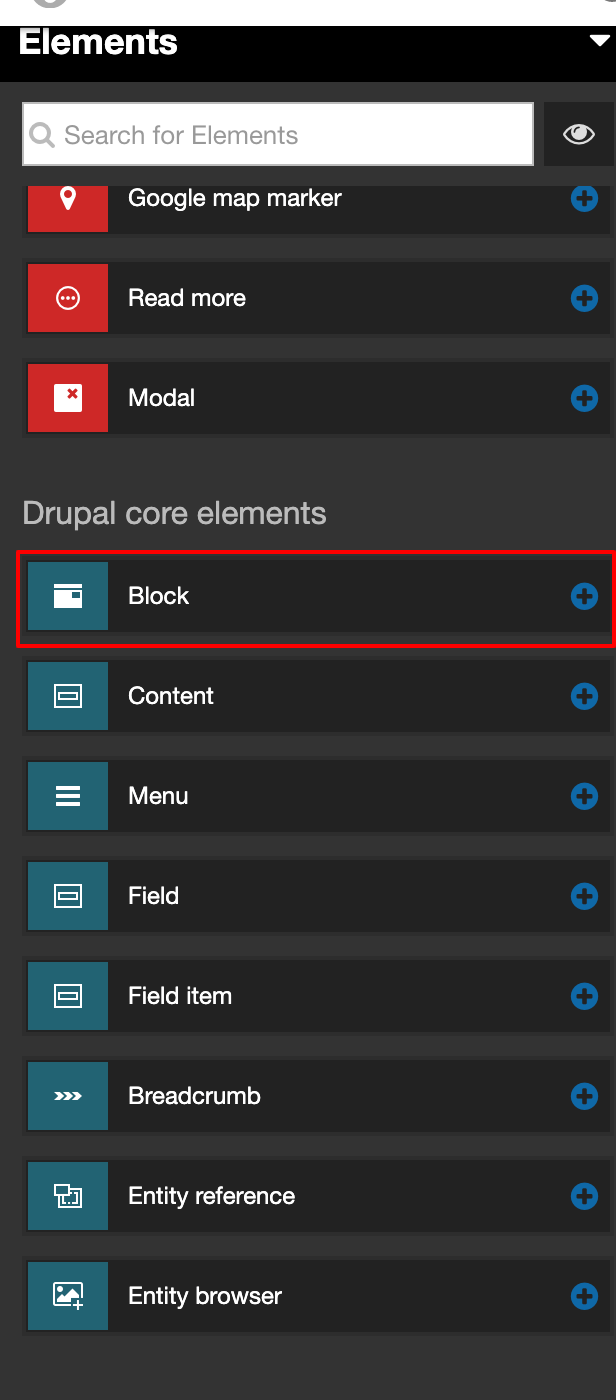

- Once the element is in the layout canvas → Double-click on it to edit.
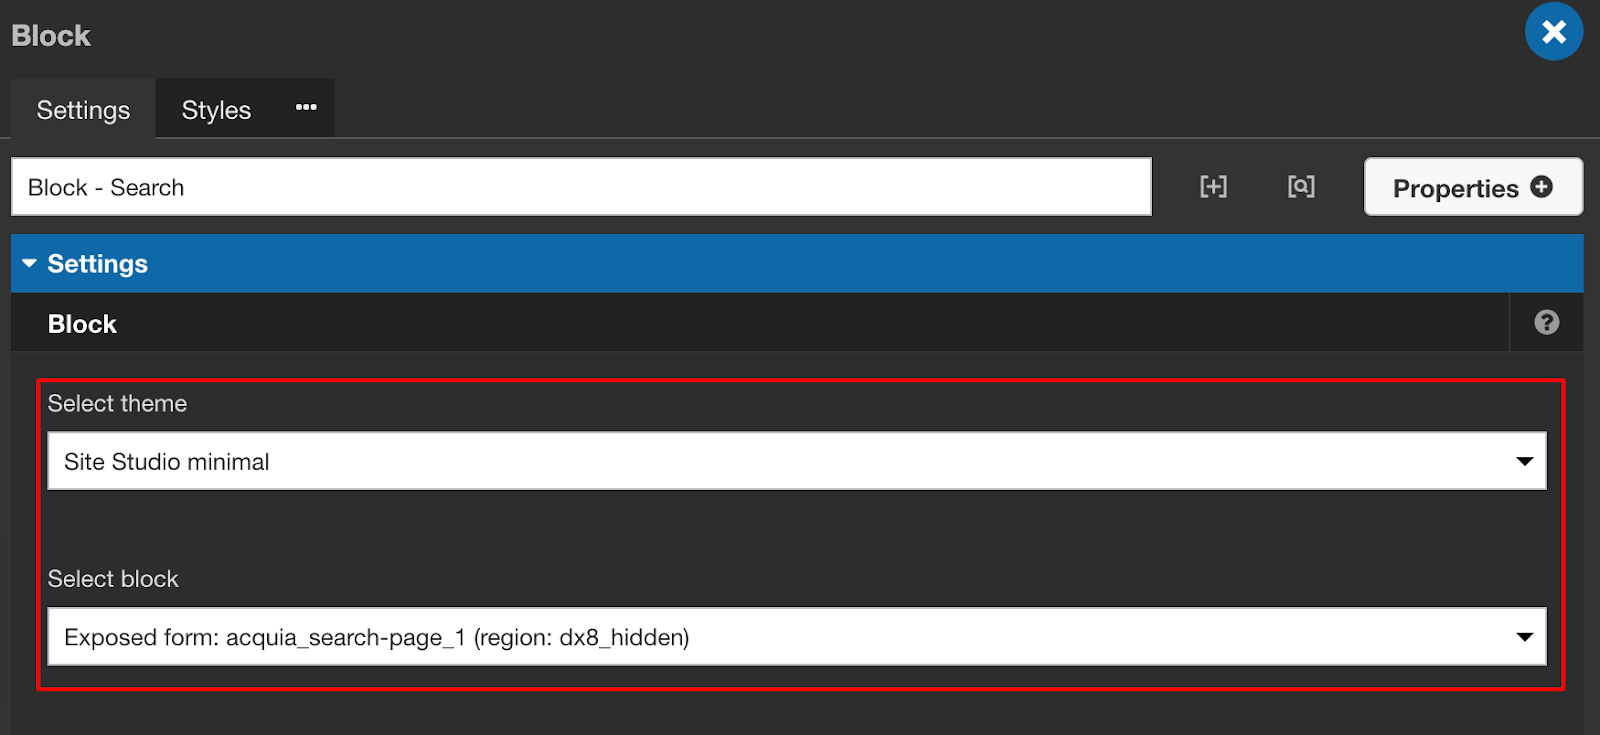
- Select your theme(sub-theme if created for example Fluffiness) and a particular block from the hidden region and save.
Thank you for reading!

