
.avif)
In this 2nd Selenium 4 article, we are going dive into Selenium WebDriver 4's screenshot feature. While performing automation testing using Selenium, we often need to capture screenshots of the webpage or a particular web element. In Selenium 3, users can only take a screenshot of a web page, not a particular element. But with Selenium 4, we can take a screenshot at the element level, section level and full-page level.
Why take screenshots during automation testing?
- Taking screenshots of tests helps debug and determine whether the issue is with the test script or the AUT.
- Screenshots are useful in understanding the test execution flow of the application and its behaviour.
- Sometimes, we need to see the execution at later stages. These screenshots can help us to avoid the re-execution of tests.
- Screenshots are useful in bug reporting.
How to take screenshots in Selenium 4?
Element Screenshot
In Selenium 4, WebElement has a new method called getScreenshotAs, enabling you to take a screenshot of a specific WebElement. The process consists of finding the required WebElement and then taking a screenshot of it.
Below is the snippet to take a screenshot of the QED42 logo:
Section Screenshot
On the QED42 homepage, there is a section of services and details of each service.
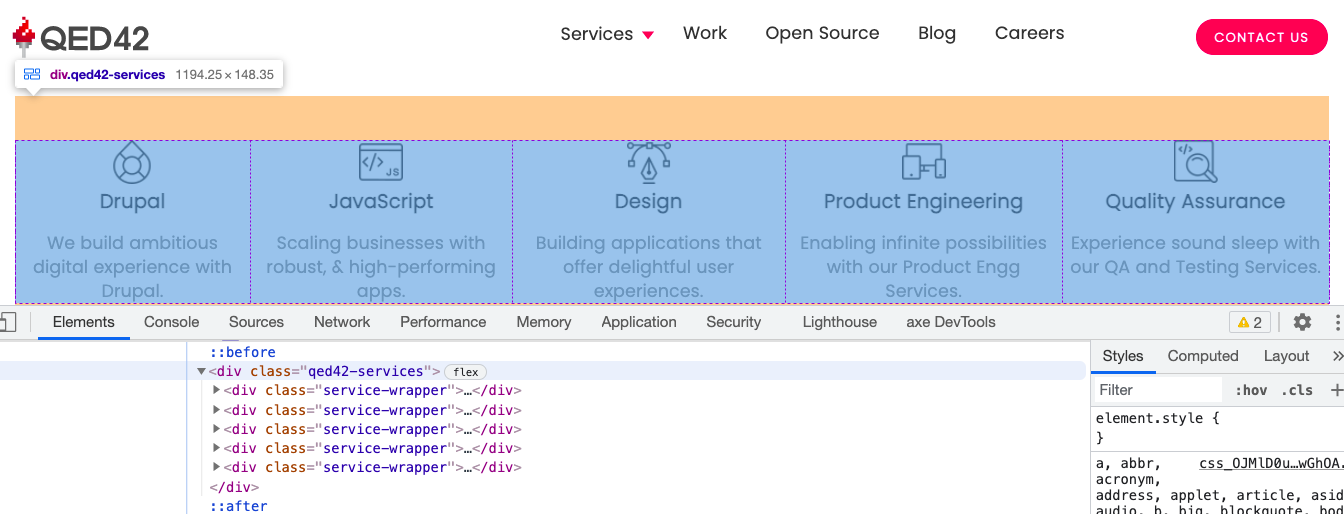
When the QED42 site is launched, there is a cookie consent pop-up and the QED42 Services section appears below the page fold. So, before we take a screenshot, we need to close the cookie pop-up and then perform a scroll down so that the required section is visible.
Below is the snippet to take the screenshot of “QED42 Services” section:
Full-Page Screenshot
With Selenium 4, we can take full page screenshots using the getFullPageScreenshotAs() method. It is only available for the Firefox browser. Here, we need to typecast the WebDriver instance to the FirefoxDriver instance instead of typecasting it to the TakesScreenshot interface.
There is a difference between the existing screenshot feature and the new full page screenshot feature. The existing screenshot feature takes a screenshot of the visible part of the page. The new full-page screenshot feature takes a screenshot of the entire page whether we can see it or not.
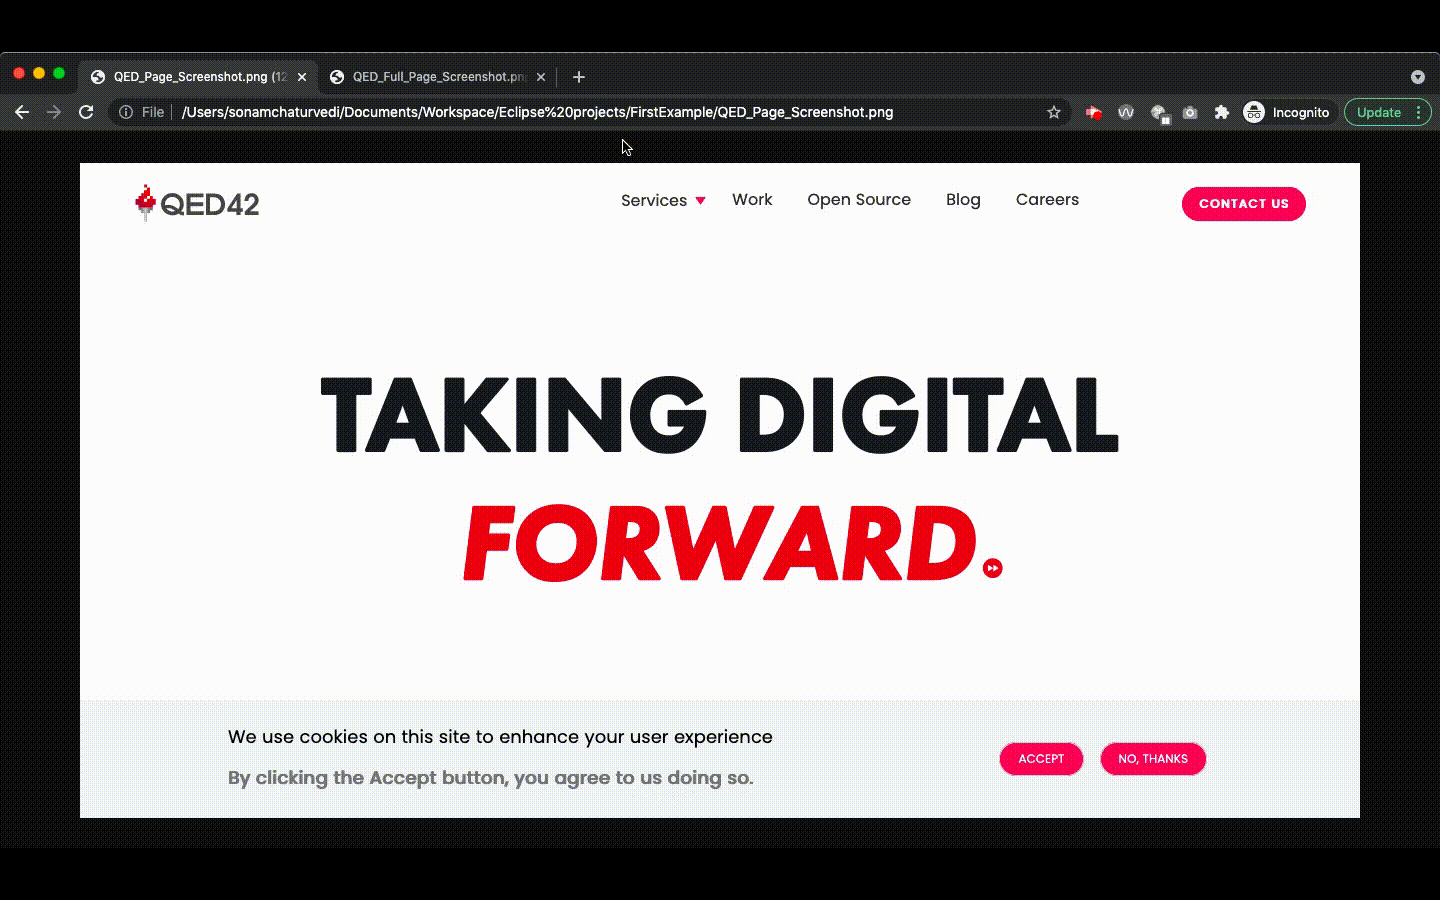
Let’s understand the difference between a page and full-page screenshots with an example. Consider we need to take a full-page screenshot of the QED42 homepage.
When the above test snippet is run, two screenshots are captured - QED_Full_Page_Screenshot.png and QED_Page_Screenshot.png.
- QED_Page_Screenshot.png consists of only visible parts of the web page.
- QED_Full_Page_Screenshot.png takes a normal screenshot of the entire page from top to bottom and does not include the browser address bar.
The sample codes are available at the Github repository here.
Conclusion
This article covered the new screenshot feature of Selenium 4 and how we can use it to take screenshots at various UI levels. Testers can use this feature in debugging and bug reporting.
Happy Testing!