

Behat is an open-source behaviour driven development framework for PHP. Behat is used to write code in easy human-readable statements for automated functional tests. The framework uses the Gherkin syntax. These statements are simple English text which makes it easier to understand the feature and the automated scenarios.
Following are mostly used gherkin keywords:
- Given - is used to mention the precondition for the test case
- When - is used to define the steps which we are going to perform
- And - is used to avoid writing given/when/then repetitively
- Then - is used to define the result or the outcome of the steps which are performed
Let’s take an example of forgot password functionality in Gherkin language as:
Feature: Forgot password functionality
Scenario: Verify Forgotten Password link
Setting up a Behat project
Step 1: Create a new directory and create a composer.json file inside your directory. So, you can install the dependencies using composer. In composer.json mention the dependency and configuration as mentioned below:
Note: We are using a Drupal extension for setup which will automatically download behat dependencies, you can also use behat, mink, etc. packages directly.
Step 2: Open the terminal and run the following command in your directory:
composer install
It will start installing all the dependencies which are required for behat setup under the vendor directory.
Step 3: Now run the following command to create the default directory structure.
bin/behat --init
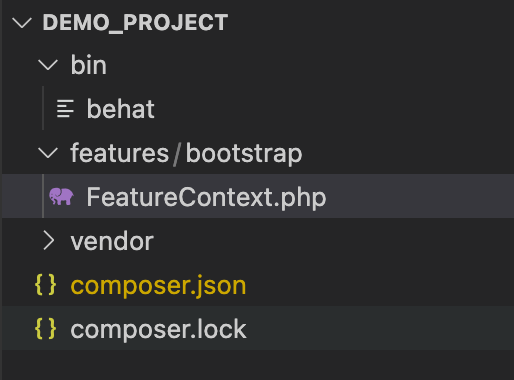
This will create a features folder with FeatureContext.php class file in features/bootstrap, where we can keep the custom step definitions and logics required to execute the test cases. The behat directory will look as below:
Step 4: Next step is to create a behat.yml file in the root folder, which will be the configuration file from which the behat executor will know about our environment and extensions to be used while executing test cases. Add the following to behat.yml
Step 5: Creating a feature file
What is a feature file?
A feature file is an actual test case that will hold all the scenarios, Let’s say for example - login functionality that needs to be automated, we need to create a login.feature file inside features folder and that will consist of - Feature, Background(optional), Scenario and Steps.
- Feature - It is used for describing the feature which we are going to automate
- Background - it is optional, if there are some set of steps that need to be performed before every scenario then we can put it in the background
- Scenario - It is the description of the test case
- Step - Every line inside the scenario is a step, which has been mapped with a PHP function that gets executed when the step is called
Let’s see an example of a login.feature file:
As you can see, the login feature file consists of two different scenarios for valid and invalid credentials.
Best Practice Tip: do not write XPath or CSS paths in feature files, use labels, id, name or attributes which are easily readable.
Step 6: Execute behat test, you need to run the following command - bin/behat features/login.feature
This feature file will run on the base_url which is mentioned in the behat.yml file.

Yay.! The behat setup is ready
Writing Custom Step Definition
Every PHP function which is mapped to the step in the feature file is called step definition, so wherever a step is executed a mapped PHP function gets executed. Step definition holds the actual code and logic of steps
We are using the Mink and Drupal extension which provides us with most of the predefined steps that can be used to write tests. You can see all available steps using this command - bin/behat -dl
But we might need to write custom step definitions based on our application, in such cases, we can write custom step definitions in FeatureContext.php.
For example, I need to write a logout step for my application, I will create the following step definition in the FeatureContext.php file
To call this step definition we can use And I logout step in the feature file.
Passing data to Step Definition: The step definition can accept parameters that can be used in functions to make it more generic and reusable.
For example, I need a step definition to click a button, I can write a to step definition in the following way by passing a label as a parameter.
In the above way, I can pass the label of the specific input type-button (eg. Save, Submit, Cancel etc) to function and it will get clicked.
To call this step definition we can use And I press the “Save” button step in the feature file where “Save” will be the parameter for your step definition.
Frequently used plugins for Behat
Here is a list of mostly used plugins for behat:
- Drupal Extension: This extension is an integration layer between Behat, Mink Extension, and Drupal. It provides step definitions for common testing scenarios specific to Drupal sites.
- Mink Extension: This extension is used for managing sessions and drivers and also provides predefined step definitions which can be used for writing test cases.
- Bex Screenshot Extension: This extension helps you to capture screenshots, you can use this to debug Behat scenarios by taking screenshots of the failing steps.
- Emuse Reporter: This extension helps you in generating graphical HTML reports from your test executions.
- Dmore Headless chrome: This extension is used for controlling chrome without the overhead of selenium. It supports headless mode.
Conclusion
As we know, automation is the best way to increase the effectiveness, efficiency and coverage of our testing. Behat is easy to set up and gherkin language makes it easier to understand the test cases for non-technical stakeholders, also it comes with extensions like mink and Drupal which provides predefined steps that can be directly used in writing test cases which reduces the time required for custom code.