

Introduction:
In the fast-paced world of app development, ensuring a smooth and bug-free user experience is paramount. One crucial step in achieving this is thorough testing, and TestFlight stands out as a reliable platform for iOS app testing. This blog will walk you through everything you need to know
about deploying apps to TestFlight, covering requirements, and benefits, and providing a step-by-step guide for a hassle-free deployment process.
Understanding TestFlight:
What is TestFlight?
TestFlight is Apple's official beta testing service that allows developers to distribute pre-release versions of their iOS apps to a selected group of testers for thorough testing before the app goes live on the App Store.
Benefits of Using TestFlight:
1. Early Feedback:
Enables developers to gather valuable feedback from a diverse group of testers before releasing the app to the general public.
2. Real-world Testing:
Provides the opportunity to test the app in real-world scenarios, uncovering potential issues that might not be apparent in a controlled environment.
3. Security and Privacy:
Ensures that the beta testing process is secure and respects the privacy of both developers and testers.
4. App Store Preview:
Allows developers to create a polished App Store page with screenshots, descriptions, and other information before the official release.
Requirements for Deploying Apps to TestFlight:
1. Apple Developer Account:
Ensure you have an active Apple Developer account. This is a prerequisite for accessing TestFlight.
2. Xcode:
Install the latest version of Xcode, Apple's integrated development environment (IDE).
3. Appropriate Certificates and Profiles:
Generate and configure necessary certificates and provisioning profiles in the Apple Developer Center to sign your app.
4. Testers' Apple IDs:
Collect Apple IDs from individuals who will be testing your app.
Step-by-Step Guide to Uploading Apps to TestFlight:
Step 1: Prepare Your App in Xcode
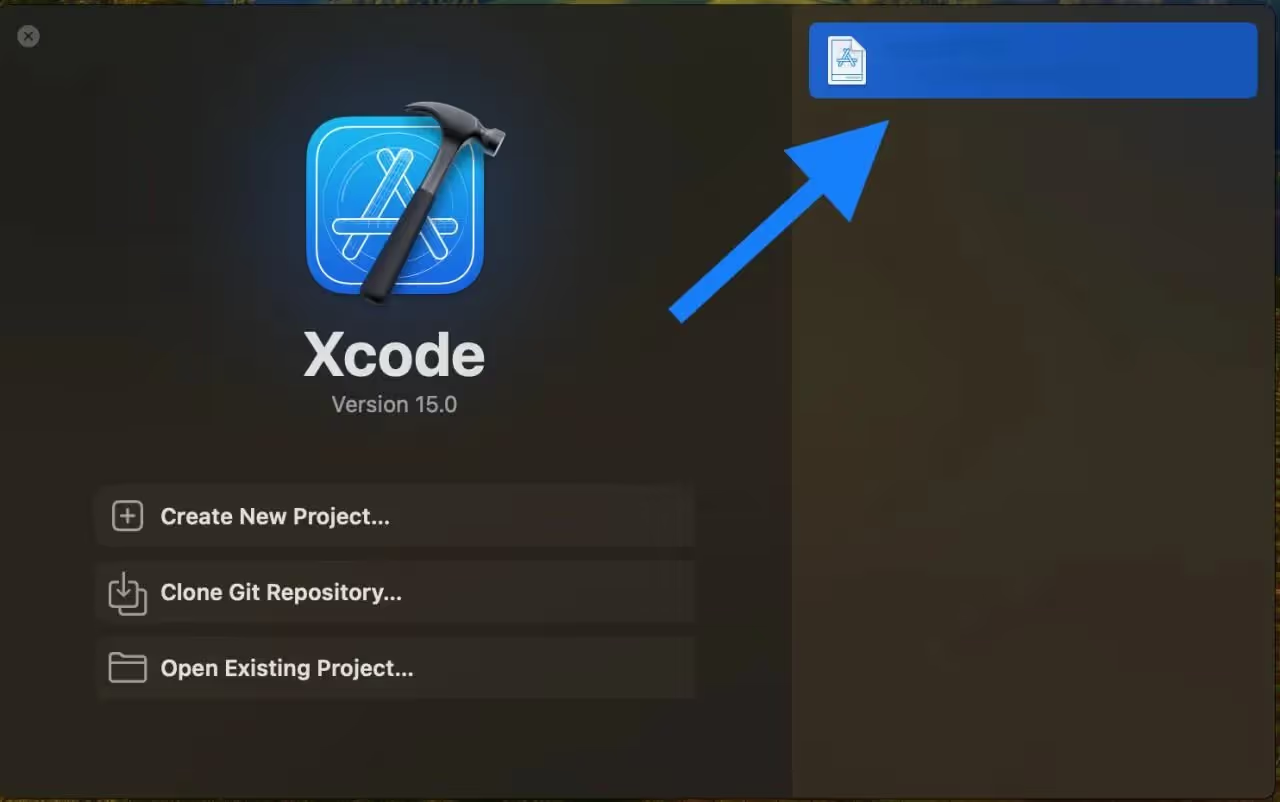
1. Launch Xcode:
Open Xcode and load your project.
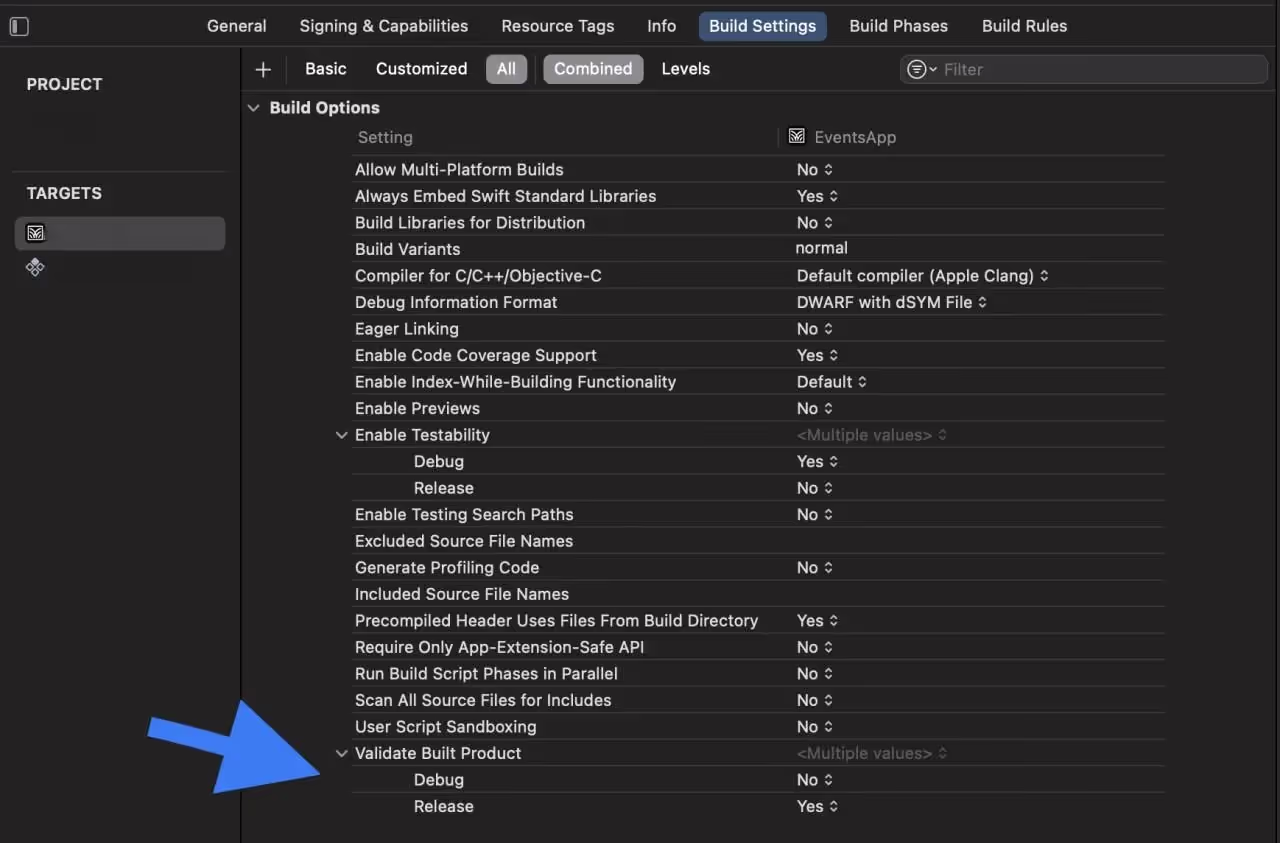
2. Configure Build Settings:
In the "Project Navigator," select your project, go to "Build Settings," and set the build configuration to 'Release.' This optimizes your app for distribution.
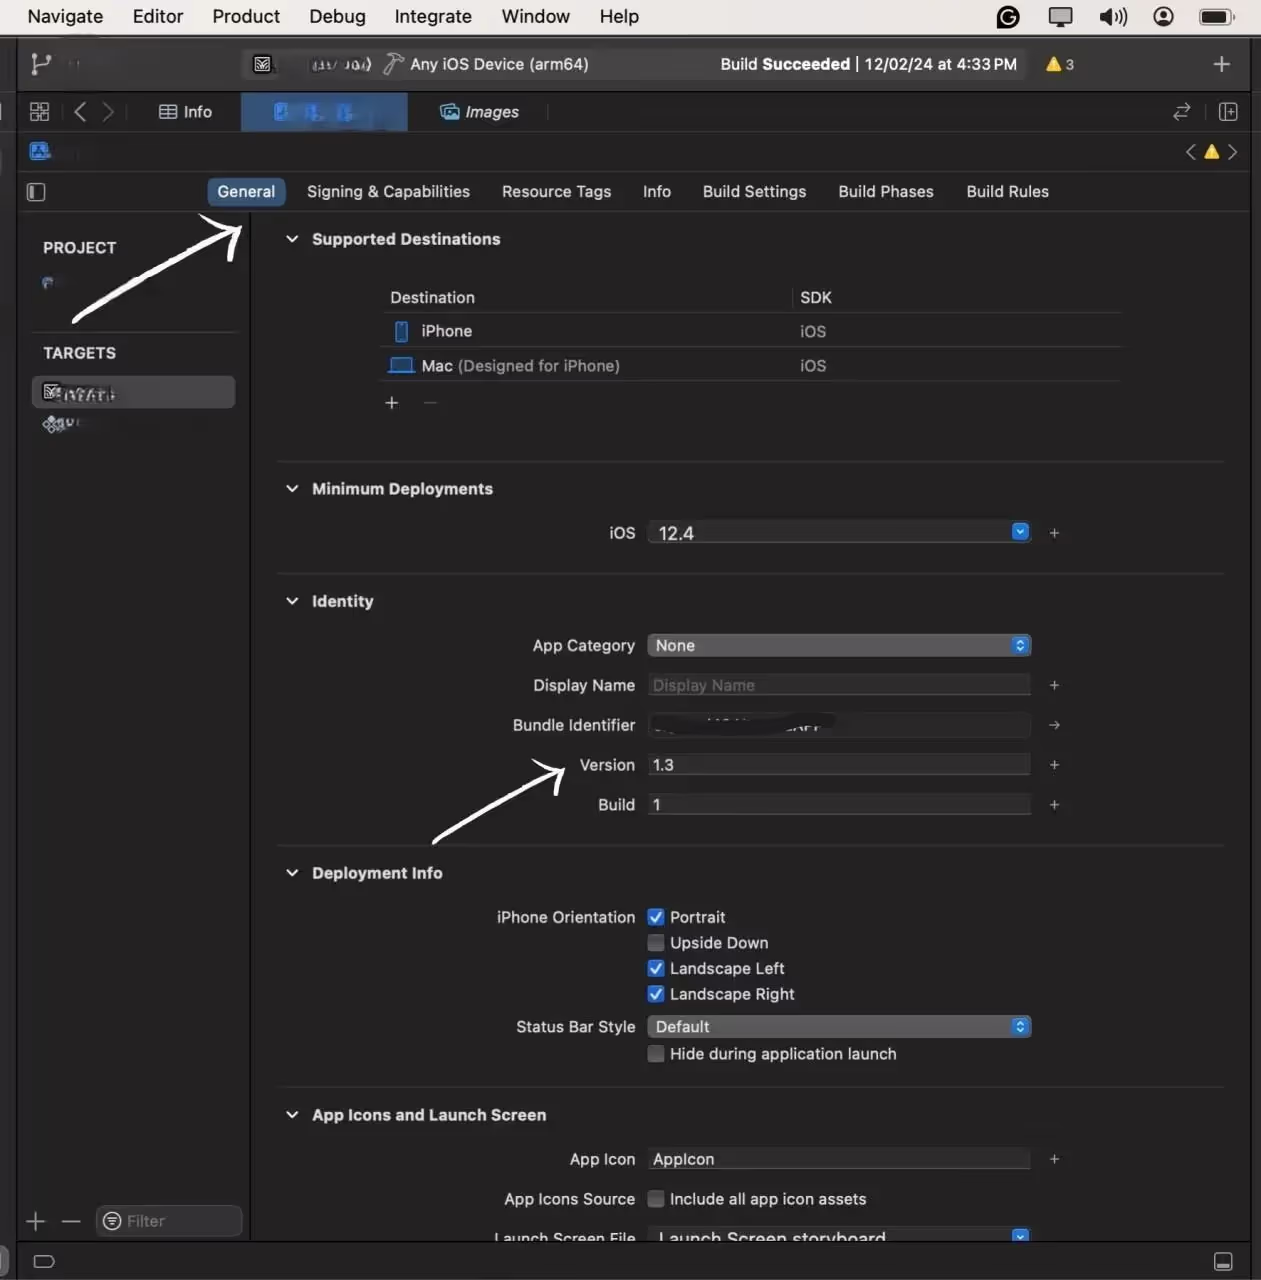
3. Versioning:
Navigate to the 'General' tab and adjust the version number and build number. This step is crucial for tracking different versions of your app.
Step 2: Archive Your App
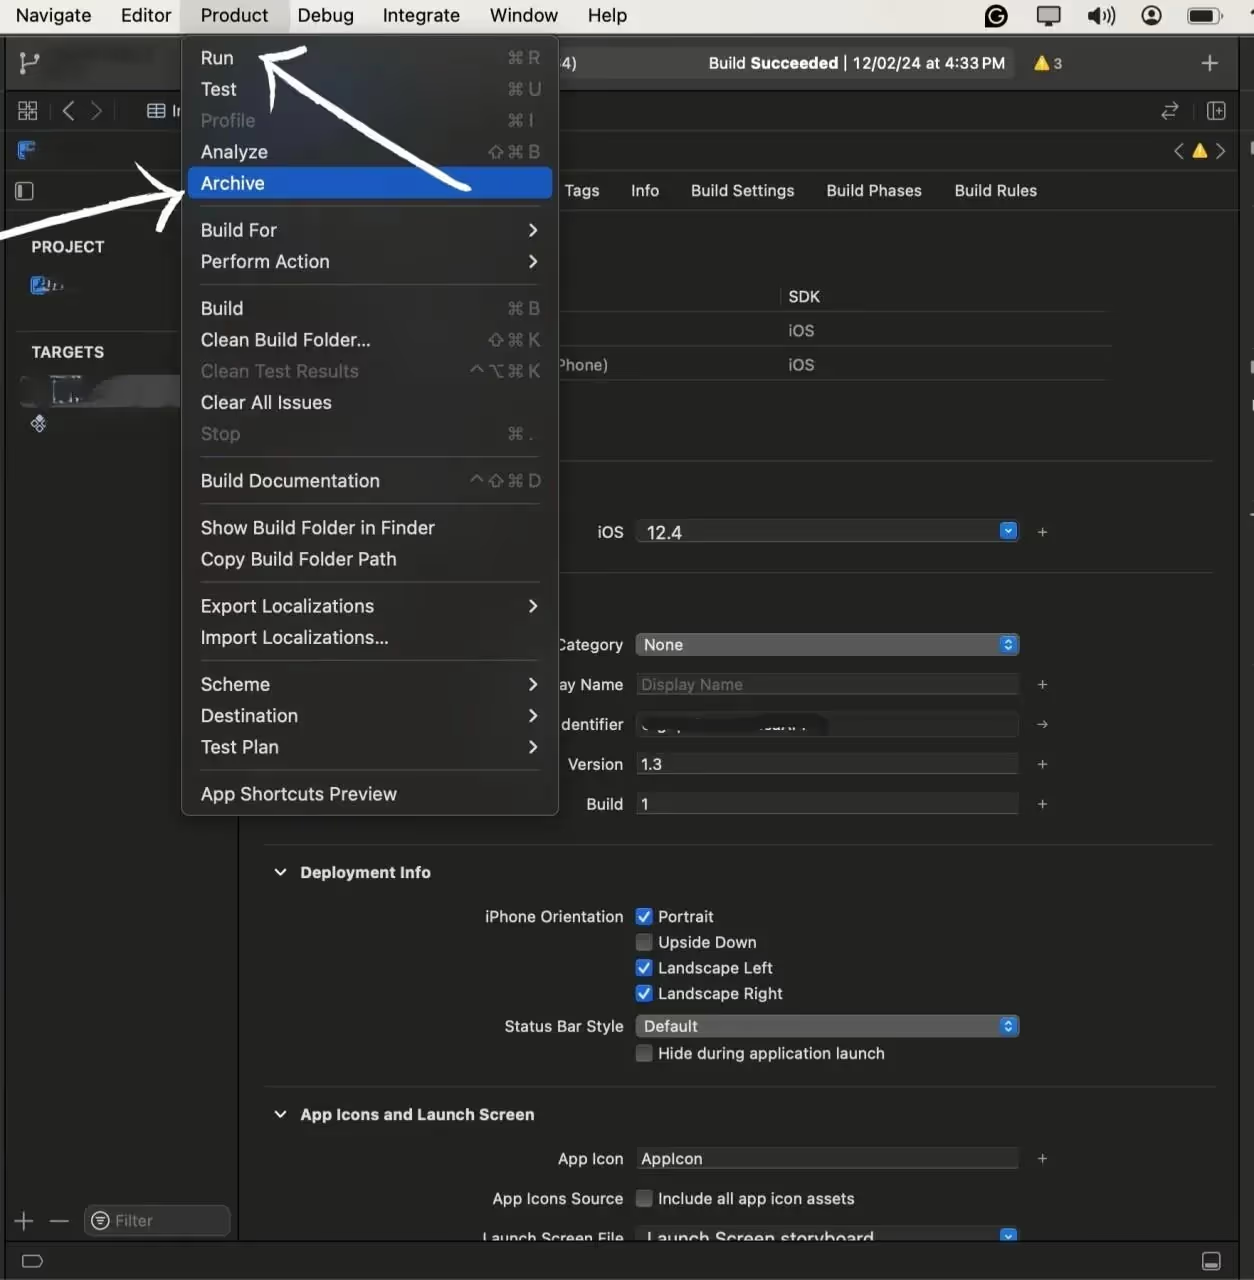
1. Generate Build:
From the top menu, select your target device as "Any iOS Device" to generate a build suitable for distribution.
2. Archive the Build:
Go to "Product" > "Archive" to Start the process of Archiving.
Archive is the process of preparing our app for uploading to the test flight, in-short it creates the compressed version of our app for the appropriate upload
Step 3: Distribute the App
1. Select the version of the app to Distribute
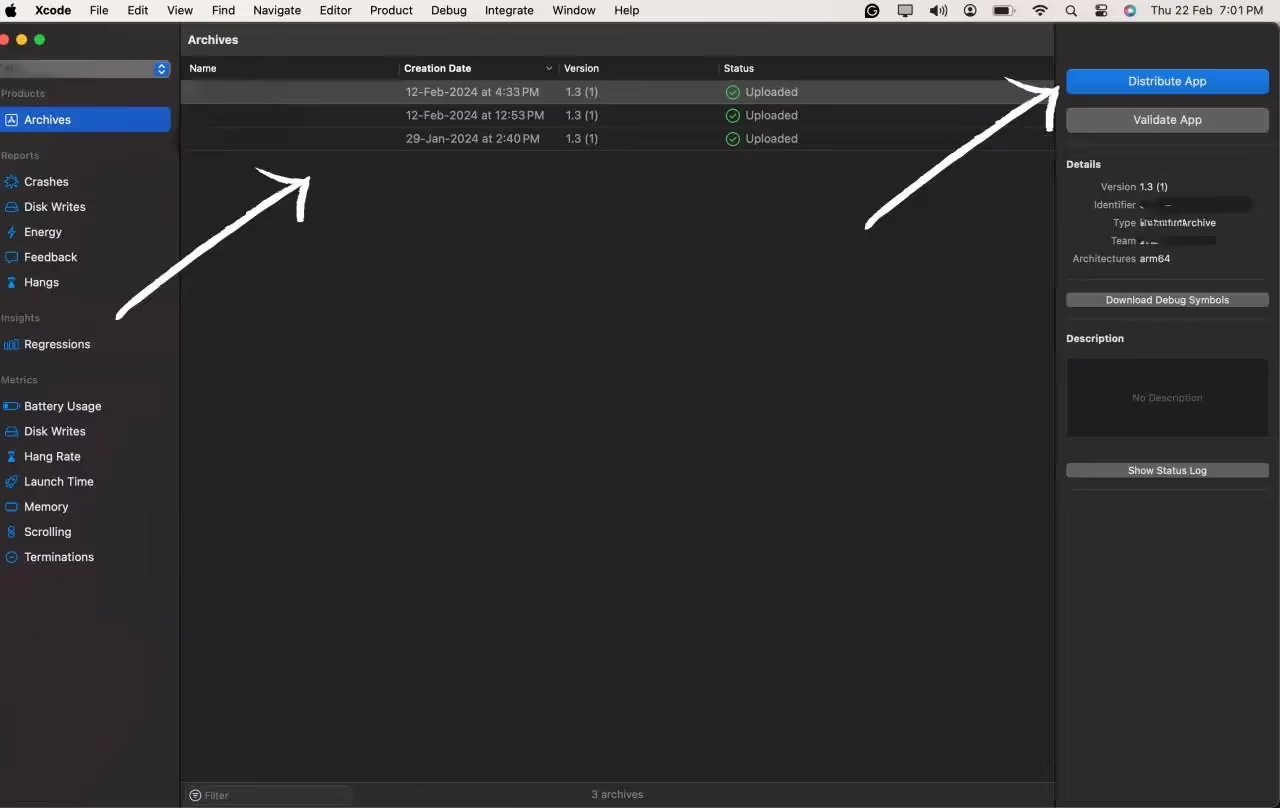
After the archive process is completed you will be redirected to the All Archives page, here select the archive you want to deploy to the Test flight,
After selecting the archive hit the Distribute button to start the process.
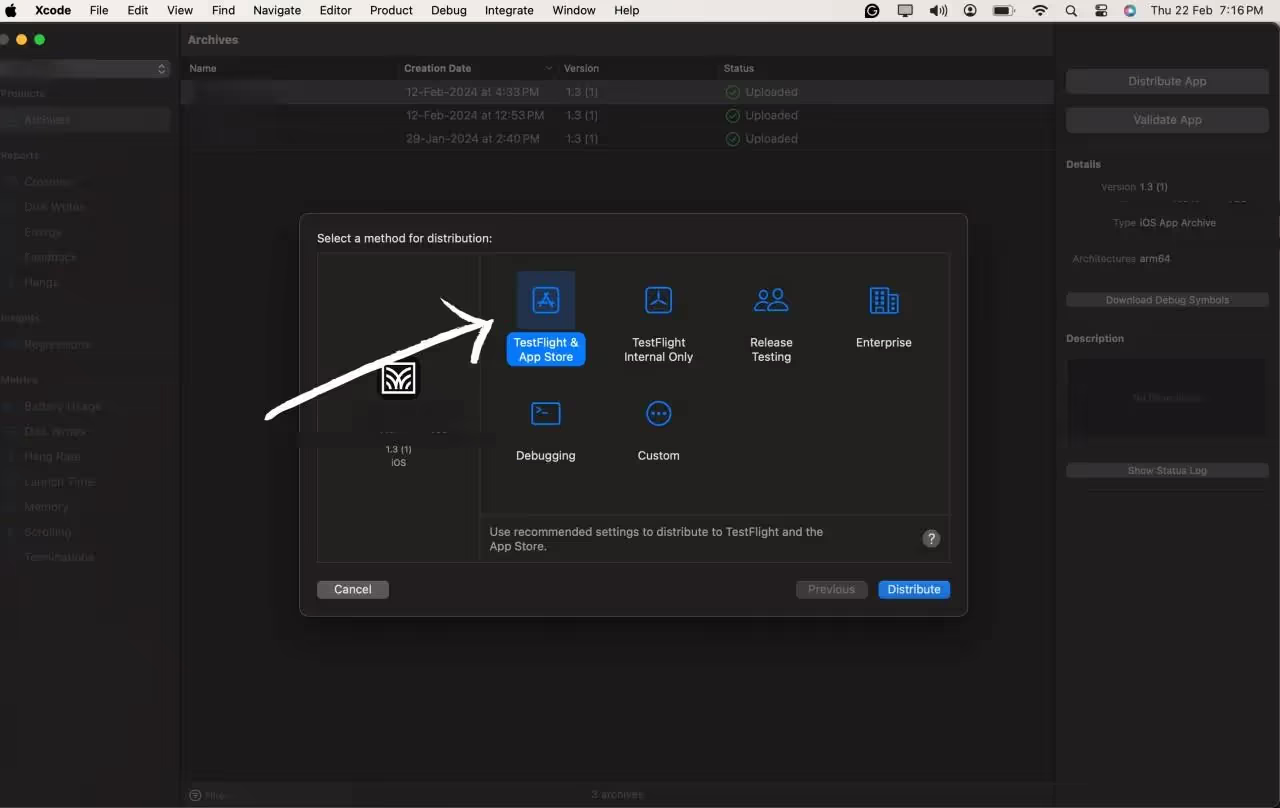
2. Configure the Options:
After hitting the Distribute App option you will be prompted with the option of how you want to deploy the app. You can select the option according to your needs and the purpose of the app, We will go with the Test flight option for this blog.
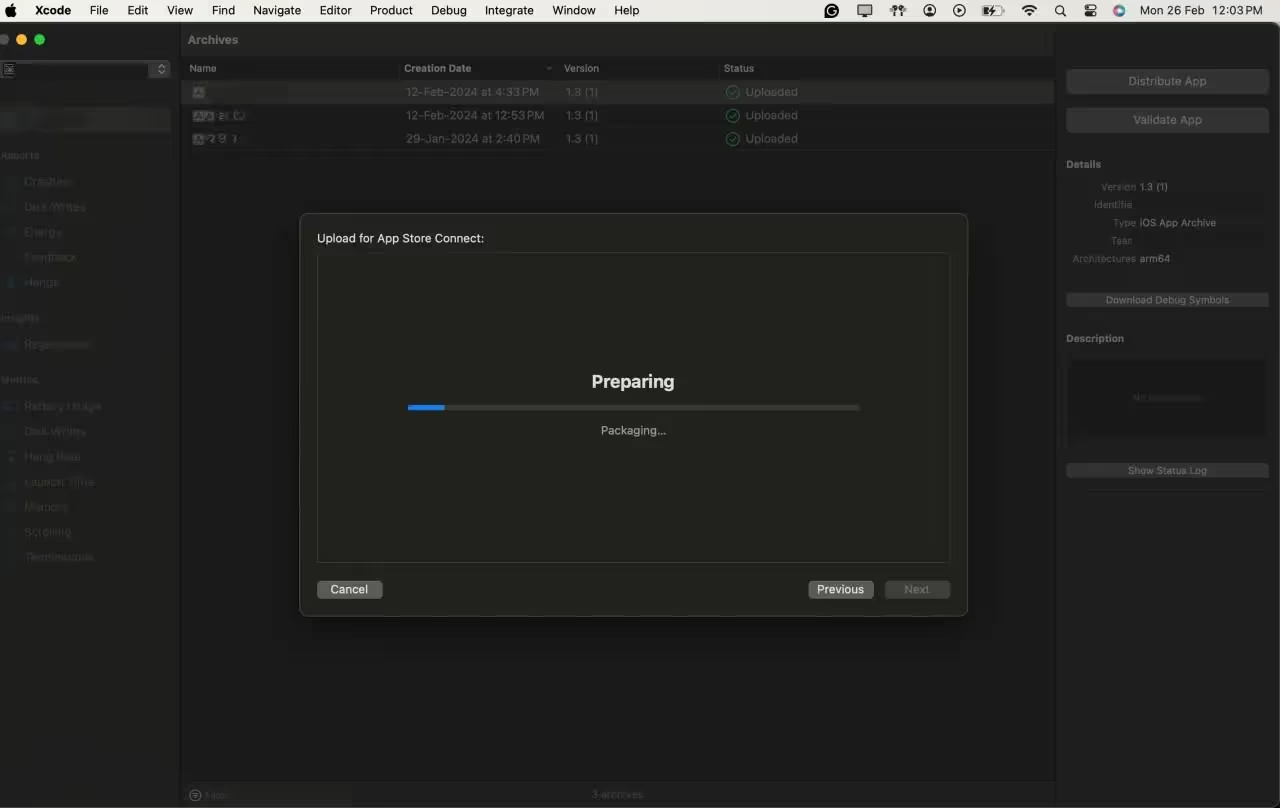
3. Start Uploading the Build
After selecting all the configuration options we can start the distribution by Pressing the Distribute button.
Step 4: Tester Onboarding
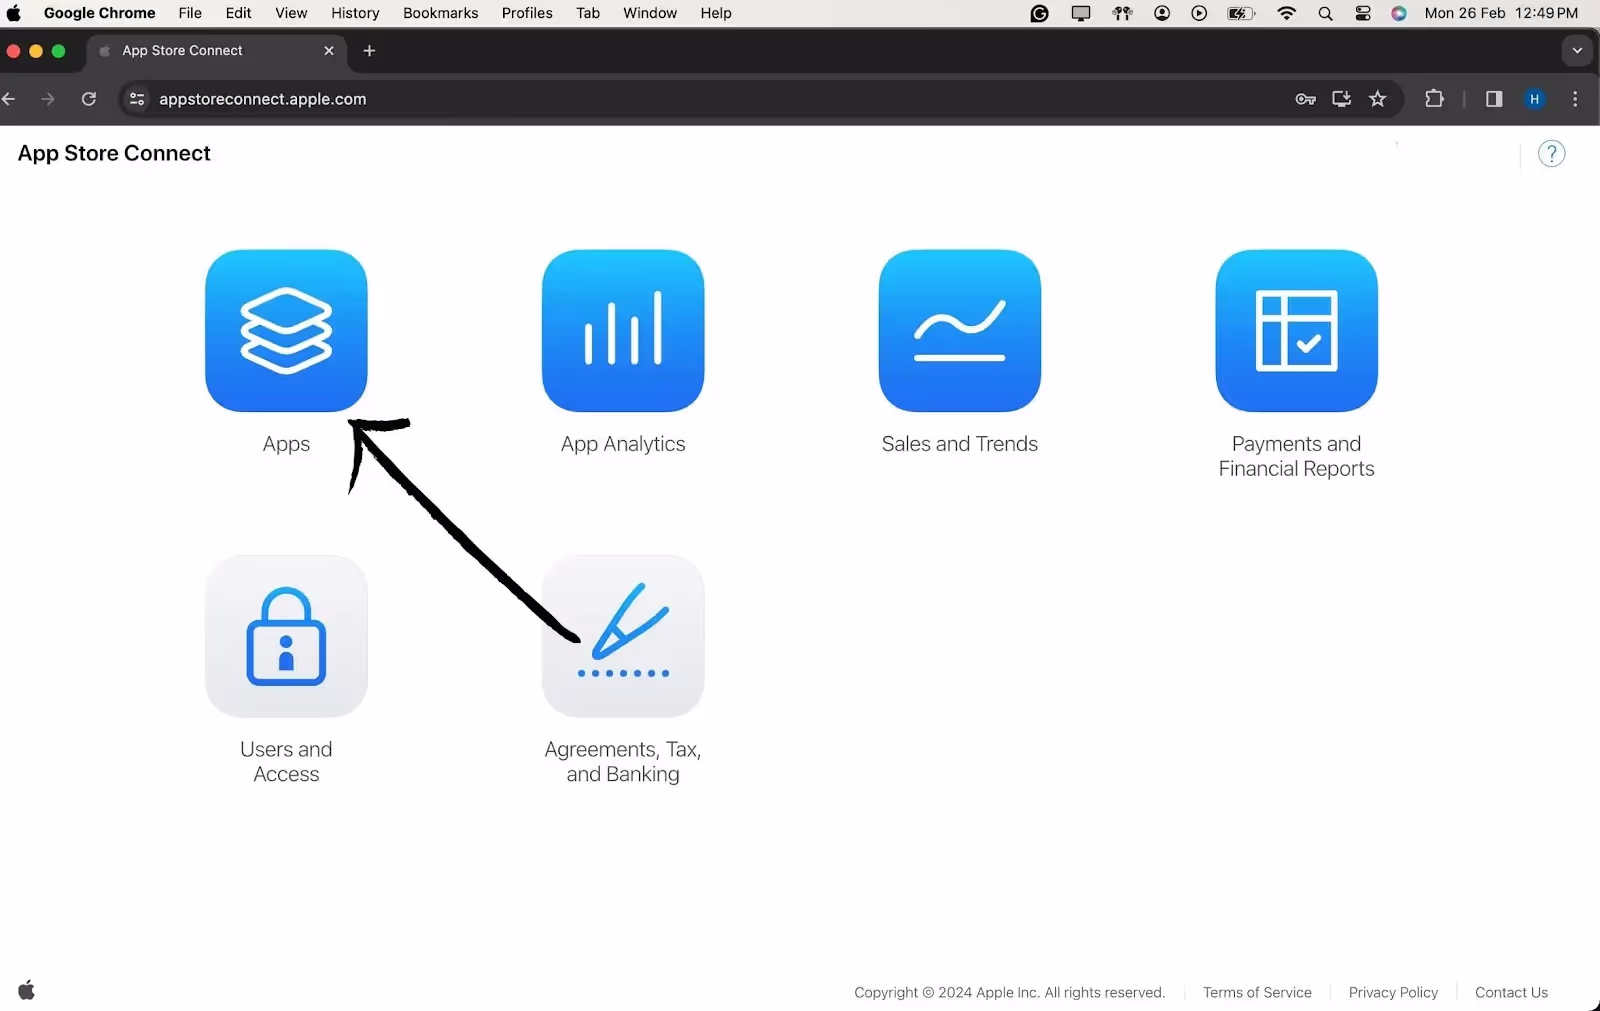
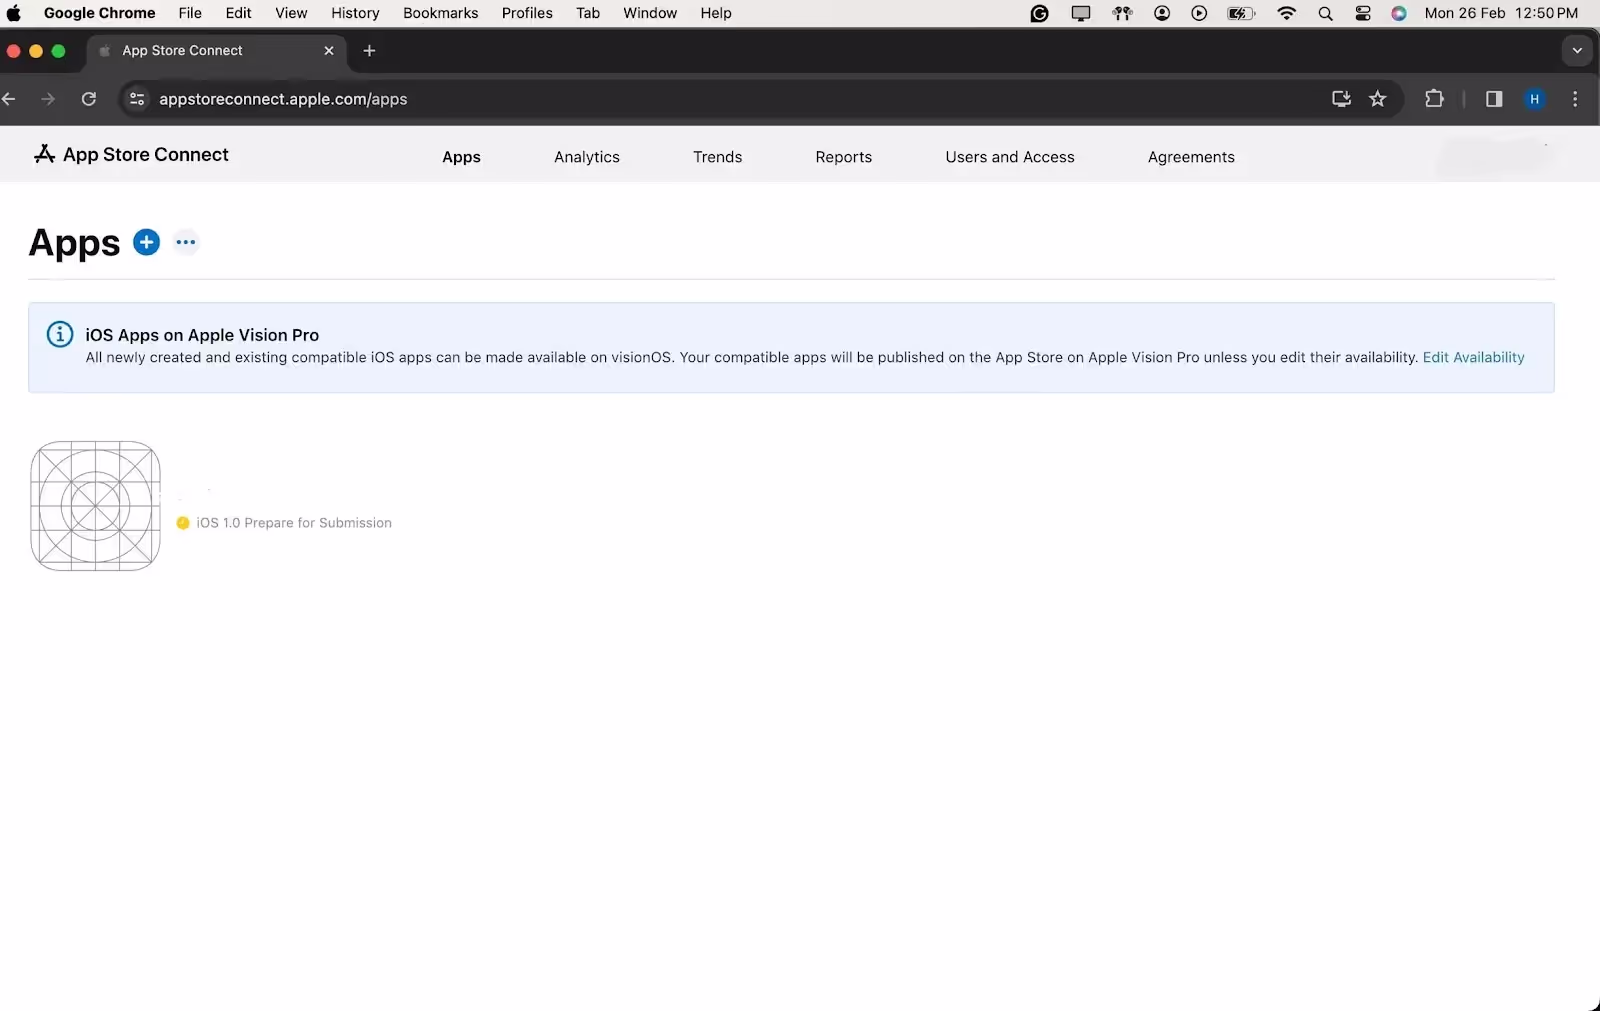
1. Access the Login Page:
Open your preferred web browser and navigate to App Store Connect.
2. Enter Apple Developer Credentials:
Log in using your Apple Developer account credentials. Ensure you have the necessary permissions for managing users and builds.
3. Access TestFlight Section:
Once logged in, you'll be on the App Store Connect dashboard. Navigate to the "My Apps" section and select your app. In the left sidebar, find and click on "TestFlight."
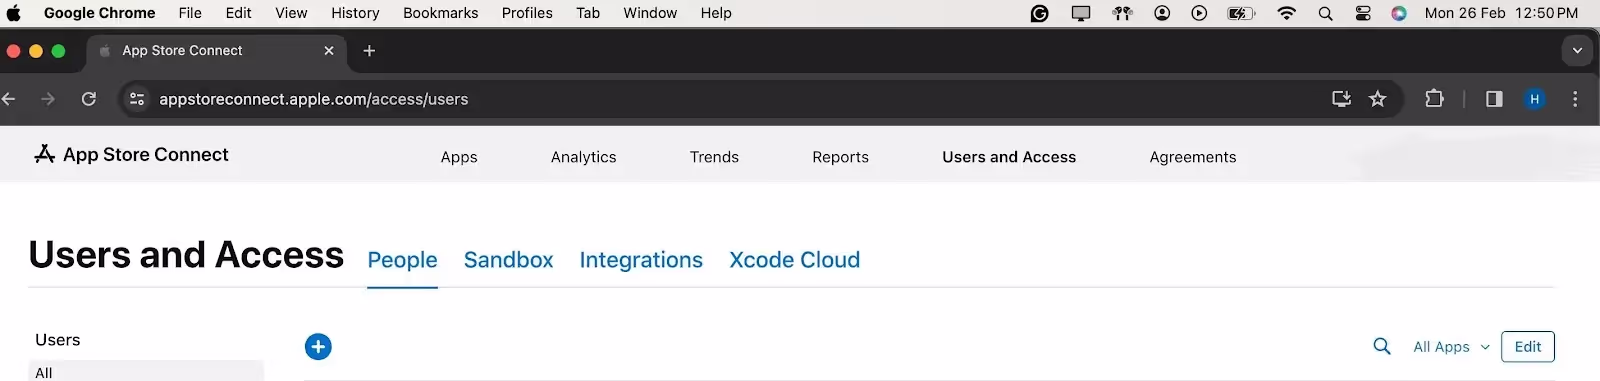
4. Select Internal or External Testing:
In the TestFlight section, choose either "Internal Testing" for your development team or "External Testing" for a wider audience.
5. Add Testers Using Apple IDs:
Click on the "+" (plus) icon to add testers. Enter the Apple IDs of the individuals you want to invite as testers. For internal testing, use the Apple IDs associated with your development team. For external testing, use the Apple IDs of external users.
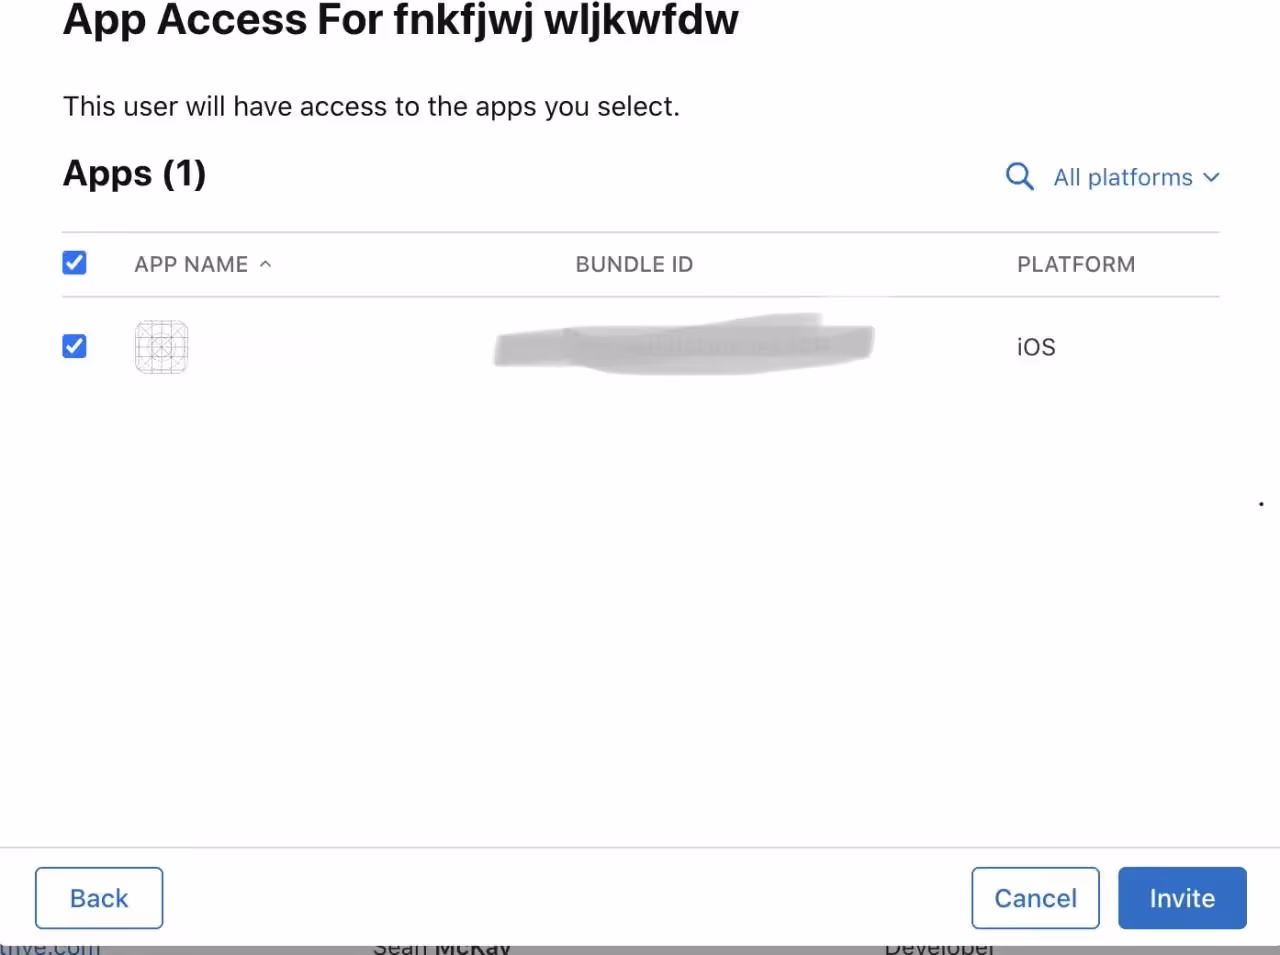
6. Configure Tester Information:
Provide additional information about each tester, such as their first name, last name, and email address. This ensures that testers receive invitations with accurate information.
7. Define Tester Roles and Notifications:
Specify the tester's role (App Manager, Developer, Marketer, or Tester) and select the desired notification options. This step allows you to tailor the testing experience based on individual roles.

8. Send Invitations:
Once all details are filled, click "Invite" to send invitations to the added testers. Testers will receive an email invitation to join the testing group.
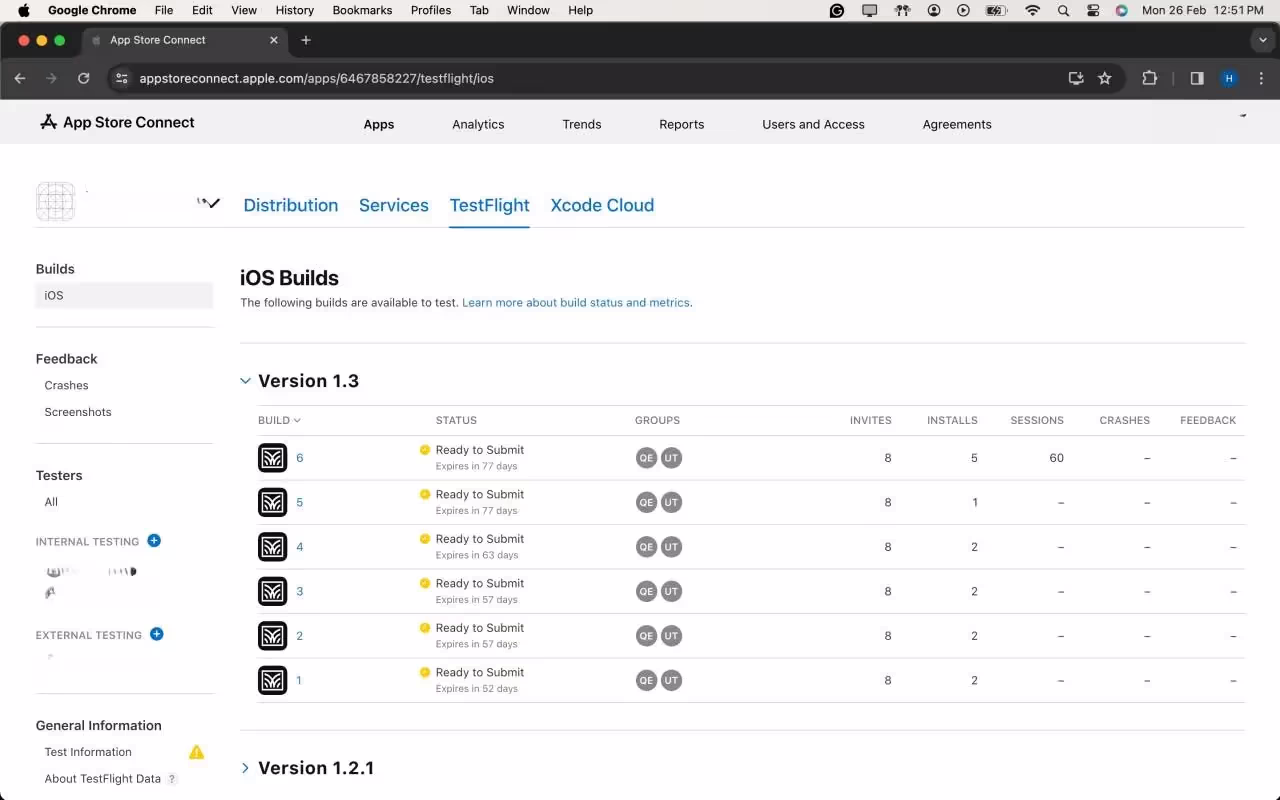
Step 5: Adding the Build for Testing
After the uploading is successful, the latest version will show up in the IOS Builds section
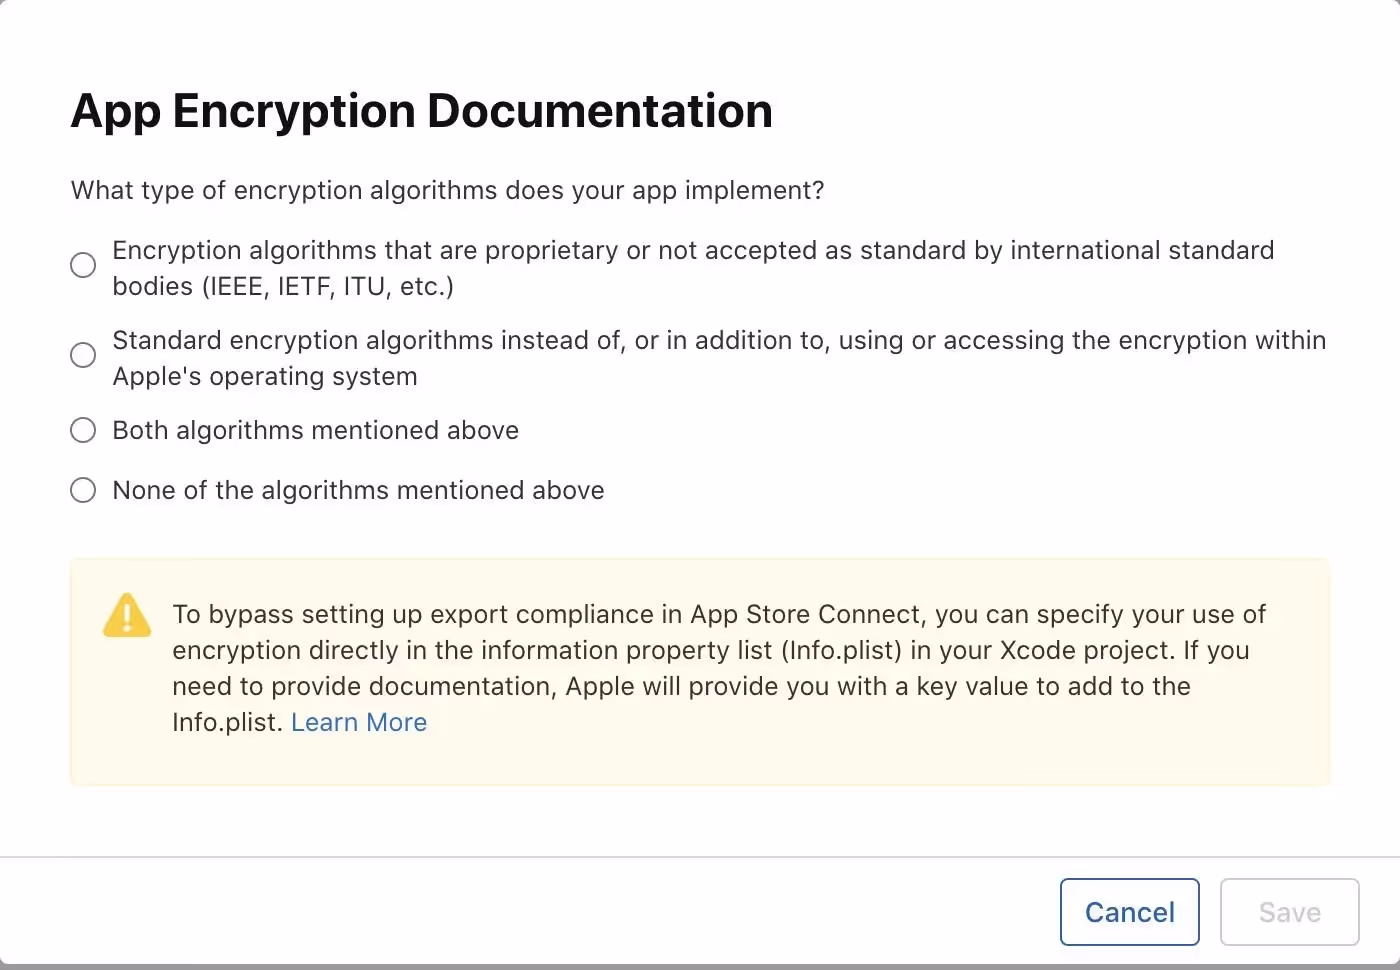
It will contain some Options for compliance for the app which which will ask for basic app details like if your app includes any kind of Authentication, if yes then which kind of it is?
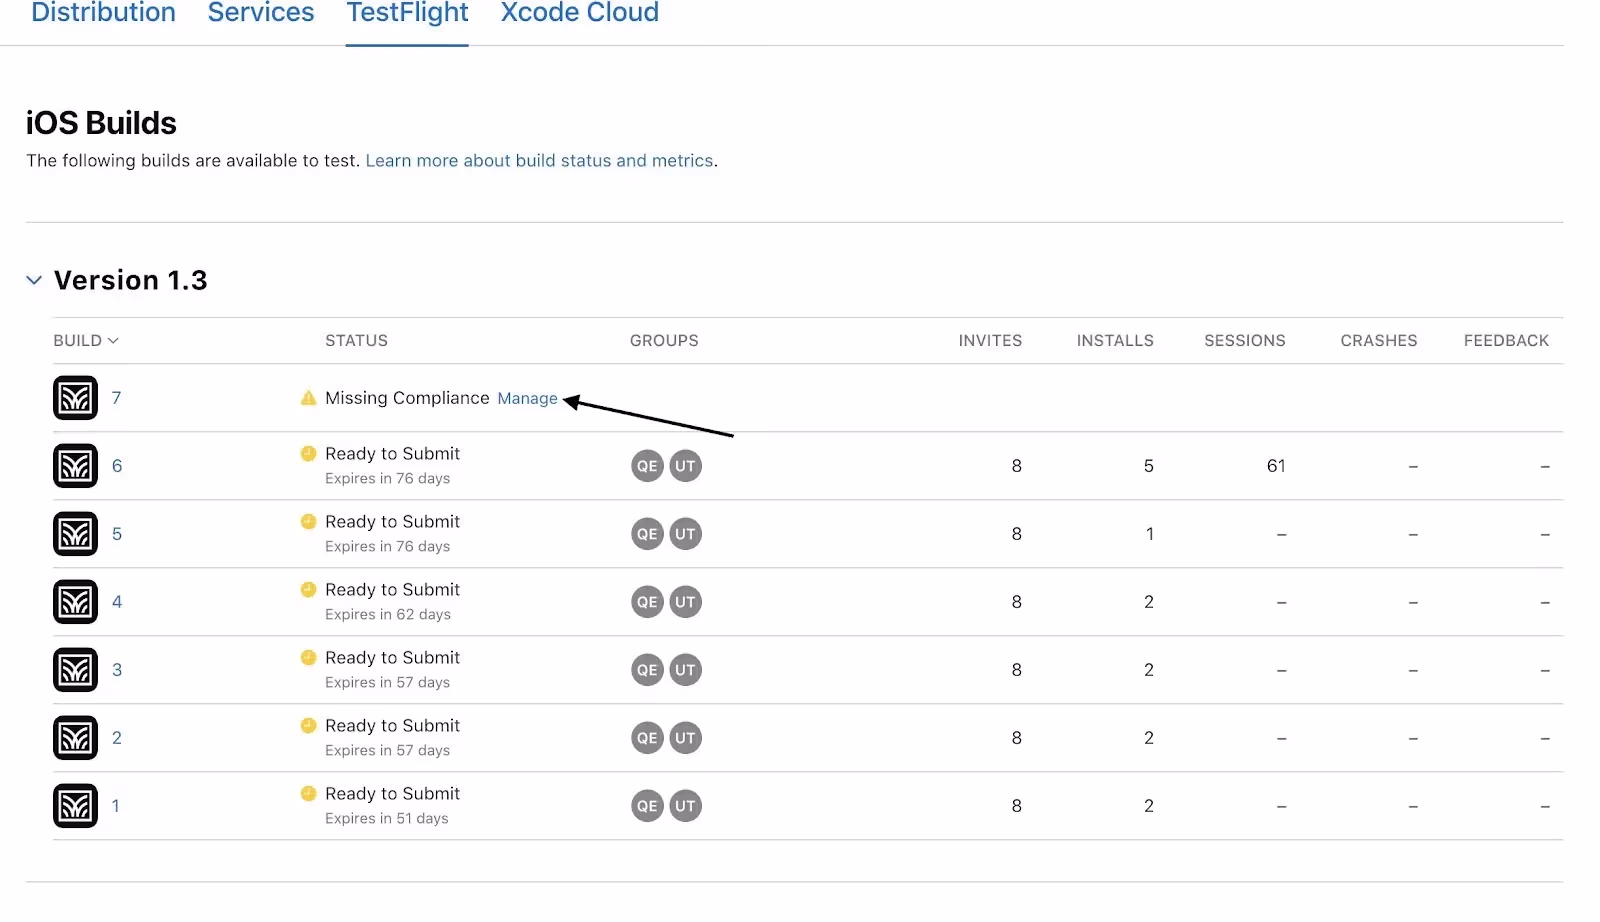
As a final step, once you check all the compliance, the app will automatically be available to testers for testing purposes in the test flight App.
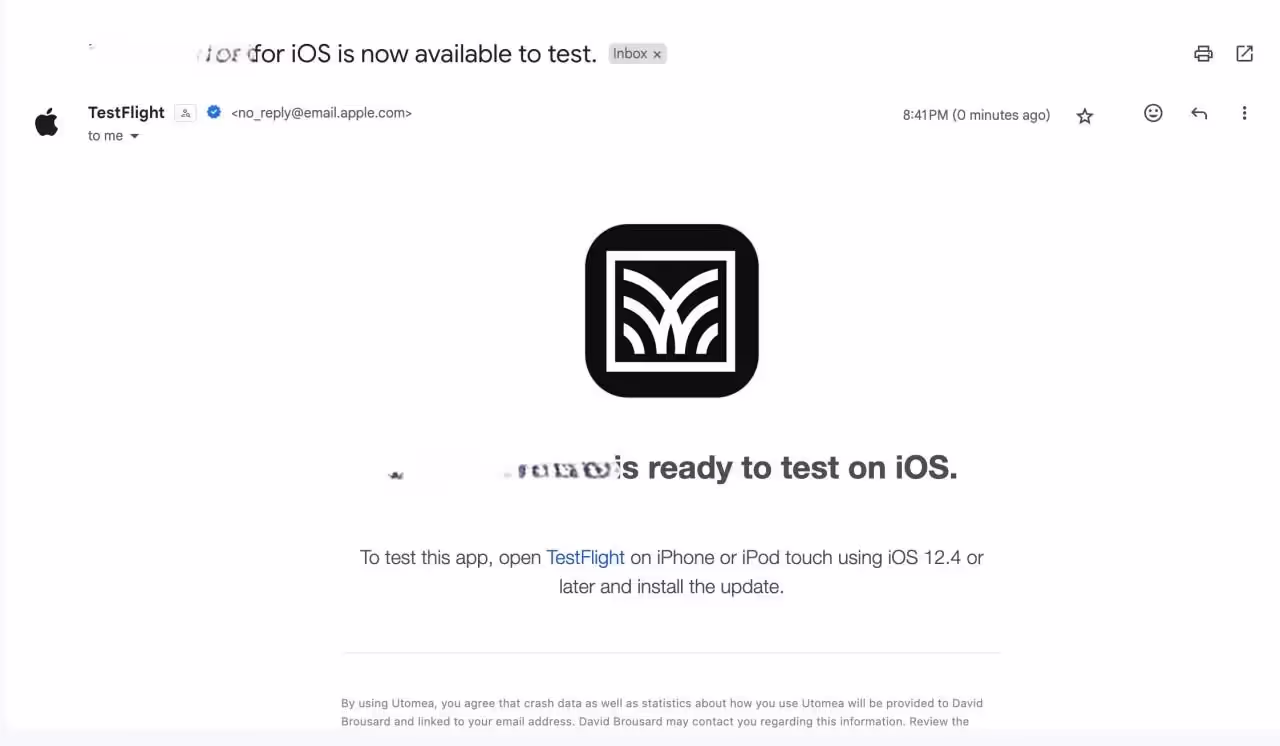
Testers will receive an E-mail notifying them that, a new build is available to test.
Step 6: Submit for Review(Optional For Testing)
1. Complete App Information:
Fill in all mandatory information on App Store Connect. Include details such as app description, keywords, and screenshots.
2. Submit for Beta App Review:
Submit your app for beta App Review. This ensures your app complies with Apple's guidelines.
Troubleshooting Deployment: Navigating Common Issues with TestFlight
Even with meticulous preparation, the world of app deployment can be unpredictable. Understanding and resolving common issues is an essential skill for any developer. Here, we delve into potential challenges that may arise during the TestFlight deployment process and provide detailed solutions.
1. Code Signing Issues:
Symptoms:
Error messages related to provisioning profiles or code signing during the build process.
Solution:
1. Revisit Apple Developer Center: Ensure that your certificates and provisioning profiles are correctly set up. Sometimes, a simple refresh or recreation of these in the Apple Developer Center can resolve issues.
2. Xcode Preferences: Check Xcode preferences to make sure the correct developer account is selected, and the associated provisioning profiles are up to date.
2. Build Rejections in App Store Connect:
Symptoms:
Your build is rejected during the beta App Review.
Solution:
1. Review Apple's Guidelines: Thoroughly review the App Store Review Guidelines to identify any violations.
2. Update Metadata: Make sure all app metadata, including descriptions, screenshots, and keywords, complies with App Store guidelines.
3. TestFlight Invitation Issues:
Symptoms:
Testers cannot access the app or face issues with TestFlight invitations.
Solution:
1. Verify Tester Email: Double-check that the email addresses of your testers are accurate, and they have accepted the TestFlight invitation.
2. Expired Builds: If testers are trying to access an older build, ensure that the build is still valid and hasn't expired.
4. Problems with Beta App Review:
Symptoms:
Delays or rejections during the beta App Review process.
Solution:
1. Communication with Apple: If you face delays or rejections, reach out to Apple through the Resolution Center in App Store Connect for clarification.
2. Adhere to Guidelines: Ensure your app follows all guidelines. Apple provides specific feedback during the review process, which can guide you in addressing issues.
5. Issues with TestFlight Distribution:
Symptoms:
Testers cannot download or install the app from TestFlight.
Solution:
1. Check Tester's Device: Ensure that the tester's device meets the minimum requirements for the app.
2. TestFlight App Version: Confirm that the TestFlight app on the tester's device is up to date.
6. Network or Connectivity Problems:
Symptoms:
Slow uploads, timeouts, or other network-related issues.
Solution:
1. Stable Internet Connection: Use a stable and high-speed internet connection to avoid interruptions during the upload process.
2. Retry: If issues persist, try uploading your build during non-peak hours or using a different network.
7. Issues with External Testers:
Symptoms:
External testers encountering difficulties joining or accessing the beta.
Solution:
1. Double-check Email Invitations: Ensure that the email invitations sent to external testers are accurate, and that they follow the provided instructions.
2. Resend Invitations: If testers are having trouble, consider revoking and reissuing invitations.
8. New Terms Agreement:
Symptoms:
A prompt for new terms or agreements in App Store Connect.
Solution:
1. Review and Accept: If prompted to agree to new terms or agreements in App Store Connect, carefully review the terms and conditions. Accept them to continue using the platform.
2. Clear Cache and Cookies: In some cases, clearing your browser's cache and cookies may resolve issues related to accepting new terms.
Conclusion:
Deploying apps to TestFlight is a crucial step in ensuring a successful app launch. By following this comprehensive guide, you'll be well-equipped to navigate the TestFlight deployment process, harness its benefits, and gather valuable feedback to refine your app before it reaches the wider audience on the App Store. Happy testing!
Here are some links to official Apple documentation for reference on How to deploy the apps to the test flight: