

We invest significant time, effort, and passion in bringing a website and its content to the web. Thanks to Drupal, content creation and publishing have never been easier. Your website may contain hundreds of pages, offering substantial value to the end user.
However, the success of a website depends not just on the quality of its content, but also on how easily users can find that content. A fast, responsive, and 'smart' search page is an integral part of every modern website, enhancing user engagement and retention. A poor search experience might lead to users discontinuing their use of your website.
Algolia is a proprietary search-as-a-service platform designed for use cases requiring high-quality and relevant search capabilities. It is a hosted search engine and can be integrated to websites using APIs to provide consumer grade search experience. It is capable of delivering real-time results from the first keystroke.
This is the first part of a three-part blog series, where we will explore how to integrate Algolia with Drupal to create a multilingual search page for the umami profile. In this first part, we will look into a basic integration, offering a comprehensive overview of each step.
We will be using “search_api” and “search_api_algolia” modules for indexing the content and then Javascript (instantSearch.js) to create the search page. In the second and third parts, we will dive deeper into structuring the content before indexing. This series is mainly focused for developers and has code level explanations.
Before we start..
- Create a new website with the ‘demo_umami’ profile. We use this profile so that we would get a beautiful multilingual website with preloaded content. We will be creating a search page for this content.
- Create a user account in Algolia from this link.
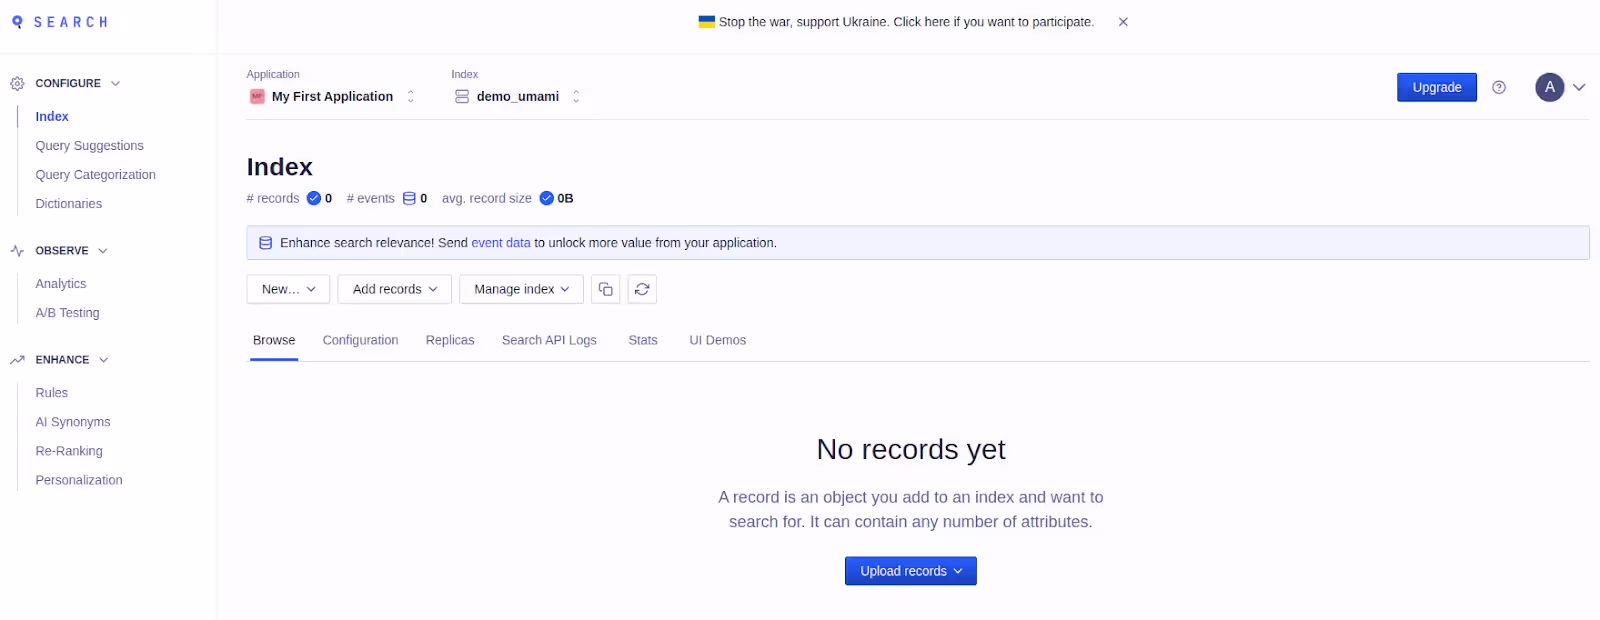
- Once you’ve created an account, you’ll be taken to your dashboard. This is where you’ll manage your Algolia applications and indices.
- The data we index from our Drupal site will be stored in “indices” and will be called “records”.
- Indices reside inside “Applications”. When you create a user account, Algolia will automatically create an Application named “My first Application” for you.

- To create a new index, Click on the “Data Sources” icon from the dashboard and select “Indices”.

- Click on “Create index”. Give “demo_umami” as the name and save. The index will get created.
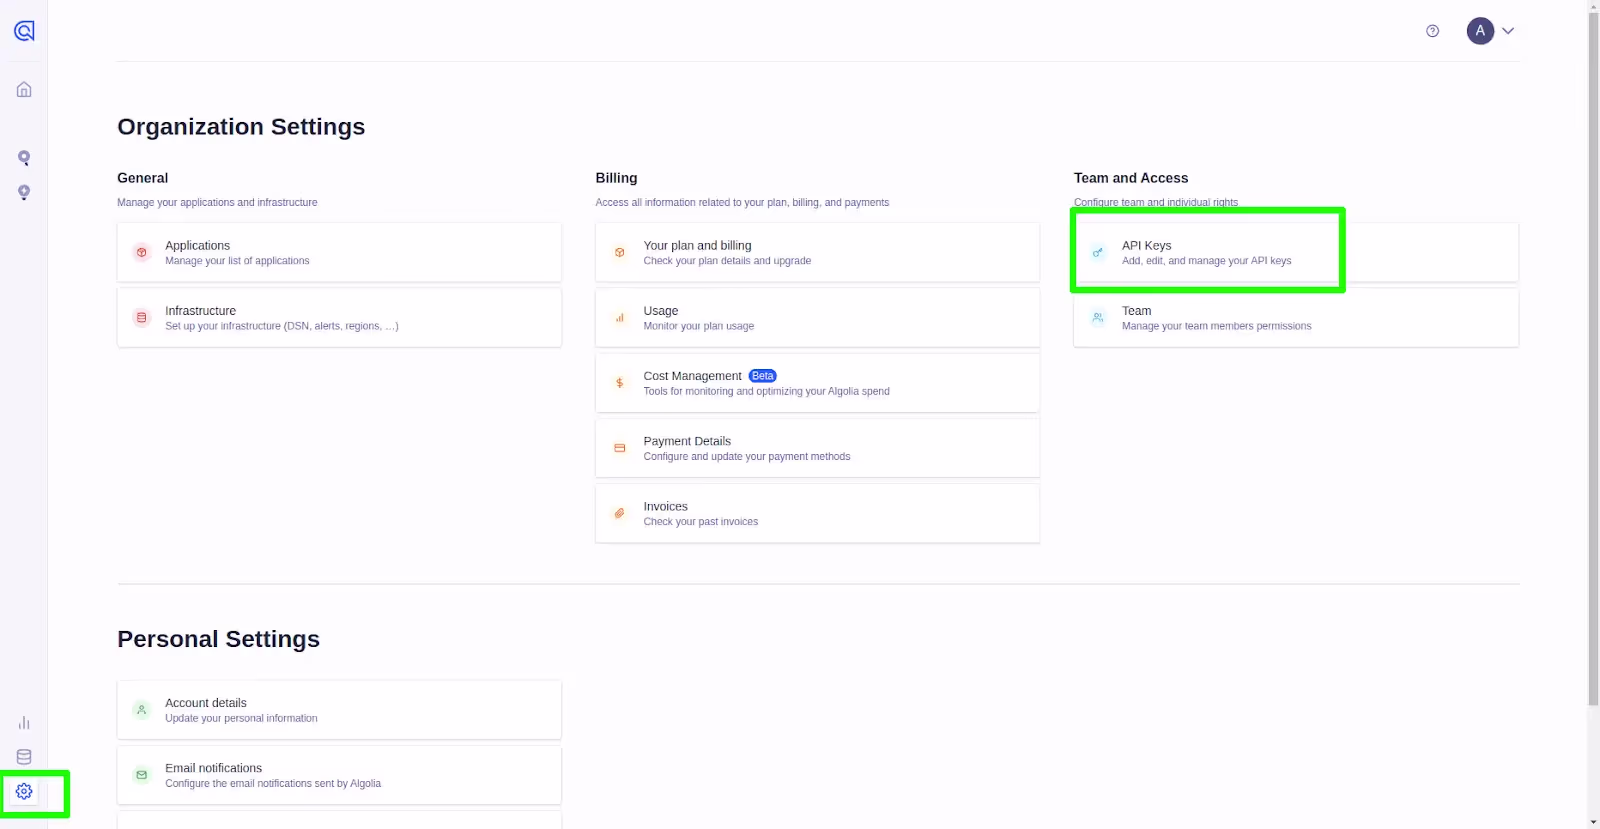
- You need to obtain the “Application ID” and “API key” of your Algolia account to connect your website to Algolia.
- For that, login to your Algolia account again and go to Settings -> API keys.
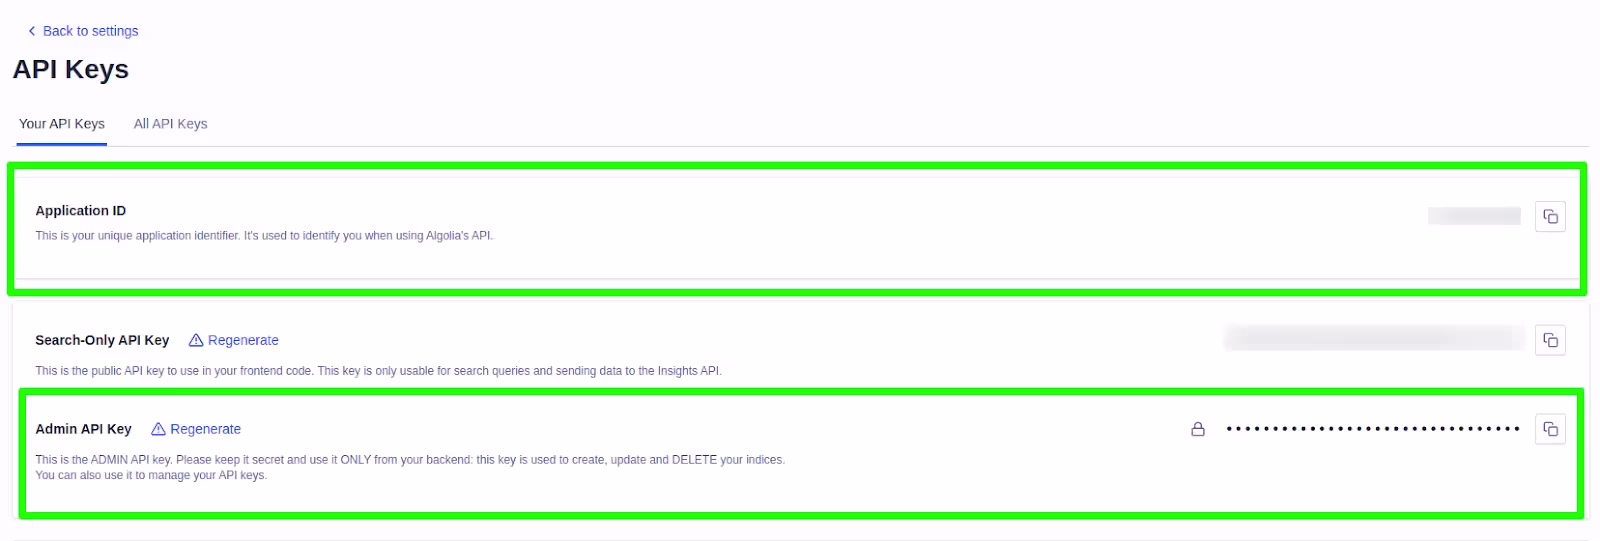
- You will see 2 types of keys: “Search only API key” and “Admin API key”’.
- We will use the “Search only API key” only when we create the front end UI.
- “Admin API key” is the one we need to use in Drupal backend to index the content.
- Make sure to keep the Admin key safe and private as anyone with this key will have full access to your search data. Never use the Admin key in the front end.
We are all set. Let’s start the implementation. In a nutshell, Integrating Algolia search involves 3 key steps.
- Indexing contents from Drupal backend.
- Configuring the indexed data from Algolia dashboard.
- Creating the search UI in Drupal using instantSearch.js.
Indexing contents from Drupal backend
- Download and install search_api_algolia module.
composer require 'drupal/search_api_algolia:^3.0@beta'
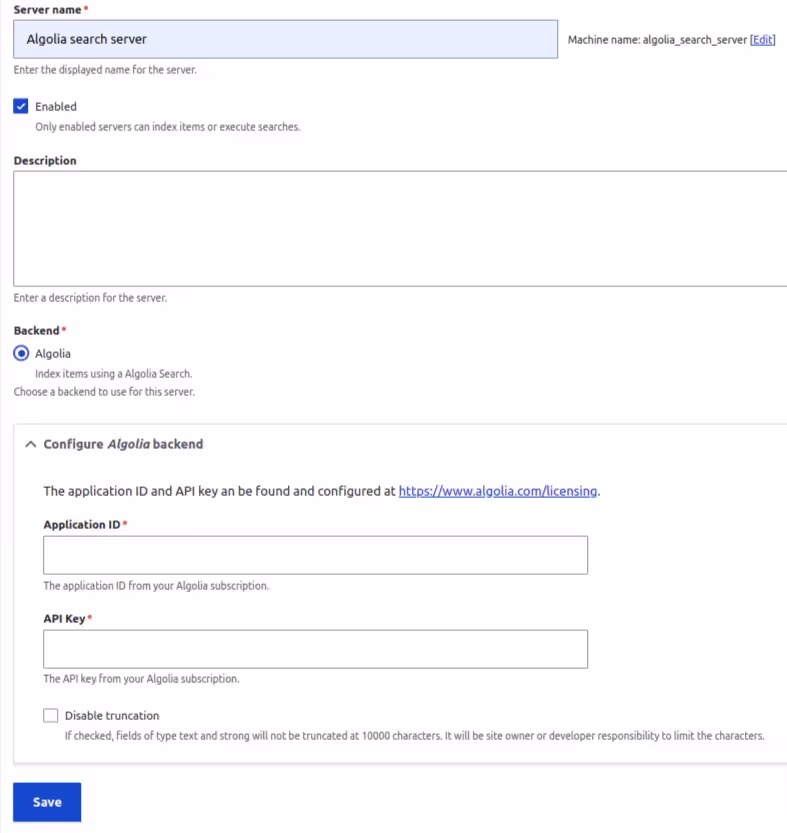
- Go to /admin/config/search/search-api and click on “Add server”. Give “Algolia search server” as the name. Add the API key (Admin API Key) and Application ID. Click save.
- Create a search index with the machine name “demo_umami” (Index machine name should be the same as the index name in Algolia).some text
- Select “Content” as the data source and select only Article and Recipe content types.
- Select both English and Spanish languages.
- Select server as Algolia search server.
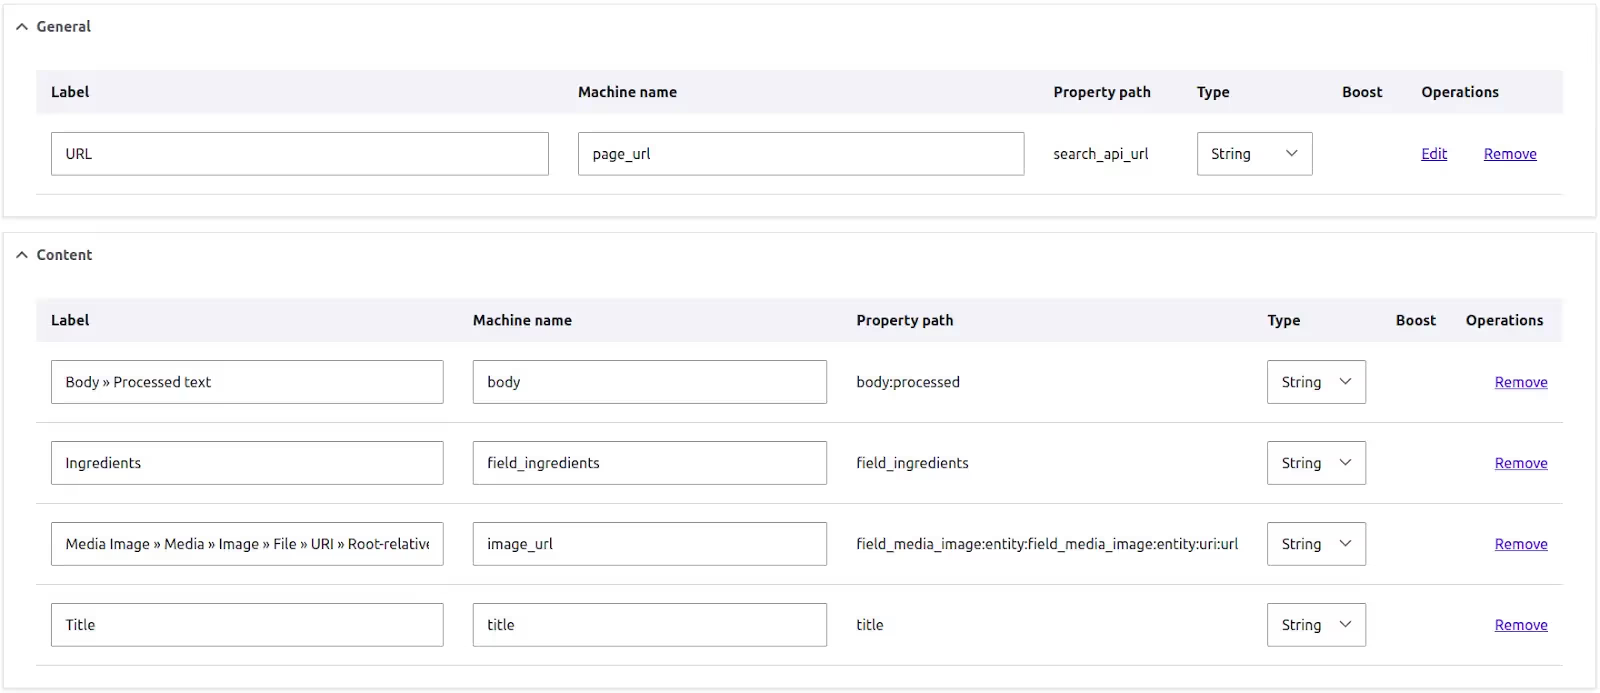
- Go to admin/config/search/search-api/index/demo_umami/fields and add the following fields.some text
- title
- field_ingredients (Used by recipe content type)
- field_media_image (Common field that stores the image. We need the URL of the image. So make sure to add the URL of the image - Media Image » Media » Image » File » URI » Root-relative file URL)
- body (Used by Article content type. Most of the searchable data of articles is in the body field).
- page_url (Stores the URL of the page)
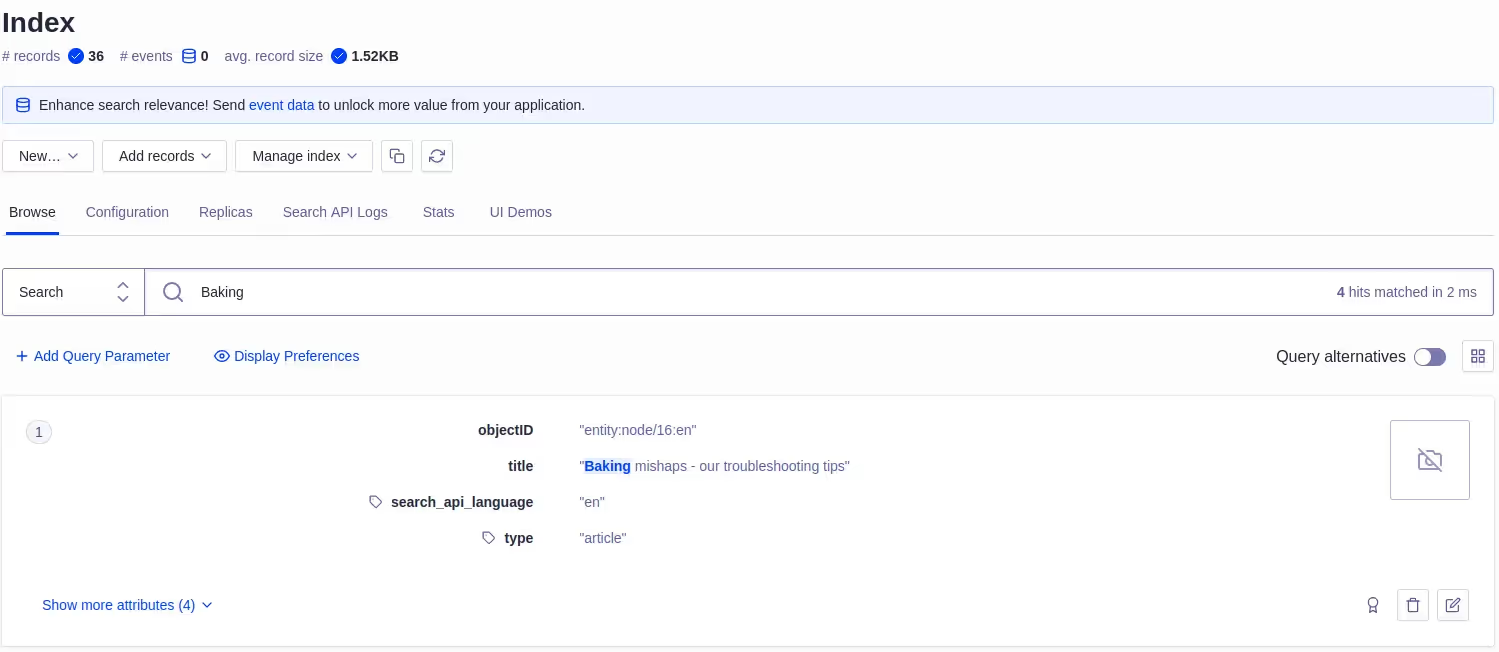
Now we are all set. Index the contents from /admin/config/search/search-api/index/demo_umami. Once completed, Go to your Algolia dashboard and view the index. You will see all the indexed contents from our site in the dashboard. As mentioned earlier, each indexed content is called a “Record”. Every record will have a unique “objectID”. You could even perform a search from the dashboard and see the results.
Configuring the indexed data from Algolia dashboard
Before creating the search page on the website, We need to do some configurations in the dashboard to make the search results more relevant.
Configuration-1: Define searchableAttributes
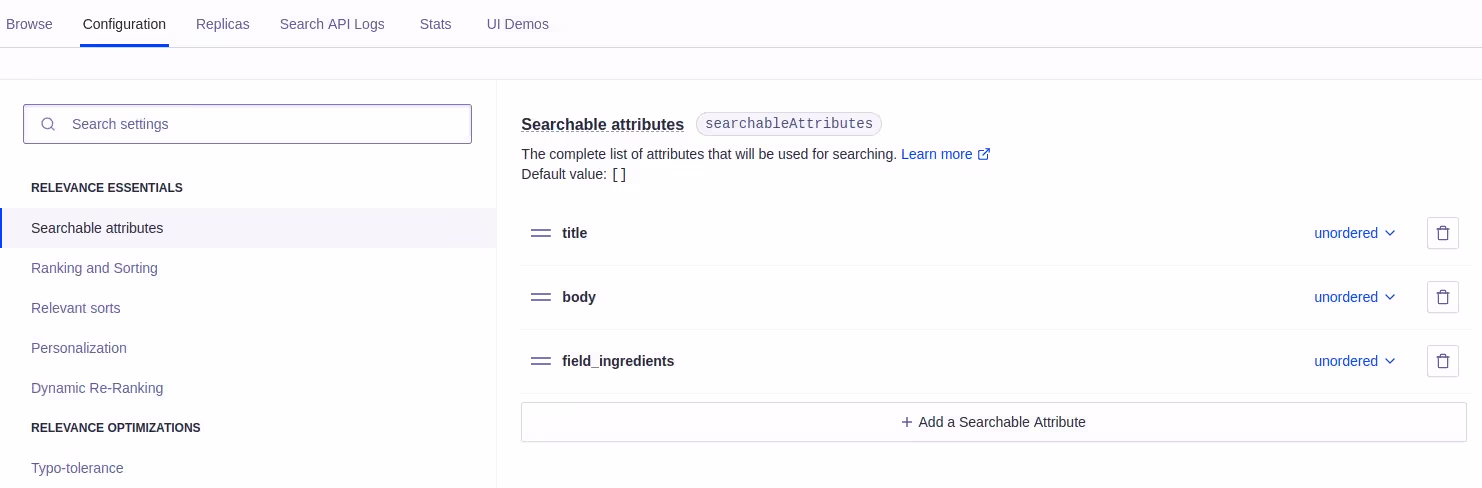
- First, we need to inform Algolia about the fields in our records that should be “searchable”. For example, the title and body fields contain useful data, so should be searchable, but the 'image_url' should not be.
- For that, Go to “Searchable attributes” and add “title”, “body” and “field_ingredients” fields in the same order.
Configuration-2: Define attributesForFaceting
- Next, let’s add a filter. Remember, we have both English and Spanish contents indexed in the “demo_umami” index. When we create the search page, we show only English results in the English version of the search page and only Spanish results in the Spanish version of the search page.
- If you check all the records, you will see that each record has a ‘search_api_language’ parameter and it’s value will be the language code of the record (Page). Let’s inform Algolia to use this parameter as a filter.
- Go to Configurations -> Facets -> Attributes for faceting and click on “Add attribute”. Add the “search_api_language” parameter and make it filter only.
- Save the configuration.

Configuration-3: Define attributesToSnippet
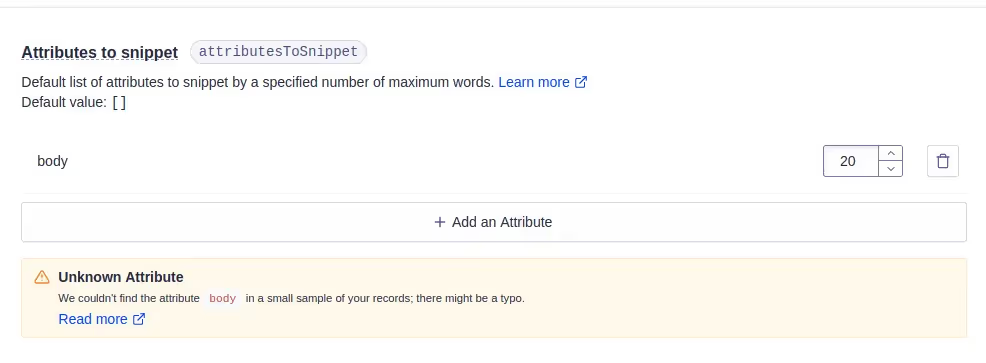
- Now let's configure the “attributesToSnippet” option. This parameter helps to show only the relevant data from a field in each result. For example, the body parameter of article records contains lots of data. But we don’t need to show all the data in the body field of each result in the search page of our site. Instead, we can add ‘body’ as an attributesToSnippet and configure it to show only 20 characters at a time in search results.
- For that, Go to Configuration->Snippetting->Attributes to snippet.
- Click on “Add attribute”. Type ‘body’ and click on “Use body”. Type 20 in the number field. You might see a warning like “We couldn't find the attribute body in a small sample of your records; there might be a typo”. This is because the body parameter is only present in the records of Article content type. You can ignore this warning.
All essential dashboard configurations for this part are completed. Now let's build the search UI to display the search results on our website.
Creating the search UI in Drupal using instantSearch.js
If you navigate to /recipes or /articles in your Umami site, you will see the articles/recipes listed as cards. We are going to reuse this design in our search page. For that, We will define the same HTML structure for the search results and attach the libraries that style the cards to the search page. We will be using instantSearch.js to build the search UI.
This section is divided into 3 sub-parts.
- Render the indexed data in card form, reusing existing styles.
- Add a search box to the search page.
- Filter the results based on language.
Render the indexed data in card form reusing existing styles
- Create a custom module “umami_site_search” and install it.
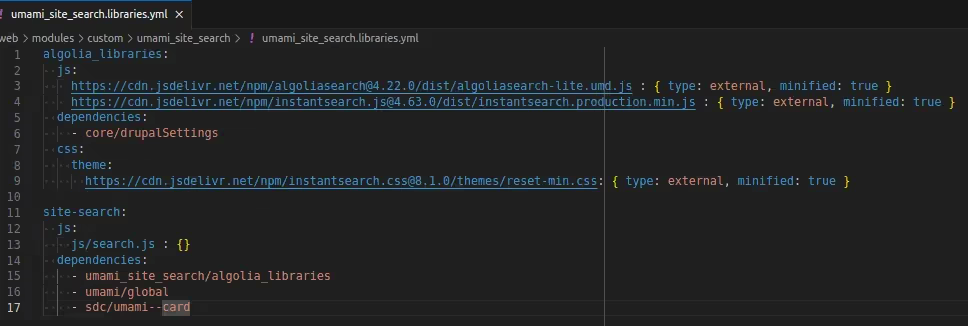
- Create a umami_site_search.libraries.yml and add the following code.
- This will import instantsearch.js libraries in our search page. Now create search.js in umami_site_search/JS folder and add the following code.
Let's break down the code.
- This part initializes the search. Always use the search only api key from your dashboard here. Never use the admin key.
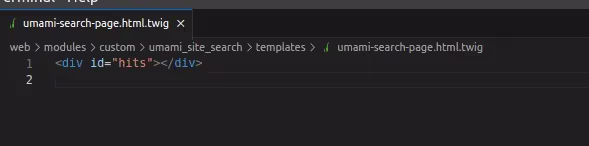
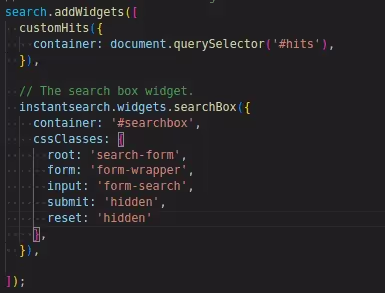
- Every component in the search page (Search box, Filters, Sorts, Pagination, Results etc..) is called a widget. The widget responsible for showing the search results is called “hits” widget. Since we need to display the results in card format, we need to define the html structure. The following code does the same.
- Using instantsearch.highlight({ attribute: 'title', hit: item }) to display the title instead of just “item.title” ensures that the title of search results are properly highlighted in the search results.
- Similarly instantsearch.snippet({ attribute: 'body', hit: item }) is used to render the body field in such a way that only 20 characters from the body field would get displayed in each result (Remember, we configured it from the dashboard).
- And finally we provide the html element in which search results should be appended to.
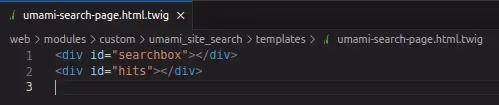
- Now, create a custom template with the following code.
- Add hook_theme() implementation for this template. Update libraries.yml to create a library for search.js. Add the css libraries that style the cards as a dependency.
- Next, create a controller for the path /site-search and render the template from that controller.
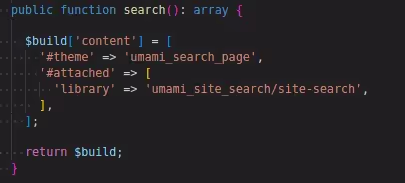
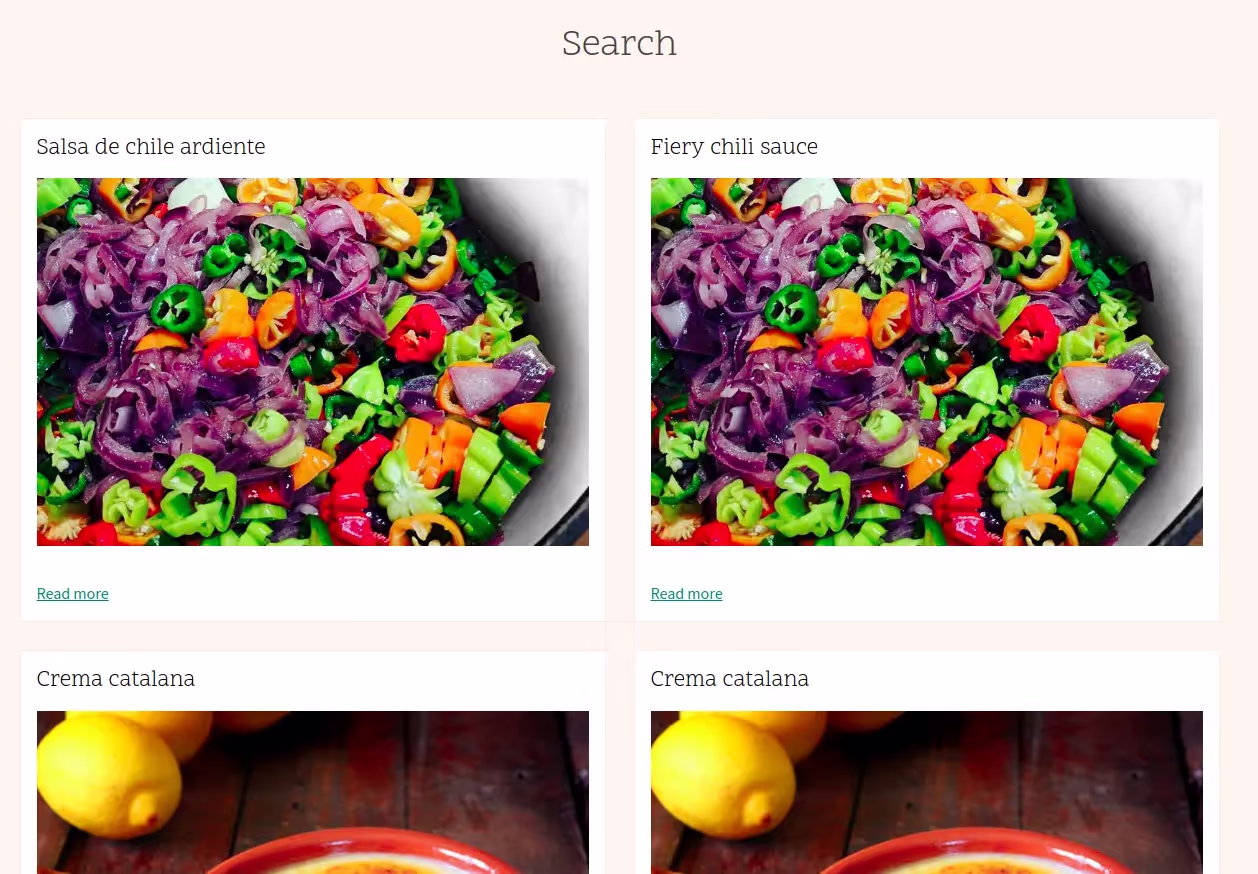
- Clear Drupal cache and access /site-search path and you will be able to see the search results.
Add a search box to the search page
Now let’s add a “search box” widget so that users can actually type something and search.
- Add <div id="searchbox"></div> in the custom template. The search box will be appended to this element.
- Initialize the search box widget in search.js. This time, we are not going to provide the HTML structure. By default, most of the instantsearch widgets would have an html structure. We are going to use the default structure of the search box widget. But we are adding few css classes. These classes are used by the default search box in the Umami site. When we add them in our widget, existing styles from the umami theme would get automatically applied.
- Now the search box will be displayed when we access the search page. Test it out with different keywords and you'll quickly discover just how fast and responsive our search page truly is!
Filter the results based on language
- We have already configured “search_api_language” as a filter from the dashboard. Now let's apply that as a filter from the JS.
- We can use the “configure” widget in instantsearch for the same.
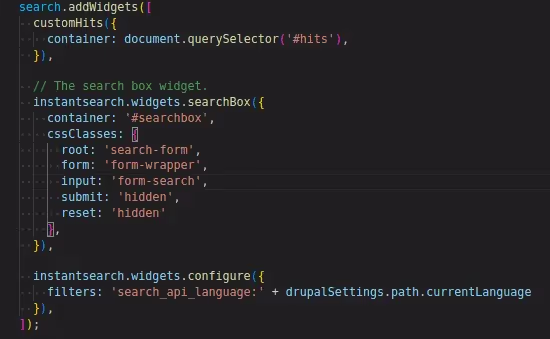
- Reload the search page. Now only English results will be displayed in the English search page. Similarly, /es/site-search will show only Spanish results.
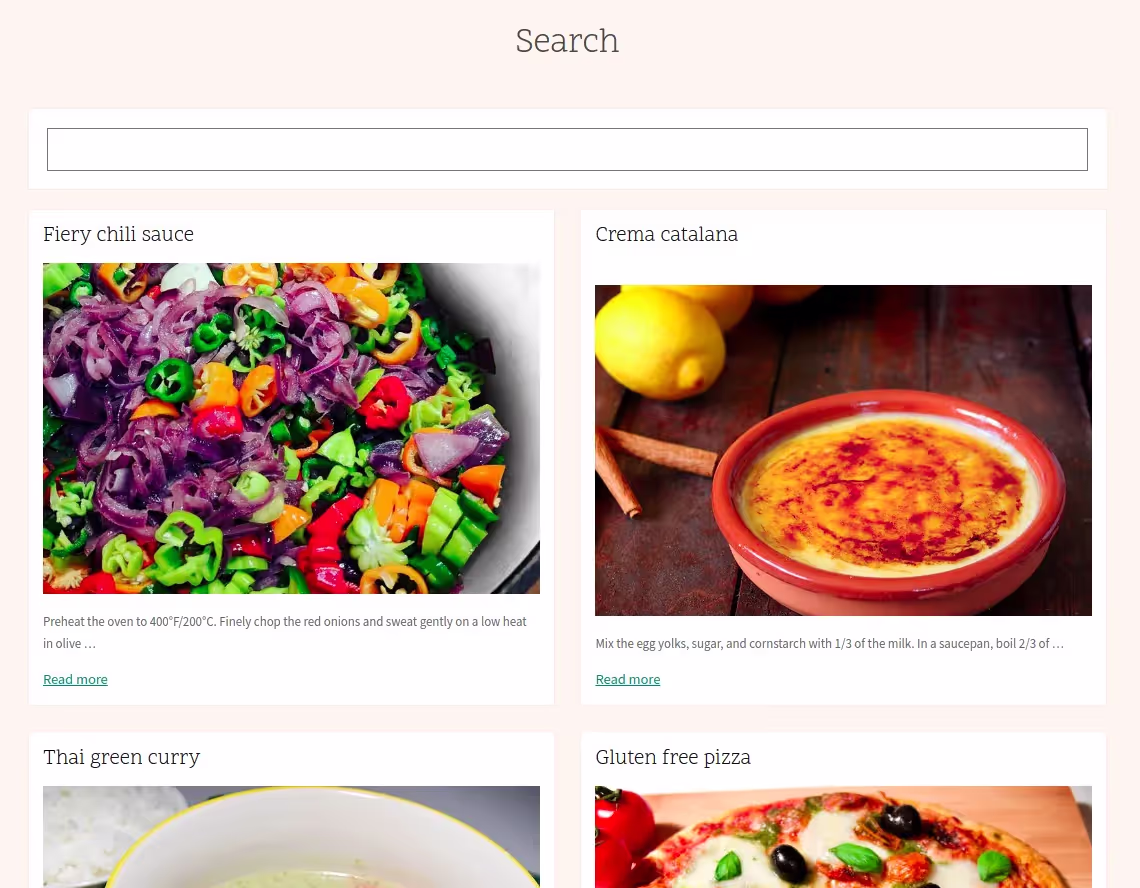
This concludes the first part of our Journey. We've successfully built a fast, responsive, and language-dependent search page. Let’s recap what we’ve learned so far.
- Integrated the search API Algolia module and indexed our content in Algolia.
- Configured the dashboard to ensure Algolia understands and optimally processes our data.
- Created a custom module to build the search UI using instantsearch.js. Reused the ‘card’ design from Umami.
- Created custom widgets for the search page using instantsearch.js.
You can find the entire code in this git repository.
Remember that this demo was just a teaser. The true thrill lies ahead in our next segment, where we will take a deeper look into structuring the data from the drupal backend with the help of search api processors.