

This article is a simple introduction to Redis and how to cache your Node.js application with Redis. Here, you will learn the utilization of Redis for caching through an example and how you can use it to improve your application speed and performance. Before that, let us understand what caching & Redis is.
What is caching?
Caching is the process of storing copies of files in a cache or a temporary storage location so that they can be accessed more quickly. The goal of caching is speeding up data access operations better than a database or remote server could allow. It is ideal in the case of expensive (in time) operations. As a back-end developer, our task is to complete the clients’ requests as fast as possible. Sometimes, queries require several operations like retrieving data from a database, performing calculations, retrieving additional data from other services, etc., that drag our performance down.
With caching, we can process the data once, store it in a cache and then retrieve it later directly from the cache without doing all those expensive operations. We would then periodically update the cache so that users can see updated information.
What is Redis?
Redis is an open-source (BSD licensed), in-memory data structure store used as a database, cache, and message broker. You can think of it as a No-SQL database, which stores data as a key-value pair in the system memory. If needed, Redis supports disk-persistent data storage too.
Redis is best in situations that require data to be retrieved and delivered to the client in the least amount of time. Now that you have an understanding of what Caching and Redis are, let’s build a basic project that implements caching using Redis.
Install Redis:
If you are an OSX user, you can install Redis using the command below. For other platforms, please follow the guide on https://redis.io/download.
Create a new directory for the application by running the following command on the terminal:
Initialize the directory to create a package.json file by running
After running the above command, you should have a package.json file in the redis-nade-cache directory. Now, we are going to request a json placeholder API https://jsonplaceholder.typicode.com.
Start by creating a simple Express server in index.js:
Now, start the server by running node index.js and open postman to request the photos endpoint.
First Request-Response:

Second Request-Response:
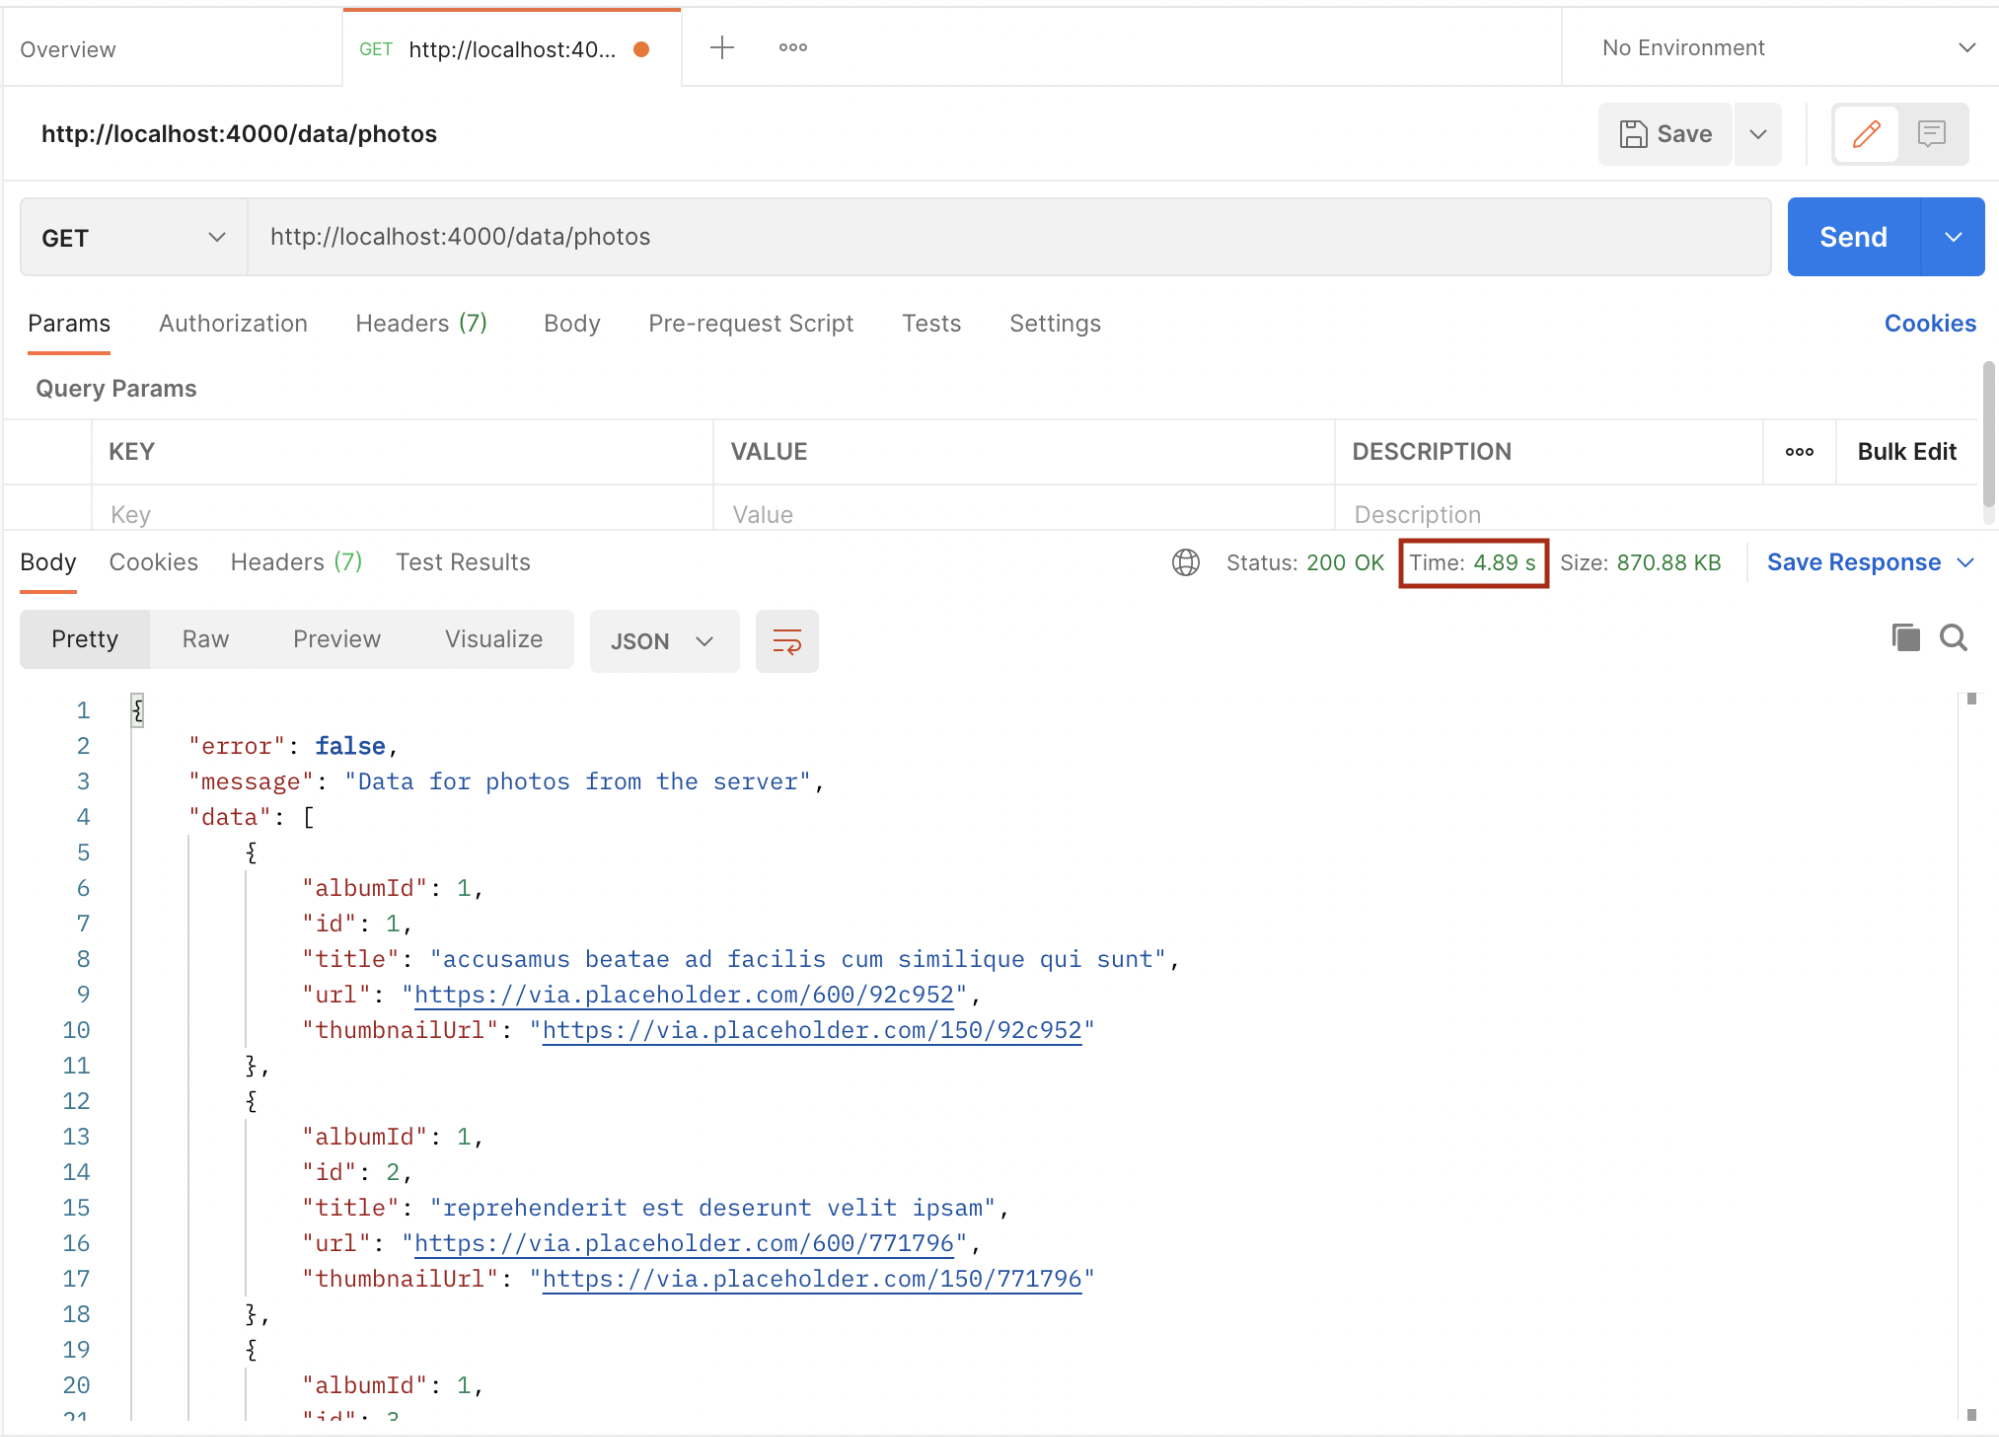
Take note of the time from the above images. The first request took 5.38 seconds while the second one took 4.89 seconds. We will improve this by implementing caching using Redis. Let’s implement Redis in the above example.
Install Express, Redis, and node-fetch npm modules with the below command:
Now that we have successfully set up Redis, the next step is to use it in our application to improve it by reducing the turnaround time of request and response. Now we will add the following changes to the index.js file.
First, we create a Redis client and link it with the local Redis instance using the default Redis port (6379)
Then, in the /recipe route handler, we will try to get the appropriate matching data to serve the request by checking for the key in our Redis store. If found, the result is served to the requesting client from our cache and there is no need to make the server request anymore.
If the key is not found in our Redis store, a request is made to the server and once the response is available, we store the result using a unique key in the Redis store:
Hence, subsequent requests to the same endpoint with the same parameter will always be fetched from the cache, so long the cached data has not expired. The setex method of the Redis client is used to set the key to holding a string value in the store for a particular number of seconds which in this case is 1020 (17 minutes).
Final code of index.js
Now, let’s test the application after implementing cache. Open postman and request the same endpoint as before.
If the key is not found in the cache, the request is sent to the server which takes 566 minutes to complete. Since the key didn’t exist in the cache before, it is now saved in the cache and subsequent requests with the same data will be fetched from the cache which makes it faster, and also reduces the load on the server. Below is the response time after the cache:
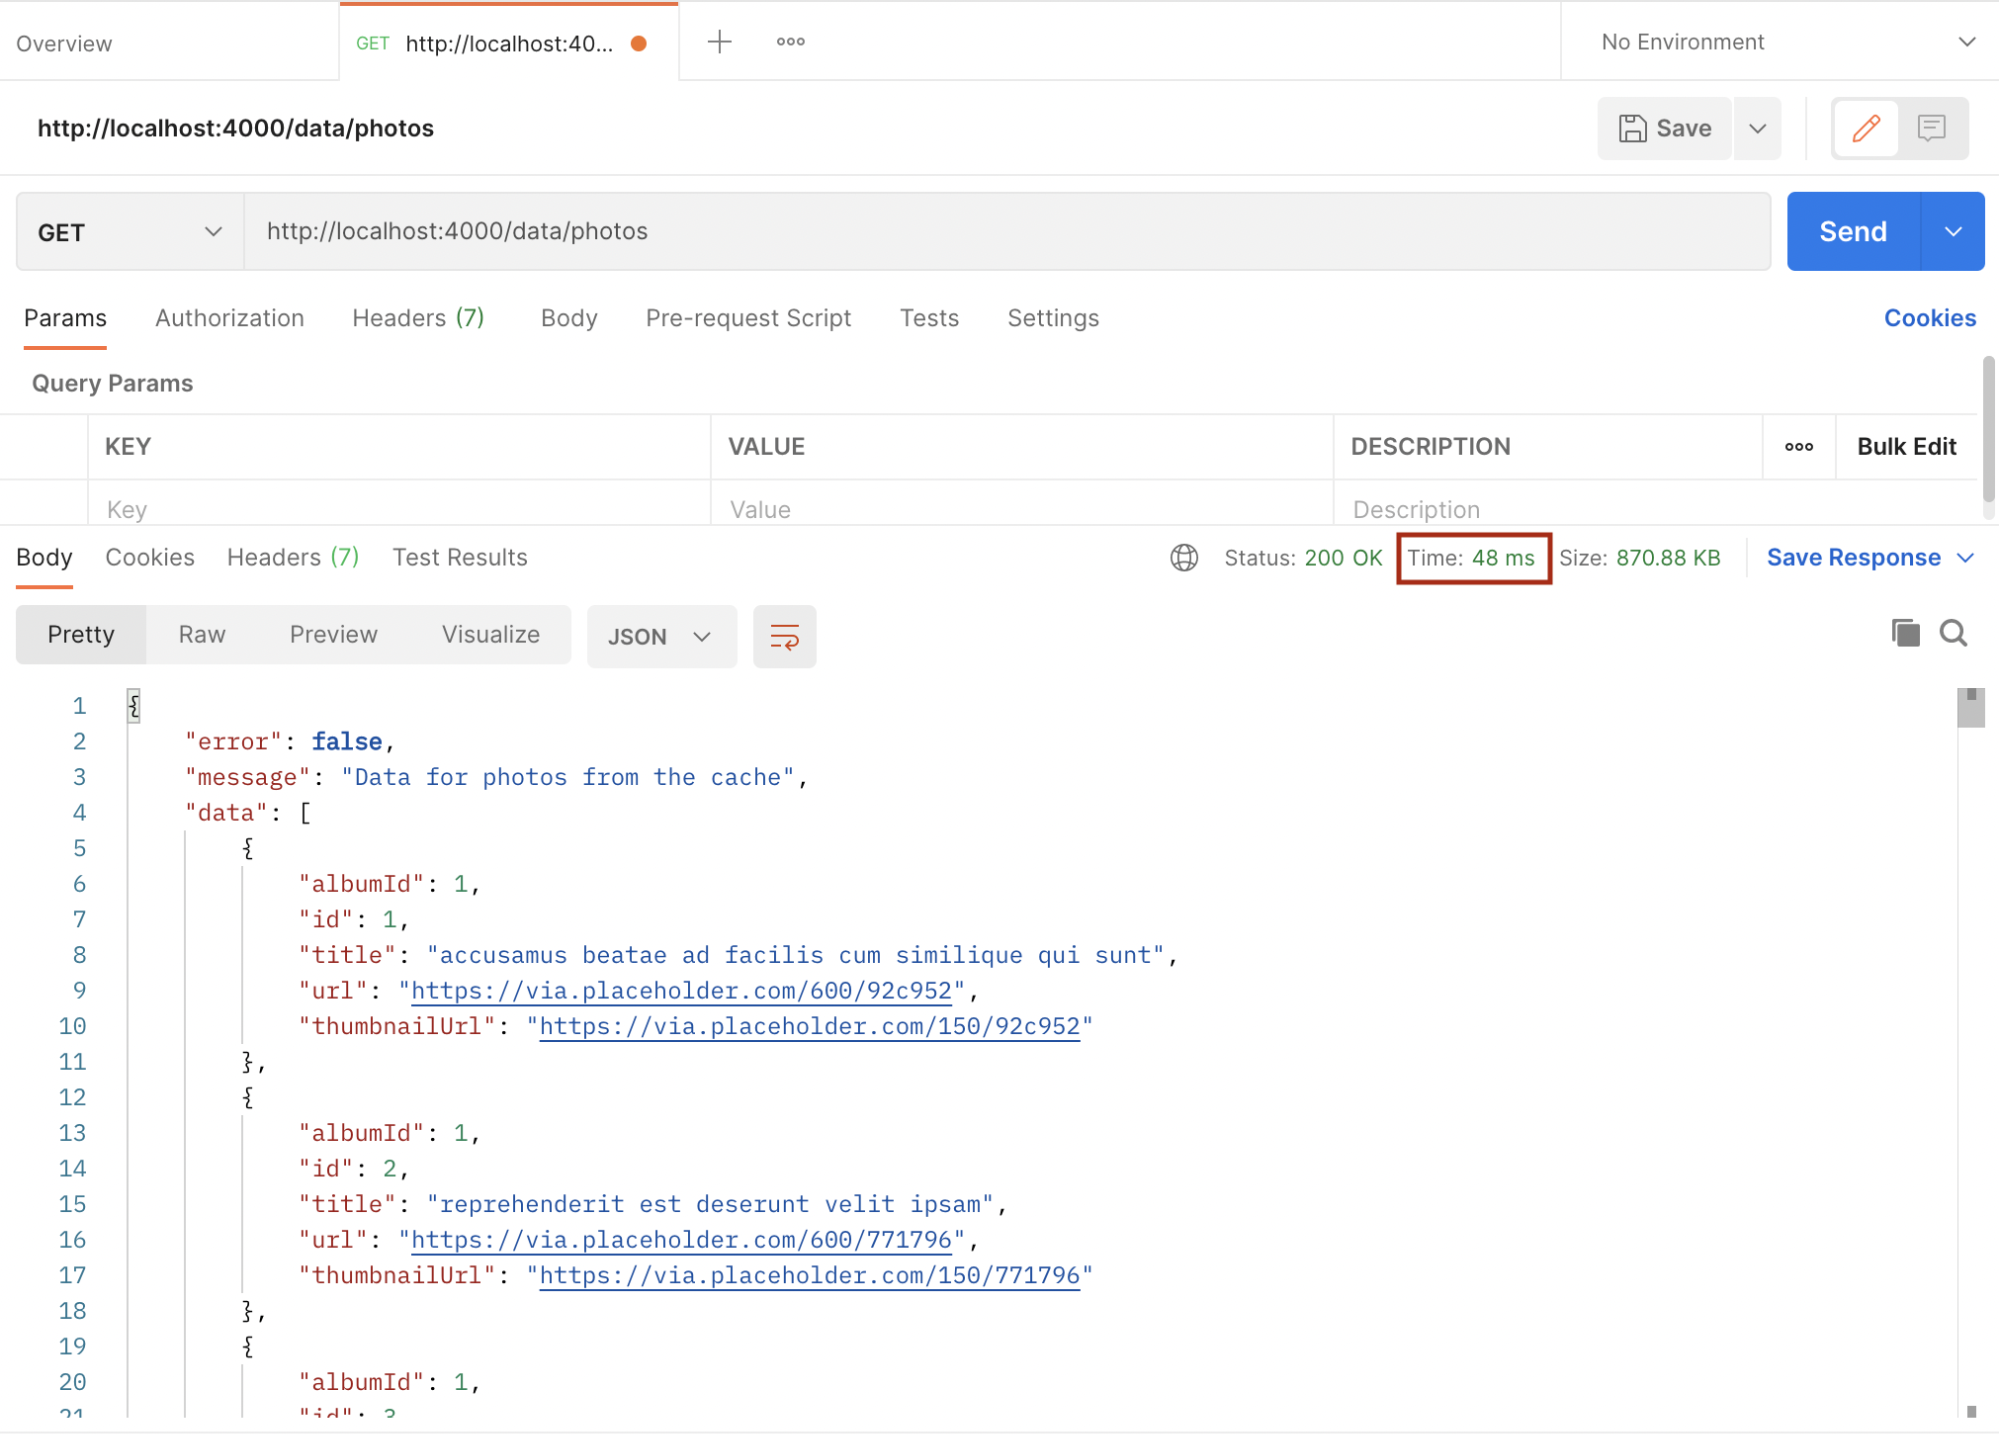
As we can see above, it took a blazing 48 milliseconds for the request to be completed because it was fetched from the cache.
Conclusion
Redis is a powerful in-memory data store that can be used in our applications. It’s very simple to save and get data without much overhead. Refer to https://www.npmjs.com/package/redis for more use cases and refer to https://redis.io/commands for more Redis commands.